


Likes
Comments
Share

@Lazpool
Follow
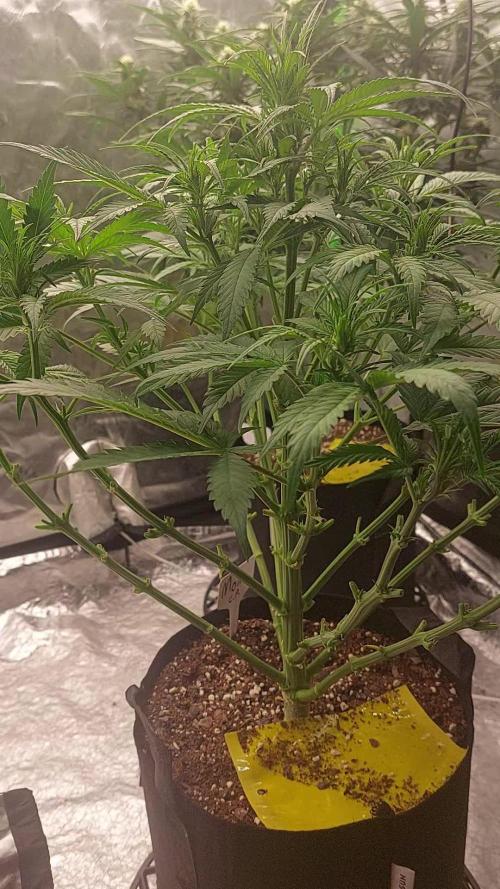
Blackberry is gorgeous. Rub a stem or lightly touch a bud and your left with a deep berry smell with a backing of the earthy kush. Hope to see the flowers put on some real mass soon.
Now I have some pics of the others.
Whiskey blew part Blackberry in height. The stretch is crazy. No matter how close or far the light is she reaches for it.
Cherry is a squat little girl. She is thicc. With 2 "c".


Processing
Likes
2
Share


@Cannibalgardens
Follow
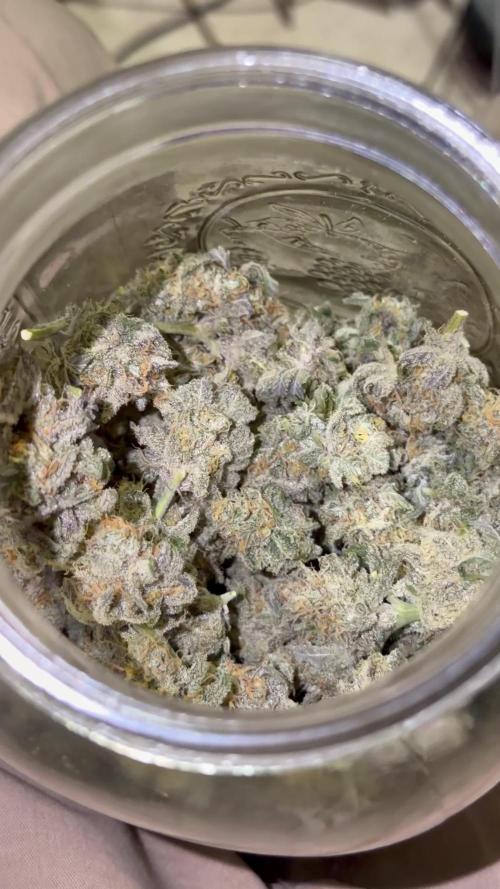
Well not a whole lot to say this week she fading and the smells are more rotten in this bud a bit the over ripe fruit smell is good .. she had lots of resin and the buds are getting dense now.. The strain is very nice and easy to grow with a big for giveness when it comes to overfeeding and she loves training ...


Likes
5
Share


@TheDutchGrower
Follow
I moved everything into a corner en but up some foil walls and installed a second light. Now 2 x
vs1000 vivosun.
Going on 75 % but actually i think i put them tomorrow to 100 %, and move them like 50 cm from the plants. Maybe 53.
They are going good i guess? Little small but the new lamp should help out and show a little results.
Enter the 5th week!
Likes
14
Share


@Fullmeltalchemist
Follow
D71/F19 - 11.25 - Got them all defoliated. Everything is looking open, lots of light for the flowers, lots of room to grow and good airflow. I've got a couple co2 bags hanging in there too now.
D75/F24 - 11.29 - Responded well to defoliation. Getting chunky! <3

Likes
Comments
Share

@Organic_bud21
Follow
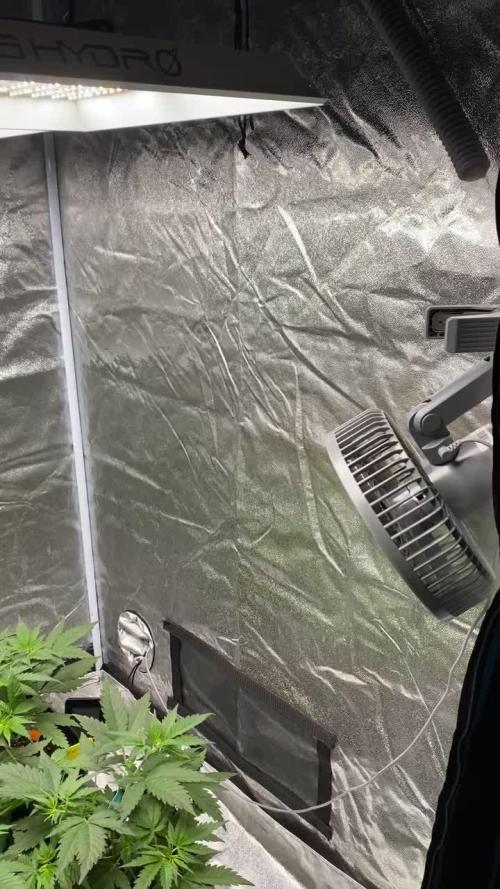
Zum Anfang der Woche habe ich wieder umgetopft. Diesmal in den Endtopf 7,5L. Außerdem habe ich die Green Poison F1 und Tropicana Poison F1 von den Crystal Candy F1 getrennt. Das Substrat ist genau wie vorher 30% Euro Pebbles und 70% Light mix. Beides von Plagron. Den EC habe ich beibehalten. Weiterhin nach jeder 3ten Bewässerung mit 10-15% Drain bewässert, sonst nur ca 600ml täglich ab dem dritten Tag der 5ten Woche eine Stunde nach Sonnenaufgang. Zum Ende der Woche habe ich die zweite Ts 1000 eingesetzt, um etwas gleichmäßigere Verteilung zu bekommen und nähere mich jetzt auch dem Blätterdach täglich bzw. hänge die Lampe nicht höher. Im Nachhinein gesehen, hätte ich direkt das Netz einsetzen sollen um mehr Zeit zu sparen. Nicht das alles unter Zeitdruck ist, aber die zu lange Vegi macht sich Nachher mit mehr Laub als gewollt in der Blüte sichtbar. Durch die kalten Temperaturen teilweise habe ich schon heizen müssen. Deshlab lief der Befeuchter von Mars hydro quasi im Dauereinsatz um in beiden Zelten die Feuchtigkeit auf 65-70% zu halten.

Likes
6
Share


@Dbkoop
Follow
• Largest plants’ fan leaves yellowing now.
• CP(1) looking a little purple finally.

Processing
Likes
1
Share


@Funkyskunky1
Follow
I have seen significant growth this week. Looking good and smelling great!
Likes
9
Share


@ertaverd
Follow
El dia 70 empecé a regar solo con agua, el dia 77 he empezado el lavado de raíces, voy a cortar a medianos de la semana que viene.
The day 70 i've began to water her with water withowt nutrients. On the day 77 i began to wash the roots, will harvest the next week
Likes
155
Share


@deFharo
Follow
Bienvenidos cultivadores de marihuana clandestinos y también a los que tienen la fortuna de no serlo!🖐️👨🌾👍
Este es un diario donde semanalmente explico algunas de mis técnicas de cultivo y preparados orgánicos, los cuales llevo experimentando dos años en cultivos de marihuana interior.
• Hay dos componentes absolutamente necesarios para cualquier cultivo y de los que no se puede prescindir: La luz y el agua... hoy toca hablar de agua, homenajear al agua que la montaña y el cielo me regalan para mis plantas de marihuana!! 💧💧💧
Tengo que decir, que hasta el momento, nunca he usado agua con cloro en mis cultivos, mi interés por el agua pura de manantial ya venía de antes, pues yo mismo la consumo habitualmente, el cloro es añadido al agua corriente para hacerla potable y acabar con posibles bacterias o patógenos, pero no distingue entre buenos y malos. Siempre he creído que el consumo de agua pura, ayuda a mantener la micro biota de nuestro sistema digestivo, os podría hablar de las ventajas palpables, pero voy a obviar comentarios escatológicos.
En el caso de mi modo de cultivo, donde baso toda mi técnica en el mantenimiento e inoculación masiva de Microorganismos de Montaña (MM) en el sustrato, el uso de agua pura sin cloro es obligado.
El 03 de julio de 2020, publiqué lo siguiente:
GROWING TIP: Agua!! Mineralizada, viva y estructurada.
La importancia de la calidad del agua para el cultivo es vital para mi, he recorrido los manantiales, ríos y arroyos de mi zona con el medidor de EC y el de PH para conocer las aguas que me rodean, recojo siempre que hay oportunidad agua de lluvia de la terraza de un vecino, nunca me falta agua pura, desecho regar con agua del grifo. Para mi, y actualmente, la mejor mezcla de agua que puedo ofrecer a mis plantas es agua de lluvia 75% con otra de un manantial de montaña de agua alcalina (Carbonato cálcico PH: 9.2) y muy mineralizada (EC: 0.85), esta agua yo mismo la consumo regularmente, consigo una mezcla de agua pura con un EC alrededor de 0.19, me garantizo así el aporte de calcio y otros minerales. En épocas donde no llueve uso agua pura de manantiales y arroyos con EC de 0.3.
Estas aguas las filtro y almaceno a obscuras en mi casa, la cuestión es que el agua parada pierde oxígeno y también desordena su estructura molecular haciéndola caótica. Para poder recuperar esta estructura y oxigenación, el agua debe estar en movimiento como en la naturaleza, yo me ayudo de un agitador magnético para volver a tener agua viva, el agitador crea un vórtice implosivo que en 10 minutos pone las cosas en su sitio y carga de oxígeno nuestra agua, una vez hecho este proceso voy añadiendo los nutrientes uno a uno y sigo agitando hasta el final.
El agua tratada con esta técnica, mejora la asimilación de nutrientes porque favorece el intercambio catiónico e inunda de oxígeno nuestro sustrato y raíces, también con esta técnica se pueden bajar las concentraciones normales de EC en un 30% y conseguir los mismos resultados, prueba y verás!!
------
Hoy tengo algunos comentarios nuevos sobre los diferentes tipos de agua que uso y usé.
- Agua de río: Comencé recogiendo agua de los dos ríos caudalosos que cruzan mi pueblo, buena agua, no hay industrias en su cauce, pero sin embargo las aguas fecales de los pueblos acaban en él. Por lo que, ante la duda, deseche el uso de este tipo de agua.
- Agua de lluvia: Como comenté antes, recogía agua de lluvia desde el desagüe de la terraza de un vecino (PH: 7, EC: 0.07), mucho trabajo, exposición vecinal y explicaciones surrealistas a los transeúntes que me preguntaban, como decir que recogía el agua para mi perro que no podía tomar agua con minerales por tener tendencia a la formación de piedras en la vejiga, en otras ocasiones, respondía con entusiasmo que era la mejor agua para cocinar alubias!! 🤷♂️😎 Definitivamente dejé de recoger agua de lluvia de ese lugar, pues el agua que explico a continuación ya viene con los niveles de EC que yo busco...
- Agua de montaña: Manantial permanente a 700m de altitud, el PH varía según la época del año, cuando en otoño, invierno y primavera hay más lluvia, el PH está en 7, y el EC en 0.25, en verano el PH sube a 8 y el EC a 0,5, esto es debido a que la carga de minerales es mayor cuando no hay lluvias. Según la geología de la zona, rocas cálcicas, arcillas y basalto principalmente, este agua mineral contiene suficiente mineral (Ca, Mg, Si, Al, Fe, K...) para no tener necesidad de usar aditivos como CalMag. Esta, es el agua que más uso para riegos.
- Agua de manantial alcalino: Casi a nivel del mar, muy mineralizada, con menos variación de PH y EC en épocas de lluvia: PH entre 8 y 9.2, EC entre 0.5 y 0.9.
Esta agua la uso de varias maneras:
a) Es el agua que yo bebo.
b) El café y la comida la hago con esta agua.
c) Por su nivel de alcalinidad la uso para los diferentes fermentados anaeróbicos, compensa la extrema acidez de estos preparados y aporta minerales ya solubilizados.
d) Este invierno la he usado para riegos mezclada con agua de des-humificador al 50%, obteniendo agua con un EC de 0,25.
e) Las raras ocasiones en que riego sólo con agua, uso ésta si el cultivo va bien, y si necesitara hacer un lavado de sustrato por sobre fertilización, uso el agua de des humificador: PH: 7, EC: 0.09, que al no contener minerales el poder de disolución es mayor.
- Agua de des humificador: Este invierno debido a las bajas temperaturas, alta humedad relativa y aparición de oídio, me vi obligado a tener funcionando permanentemente un des humificador, y para hacer de la necesidad virtud, he estado recogiendo esta agua exenta de minerales, mezclándola al 50% con las aguas del manantial alcalino, de esta manera me he he ahorrado algunos viajes al manantial de montaña.
Recientemente medí el consumo de este aparato, y casi me caigo de espaldas al comprobar un consumo de 140w, lo he tenido encendido más de 3 meses las 24h del día y en ocasiones he tenido funcionando dos des humificadores! y yo, engañosamente, pensé que no consumían más de 50w... bueno, después del disgusto de saber el despilfarro de vatios, yo, que me he esforzado mucho en los últimos cultivos, acarreando macetas del interior al exterior, por consumir el mínimo de luz eléctrica y que me ha supuesto obtener unas cosechas medio bajas para lo que estaba costumbrado, ahora, en mis nuevos 4 cultivos la luz no va a ser el obstáculo, ya que ahora los des humificadores están guardados, y voy a alumbrar estas plantas con todo lo que me quepa en la carpa, la media de vatios por planta de mi última temporada de cultivos fue de 40w/planta, esta temporada voy a llegar a los 100w por planta... más luz es igual a más masa floral!!🌲🌲🌲🌲
- Agua de mar (for nerds): Yo no me he atrevido a usarla para riegos, pero con el agua de mar preparo Ormus casero con agua del mar Cantábrico, donde separo el sodio y hago precipitar los minerales:
Publicado el 10 de julio de 2020
a) Fuente principalmente de Magnesio, Azufre y calcio para todo el cultivo. El Ormus contiene de un 30 al 60% de magnesio. Yo lo uso sistemáticamente en todos mis riegos, las dosis van desde el 1% al 2%.
b) Contiene más de 70 minerales, la mayoría en modo monoatómico que mejora el intercambio catiónico y la asimilación de nutrientes.
c) Al ser un producto alcalino se puede usar para subir el PH del riego cuando se necesite. Aumenta muy poco la carga de EC.
d) Forma parte de mis componentes en la solución acuosa que preparo para germinación y establecimiento de semillas.
e) Almacenado a obscuras el producto no tiene caducidad conocida.
• Agua de coco (for nerds).
Producto natural rico en azúcares, vitaminas, proteínas y aminoácidos, enzimas citocininas (División celular, crecimiento), ácido giberélico (Estimulación de raíces) y minerales (Ca, Fe, P, Mg).
- Los momentos clave de más demanda de enzimas citocininas comienzan en la mitad de la primera etapa de germinación y establecimiento de la plántula, y al comienzo de la etapa de floración/reproducción. En la última etapa de los cultivos es innecesaria.
- Los momentos clave del ácido Giberélico comienzan también en la primera mitad de la primera etapa de cultivo y las últimas semanas de crecimiento vegetativo, después de estas etapas la necesidad del ácido decae hasta hacerlo innecesario en las últimas semanas del cultivo.
- Yo uso el agua de coco, alternándola con otros nutrientes, sólo en las primeras etapas de la planta y hasta la preflora.
- Las dosis dependen de la carga de EC que se prefiera. Como mínimo aconsejo una carga en disolución de EC de 0,4 o PPM 200.
- El agua de coco natural se debe guardar en el refrigerador, como máximo 4 días, pues fermenta con mucha facilidad.
y esto es todo por hoy... tengo sed! 😁
Hasta la próxima semana...
SALUDOS CULTIVADORES!!🖐️👨🌾💧💦🌞💡
=================================


Likes
5
Share


@I_Identify_As_A_Dan
Follow
Week 6 for Moby Dick,
She was moved outdoors at the start of the week, shes been adjusting well besides the fact shes been having issues with aphids 😥 But shes been getting sprayed water every sun rise to keep them under control as well as me going in there & killing them when i can spot them every morning & evenings. Trying to get my hands on some pyrol products to clean her up nicely as well as clean up the outdoor space.
But wow look at her size... really looking forward to her coming out with some flowers😍
Likes
92
Share


@DogDoctorOfficial
Follow
Week 4 Veg Report - TrolMaster Chronicles 🌱
What a week it’s been in the garden! We finally transplanted the Papaya Zoap into its final Autopot, and let me tell you, this plant is something special. Though her roots weren’t quite where I wanted them to be yet, the move was needed to help her catch up with the rest of the crew. She’s already looking fantastic in her new home, and I have no doubt she’s about to explode with growth in the coming days. Sometimes, you just have to trust the process, and I’m feeling like this is one of those moments. It’s almost as if the room itself is taking on a life of its own. 🌿
In fact, I’m starting to believe that what we’re building here is something greater than ourselves—there’s this energy in the room, a feeling of everything coming together perfectly. I can’t wait to see how this journey unfolds!
Dialing in the VPD with TrolMaster’s Tech
Now, let’s talk VPD (Vapor Pressure Deficit) and how I’ve been keeping everything in check with the Tend-X and the incredible (DSH-2U) Humidity Station. VPD is crucial to plant health—it’s all about finding that perfect balance between humidity and temperature to optimize transpiration and nutrient uptake. The (DSH-2U) Humidity Station, connected directly to my humidifier, has been an absolute game-changer in this regard. With its real-time data and automation, it allows me to monitor and adjust the RH with pinpoint accuracy.
Simple yet brilliant, the (DSH-2U) Humidity Station is keeping my room at the sweet spot I need. Whether I’m tweaking the settings from my phone while I’m out and about or just fine-tuning things while relaxing at home, this machine does it all. It’s like having an extra pair of hands in the grow room—and when you’re managing something as complex as VPD, that’s invaluable!
And yes, the TM+ Pro App—let’s not forget how awesome it is. I’m adjusting my grow room from the couch, the car, or even the bathroom 😜. I’ve said it before, but this app is making growing easier than ever.
Feeding the Girls: The Perfect Blend 🌱
We’ve upped the game by adding CaMg-Boost at 0.25 ml/L to the feeding schedule. Along with the 1 ml/L of the all-in-one liquid, this brings the TDS up to 320 ppm, with a pH of 5.99 and solution temperature of 24.8°C. In the soil, readings are around 415 ppm, with temperatures hovering around 25°C The plants are absolutely thriving, and I can already see the difference this new feed is making.
I can’t help but have a bit of fun with this process—it feels like I’m spoiling them with the best of the best. And they’re rewarding me with beautiful growth and vibrant green color. You know how it is, with the right care and attention, these plants are truly becoming a masterpiece in the making. 🌱
Shoutouts 💚
Big shoutout to TrolMaster and ThinkGrow LED for the phenomenal gear that’s making this grow smoother than ever. Also, massive thanks to Aptus Holland for their top-notch nutrition, and of course, to the community here on GrowDiaries—you guys keep the energy alive! 🌱
Last but definitely not least, shoutout to all the seed banks supporting this journey. You’ve been a huge part of this process, and I couldn’t do it without you!
Remember, for exclusive behind-the-scenes content and updates in real time, head over to my Instagram and YouTube channels @DogDoctorOfficial. We’ve got tons of epic content lined up, and you won’t want to miss it!
P.S.
Let’s talk about the new Model One LED Bars—these beauties are not only powerful but super efficient. I’ve been able to dim them down, save on electricity costs, and still maintain an incredible PAR and spectrum. It’s all about fine-tuning the balance of power and performance, and these lights make it easy to get the best results while being eco-friendly. Whether you’re running them full throttle or dialing it back, you’re still getting optimal growth conditions for your plants. That’s the kind of innovation that takes your grow to the next level. 💡
Growers Love to all 🌿💚


Likes
4
Share


Likes
16
Share

@Sebb_growt
Follow
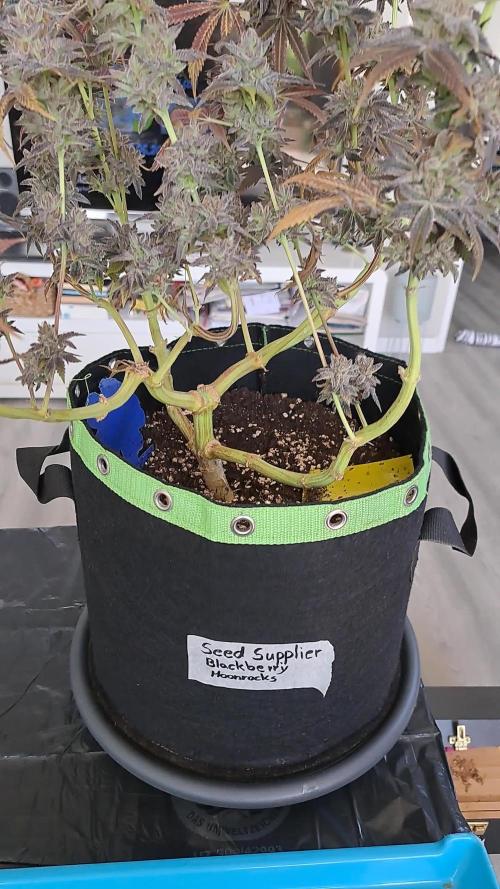
Ich bin relativ zufrieden mit der Dame. Wird nicht so viel bei rumkommen aber sie riecht unfassbar gut und d sieht mega schön aus.
Ich bin gespannt, nach dem probieren wird der rest nachgetragen.
Likes
299
Share


@Metatronix
Follow
Hello to you all.
As a true visionary I decided to go FULL HYDRO this week, that means water in buckets and outside the buckets /s
This grow turns out to be an uphill battle but i already decided to bring it to completion no matter what...Icy weather, floods, alien invasions what's coming next a big bank crash?!
I'll bring this grow to the end! Who needs banks anyways when you got #coins ;)
On 22.02. added nutrients to the 140 liters of solution.
That's it, I hope to see y'all next week growmies.


Likes
53
Share


@buddha61
Follow
7/29 - Week 9 of veg is starting. At this point, it is just let them grow up a few inches, and also fill out the pots some more with roots before transplanting to 5 gallon fabric pots (their final homes). I also plan on mixing a 'flower blend' soil to fill up the 5g pot around the rootball that is transplanted. This recipe for the soil is taken from MaximumYield:
Enhanced fruit/flower potting soil recipe
This soil recipe is designed for plants that are ready to fruit or flower. In particular, this recipe works great for ornamentals that are already in bloom and for fast-growing annuals that are entering their fruiting or flowering stage. Parenthesis indicate small changes or products I'm using.
1/2 cu. ft. (60 cups) sphagnum peat moss (Promix BX)
1/4 cu. ft. (30 cups) coco coir (Mother Earth Coco Peat)
1/4 cu. ft. (30 cups) compost (either compost or manure)
1/4 cu. ft. (30 cups) perlite
10 cups pumice (likely to just use perlite here)
5 cups worm castings
3 cups bat guano (high phosphorus)
1 cup fish bone meal (using regular bone meal, got Jobe's Bone Meal)
1 cup oyster shell
1/2 cup seabird guano (likely to just add as the high phosporous guano)
1/4 cup alfalfa meal
1/4 cup fish meal (Down to Earth Fish Meal)
2 tbsp. langbeinite (Down to Earth Langeinite)
1 tbsp. glacier rock dust (Azomite ordered from Amazon)
7/30 - While technically the morning of 7/31, lights haven't gone out yet, so it is still the 30th ;) It almost hurts posting pictures today, because they were really thirsty, but I honestly hadn't looked at them for a couple days. Anywho, the plants were watered with ~1.25 liters of water each, about 90 minutes before lights out. Will be interesting to post the 7/31 photos after a couple hours of lights on, and see the difference in appearance. I also mixed the soil for flowering, and it will now have a couple weeks to 'cook' and become ready for the plants. I did make a mistake and accidentally added 1 cup of fish meal instead of 1/4 cup (oops), and the alfalfa meal just smelled too good, so I added 1/2 cup instead of 1/4. Hopefully those 2 'changes' don't add too much nitrogen for flower, but I imagine it won't. I also instead of adding perlite (didn't want to buy a 4 cu ft bag when I needed at most 2.5 gallons (1/3 cu ft), so I opted to add 1 gallon of pumice. Since the coco peat and promix both have perlite in them, I didn't want too much added. There were also some worms from the compost that made it into the tote that is now storing the mix, so life has already started in the soil.
7/31 - It wasn't just after lights on, as I didn't have time to photo earlier, but this is just about 24 hours after watering, and praying/looking good. I had noticed that it looked like the fan had slipped down the pole a bit, and was causing some wind burn/clawing of the leaves yesterday, which probably attributed to poor looks, but looking better today! I am not that versed in checking preflowers, though I know the difference for sure once flowering starts, but it appears both of these may be ladies!
8/4 - After getting home from work, and realizing I hadn't checked on the plants in a couple days and I knew they were due for water either yesterday or today, I saw some THIRSTY plants. They each got ~1.2L of water, and also a quick trim back. Also, as shown in the pictures, and while still under 18/6 light, DC#2 has developed balls, and is definitely a male. I have been contemplating growing any males out for pollen, but that just might be further down the road for me. He will likely get the plug soon. On the plus side, DC#1 definitely has hairs!
