
Likes
Comments
Share

@German_GrowLab
Follow
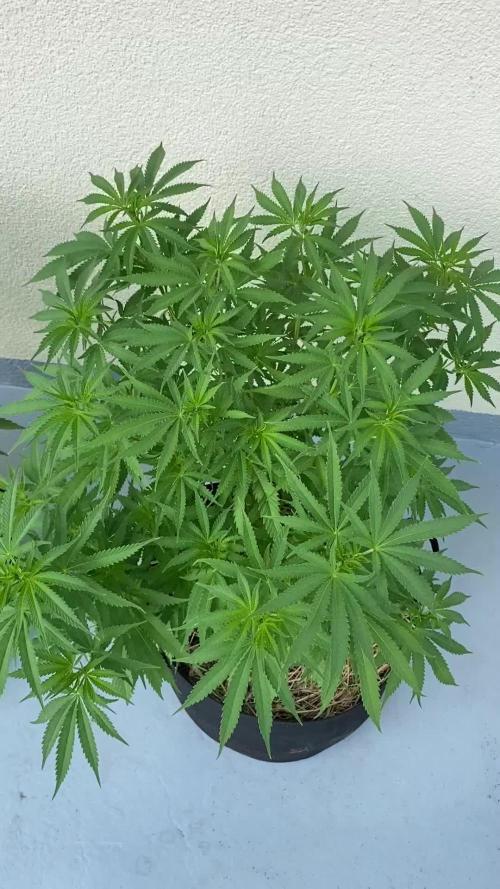
Einen wunderschönen guten Tag, liebe Grow-Community, und herzlich willkommen zur dreizehntenWoche meines kleinen Outdoorprojekts!
Diese Woche halte ich es mal wieder etwas kürzer😄.
Ich will mich hier ja nicht die ganz die ganze zeit beschweren aber das Wetter könnte echt n bisschen mehr mitspielen 😅. Die letzten Tage hatten wir. Von Niesel regen bis zu Monsun artigen Verhältnissen alles gehabt. Die Damen haben diese wiedersagen Verhältnisse gut weggesteckt und stehen in voller Pracht. Allerdings haben sie nicht übermäßig an höhe zugelegt was ich ihnen angesichts der Wetterlage auch nicht übel nehmen kann.
Aber was ist die Woche geschehen?
Ich habe den Pflanzen eine kleine Hormonkur in Form der im letzten Bericht angesetzten Jauche gegönnt. Dies besteht aus:
5l Wasser (in meinem Fall habe ich destilliertes verwendet ist aber eigentlich egal)
75g Alfalfa
75g Seegras
20g Melasse/Lab Mischung
Das ganze in einen Behalte gegeben und dann mit offen vergären lassen. Da die verwendeten Milchsäurebakterien sich anaerob vermehren, also ohne zugäbe von Sauerstoff wie beim AACT, werdende sich keinen sprudelstein. Die Jauche wird einmal am Tag mit geschlossenem Deckel geschüttelt.Wichtig ist zu erwähnen das die Jauche über die zeit immer mehr an Potenz gewinnt da die Milchsäurebakterien immer mehr Material zersetzen. Dies ist zu bedenken wenn man die Jauche verdünnt.
Die fertige Jauche ist eine absolutes Monster im garten und bringt eine reihe an benefits für die Pflanzen. Unter anderem:
+verbesserung der Bodenbeschaffenheit
+Erhöhung de Stresstoleranz
+förderung des Wachstums durch phytohormone
+erhöhen die diversität an Mikroorganismen
+Verbessern die Phosphoraufnahme durch die bessere aufspaltung im Boden
+untedrückung von Schadorganismen
eine gute und bereits Pflanzenverfügbare Silikatquelle
Und und und …
Die Jauche habe ich einerseits im Verhältnis 1:20 gespritzt hierbei ist darauf zu achten das man dies eine Stunde vor Sonnenaufgang erledigt um Verbrennungen Vorzubeugen und den Bakterien zeit zu geben einen film auf den Blättern zu bilden welcher auch die Ansiedlung von Pilzen erschwert (Mehltau etc.). Am nächsten Tag habe ich die Jauche dann noch im Verhältnis 1:10 gegossen um wirklich alle bennefits mitzunehmen . Die Pflanzen haben das Treatment gut aufgenommen und wirken bereits etwas vitaler.
Es gibt auch einen neuen Liebling im Garten:
Die bitter Orange hat sich wirklich gemacht und ein robb ein an den Stängeln (nicht dass das immer aussagekräftig wäre) ist wirklich vielversprechend.
Mit dem im letzten Bericht angekündigten lollipoppen warte ich doch noch etwas das ich mit bei dem eine oder anderen unteren trieb nicht sicher bin ob er sich nicht doch noch macht . Das alles wird sich dann in den nächsten ein bis zwei Wochen entscheiden.
Und zu guter letzt..
Habe ich den Bio Bloom in Form eines Top-dress eingearbeitet, da wir uns doch langsam aber sicher in Richtung Blüte bewegen und das Bodenlöeben diesen erst Pflanzenverfügbar machen muss. Durch das aufstreuen hat sich ein leichter Pilzfilm gebildet. Dies ist aber kein schlechtes Zeichen und wurde auch son in der akungsbeilage beschrieben.
Alles in allem sind wir gut auf Kurs 😊
Das war’s für diese Woche. Euch noch einen schönen Restmontag und einen guten start in die Woche.
Peace


Processing
Likes
81
Share


@NugLife420
Follow
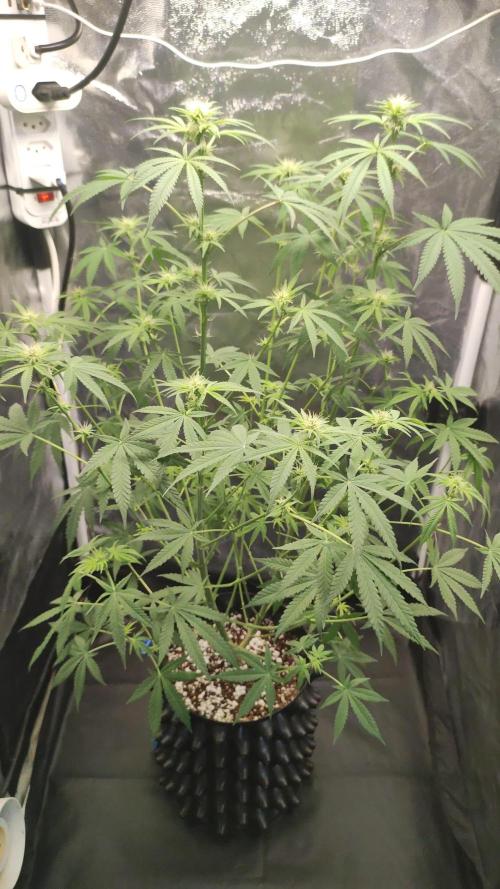
I received my Mars Hydro lights and they helped a lot. 2 TS-1000's. I supper cropped some of the 12/12 from seed and it looks like something trampled through the garden. Lol. The rest are really stretching now. I hope I the larger ones don't get rootbound. 🤞😁😁😁


Likes
92
Share


@DogDoctorOfficial
Follow
🌟 Welcome to the TrolMaster Chronicles: Seed to Harvest Adventure! 1st run🌟
Hey, Grow Fam! It’s DogDoctor here, and I’m thrilled to kick off this exciting new series with you. Today marks the beginning of our journey through the TrolMaster sponsorship, and we’re diving right into the heart of the action with germination and unboxing. 🌱✨
We’re starting strong with the Germination Station by @thecannakan, a game-changer for this process. I’ll be showing you all the details as we delve deep into every aspect of our grow adventure.
Here’s today’s lineup for the germination extravaganza:
1️⃣ Mandarin Squeeze - Terpyz Mutant Genetics. 🌈 One seed germinated.
2️⃣ Punch Pie RQS and Tyson 2.0 Genetics. 🍰 One seed germinated.
3️⃣ RS11 by Kannabia Seeds. 🚀 One seed germinated.
4️⃣ Green Papaya by Super Sativa Seed Club. 🍍 Tester unreleased seed, one germinated.
5️⃣ Gorilla Mellon by Fast Buds. 🍉 Two seeds, one germinated (the first one didn’t make it).
6️⃣ Tropical Smoothies - Tried all seeds from the pack, but unfortunately, none germinated. 🌴
We’re also using the complete organic mineral line from @aptusholland, which includes top-notch nutrients to ensure our plants get the best start possible. 🌿✨ Plus, we’ve got the new ProMix Mycorrhizae soil, which will help create a thriving root environment. 🌱
Throughout this journey, I’ll be breaking down every step, sharing tips, and keeping it real with both the successes and challenges. I’m excited to share this adventure with you, and there’s so much more to come!
For more in-depth coverage and exclusive content, make sure to check out my YouTube channel and subscribe—where you’ll find full video breakdowns, detailed insights, and more. 🌟🎥 Follow me on Instagram for additional exclusive updates and behind-the-scenes peeks that you won’t find anywhere else! 📸✨
Your support means the world to me, and I can’t wait to have you along for every step of this amazing journey. Let’s grow together and make some magic happen!
#TrolMasterChronicles #SeedToHarvest #GrowDiaries #GrowJourney #TrolMaster #TheCannakan #GrowLife #PlantAdventure #HighFrequency #PositiveVibes #GrowWithMe #SubscribeNow #ExclusiveContent #AptusHolland #ProMixMycorrhizae
P.S. 🌟💚 I want to take a moment to express just how honored and grateful I am to be the first TrolMaster Maverick. This opportunity is a dream come true, and I’m beyond excited to embark on this journey with all of you. Being a part of this incredible community and pushing the boundaries of indoor horticulture with TrolMaster and ThinkGrowLED is a privilege I don’t take lightly. 🙌
A massive shoutout and thank you to the entire TrolMaster and ThinkGrow team for believing in me and supporting this adventure. Your trust and support mean the world to me, and I promise to give it my all to make this journey as amazing as possible. 🌟🙏
Thank you, Grow Fam, for being here from the start. Your encouragement and enthusiasm fuel my passion and make every step of this journey worth it. Here’s to making magic happen together and to many more incredible milestones ahead. Let’s grow, learn, and shine! 🌱✨
With all my heart,Growers Love and thank you. 💚
#FirstMaverick #TrolMasterFamily #ThinkGrowLED #GratefulHeart #GrowTogether #MakingMagic
Lets Play a game , FB Gorilla Melon Jump in to the future, can you guess the week ? Let me know in the comments before we get there , this is just for fun Lets Grow 💚💚💚 Growers Love everyone 💚💚💚


Likes
9
Share


@Corks_Crew
Follow
Growing: 5 weeks
Flowering: 9 weeks
This was my first grow indoor from some time ago. First time using the Mars Hydro SP250. Was amazed at the result, did not expect it. Encountered a few problems, including Calmag deficiency and some bugs. Did not gave them water for 30 days after plantation to the big bags of 25L. Harvested all plants at the same time, which might have been too early for a few ladies. Nevertheless I enjoyed getting to know the lamp and hoping I will do better next round. The lamp was in this round not at max capacity but at 226w, it came like that out of the box and I did not adjust it. Also did zero defoliation which resulted in a lot of "Albino Tops" under the net, which I recovered to make butter and bubble hash from. Most of the buds above the net where really dense and not fluffy at all.
End result: 320gr total, around 4x 70gr average from the 2x BB OG, 1x A.M.S. and 1x Jack, the Purple Bud gave around 40grams.
Thanks for checking out my grow! Good luck growing!


Processing
Likes
8
Share


@eldruida_lamota
Follow
Que hay de nuevo familia, mis green ak xL están dando sus frutos, no veas que bonitas que se están poniendo, floración algo lenta y variedad difícil de cultivar pero que si sabes realmente merece la pena.


Likes
4
Share

@Bncgrower
Follow
Another week complete, this plant is developing very well, strong, and already exudes a very good sweet aroma when I rub my finger on the stem. 💪🌱


Likes
7
Share

@Gewaltmann
Follow
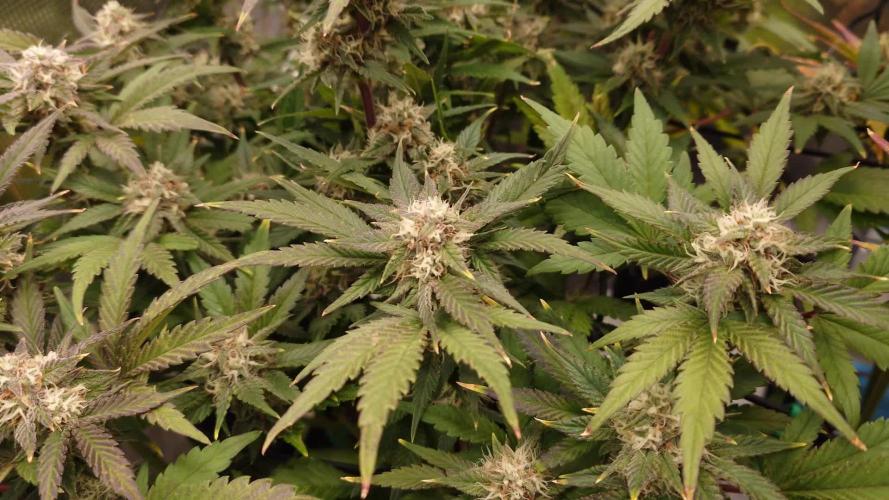
Ein gesundes neues Jahr allen! Bis auf den Jahreswechsel, ist nicht viel passiert. Die Damen arbeiten fleißig an der Fülle. Beim ersten Trichom Check, zeigt sich das, was mir die Damen auch langsam signalisieren. Der Herbst kommt und in ca 2 Wochen, dürften die Trichome genau den gewünschten Grad haben. Für mich, relativ viele Bernstein farbend. Wobei die LCC etwas mehr als die BPP haben wird. Die PH sollte genau ihren Höhepunkt haben. Wenig klar, der Rest milchig. Nährstoffe werden nun auch nicht mehr geben. Schauen wir Mal wie es weiter geht. 🏻
Processing
Likes
13
Share


@ladyjane
Follow
6/29 - 4 days after I gave everyone the compost tea, the Wonder Woman ladies have sprung back to life! The compost tea was a literal life saver. Just a few days later and their leaves have lost the yellow tinting between the veins of the leaves and her leaves are more smooth.
6/30 - Top dressed all with Uprising Grow and Uprising Foundation
7/1 - Today I did a little selective defoliation on the Wonder Woman ladies. They are looking stronger and stronger each day.
7/2 - Today was feeding day. Gave them a dose of their regular nutrients. They are very happy!
7/3 - Added some red wigglers today! I ordered some Red Wigglers from Uncle Jim's Worm Farm and they arrived today. I added about 10 to each pot then moistened the soil a bit with just RO water pH to 6.6. I can't wait to watch them do their thing!

Likes
7
Share


@agustinnnv
Follow
Buenos dias a todos. Es la primera vez que cultivo, en este caso es una Sour Compassion CBD. Esta planta fue un esqueje que me regaló un amigo. Cuando me lo dio estaba espigado en un vaso de plástico con 1 mes de vida. La pase a una maceta "Mad Rocket" de 16L. La hice vegetar 2 meses y luego la pase a florar el 8 de Marzo. Tuvo 111 días de vida y 71 días de floración. Con respecto a la fertilización que aparece, hace referencia a toda la vida de la planta. Saludos cannabicos
Likes
4
Share


@el_cultivito_colombia
Follow
Semana 3 (1/8/22 - 7/8/22)
Plantulas mostrando un buen enraizamiento.
Se preparo una solucion de Elite 91 Myco Jordan iniciando la semana con:
-PPM : 80
-pH : 5.8
4/8/2022 se transplanto a macetas de 3 litros con suelo Jiffy.
Las macetas se regaron con agua:
PPM : 10
pH: 6.5
En el transplante se uso Elite 91 Myco Jordan en forma de polvo para cubrir el hueco del suelo y cubrir las raizes de las plantulas para reducir el estres del transplante.


Likes
2
Share


@EtnoGrow
Follow
well everything is going well without pests without at least not noticeable or minimal deficiencies surely, which leaves us calm, potassium soap and neem oil were purchased but it was not applied at the end, it will be the next one, after this pruning work a new one was installed scrog mesh and as you can see we also did with some or one at least the 2nd largest an attempt at sog, so it's like a mixture, then this big ugly mesh, we change it for an ideal girl what we want is that it doesn't grow too much in that The mesh helps us, well, we also change and go to flowering officially when we see that the plant is already flowering by itself, we spread a little so that the small 5 small pots grow a little more, the intensive pruning is to compensate for the ventilation that The temperatures may still be somewhat high, the air circulation in general, my closet is 60x60x160cm, so it comes in handy, it seems to me that we have carried out a good sativa plant by taming it in such a small space and it is I am proud, in addition to having the other copies as well, I hope I have taken advantage of the space and the light as best as possible, that was the idea.
Likes
50
Share


@peterkleber7
Follow
Day 88:
Guten Morgen Freunde :)
Zur Zeit sieht alles super aus. Der Luftentfeuchter hält die Luftfeuchtigkeit konstant bei 52% RLF.
Die Pflanzen haben ordentlich an Höhe und Gewicht seit der letzten Woche zugenommen und sehen schon ziemlich frosty aus.
Ein Paar Blätter signalisieren einen leichten Nährstoffmangel, welchen ich durch 2 mal düngen wahrscheinlich beseitigen kann.
Die Damen trinken extrem viel Wasser, der Luftentfeuchter zieht jedoch auch viel aus der Luft.
Teilweise ca. 500-1000ml pro Tag
Der Geruch ist noch nicht stark vorhanden, zu meinem Glück.
Dafür sind die Pflanzen schon sehr harzig und klebrig.
Bis zur nächsten Woche.
Likes
17
Share


@Papastroumf
Follow
Day 51 : Watered with 2.5L each lady. I added as always 1 co2 tab per 4.5L . Also i added nutrients. The next one will be pure water. She smells citrus.
Edit (Day 56) : Watered 1.5L pure tap water of 7.5ph and 360ppm. No co2 today. Just pure water with 0.5/L Cal-Mag. She started to form some foxtailing. Buds are fattening nothing else.


