
Likes
Comments
Share

@GermanGrow182
Follow
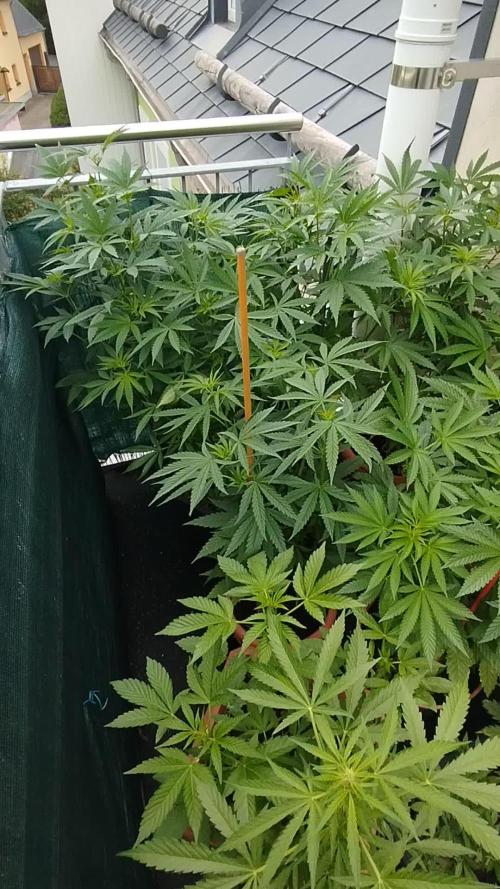
Durchwachsene Woche. Öfters Regen und prompt die erste SchimmelStelle diese Saison. Eine dicht gewachsene tropicana Cookies purple Auto war das erste Opfer. Auch noch der mainbud... 😐 Da auch eine fat Banana Auto und drei Apple fritter Auto reif sind, hab ich zwei komplette fritter und die mainbuds von einer Fritter und einer banana geerntet. Spatz in der Hand ist besser, als die Taube auf dem Dach... Sicher ist sicher. Die Photos kommen herrlich und haben knapp 90cm mit je 8 Haupttrieben. Das wird gut. Denn die wachsen noch mindestens 4 Wochen 😁👌 bis nächste Woche. Dann wird die erste Ernte beziffert ✌️


Likes
75
Share


@Kitties_and_Colas
Follow
~_~_~_~_~_~_~_~_~_~_~_~_~_~_~_~_~_~_~_~_~_~_~_~_~_~_~_~_~_~_~_~_~_~_~_~_~_~_~_~_~_~_~_~_~_~_~_~_~_~_~_~_~_~_~_~_~_~_~_~_~_~_~_~_~_~_~_~_~_~_~_~_~_~_~_~_~_~_~_~_~_~_~_
❤️💡🌱😽💨
First week of flower at last!!! This plant is sooo ready to go lol...we started her flower feeding regiment a whole week before flowering.. we also replaced x2 315watt Philip CMH fixtures for the FC-E6500 by Marshydro..what an awesome move.. this light is so f*cking incredible.. i honestly don't think a better 4x4 option exists, if it does Iv'e never seen it... this plant probably should of been flipped a few weeks back but she should have the room (hopefully)..we'd love to pull over a Lb and this is DEFINITELY the strain to do it.. we pull approx. 3-3.5oz dry on a 6 week veg with ILGM Big Bud, this should smash some records lol...Thanks for dropping by and happy harvests folks!!
⚡Mars Hydro/FC-E6500⚡ Specifications ⚙️:
650 watt, full spectrum design, removable light bars and driver 🔌
Diodes: BridgeLux chips (3978 count!)
Veg Coverage: 6x6 ft 🌱
Flowering Coverage: 5x5 ft 🌼
High-Efficiency
PPFD: 1200umol/m²/s ☢️
-IP65 waterproof ratings, tolerant to high humidity grow environments 💦 ..
-Can be daisy-chained together and all controlled from a single light! 💡~💡~💡~💡~💡
~_~_~_~_~_~_~_~_~_~_~_~_~_~_~_~_~_~_~_~_~_~_~_~_~_~_~_~_~_~_~_~_~_~_~_~_~_~_~_~_~_~_~_~_~_~_~_~_~_~_~_~_~_~_~_~_~_~_~_~_~_~_~_~_~_~_~_~_~_~_~_~_~_~_~_~_~_~_~_~_~_~_~_

Likes
295
Share


@Ju_Bps
Follow
Hello growmies 👩🌾👨🌾🌲🌲,
👋 This week young plant keep growing well and fast, the preflowering is started, we can see on pics the first pistils. Start to smeel a weak 😋.
I increase each times the nutes,
Last week I talked you about my Plagron Prize stolen, @Plagron resent it, and now I got it 😊😊🙏🙏, we could do the grow with the nutes range of @Plagron 😀
💡 I up a bit the supply of lamp each days.
💪 I continue the training and removed few fan leaves (shadows)
💧 Give water each 2/3 day
And vaporise plant with water + Plagron Roots (1ml/l)
0.6 l Water + Roots + Grow ( 1 + 3 ml/l)
0.7 l Water + Roots + Grow + Sugar Royal (1 + 4 + 0.5 ml/l)
0.8 l Water + Roots + Grow (1 + 5 ml/l)
PH @6
💡Mars Hydro - FC 3000
27% 54 cm.
Mars Hydro Fan kit
Setting 5
Have a good week and see you next week 👋
Thanks community for follow, likes, comments, always a pleasure 👩🌾👨🌾❤️🌲
Mars Hydro - Smart FC3000 300W Samsung LM301B LED Grow Light💡💡
https://www.mars-hydro.com/fc-3000-samsung-lm301b-led-grow-light
Mars Hydro - 6 Inch Inline Fan And Carbon Filter Combo With Thermostat Controller 💨💨
https://www.mars-hydro.com/6-inch-inline-duct-fan-and-carbon-filter-combo-with-thermostat-controller
Anesia Seeds - Deep Jealousy Auto🌲🌲
https://anesiaseeds.com/product/deep-jealousy-auto/

Likes
7
Share


@BushDoctor740
Follow
The girls are moving along nicely just watering with water ph to 6.4 this week as I top dressed with Gaia green 4-4-4.Spider farmer Se7000 dialed in at 30 percent and to the ceiling.Noticed some minor deficiencies Day 12 and check soil slurry 50/50 soil/water and the ppm was at 780 lil high at this early stage and the culprit.Going to work on lowering that a bit this week.I did add a top layer of fox farm ocean forest as well which runs a little hot with nutrients rather than the pro mix.I have to remember with these beautiful auto flowers less is better :)

Likes
35
Share


@g_slim
Follow
Made compost tea last week and documented it. Since I am still new to the whole bio experience, any input and or experiences are appreciated on the matter.
The weather was 3 days of rain, 2 cloudy days and 2 days of sun.
The plants are comming along nicely. I gave some guano to the autos and some horse manure to the Passion #1 and watered it in with horsetail extract. No. 7 seems to really like her spot and conditions and has the potential to become pretty big. Still many "ifs" to overcome until then though. I put up a net to better guide the plant and to help carry itself later in flowering.
I did some light defoliation on the autos, on the insides of the plants.
Happy growing everyone!


Processing
Likes
6
Share


@AbbyRose
Follow
These chef anna white label autos are just amazing. The smell is so pungent it just smacks you in the face from 10 feet away. I cant wait to smoke these lovely ladys. Not to mention look at all those pistols.


Likes
2
Share


@Strangelet
Follow
Harvest day 74. 10g dried after 4 days.
Little plant and little yeald.
Didn't respond well to topping, problems with over feeding in late flowering. Also began to foxtail in last week, probably due to 40°C at daytime.
Will update the smoke test curing.
Likes
8
Share


@DannyDank
Follow
Think they are done stretching not 100% but the hairs are showing it’s go time they are suffering a little light burn but I only have the light on 80% power any advise
Nope I was wrong they haven’t done stretching growing tall
All being feed a litre each


Likes
9
Share


@Edles_Gas
Follow
For this second week of flowering im doing more lst on the 🍉Zkittlez getting the right shape for the plant. I’m also increasing their nutrient uptake as they are in full flower mode and hoping to get phat buds, aswell I brought the trellis down to start tucking any colas that reach above it. As for next week I’m gonna set up the carbon filter to reduce the aroma these girls are gonna put out and that’s it.


Likes
3
Share

@DannyDank
Follow
Colours are popping
Again nothing is accurate just wanted to share this with you guys
Likes
24
Share


@MadeInGermany
Follow
Hey everyone 😊.
Welcome to the last week 😃.
She looks beautiful :-)
Her buds, the smell, everything is just right 😍.
I can't wait to try it for the first time in a few weeks 😄.
It will be harvested in the next 2-3 days.
There will also be another update during the drying process before the final harvest update comes 😃.
I wish you lots of fun with the update, stay healthy and let it grow 😎
You can buy this Strain at :
www.Zamnesia.com
Type:
Runtz
☝️🏼
Genetics:
Zkittlez x Gelato
👍
Vega lamp: 2 x Todogrow Led
Quantum Board 100 W
💡
Bloom Lamp : 2 x Todogrow Led
Cxb 3590 COB 3500 K 205 W
💡💡☝️🏼
Soil : Canna Bio
☝️🏼
Nutrients : Canna Bio
☝️🏼🌱
Water: Osmosis water mixed with normal water (24 hours stale that the chlorine evaporates) to 0.2 EC. Add Cal / Mag to 0.4 Ec Ph with Organic Ph - to 6.0 - 6.3


Likes
19
Share


@GuerillaSweed
Follow
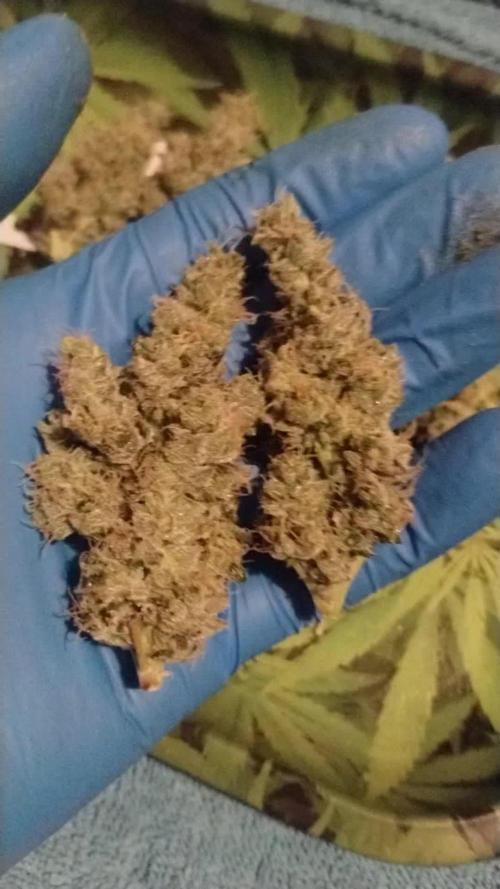
Had alot of fun this season!Only 5g got moldy, but it took heavy rain and bad weather for 5-6 days in row.
Bud smells super fruity and exotic


Likes
Comments
Share


@Organic473
Follow
This girl was pollinated with Durban Skunk pollen…I await her ripening for the new strain Durban Skunk OG. She has a sweet smell thus far.


