


Likes
1
Share

@Bdog7878
Follow
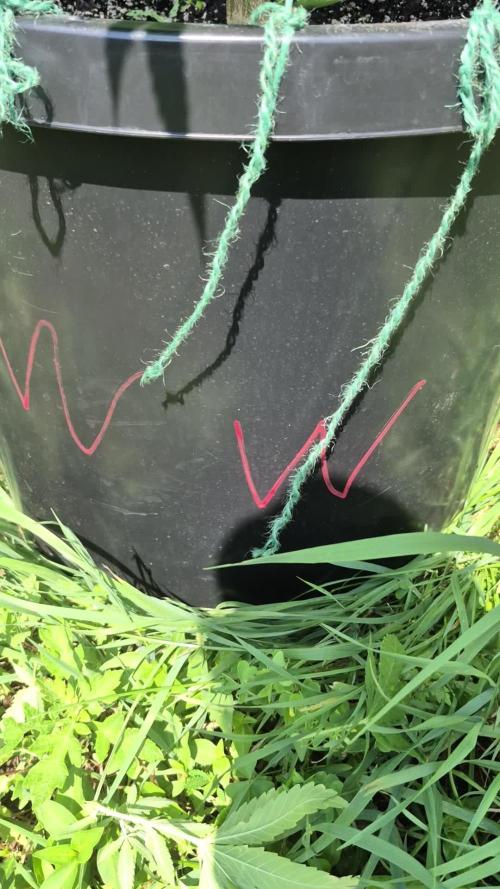
The stretch is on they are growing super fast right now and feeding heavy. Been feeding every 5 days giving recharge once a week and they drinking two gallons a day now in this hot heat. I did a small amount of trimming im a little late with it i usually do it earlier but been super busy. I had a few split branches from a storm other day but I bandaged it up and didn't loose anything never skipped a beat. Im working on getting some support going on if they breaking now they dont have heavy buds yet.


Likes
278
Share


@Metatronix
Follow
A big hello to all the cannabis growing gardeners...and all the other visitors that came across my grow journal.
Not much happening this week the one thing i did this week was transplanting the little rockwool cubes to bigger rockwool cubes. The seedlings will probably wait another week or two for the transplant in to the RDWC system.
You can acquire Moby Dick seeds from Seeds Mafia here:
https://seedsmafia.com/en/feminized-cannabis-seeds/moby-dick-feminized.html
This whole grow's main sponsor is Spider Farmer and as such I added a video of unpacking one of the parcels I got from SF.
Here are the links for people interested in the Spider Farmer products that are presented in the video:
https://cutt.ly/gwjZIk9r
A big thank you to Jessie and the whole Spider Farmer crew for supporting my effort to grow the best cannabis I can.
Thank you for your visit, please leave a like and hope to see you beck here in about a week.



Likes
Comments
Share


@gr3g4l
Follow
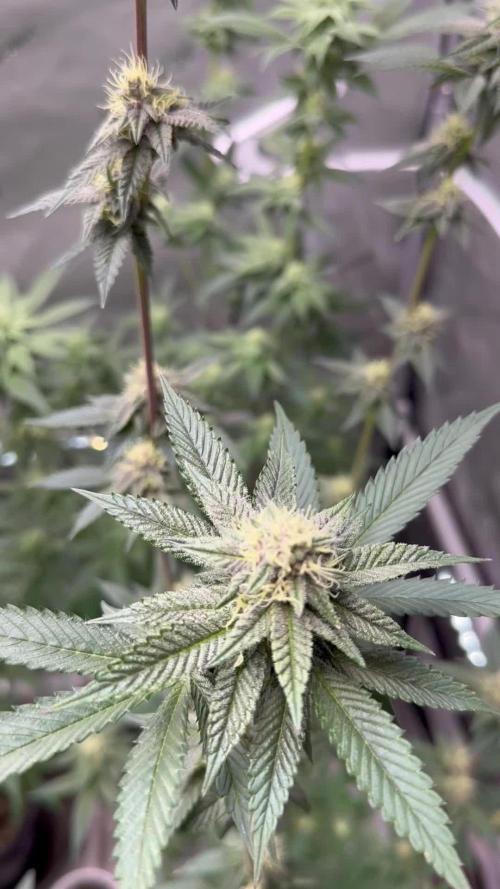
Esta semana podemos empezar a diferenciar claramente la formación de cogollos de unas u otras variedades.
AMARETTO TARMAC
Fruto del cruce entre Amaretto Sour y Apollo Black Cherry, esta genética de dominancia sativa promete un efecto de altos vuelos, cerebral y estimulante, que despierta la creatividad.
MACK&CRACK The Mac (AKA Mac1 AKA miracle alien cookies) x Green Crack . De las pocas genéticas verificadas independientemente con más del 30% de THC.

Processing
Likes
36
Share


@The_Projexx
Follow
She's just a growing and a flowering not much to say other then that . Going to be doing a light defoliation then letting her do her thing !!
Thanks for everyone's continued support you guys rock !
-Happy Growing!


Likes
2
Share

@TowersD
Follow
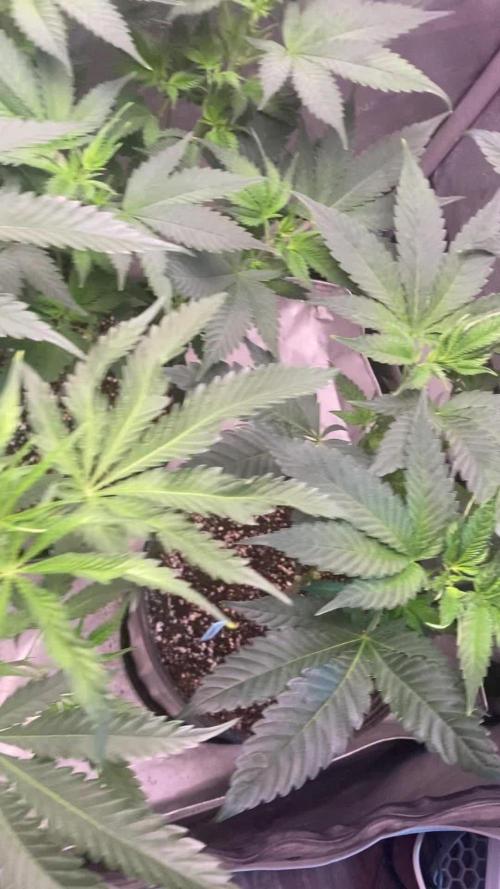
I put the plants under the Electric Sky 180 V2
I kept only 4 plants because one was growing really slow compare to the others and another turned out to be a automatic plant so i took it away as well.
I am keeping 2 phenos of the Nanaz x BBC and 2 ot the Humboldt Headband.

Likes
81
Share

@cangrowz
Follow
🍋🍇 Air Lemon x Shishkaberry Anfang Woche 24 🍇🍋
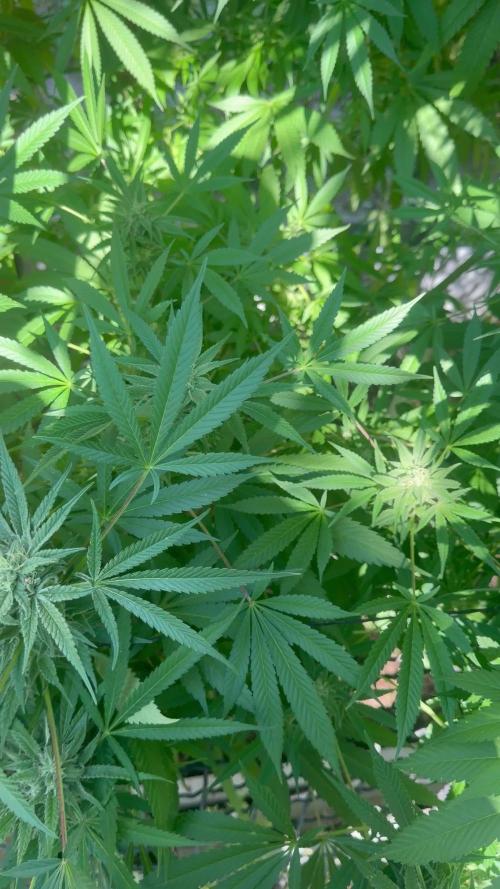
Weiter geht’s mit meinem Outdoor-Projekt und mittlerweile sind wir bei Anfang Woche 24 angekommen.
Die Pflanzen stehen weiterhin richtig kräftig und haben sich über die vergangenen Wochen zu stattlichen Pflanzen entwickelt. Auch die Blüten legen weiter zu und zeigen eine schöne Harzentwicklung. Auf den aktuellen Bildern sieht man, dass wir langsam aber sicher in die entscheidende Endphase des Grows kommen.
Jetzt wird es besonders spannend, denn die kommenden kälteren Nächte stehen vor der Tür. Ich hoffe natürlich, dass die Pflanzen die letzten Wochen noch gut mitnehmen und uns vielleicht sogar noch mit einem schönen Farbspiel in den Blüten überraschen. Gerade die kühleren Temperaturen könnten für interessante Veränderungen sorgen.
Ein großes Dankeschön geht natürlich an Green House Seeds für den Support und die Möglichkeit, dieses Projekt mit der Air Lemon x Shishkaberry begleiten zu dürfen.
Danke auch an die gesamte Community für den Support, die Kommentare und dafür, dass ihr den Grow bis hierhin mitverfolgt!
Jetzt heißt es Daumen drücken für einen schönen Endspurt und hoffentlich noch ein richtig schönes Farbenspiel.
Happy Growing Growmies 🌱

Likes
39
Share


@Hazecat_420
Follow
Todo bien, seguimos. Próxima semana se cambia el fotoperiodo, se aplicará una defoliación para evitar posibles plagas

Likes
15
Share


@crystal_garden_0
Follow
Great week. No problems. Plants ready to harvest. Flushing is done plants smelling incredible Orange mango fruits going to be delicious forsure. Dense buds one is big. Thanks everyone

Likes
5
Share


@HowtoBubatz
Follow
The Ztrawberriez girls have absolutely exploded this week, super happy with their early progress.💚
All three seedlings are off to a flying start, stretching up with strength and vigor.
No issues so far, they’ve handled the environment like champs and are developing beautifully.
Looking lush, green, and full of promise – can’t wait to see how they take off in the next phase! 🌱✨
Likes
15
Share


@Newfie80
Follow
Things are coming along here now, won’t be too much later for these plants. Probably start thinking about flushing 2 of them soon, I suspect the soil is loaded with a high ratio of nutes, think next time won’t use the high nute soil and go for total control. Already harvested one plant already, it was the smallest one, a bit early but she was milky and a few ambers, think she got me 25.55 dry in jar now. Letting the Others hit 50 % amber before harvest those. Two in back big stretch on them,the one left in front short and fatter, say she going next in a bit

Likes
47
Share


@Ultraviolet
Follow
The cannabis strain Grape Guava can be a purple strain, depending on its specific phenotype and genetic makeup. While not all phenotypes of Grape Guava are purple, some variations, such as the Zatix Grape Guava, are noted for their striking purple appearance due to the genetic expression of anthocyanin pigments.
https://www.youtube.com/watch?v=cKdVmdoKJ5k
In a garden of green, Grape Guava gleams,
With its fruity aroma, enchanting dreams.
Clusters of grapes, guava's sweetness ignite,
A strain so divine, in purple and white.
Euphoria whispers, a lush fruity haze,
Grape Guava's embrace, a tranquil daze.
Off and away.@1400ppm. The increased CO2 allows plants to thrive at higher temperatures, which in turn necessitates higher humidity to maintain the ideal VPD for healthy growth and transpiration. 80F -5F = 75F LST with 70% RH = 0.72 kPa. Higher temperatures and humidity promote rapid growth, nutrient uptake, and photosynthesis while maintaining a lower stress level. Temperature influences the rate of enzymatic reactions involved in aerobic respiration. Enzymes, such as those involved in glycolysis, the Krebs cycle, and the electron transport chain, work most efficiently at an optimal temperature range. In low temperatures, enzymatic activity will slow down, thus reducing the rate of aerobic respiration. In high temperatures, enzymes can become denatured, thus impairing their function and stopping the process of aerobic respiration. Glucose is the primary fuel for aerobic respiration. The rate of aerobic respiration increases with the availability of glucose, as it is the starting point for glycolysis. If glucose levels are low, cells may rely on alternative energy sources such as fatty acids or amino acids , but these processes may yield less ATP or be less efficient. To determine this effect, carbon dioxide volume was measured (as carbon dioxide is an output of aerobic respiration)
18/6 with the 6 being IR. The near infrared (IR-a) borders around 700nm up to 1400nm @ photon par flux density of 1.8 instead of darkness, keeping temps overnight a neat 77F-80F.
Think of my tent as a lung. What goes in must come out. When the rate of air going out exceeds the amount of air coming in, it creates a negative pressure. Tent concaves (bends in). If set up correctly, your RH will begin to drop slowly to the desired level you set, and the extraction turns off when it reaches desired% RH. The plant, as it performs cellular respiration, will always be releasing more water into the air, so the RH% of the tent overnight will always increase, so long as oxidative phosphorylation is occurring. As soon as the RH% creeps back up to 55%, the extraction turns back on, over and over. This creates a strong pressure differential which will work wonders on your grow. Replicating high and low-pressure fronts in nature. Critical for oxygen diffusion at the critical time of peak cellular respiratory function..
Moisture will not transfer from a saturated atmosphere to another if that air is already at or above its saturation point, meaning the air can't hold any more water vapor. Once I understood that water is produced as a by product during cellular respiration, specifically at the very end of the electron transport chain (ETC) where electrons are finally transferred to molecular oxygen, the higher the RH of the air, the more resistance there is for more moisture to be added to that environment, and effects the ease with which it does so. But none of that water comes from the pot; it's pulled from the air. If you run high daytime RH, your medium/pot is 100% reliant on transpirational root pull to move water. ZERO evaporation happens across the atmosphere if the tent air has high RH%, the medium cannot release its water through evaporation. Once a canopy develops, light no longer slowly wicks and evaporates from the topsoil. The Soil-Plant-Atmosphere Continuum (SPAC) describes the continuous pathway and process of water movement, driven by a gradient in water potential, from the soil, through the plant's roots, stem, and leaves, and finally evaporating into the atmosphere through transpiration. There is evaporation, there is transpiration, and then there is evapotranspiration; Evapotranspiration (ET) is the combined total of two processes: evaporation (water lost directly from soil and surface water into the atmosphere) and transpiration (water released from plants to the atmosphere through their leaves). Evapotranspiration represents the total amount of water that moves from the medium into the air. There is no such thing as a medium with too much water, only a medium that retains too much for too long.
The water must always flow efficiently from one atmosphere(Medium) to another(Air) in a timely manner. Moisture is a critical factor for bacterial growth and decay. Dictating how long it's allowed to sit in any one location for any given period is a key preferred control. To ensure a net reduction in a bacterial population, the rate of removal (ET) must exceed the rate of bacterial growth (decay rate), which is often modeled as a growth rate for the specific bacterium under the given conditions. By optimizing daytime VPD, we also optimize conditions for bacterial growth to explode exponentially above 77°F.. If water is allowed to sit in a medium without an escape within a timeframe, nothing good will happen. IF High RH is maintained overnight as well as during the day, placing 100% of water movement at the behest of daytime transpiration, roots can only pull where they can reach, and if soil is compressed above a certain point, moisture will become trapped in a medium with no way of moving day or night. This will begin the countdown for decay to take hold. When water stagnates in a medium, it loses oxygen, creating anaerobic conditions that foster the growth of harmful microorganisms like bacteria and fungi, which can produce toxins and disease vectors.
Thigmomorphogenesis, the process by which plants respond to mechanical stimuli like touch by altering their growth and development, results in significant morphological changes to improve survival against mechanical perturbations. This complex response involves sensing touch and initiating physiological and genetic responses, leading to changes in form and structure over days or weeks. The process is triggered by physical forces such as wind, rain, or touch. Plants adapt to these stimuli by changing their shape and structure, which may include slower growth, thickened stems, or altered leaf development. Plants possess sophisticated mechanisms to detect even subtle mechanical stimuli and initiate responses. A variety of molecules, including calcium ions, jasmonates, ethylene, and nitric oxide, are involved in signaling these mechanical inputs. Touch can induce the expression of genes that encode proteins for calcium sensing, cell wall modification, and defense mechanisms. A plant exposed to constant wind may become shorter and sturdier. A plant that is touched frequently might grow more slowly to conserve energy and develop thicker cell walls. These changes increase a plant's resilience and ability to survive in harsh environments.
Let's get Thiggy with it.
Likes
11
Share

@Pete_vs_Nature
Follow
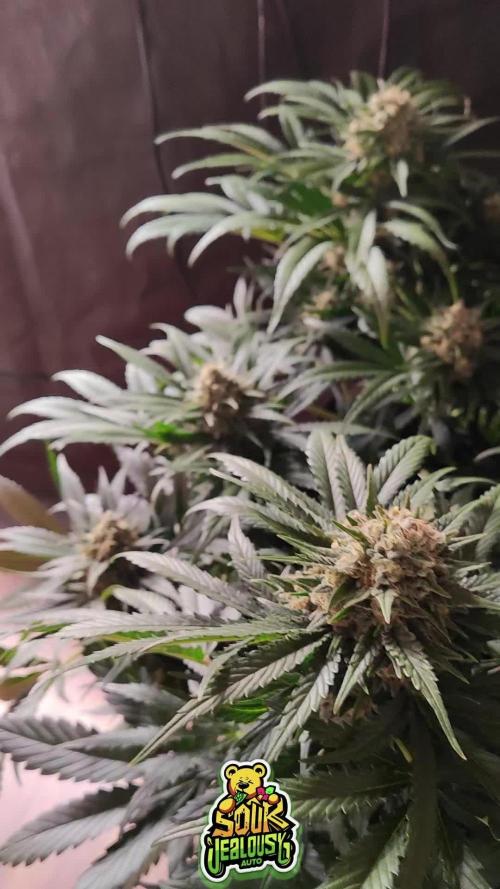
Okay now this has been ridiculous. SJ re-affirmed my choice as stability anchor, in case my Haze experiments go wrong (they kinda did*) - and she delivered big time 😵
*they did, with a funny and unbelievable twist: I am the proud owner of two seeds, this one likely is " Mephisto OSMH × 42FB SourJealousy — F1 Fem Auto (rodel)
Her flower is extremely dense, which comes with a challenge for spotting bud rot. So far I have not found any bud-rot during hand-trimming, but given her structure and my extended drying, I am not too concerned with finding a spot or two. Here's my logs, excuse the dump:
----
42 Fast Buds : Sour Jealousy #2
State: Age: 73 days | Life: Content & relaxed throughout all phases. Very healthy & confident representation throughout.
Trichomes: ~10% amber | Pistils: Slow, gradual fade towards 80% brown (indica representation; full white pistils possible at correct harvest time)
Flower Development:
Very evenly matured and ripe flower with light senescence fade (-) deeper into sub-canopy.
Larf: ~1.5%
Fully matured/ripened to freshly maturing/ripening ratio: 2.6:1, or 72% : 28%
Hand-trimming: 6h 46/h
Drying: Extended low VPD drying (12d) with increased botrytis risk. Temporary humidity stabilization → grove bags nested in RH container.
Flower State: 62% RH on all but top main colas (still burping). Monoterpenes noticeably degraded (30%+ perception)
Pharmaceutical Profile: Under my (drying) conditions: very long lasting, mellow. Sedative-leaning but daytime-profile with strong, pleasant body aura / high. Strong focus / immersion, some tendency to wander off. Relaxed, focused working / occupation. Creates ""bubble"" reducing distractions, without inducing artificial happiness other than from (largely) increased comfort. Reduced motorical drive slightly debilitating but never couch-locking. High THC contents (apparent during use) create ceiling for daytime profile.
Smell: sweet forward, reminiscent of sweet almond profiles, creamy elements. On rupture: deep herbal profile with surprising mint and earthy notes (background); + a ""vibrant, lively spin"" on those herbs as a warm, almost fennel-like umami / wet nest inside profile (only on well preserved flower).
Taste: no good data (combusted with tobacco)

Likes
110
Share


@SlowpokeFuegobud
Follow
💜 💚 😍🥤💜💜 💚 😍🥤💜💜 💚 😍🥤💜💜 💚 😍🥤💜💜 💚 😍🥤💜
Dear growmies, welcome to week 13 which only has 2 days!! ❤️
This was the most spiritual grow ever! 💜🙏On day 1 of flowering week 8 she started to throw out bananas, and I took that as a discreet sign that she is finished. 😅 Magically just right. ✨
So happy with this! I will miss her! Can't wait for the smoke report. 😍
Thanks @Fast_Buds for your awesome genetics, growing Fastbuds is always a bit like riding a ferris wheel! Woohooo!! 😜 🙏 💚
Thanks to my sponsors @Green_Buzz_Nutrients, their nutes never ever let me down!! Check out my diaries on how well they work! 💚 😘 In case you want to give them a try, you can find a generous discount code in the setup description further down the road ⬇️
You can find more brand hot updates on my IG, where I share real time events from my growroom, don't miss this! 😝
_______________________________________________________________________
Purple Lemonade FF
As refreshing as cold lemonade on a hot Summer day. 🌞
• Quench your thirst. Just as good as lemonade on a hot Summer day.
• The gentle giant. Up to 550 g/m2 of gorgeous pinkish-purple buds.
• Refreshing for the mind and body. The ideal all-day strain with a perfectly balanced effect.
• Sweet n’ sour terps. Mouth-puckering lemon flavors that’ll hypnotize your taste buds.
• Properly purple. The perfect choice for purple hash and extractions. As refreshing as cold lemonade on a hot Summer day.
Arising from a cross between purple and citrus Cali genetics, Purple Lemonade FF (Fast Flowering) offers a complex high made up of perfectly balanced cerebral and body effects that are ideal for daytime use. Expect an extremely enjoyable high that boosts your mood while deeply relaxing your whole body and getting
rid of muscle pain. This meticulous cross produces up to 550 g/m2 of some of the most beautiful purple buds, with pinkish and reddish hues that will catch everyone’s attention. The beautiful purple buds are ready for harvest in 7-8 weeks and come hand-in-hand with unbelievably sugary citrus terps that are just as refreshing as a cold lemonade on a hot Summer day. It’s the ideal variety for the sweet-tooth stoner seeking strains that deliver both in quality and quantity of resin.
Bud Description 🦔
Purple Lemonade FF grows chunky, spade-shaped buds that boast a whole range of pinkish-purple hues with rich, dark orange pistils shooting out of every direction. This variety stands out for the, oftentimes, lilac trichomes that give them a gorgeous pink tint and make for outstanding purple concentrates. The buds give off a delicious tart lemon aroma that reveals a sweeter, more fruity scent as you break the buds open. Definitely a must for flavor chasers and those looking for pungent terpene profiles.
Smoke Reports 💨
Purple Lemonade FF offers an effect that’s just as unique as the flavor. Expect a potent uplifting high that gives you that energy boost you need to get things done while 100% happy and stress-free. The effect gradually transforms into a wave that works its way along the limbs and through the muscles, deeply relaxing your body and putting you in the right mindset to go through a busy day with a huge smile on your face. This is an excellent all-day smoke as it not only increases energy but can also help combat chronic pain, migraine and stress.
Plant Appearance 💄
This feminized photoperiod variety develops a thick and strong structure, growing a medium-sized main cola with multiple shorter side branches, typical of hybrid strains. Purple Lemonade FF develops fairly short internodal spacing with gorgeous purple buds growing stacked on top of each other, making it the perfect choice for growers of all levels looking to get lots and lots of top-shelf purple weed, as this variety can produce up to 550 g/m2 in a 7-8 week flower cycle.
Grow Tips 🤓
This is a super fast feminized photoperiod version that takes approximately 7-8 weeks to flower with a 5-week vegetation cycle,, this means you can have faster harvests by shortening the veg cycle or have a longer veg cycle for bigger yields. Purple Lemonade FF (Fast Flowering) makes for a great candidate for growers of all levels as it’s a vigorous strain that will thrive with basic maintenance both indoors and outdoors. This is a resin powerhouse so make sure to have your trim bin close by as all the resinous sugar leaves will make for the most mouth- watering hash and extracts.
Flavor 😋
Expect a long-lasting citrus zest that taste just like it smells. Purple Lemonade FF reeks of a delicious blend of sweet fruits and tart citrus that’ll make your mouth water. On the inhale, expect sour flavors that taste just like lemon candy with hints of orange and a really subtle earthy background. And on the exhale, the citrus flavors open up, giving place to a more sugary berry fruitiness that leaves your whole mouth tasting like an extremely sweet weed-infused lemonade.
https://2fast4buds.com/seeds/purple-lemonade-fast-flowering
_______________________________________________________________
Setup:
140x70x200 cm Spiderfarmer tent
2x Monkey 16W fans (not oscillating)
1x Secret Jardin 30W
1x box fan 50W oscillating (on lowest level)
LED
Full Spectrum 320W AGLEX AGL-320W-MA
5,6 kg
foldable, dimmable
864 pieces Samsung LH301H
864umol/s
2,7umol/J
full spectrum white
RED 660nm
IR 740nm
wavelength range 380-780nm
covering 3x4ft
Green Buzz Nutrients https://greenbuzzliquids.com/
❗ Use code GD42025 for generous 25% discount (for orders of minimum 75€)
Biobizz Lightmix
coco
wormcastings
perlite
Carbon Active Granulate Filter 125/360 cm³/h
PrimaKlima exhaust EC 125-400/240 cm³/h
Likes
4
Share


@DmbTexasRanger
Follow
Outdoor harvest smells and looks better than indoor. AN bloom boosters (full lineup) made a huge duffe

Likes
5
Share


@Backtotheroots2222
Follow
~4weeks old...(Triploid splitt head) aka Pseudo4Ploid..See picture...at this time i dont know what i will do with it...the smell is lite Berry dark Woody with some spices and Herbs...flower pics are from older grow day 31, and from a sister plant..they homogene at all with little Varietés and some have mutatins...lot of notes stretch 300%. Buds from top to bottom with little space between buds by the most,lot of branches,all giong up to one high only top bud is little higher.. loud smell at the second week to end. mostly sweet floral weedi mango Woody light spices..
Processing
Likes
Comments
Share


@WhizbangWheelhouse
Follow
Had to do some trimming on the one plant, however it is coming back strong. trying to get my watering schedule down.
I guess I wont complain too much, they are still alive.
Likes
Comments
Share


@streamkiller
Follow
Malas noticias con Nefertiti todavía no creció. La saqué del papel húmedo y ahora nuevamente está con agua, la dejaré así 1 o 2 días y luego la plantare directamente.
Las 2 CSSH que germine fueron exitosas, una con una raíz de 5-6mm y otra de 3-4mm, ya fueron trasladadas a tierra como se ve en la imagen.
La primer CSSH todavía no creció , tengo miedo que haya tomado mucha humedad la tierra y no haya descargado correctamente.
En esta ocasión agregué unas muy pocas gotas de una hormona de enraizado, he tirado unos pocos milímetros de agua en cada una , guarde mucho para los días consecuentes.


Processing
Likes
5
Share


@Kourtney80
Follow
Topped this plant and LST also.
Still at ph 6.5 of rain water and spring water, however the leaves are crumbling and turning brown, I’ve move the light up more so it’s about 45cm away now.
I’ve gel it a ml of baby bio and tomato plant feed per gallon of water, I’m unsure if this is to little nutrients for but I’d rather under feed than over feed.
Please feel free to leave any advise; this is my first time growing so I need all the help I can get☺️💗