
Likes
Comments
Share

@Nonem420
Follow
Day 77
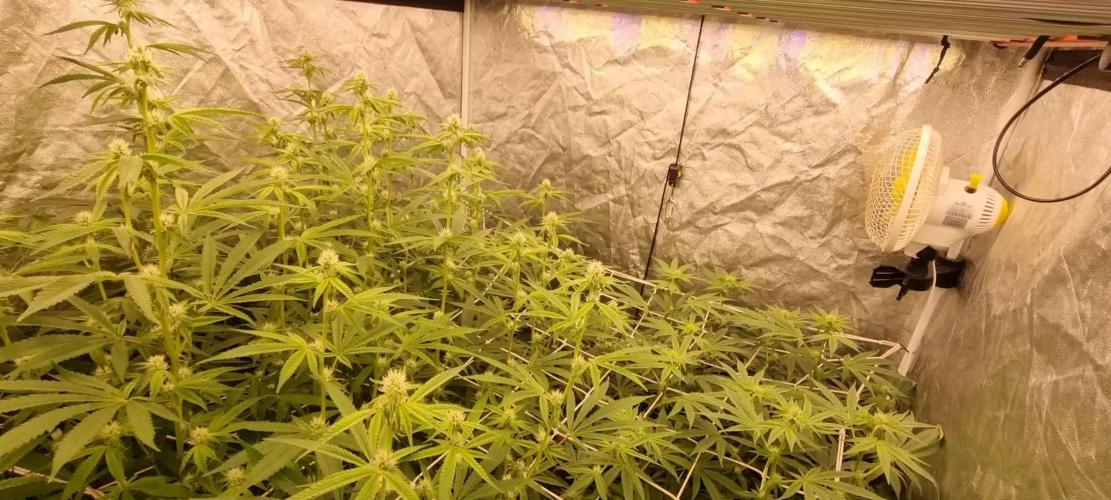
I'm running out of vertical space for pinus contorta, this weekend i will open the box to move the leds higher and will try to do some decent photos.
At this point i've added the Pinus purple matcha to the diary because she's huge and impossible to not notice, should be around 1,5m² almost 150cm tall. Had to do a very risky move and "soft crop" 2 apicals because of burn risk, too close to the leds.
I wasn't expeting a freakin' tree like that!
Day 79
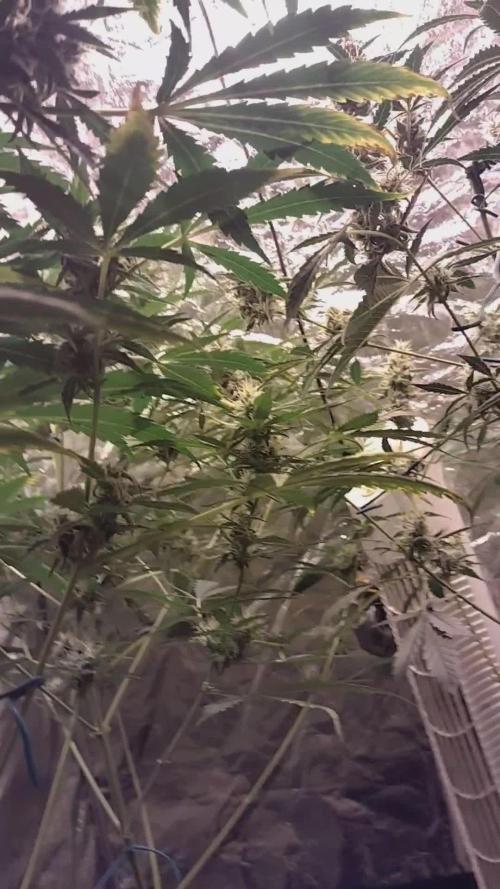
Jeez plz stop growing in height!! After this shaky video i raised the leds 10 cm, now i'm for real out of space.. I'm adding 10 to 12 liters every day, alternating ro with only silica one day and the other with nutrients.
Day 81
Way too much leaves in the lower part of the plants but i really don't want to stress them more than the temperature is already doing (29.3C measured in the upper canopy at 5 cm from the leds).
Luckily i've got a lot of airflow, 3 filtered exhaust and 1 huge intake to remove almost the humidity. Despite it all they are pretty healty, no visible burning signs.


Likes
16
Share


@Oimjr
Follow
Still going...sigh...
3/18 ; did a water change and man is ut getting awkward getting her out of the tent to do water changes. I might drill and put a valve on the very bottom of the bucket next grow to make water changes a little easier in the future. 4 gallons of well water with 4 tsp of maxi grow and 1 tsp of Kool bloom. I added 1 tbl of calmag for the hell of it. The older leaves are looking a little stressed. The buds seem to be swelling to me, but strange enough, seems like the smell is decreasing. But what there is, is very fruity.ph to 6.1

Likes
74
Share


@Mr_Maes
Follow
We are officially in full bloom. The have been enjoying 6-7 hours of sun light per day for about 4 days now, then brought back in under the cobs. The girls are all exploding with growth and stacking what I expect to be huge buds.


Likes
7
Share


Processing
Likes
45
Share


@AsNoriu
Follow
Day 127. Oh boy it will be my longest grown plant indoors.
This bean is from bagweed, just wanted to show, that from shitty weed found seed you can produce good result, but i screw up with this girl by having no space for her, by giving her to wrong guy ... And now again, i checked temps during my holidays and lowest was 13 , highiest 33 ... Very bad, she is from leafy pheno and that didnt helped for buds and leafy i dont like already, hate triming .... ;)
Will do last hard training apart from everyday lst here and there , she will loose a bit of leaves tomorrow before watering just phed water. I never feed after training.
Tomorrow she will go to new tent and i start new diary, hands full ;)
Happy growing !
Day 128. Girl got small defoliation , up to 50 leaves, now more buds get light, have to prepare her for smaller , where i will fit only one light, otherwise its too hot inside ....
All movement postponed for a bit, have to leave town so only phed water for her after new look. She drinks now like 5 liters every 3 days.
Day 131 . She is stinky sticky b**ch ;)) Amazing plant, my mini bonza, would want to flaten her up, but in new tent fan has to have space aswel ;)
Her new fan is delayed an i quess it will take a week to be redelivered ...
Fingers crossed.
Heavy feed - done. ;)
Day 132. She starts to pack up a bit, maybe it will be something desent again.
Girl is under two lights ( quantum boards 2x240) and in a week will stay just under 240 , but in new tight house with better reflection from walls, hope it will even pars , despite power loss ....
I think i will smoke first joint on day 160, its almost half of the year, crazy adventure ...
Her leaves are too green, so no silica and red leaves stemps doesnt show up, so no cal mag .
Think she'll have like 2-3 feeds max in two weeks and then final strech ;)


Likes
3
Share

@GERGrowDesigns
Follow
Dear Growers ,
Over the next weeks, we’re excited to share a very special project with you: Sensi Seeds Supreme Jack F1 Automatic 2025 Release
With dedication, knowledge, and hands-on practice, we’ll guide you step by step through the journey—watch with us as growth, development, and small wonders unfold before your eyes.
Whether you're a beginner or an expert, you are warmly invited to join, ask questions, and share your own experiences along the way!
Project Setup & Conditions:
• Brand/Manufacturer: Sensi Seeds
• Tent: 120cmx60cmx80cm
• Light: 2x 200 Watt Full Spectrum
• Humidity: 45%
• Soil: Narcos Organix Mix
• Nutrients: Narcos Products
• pH Value: 5.8
A Special Thanks To
Sensi Seeds
for the amazing collaboration, trust, and generous support in making this project possible. Your contribution is truly appreciated!
Congratulations on Your Own Projects!
We celebrate your growth, your creativity, and the passion you bring to the table. It’s truly inspiring to witness at Each visit .
Stay curious and keep up Growing —we look forward to welcoming you back for the next chapter soon!


Likes
137
Share


@MrJones
Follow
mrjones - Slurricane #7 S1
🌱Slurricane #7 S1
@inhousegenetics_official
👨🌾🏽GD Grower: MrJones
🔹🔹🔹🔹🔹🔹GOALS🔹🔹🔹🔹🔹🔹
🌞Environment - 75/80℉ and 60% Humidity Good Old Mother Nature
💧 Feeding - The Green Sunshine Company - Earth Dust All-Natural Plant Nutrients
⚗️Soil - 35% ProMix MP / 25% Ocean Forest / 20% Tupur Royal Gold / 10% lobster Compost / 10% Additional Perlite
🍃Training / So this girl was 60 Inches and spread out under a 5x5 Trellis
🕷️ IPM - Will be using Green Cleaner" 1 OZ per Gallon, and CannControl from Mammoth alternating between products each month
🔹🔹🔹🔹🔹🔹🔹🔹🔹🔹🔹🔹🔹🔹🔹
📜 Rambling - So with the end of July on the Horizon, my time is running out to get the 3rd trellis up and do some major defoliation, but work has been so busy, the girl under the trellis has grown a foot above the second trellis! The other plant is almost 7 feet tall as well, just amazing, the Earth Dust is rocking it out!
🔹🔹🔹🔹🔹🔹🔹🔹🔹🔹🔹🔹🔹🔹🔹
▶️ Sunday - 07.25.21 / Just watering daily with Dechlirnated H20 using the BOOGIE BLUE PLUS+ (High-Capacity Filter) to remove the Chlorine and Chloramine out of the water.
▶️ Monday - 07.26.21 / Just watering daily with Dechlirnated H20
▶️ Tuesday - 07.27.21 / Just watering daily with Dechlirnated H20
▶️ Wednesday - 07.28.21/ Just watering daily with Dechlirnated H20
▶️ Thursday - 07.29.21 / Just watering daily with Dechlirnated H20
▶️ Friday - 07.30.21 / Just watering daily with Dechlirnated H20
▶️ Saturday - 07.31.21 / Today the girls got a hair cut, in the form of massive defoliation, adjusted the trellises, then top dressed with Earth Dust, watered it n with Dechlirnated H20.
🔹🔹🔹🔹🔹🔹🔹🔹🔹🔹🔹🔹🔹🔹🔹
Earth Dust - DESCRIPTION
🔹Earth Dust is our all-natural plant nutrient designed for indoor and outdoor flowering plant growers. You can grow easily by “just adding water” to your soil for the entire growth cycle. It creates a “living soil” so your plants thrive from seedling all the way through flower and harvest. Earth Dust represents an organic dry amendment method of gardening, it’s made of a natural powder of ingredients.
🔹Because you only need to water your soil with Earth Dust, you can concentrate on caring for your plants and getting a healthy crop “on autopilot”. Now you can grow without spending hours of your life mixing chemical nutrients, and you can do it naturally. What’s more, is you will enjoy the cleanest, most aromatic, and flavorful harvest you’ve ever experienced when a plant grows in a rich, organic web of living soil.
Product Highlights
🔹All-Natural Ingredients – Mostly plant-based – Safe around children and pets.
🔹Packaged in kraft paper bags that are recyclable and compostable.
🔹Easy to Use – Just mix the powder into the soil 3 separate times – then water only.
🔹Packed full of rich microbe food & contains billions of beneficial fungi and bacteria! Creates a resilient, living soil that defends against pests and diseases.
🔹Rich in trace minerals and nutrients for full plant expression. Sourced from rock dust, sea-farmed kelp, and land-grown crops.
🔹Soil Conditioners help balance pH and make nutrients more available in the soil. Achieved with ingredients like bat guano, worm castings, limestone, molasses, and humic acid.
🔹The correct balance of N-P-K nutrients for each stage of growth:
🔹Earth Dust Base (3-1-2) contains key nutrients for sustained vegetative growth. High nitrogen (N), Low Phosphorous (P), and Medium Potassium (K).
🔹Earth Dust Boost (2-3-6) contains accelerated-release nutrients for powerful flowering growth. Low nitrogen (N), Medium Phosphorous (P), and High
Potassium (K).
🔹Re-use soil harvest after harvest by simply adding more Earth Dust Base to begin again. Create your own living soil that gets better every time it’s used.
🔹Go organic, save time, and get predictable, healthy harvests.
🔹🔹🔹🔹🔹🔹🔹🔹🔹🔹🔹🔹🔹🔹🔹
Compost Tea for Vegetative Stage
Water 4 Gallons
3 Cups Composr (Your Favorite Worm)
4 TBL Molasses
4 TBL Seaweed Extract
4 TBL Fish Fertilizer
Use air Stone o the tea for 24/3 hours 70/75F, use at full strength for establishing plants and a half-strength for younger plants

Likes
6
Share


@urbanmitchell
Follow
my god the frost on the leaf and the swell is like the blueberry note aroma whit the dosidos and the background this baby i will keep it for the next batch clone done under the light other tent


Likes
18
Share


@Hempface86
Follow
Ladies and gentlemen, here we are getting into the 3rd week of flower, so you know what that means!!! Next week is Plagron Green Sensation 💚 and silica and a little cal mag, if needed... this girl is getting big.She is about two and a half feet wide and has been stretching like crazy.. this is gonna be a great plant and a nice harvest, and I can't wait to see how the Plagron nutrients swelling up those buds .. stick around because if need be I will add more pictures throughout the week .. thank you Zamnesia Seeds and Plagron for the opportunity to grow this beauty 😍.. I hope everyone is doing well on the contest.Since everybody else God bless and happy growing ✌️.
Day 56 i just uploaded a video showing what she looks like after a massive defoliation. In lollipopping, we're focusing on the top of the plant.. hopefully the stretch is over and start stacking
Likes
115
Share


@Schnabeldino
Follow
_____📅 Week 17 | 📅 Day 119 | 🍂 Harvest after the 9. week 🍂 ______
Day 119 🌞🍂🍁💐
- Sorry for the photos, they didn't turn out well in my opinion, but I only had limited time and the Biscottis had to be harvested urgently...I'll try harder again with the Amnesia.
- Yield is okay...but the buds didn't get even light either...there were too many plants or too long a veggie phase...
- Biscotti number 2 is the smallest of all the plants...also had the lowest yield...This was the plant without side light...


Likes
6
Share


@MaltedMadness02
Follow
LST has done wonders for her, she has completely transformed from where she was a month ago. She is bushing out really well and I can't wait for her to finish stretching, and for her buds to start forming. Make sure to follow along to continue to grow with me !
Likes
9
Share


@Southwest_budders21
Follow
Pink Wafers!
Day 16
Building up a nice root system at the minute and will start topping and Training over the next week or so. Had a bit of stretch but got that under control and will root pot very soon aswell ✌️🏻🇬🇧🏴

Likes
3
Share


@Burndylugs
Follow
Day 59 of flower, last day of light. Gonna give 48hrs of bro science darkness then chop. The smell from this tent is dam near unfathomable. Extreme and complex fruits. Punchberry cookies legit smells like Hawaiian Punch, and the lemon berry candy og smells like sour lemon skittles. Go figure

Likes
3
Share


@Unculti_responsable
Follow
Bueno esta semana le dimos engorde y un riego con guano , no veo que estén engondarno mucho así que seguro lo vamos a dejar unas semanas más de lo previsto , para cosechar cuando estén bien gordos los cogollos

Likes
43
Share


@The_Northern_Skunk
Follow
Plants are hanging and drying ill get the harvest weights up in a week
Likes
29
Share


@MadeInGermany
Follow
Info:
Unfortunately, I had to find out that my account is used for fake pages in social media.
I am only active here on growdiaries.
I am not on facebook instagram twitter etc All accounts except this one are fake.
Hey everyone :-)
Another nice week goes by and it is slowly becoming a bush from training 😊.
This week it was poured 2 times with 1 l each time (For nutrients, see the nutrient table above).
She was trained once again with topping.
You still have some time until it blooms until space is free :-).
Otherwise everything was checked and cleaned like every day.
Have fun with the update and stay healthy 🙏🏻
You can buy this Nutrients at :
https://greenbuzzliquids.com/en/shop/
With the discount code: Made_in_Germany you get a discount of 15% on all products from an order value of 100 euros.
You can buy this Strain at :
https://www.amsterdamgenetics.com/product/kosher-tangie-kush/
Type:
Kosher Tangie Kush
☝️🏼
Genetics:
Kosher Kush
X
Tangie
👍
Vega lamp:
2 x Todogrow Led
Quantum Board 100 W
💡
Bloom Lamp :
2 x Todogrow Led
Cxb 3590 COB 3500 K 205W
💡💡☝️🏼
Soil :
Canna Coco Professional +
Nutrients :
Green Buzz Liquids :
Organic Grow Liquid
Organic Bloom Liquid
Organic more PK
More Roots
Fast Buds
Humic Acid Plus
Growzyme Big Fruits
Clean Fruits
Cal / Mag
Organic Ph - Pulver
☝️🏼🌱
Water: Osmosis water mixed with normal water (24 hours stale that the chlorine evaporates) to 0.2 EC. Add Cal / Mag to 0.4 Ec Ph with Organic Ph - to 5.8

Likes
86
Share


@Tropicannibis_Todd
Follow
Alright Then
REMINDER I DO 2 UPDATES PER WEEK 👉WEEKLYROUNDUP👈👉MIDWEEKLY UPDATE👈
We just hit week 3 and all is well , have to admit she's showing great , Growth in just 21 days😃 .......
Middle of last week I have decided to start a little training by pulling her over to the side 👌 And will continue to LST this week👈 And she's looking fantastic add to the fact she's already begun next faze by preflowering 😲
Pheno #2 Is about 9-10 behind buts its playing catch up and I should be doing some LST on her later this week 😛
Very little water given ,so far and rain water to be used entire growth👍
Lights being readjusted and chart updated .........👍
I GOT MULTIPLE DIARIES ON THE GO 😱 please check them out 😎
👉I WISH GD HAD DISCORD SERVER SO GROWMIES COULD HAVE A PLACE TO HELP AND TALK THINGS RELATED TO GROWING IN REAL TIME .....👈
👉SO I CREATED ONE ALL YOU NEED IS TO JOIN THE GROWDIARIES DISCORD SERVER !!!!!!!!!!!👈
LINK IS 👉
https://discord.gg/zQmTHkbejs
AND SEE HOW IT PLAYS OUT !!!!!!!