
Likes
Comments
Share

@Natrona
Follow
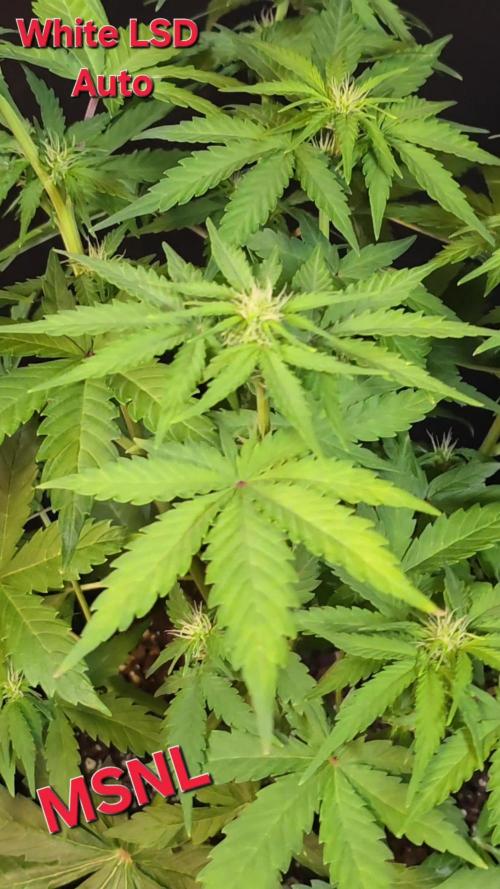
White LSD Auto Feminized Seeds by MSNL
👉Sponsored Grow👈
W5F2
7/27-8/2
White LSD grew 6 inches and is pushing out lots of hairs. She is short and bushy.
This week I’m still trying to resolve lockout issues on other plants in the tent by lowering the feed solution ph. I lowered the intake ph to 6.35. This reduced the runoff ph to 7.0-7.82. I have been watering 1500 ml with 125ml run off. This is low and I will Increase water to 1750ml next time. While the other plants in the tent reflect nutrient issues, White LSD looks healthy so far. I hope I have stopped any problems before they start.
Thank you all for your continued support and encouragement. Your likes and comments motivate me to keep sharing my journey. Let’s continue to learn to grow together!
Stay green, growers love 💚🌿
💫Natrona💫

Likes
9
Share


@Xabii
Follow
Starting this week there will be a Mars Hydro VG40 at the bottom to boost the lower buds, they will not be as dense but will be good for some hash that's why I leave them be.
The ORP probe is not calibrated and values are to be taken with a grain of salt.
Values are average of the day.
DATE - °C - RH% (Tent Temp/RH)
20240808 23.8 60.9
20240809 24.2 67.2
20240810 23.4 67.0
20240811 24.1 66.9
20240812 25.3 69.2
20240813 27.1 71.9
20240814 25.0 76.1
DATE - PH
20240808 5.91
20240809 5.79
20240810 5.77
20240811 5.73
20240812 5.79
20240813 6.09
20240814 5.68
DATE - ORP (mV)
20240808 250
20240809 175
20240810 107
20240811 118
20240812 88
20240813 85
20240814 84
DATE - EC(us/cm)
20240808 2240
20240809 2265
20240810 2162
20240811 2202
20240812 2187
20240813 2119
20240814 2141
DATE - CF
20240808 22.40
20240809 22.65
20240810 21.62
20240811 22.02
20240812 21.87
20240813 21.19
20240814 21.41
DATE - °C (Reservoir)
20240808 21.6
20240809 22.6
20240810 21.5
20240811 21.9
20240812 22.3
20240813 23.8
20240814 22.1


Likes
19
Share


@cubansoldier
Follow
I guess when I topped the girls I left a little i piece of the cola on some of them so a few of the plants have extra colas growing from the main stem that was topped which is a good thing cause enjoy who doesn't like more colas! They start out looking like mutants but after a while they start looking more normal.

Likes
15
Share


@SirBudAlotts
Follow
Week 0: Germinated her the old-school way...two paper towels, between 2 saucers..
Fastbuds: I was so impressed with the packaging ..even though I was not able to get the original packaging (Discreet)..
Week 1: just sprinkled H20 on her.. Midweek she sprouted.
Week 2: Added some AgriSil K50 for her root development..She showed her first true leafs like yesterday..

Likes
2
Share


@BetterBud
Follow
This strain likes to stretch a lot so in full swing. Bottom leaves crumbling and turning brown/ yellow. This is in a shared autopot base so increasing nutrient dosages throughout.
Processing
Likes
44
Share


@rhodes68
Follow
9/15
Beginning third week things look well. Getting time to make decisions on training, but not today as we have other matters to attend.
😏
BTW look at the last vid from the previous week and compare. The only change is the four hour dark period was added.
Rest period, It matters
9/18 Decided to stick with bend and secure this grow, will begin in a couple days just letting them stretch out for now.
9/19 Corrected nuet list, no way I would give a plant that much big bloom :)
tried the Fish Sh!t on the girls in a .25 gal feeding for each ... FS 3ml/gal - Fish Mix 5 l/gal - Big Bloom 1tbs/gal - CalMag 5 l/gal - Si 3ml/gal overnight results are explosive
9/20 Mostly all is well in the garden but I am concerned with Jen. See her pic going to list as a problem as I am out of ideas.
Training begun recovered nicely feed tomorrow
On Jen... I am thinking just because... separate feeding at 6.5ph, a drench to 10% runoff with 10ml/gal kangaroots and 5ml/gal bio-grow removing the Fish Mix.
Thats pretty much it for my guess. Something is afoul in the nuet uptake
Watson... the game is a foot! 😉
Likes
21
Share


@reirrac1
Follow
NCH x SB is starting to fade significantly and has stopped throwing out new pistils, trichomes are significantly cloudy and a few on the sugar leaves are beginning to turn amber. Debating whether I should pull her at full cloudy in a week or two or wait until I see more amber. Sour Kush is still fattening up and has a lot of white pistils yet to mature, trichomes are of course a mixture of clear/milky, no fade on this plant yet. Tangerine Dream is making great progress in flowering and bud sites have thickened up considerably, trimmed a majority of larfy bud sites on this plant since the discrepancy in the distance to the light was so large. Water pH 6.15, EC 0.4. Feed pH 6.15, EC 0.717.


Likes
3
Share


@Rumyn88
Follow
Hey all, its our 2nd week after casing drop. Facing some issues with Night temp, sometimes it could fall to +12C, thinking about how to improve it. Also concerned about slow growth because of that. Using just 1/3 of Plagron recommended dose.
Modified a bit my tank, made some technical window. Also set up automatic irrigation, because wool started to dry up during the day
Upd Sunday 10.12.2023, Decided to put Babys finally to Seramis.
Washing ceramics is some kind of hell:
-First, I decided to sift all the dust through a sieve, stood in a half-bent position with bags of Seramis for 30m (my back didnt like it), but there was a lot of dust.
-then I decided to check the Ph and rinse thoroughly. Although the package says 5.5-5.7 Ph, after the first flush with a balanced solution at 5.5 Ph, there was 6.5 in the drainage.
- I was concerned by the very muddy brick colour water, then got tired of mixing 5.5 in a bucket for flushing and decided to rinse it with tap water from shower and then balance it back to 5.5 Ph . As a result, I poured from the hose for another 30 minutes until the water became more or less transparent.
-I also tested FloraFlex discs, they drip great and, although round, fit perfectly into my square grow bags.
-Meanwhile, the Milwaukee Ph meter broke down, even the readings of the calibration buffer were changing from 4-6 Ph within one minute. In the end, I spent another 30min and half a bottle of buffer on this too. It’s good that i had yellow Chinese Ph meter, which even after 3 years of rest in the box showed accurate buffer readings.
-Finally, the Ph of the drainage was 5.5-5.7 and it was transparent, so I began to move it into the growbox. I sprinkled it as much as I could, it was impossible to dig deeper. The plants do not yet reach the matrix disk, so for now they will grow with the usual felt.
-The cap of the tank is very thin and cannot withstand the weight of 2 grow bags, I’ll have to come up with something else, maybe I’ll put some kind of drainage grid.
Watering will be from a tank with a mixed solution of 5.8 Ph and 1.1 EC.


Likes
4
Share


@MistaOC
Follow
17.04. Day 36
Grow Diary Entry – Day 36 (Flower Day 16)
Strain: Sour Frootz by Karma Genetics
Plants: 4 clones
Training: HST + SCROG
Today is Flowering Day 16, and the Sour Frootz ladies are officially deep into the early-to-mid bloom stage. Bud sites are now well-defined, and the pistils are stacking up nicely. The stretch phase has slowed down slightly, giving a good window for structural management.
To keep the canopy even and under control, I applied high-stress training (HST) by bending and tucking the taller tops through the SCROG net. I also reduced overall plant height by about 25 cm, evening out the top layer across all four plants. This should help maximize light penetration and bud development across the entire canopy.
The plants handled the stress well—no signs of wilting or shock so far. With this structure locked in, the SCROG net is now fully supporting the horizontal spread, allowing more light to reach secondary bud sites. The aroma is intensifying slightly, a sweet, fruity tang starting to build up when brushing against the leaves.
Everything is on track. From here on, the focus shifts to flower bulking, maintaining stable environmental conditions, and avoiding excess humidity as the flowers start to pack on mass.
*******************************************
6L RO Water // ph 6,4 // 0,6ml Aptus Regulator // 12ml BioBizz CalMag // 6g Greenhouse Feeding BioEnhancer // BioBizz ph-
*******************************************
Likes
7
Share


@herbalistssword
Follow
So close to ready, I probably could take her down now, but my thinking is that since this is a cbd strain, I'll leave her longer and get more of that couch lock. Flushing her so giving 0 nutrients, only phdown.
She is in the garage more than she is outside because the weather is so bad, so I improved her accommodation, put her under a couple of sky100s and surrounded with some reflective material I have, bundled the buds as close as possible to get more lights concentrated.

Likes
2
Share


@Barzenegger
Follow
This week I didn't spend much time checking in on the tent, but when I went to check the reservoir, which I expected to be empty, I realized that the system was clogged. About half of the nutrient solution was still in the tank.
I opened the tent to check the moisture of the substrate. It was pretty dry already and the plants were showing some heat stress and the burnt tips had gotten somewhat worse. Being too close to the light didn't help either. They weren't hanging yet, but they needed to drink.
It was clogged in a small part of piping between the tank and the tap, which I realized, was never actually cleaned before. And I did have some organic compounds in there a rather long time ago, which probably caused this in the first place. I unclogged it within a few minutes, and bought some Canna D Block to try out. I will probably refill the reservoir again early next week.

Likes
69
Share


@AsNoriu
Follow
Day 92. Trim day. Wet trim chosen. Result could be better, but 100 will be reached I guess for sure ;)))
Day 101. My friend has new record ! Not bad for screw up run ;)))))
Happy Growing !!!

Likes
11
Share


@BudBeezy
Follow
Welcome to week 8 of my grow diary. This week we had really good weather. Due to the high temperatures the soil dried out quickly so I had to water 8 litres almost every day instead of every 2 days. The plant was defoliated 3 times this week. The aphids were successfully controlled with neem oil.
See you next week ✌️
Likes
23
Share


@Wazowskid
Follow
I've stopped giving them fertiliser and did a root flushing 4 days ago. They are looking good, smaller buds of what could have been with the correct equipment and dedication but I can't complain. I don't have a magnifying glass so I'm basing myself on the pistils to know when to harvest. I think I'll give them one more week but everyone is welcome to give me advice, would love to receive feedback from more experienced people.
Likes
14
Share


@FlavoursUk
Follow
Girls are stretching so are basically transitioning into flower. Still healthy and impressed at the growth rate.
Last foliar feeds given as pistils will start developing.
Stay tuned
Likes
14
Share


@Naujas
Follow
79 days!!!!! and the harvest is already harvested :) The whole growth until week 6 went very well, then the girl got a little worse, (I think it's my mistake, which I described in previous weeks), but besides all that she managed to ripen perfectly, matured stiff flowers, full of shiny sticky trichomes with a very, very sweet aroma ;) 210 gr of wet buds, I also collected a lot of sugar leaves from which I will make bubble hash :) I can't wait to taste it :) this is my first trip with Sweetseeds Looking at the flowers I understand that I will definitely repeat it :) I will leave more feedback after the smoke review:) good luck to everyone.


