
Likes
Comments
Share


@SimpleDiaries
Follow
They all are getting close to harvest except Gorilla Glue which decided to out grow tent. Had to open vent and add light for top cola. Ugh


Processing
Likes
5
Share


@blendmedmedman
Follow
she is still up and kind of in limbo. she is under the big led 800 watt and has been getting blasted with the uvb light for around an hour a day. waiting for the explosion to happen, so has been a week in 12/12 cycle not much stretching yet she is 22 inches. I have been pinching the top Shute so the sides keep up so I will see. other wise healthy grow so far but only time will tell with the final product.

Likes
3
Share

@tony_kiffton
Follow
Es wurde getoppt - Die Blüte wurde eingeleitet ... Immer noch keine Zeichen des Geschlechts zu sehen.
Die Speed Queen ist eine sehr starke Indica Pflanze mit großen Blättern.
Es wäre schön , wenn sich die Damen (oder Herren) outen würden ! 😊
Dann hätte ich wieder etwas mehr Platz im Zelt -
Immer noch kein Dünger. Die Rosenerde hat noch genug Power ...


Likes
5
Share


@Bluemels
Follow
Tag 55: Ich gebe kein Dünger mehr in das Gießwasser. Bald wird geerntet 😃

Likes
14
Share


@Greenmartini
Follow
All good this week too. The strawberry lemonade turning purple!:)) gg#4 it’s a hermy… the other plants are good! White widow xxl it’s the first to harvest…In 3 weeks…. Fxxk

Likes
12
Share


@gr3g4l
Follow
terminamos con el cultivo con 66 dias a 12/12h. estos dos últimos riegos se regó con agua sola, sin más.
Me hubiera gustado alargarlo unos dias más pero me ví obligado por las altas temperaturas que empezaban hacer. Se estaba haciendo un caldo perfecto para la araña roja.
Una última noche a oscuras y a cortar para poner a secar.
Pasado un mes secando , el pesaje y guardado para seguir curando. total 355gr.
Likes
16
Share


@OrganicBuds030
Follow
Das ist Weltklasse. Damit könnte ich international an Cups teilnehmen.

Likes
82
Share


@MrHightimes
Follow
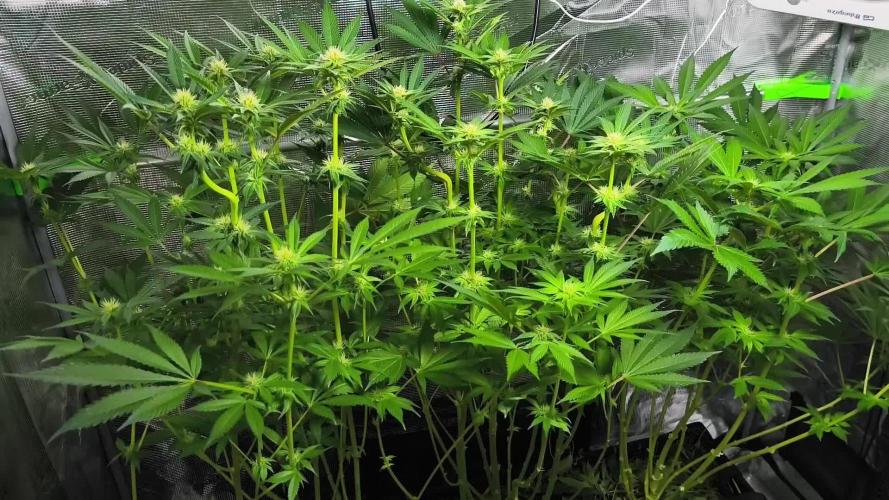
Buds stacking up! I love these plants!!!! So far this is the closest to a perfect grow I've gotten!
________________________________________________
I tried to stretch out watering and I think the plants suffered a bit for it. But lesson learned and not to much stress.
I've decided I have 2 different phenoms, they have quite different bud structure and the tight small buds seem alot less purple.
Not disappointed, just interesting to see their difference. By the small bud I wonder if it has more ruderalis in it or something.
________________________________________________
Gonna do Dry Kool bloom then ripen then done? Hopefully!


Likes
8
Share


@fungiiiiiii
Follow
20/04/2023 I neglected the girls this week, I've been lazy but they did ok without attention. Watered today since two girls were droppy, 0.8L per pot with Bioenhancer and Biobizz line.

Likes
28
Share


@Willy_Balls
Follow
Cruising along.
Two gorilla girls are very sativa pheno and are way behind in maturation.
We will see how I will handle that.
Some #indica leaning phenos are maturing nice and fast.
I'm reducing EC to 1.4 gradually. I think some of them will have to be on plain water next week to have them ready for harvest.
Cheers everyone! Have a nice Sunday! 😎

Likes
16
Share

@kevxyn
Follow
Hab sie jetzt umgetopft und ein paar Tage vorher schon die zwei unteren Triebe entfernt. Jetzt bleiben mir nur noch etwa 30 cm bis zur Lampe, also muss ich bald wieder anfangen, sie runterzubinden. Nächste Woche wird dann auch nochmal getoppt. Erstmal lass ich sie aber in Ruhe, damit sie sich an den neuen Topf gewöhnen kann.
Und natürlich hab ich letzte Nacht das Fenster offen gelassen… jetzt ist sie ein bisschen angepisst. 😅 Aber ich denke, sie fängt sich schon wieder.
Likes
30
Share


@WeWantItToGrow
Follow
This week was particularly rough with the shock to the plants from overdosing on myco+ 3-0-3 Really instilled a sense of extra caution and at some level paranoia lol fortunately the plants have shown to be very resilient in their desire to Thrive and grow because a rain water flush worked like a dream

Likes
8
Share


@skaterblasted
Follow
Days 92 - 98 (from sprout)
8/23/24 - 8/29/24
Loompa's Headband x TK fading hard this week - checking trichome color through a 15x loupe, needs more time
The Good Shit drinking a gallon of water a day but slowly backed off near end of week - my guess would be a 14-week flowering period for this genotype before harvest quality
I'm pretty much watering daily a 1/4 gallon to Blue Nose Pit or less to keep mulch layer from drying out
Sweet 16 S1 takes the win for most trichome coverage out of the garden, has the most up-front aroma out of the geno hunt
PAR is all over the place on this one and totally messed up, after this week I'll raise the light and focus on the appropriate PAR for canopy of The Good Shit
Pest Management slipping too, fungus gnats are repopulating and it seems the ecosystem has encountered a serious imbalance of beneficials and predators that normally kept soil/mulch in-check
Plan on short-term remedying this with a top-dress of remaining compost + em bokashi and a moderate drench of EM5 following with repeated treatments of enzymes (tweetmint)
Long term solution may need a predator/beneficials kit and/or higher quality vermicompost after knocking them back with enzymes

Likes
11
Share


@Kayotic
Follow
*Day 67 since sprouting
*Week 5 of flower
*Smells strong now and very frosty
*Final defoliation a few days ago
*Still no nutes
*Watered a gallon today

Likes
21
Share

@StickyHands
Follow
Day 21 of Flowering
The ladies are doing great and have finished stretching.
Today, they will be defoliated and lollipopped.
As always, they are getting compost tea.


Likes
16
Share


@Mr_Motalovah
Follow
Hello Growers and Tokers! 👋 👩🌾 🧑🌾.🔥💨
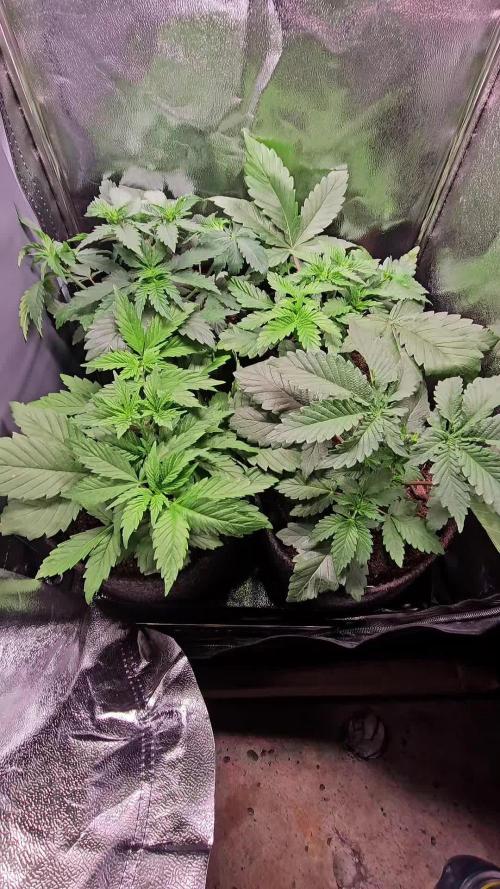
They're looking a bit better than last week.
Really loving being in the tent, there's no comparisson to the conditions they had in the balcony.
Roots are starting to show through the cups so next week i'll be transplanting them into their final 8L fabric pots and move them outside for good.
I'm doubtful on whether transplanting next week or not because of the climate, but as they're autos.. I can't wait any longer. Whatever will be shall be.
One of them got a bit of a mutation.. the one I was rooting for the most! 😪
You can notice in the pictures.. there's a node with three leaves. It seems as if she tried to top herself. Quite curious.
The girl that's been in the tent since day one has great color and leaves but is much smaller in height than the others.
Stay tuned to see how these ladies progress.
Have a good day!
One love!

Processing
Likes
6
Share


@ZhugeTsuki
Follow
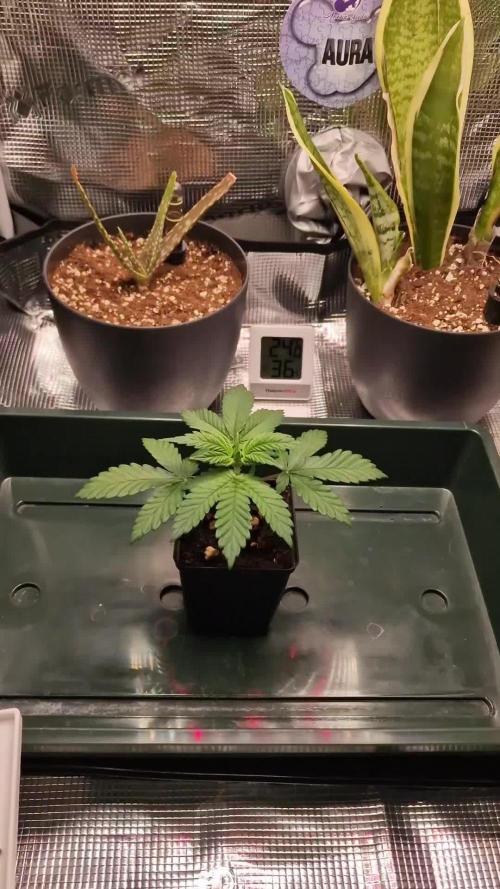
5/28 Leaves are looking a lot better now that they have some room to spread themselves apart, no signs of furthering nutrient problems or overwatering issues.
5/29 Noticed what I'm pretty sure is a potassium deficiency. Freaked me out at first but the browning tips looks exactly like the picture I see online. It's not very widespread so I cut the effected leaves off, I'm hopeful it's residual effects of the insanely high ec. Regardless of the issues the plant is still growing really well and I was able to tie down a main branch around the entire pit almost except one area, but that ended up making it easier to water.
5/30 Potassium deficiency has spread a little but not much. Even though I watered till runoff yesterday (as I always try to do) the plant was dry and light today, so I watered her with nutrient solution at about 1.3 EC and runoff was about 2.2, little too high
6/1 Calcium toxicity. Shows as brown reddish spots and can present as potassium, manganese, iron etc deficiencies which is exactly what I've been seeing. There was quite a few leaves showing the blackish rust color so I cut them all and watered with nute solution at ~.72 EC. Will see if the problem continues to develop, however judging by the color of the growing shoots she is still growing quickly.
6/2 I found a couple of leaves that had evidence of damage but they were so hard to find I could very well have missed them the other days. I cut all effected leaves I could find off again, and will check tomorrow. Rearranged the plants a little to avoid this one from getting blasted by space heater. Untangled all growing shoots.
6/3 Found I think two or three effected leaves, mostly already effected leaves that I had just cut the currently effected blades off of the other days, and one leaf that looked too far damaged to be new damage but I will remain vigilant. Watered clean water, runoff ~1.75EC, almost where I want it.


Likes
16
Share


@Indio420
Follow
Hola que tal Growers!!!
Esta semana empezó con un poco de preocupación por el problema del exceso del calcio el cual bloqueo otros nutrientes, !!!bueno eso espero!!!! hahahaha; pero va muy bien para ser mi primer cultivo Indoor, cambiamos el agua de riego por agua embotellada que tiene un PH= 6,9-7 y un EC=0,3 µs/cm bastante menor al agua de la red. Normalmente riego según la necesidad de la planta, siempre que veo el sustrato seco riego, el primer riego de esta semana solo agua aproximadamente 500ml para limpiar un poco la raíz de ese exceso. El siguiente riego si la alimento con aditivos universales de plagron, le va muy bien, la decoloración de las hojas no sigue, pero aún se notan en las fotos las pueden ver.
Solución de riego
PH=6,5
EC=0.8 µs/cm ( en la tabla de plagron me recomiendan llevarla a 1.7, pero quiero ir despacio para ver como reacciona, es más fácil corregir una deficiencia que un exceso si me pide más la planta se la suministraré)