
Likes
Comments
Share

@Latrodectus
Follow
hi everyone ,
I started flushing them this week :/ I know that they would usually need some more weeks but I simply underestimated the spider mites 😒 all my lower buds are covered already and they slowly working their way up ... the beneficial insects (predatory mites ) came to late , I should have ordered them at least 2-3 weeks ago .. from now on I will put some in as prevention the next time I put plants from my garden in my tent.
they smell pretty good so far and I will still get something out of it ... also I safed clones from every plant ;) ... so nothing really lost here but time ^^
I will cut them next week and hope the mites will stay put till then xD
happy growing everyone

Processing
Likes
5
Share


Likes
33
Share


@PEAKYPLANTERS
Follow
Welcome to all, fantastic Weed brothers!
I and these beautiful girls spent another week together stimulating all those buds to bloom in the best of conditions ....
There are good prospects!
a greeting to all and happy harvest

Likes
43
Share


@TheCannaProphet
Follow
~ FastBuds PAPAYA SHERBET Photoperiod~
Well here we go on another journey together through 'Canna-land' and this one's kinda special... forget that, it's VERY special because this is FastBuds newest surprise for the community, a FEMINIZED PHOTOPERIOD STRAIN!🤯
I was fortunate enough to score these seeds, of which only 1000 were available and can't wait to see what this strain can do! This Papaya Sherbet, according to FastBuds, is a hybrid with a 9-10 weeks flowering period. For a more detailed and accurate description of this strain the following from FastBuds says it best:
"Combining the massive stature of Papaya (Oni Selection) with the strength and resilience of one of our best keeper cuts (Sunset Sherbet), this strain develops into a big, expansive bush adorned with numerous bud sites that later transform into a generous harvest of medium-sized buds. Papaya Sherbet flowers deliver a signature flavor of premium cannabis with subtle citrus undertones that emerge upon inhaling. During growth, her aroma makes for a sweet yet pleasantly bitter fragrance, giving you an idea of what the smoke will taste like. Notably stress-resistant, Papaya Sherbet is a great choice for growers working in challenging environments. She is very forgiving and rebounds quickly from any adversity, allowing growers the freedom to experiment with confidence that she will take everything like a champion she is. This strain embodies resilience, flavor, and abundant yields in every grow cycle."
Sounds like an epic strain and I personally cannot wait for this lady to strut her stuff!😍
________________________________________________________________________________________________________________________________________________________________________________________________________________________________________________________________________________________________________________________
The Setup:
This is going to be an outdoor grow, but I have started the Papaya Sherbet photoperiod indoors as our weather is still a bit too chilly to put a newly sprouted seedling outside (nighttime temp's dipping regularly into the 40's℉).
The plan is simple... let her grow inside under a 19/5 light schedule until the nighttime temperatures are in the mid 50's℉, which shouldn't be long. After which, she'll be moved outside and transplanted into the soil which I have already setup and inoculated with beneficial microbes from BioTabs and slow release dry amendments from Gaia Green. Once she's established herself outside she'll be given periodic top dressings of Gaia Green 4-4-4 and 2-8-4 along with worm castings and Compost Tea's. Her grow area is approx. 5'x5' and I have posts and a trellis net set up already for when she gets bigger to aid in training her. Let the fun begin!🤪💚
________________________________________________________________________________________________________________________________________________________________________________________________________________________________________________________________________________________________________________________
Weekly Updates:
7/10- The FastBuds Papaya Sherbet photoperiod is now entering her ninth week since breaking ground and she is gaining height by the day now!
The Papaya Sherbet photo continues to display excellent vigor and overall health. She has a fairly wide node spacing, which is nice as it makes her easier to manage than a bushy plant with tight node spacing.
7/12- Our summer weather continues to be hot, although we do get a break from the heat when we're lucky enough to get some rain which also helps mitigate the daily watering.
7/14- The Papaya Sherbet photoperiod from FastBuds is definitely going through a growth spurt and is gaining inches by the day now!
Yesterday it rained the better part of the day, which provided over an inch of rain. Today,I went ahead and watered in the afternoon, but only gave the Papaya Sherbet photo approx. 3g of well water from the garden hose.
7/16- Well the weather and the FastBuds Papaya Sherbet photo are both on fire! Hopefully the weather will cool down soon, and the Papaya Sherbet photo will continue to impress!🤩 There's another week of veg for this beauty and I can't wait to see how big this lady gets!
Thank you for checking out my diary, your positive comments and support make it all worthwhile! 💚Growers Love!💚😎🙏


Likes
36
Share


@Cannabis_King
Follow
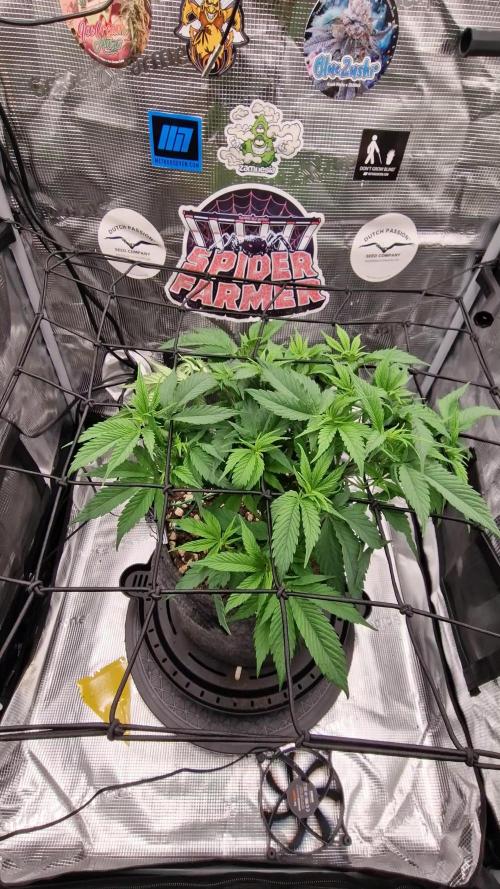
This week went great she is supposed to be an auto but still hasn't followed so I'm setting up my 4*2 tent and flip her see if she is a photo

Likes
23
Share


@SkunkyDog
Follow
Hallo zusammen 🤙.
Sie wächst sehr schön und macht keine Probleme.
Rabattcode für den BIOTABS-Webshop https://biotabs.nl/en/shop/ GDBT420, damit erhalten Sie 15 Prozent

Likes
2
Share


@regionallystoned420
Follow
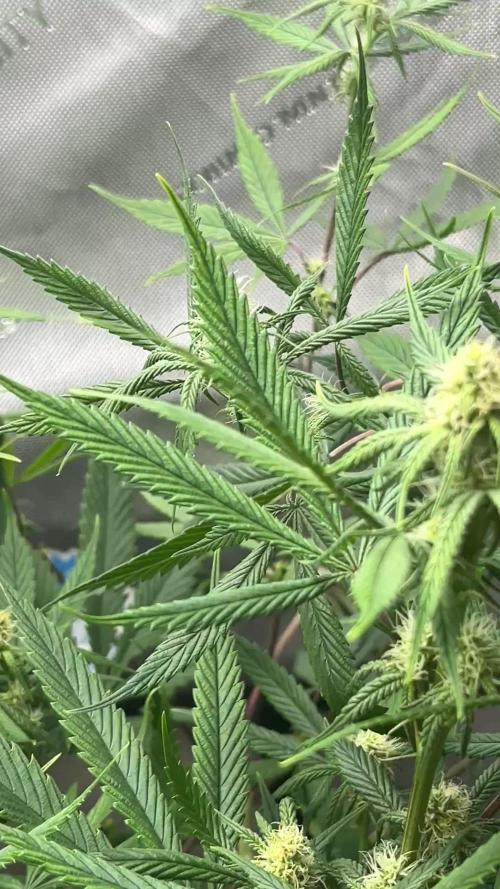
8 weeks into flower , white pistels still forming but thricombes are ready .
Likes
6
Share

@kevxyn
Follow
Die Kleine hat sich nach der Entlaubung letzte Woche wieder super gemacht! Ich lass sie noch ’ne Woche schieben, dann geht’s in die Blüte 😎🌱
Likes
30
Share


@D33jW
Follow
Instagram: @d33jw.420
FLOWEEK: 6
Light: 11/13
RH: max 55%
TEMP: 25C
PPFD: 750
FLO35 -- Canna flores 4ml + Canna PK 1ml + Canna Boost 2ml + Cannazym 2ml (EC 1.25)
FLO37 -- Canna flores 6ml + Canna PK 1ml + Canna Boost 3ml + Cannazym 2ml (EC 1.50)
FLO39 -- Canna flores 7ml + Canna PK 1,5ml + Canna Boost 2ml + Cannazym 2ml (EC 1.80)

Likes
97
Share


@OrganicNature420
Follow
JungleBoys
Gelato33 x ZkittlezCake (clone)
THC: 30+%
Terp: 45%
Nutrients • GreenBuzzNutrients
(DISCOUNT CODE • (GD42025) %25 off
I use the whole product range and this stuff is a game changer. I've not had one bad grow with this company and it hasn't let me down once. Terps and taste are through the roof. No need for run off in coco only during flush week (i use a 0ppm distilled water) Hands down the best nutrients on the market
GREEN BUZZ OUR NOW GIVING YOU GUYS A SUPER DISCOUNT OF %25 WHEN USING THE NEW CODE ABOVE. JUMP ON BOARD THE GREEN BUZZ TRAIN AND GIVE YOUR PLANTS WHAT THEY DESERVE 💚🌱
LIGHT/TENT • Mars Hydro FC-E6500 5x5 tent
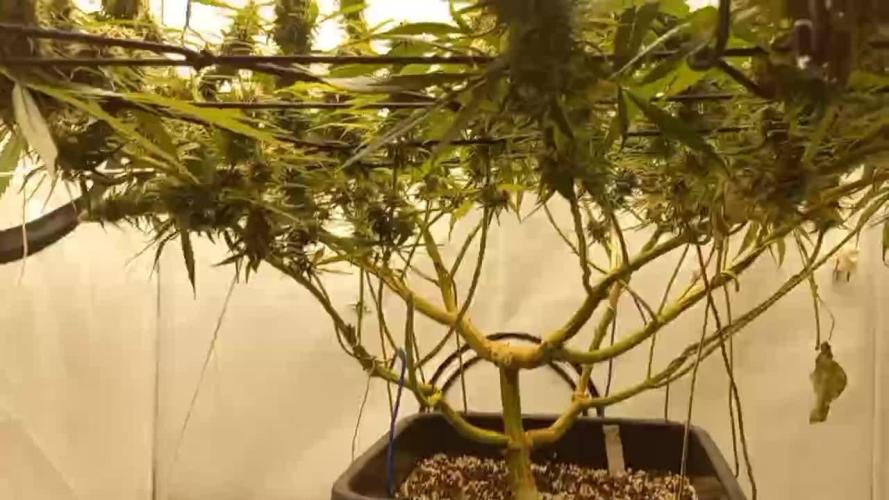
It's not the end of the world but I've given this girl to much energy. It's pistols have exploded so I will stick them onto clean fruits and flush for next 5 days. I know it's to much light as all lower Buds are fine and look dank just pissed this has happened to the clone
Likes
18
Share


@Jays_Not_Here_Man
Follow
Week 3 (Day 21) Flower- This was the last week of messing about, no more defoliating or bending and flexing. Did a heavy defoliation. Noticed some yellowing of the lower level leaves, added a few +mls of the grow and bud bottles, will water mid week with straight ph’d water (6.5) as I don’t want my medium to get to high, or get nutrient lockout. these nutes uptake best between 5.8 and 6.2, otherwise rolling along nicely. 😎💨
Likes
10
Share


@The_Chef_420
Follow
Saw some excellent lateral growth from their branches in the last week. Been removing fan leaves from main stem to allow meristems to grow more. I was using kelp in a foliar to induce apical dominance but have since removed it from the girl's regimin with the hopes of flowering beginning soon.

Likes
97
Share


@CANNASIM
Follow
GENERAL COMMENT
The SKR is dry and starting the cure in jars, and the NL is done.
RQS NORTHERN LIGHTS AUTO COMMENT.
This is the final week, next time will be the harvest, this girl just got mature from a day to the other, lost 70% of the top bud due to rot i haven t seen. So i could get virtually 30-40% yield from this girl
Without the locks or rot, anyhow still looking ok as far as harvest, quality will be a bit compromise, not the end of times though lol! 🙃👊🏻👍🏻
Likes
100
Share


@ILoVeThiSpLaNt
Follow
Giorno 56
Zombie Kush #1 è pronta. 20% di tricomi ambrati e quindi si taglia. L'avrei lasciata volentieri un'altra settimana ma ho i barattoli vuoti 😀
Zombie Kush #2 ha ancora tutti i tricomi latte e rimarrà almeno un'altra settimana. Cmq bellissime cime. Tutte di uguale consistenza e colori stupendi
Le due Rainbow sono praticamente identiche e tra qualche giorno verranno tagliate visto che hanno già un buon 10% di tricomi ambrat
La Milk Monkey ne ha ancora per due settimane e mi sta colpendo particolarmente. Penso sia la pianta più collosa mai coltivata.
A settimana prossima e grazie dei like e dei commenti ❤️


Likes
15
Share


@Lordviper28
Follow
Plants have enjoyed the scrog net for support also had a nitrogen build happen with two of the red hot cookies but got it corrected and plants looking healthier


Likes
14
Share


@GoldenWeedGrower
Follow
D78/F34 - 17/06/23 - I changed light schedule hoping she's going better. (6 only red ligh and 7 red-white)
D79/F35 - 18/06/23 - New lights schedule is running
D80/F36 - 19/06/23 - Added water and integrators EC 1.0 and pH 6.4
D81/F37 - 20/06/23 - Nothing to report
D82/F38 - 21/06/23 - Added water and nutes EC 1.0 and pH 5.7
D83/F39 - 22/06/23 - Temp is too high for both water and environment. I see signals of suffering on the flowers (foxtailing)
D84/F40 - 23/06/23 - I'm trying to keep the Tremp under control but isn't easy. To lowering water temp (that now is about 26 °C) I'm adding some ice to the water
Likes
4
Share


@IndianaGrow
Follow
Week 6th done so far so good i put scrog net down and small bit of defoliation to get some air flow through the canopy next week i will be put another scog net down to open some light penetration for the lower buds

Likes
29
Share


@Spliffing_Around
Follow
I fudged up one pot , when lifting it the down part popped and root parts went away. The plant already had his main branch broken and is still hanging.
Please advice on the deficiencies of the biggest plant.
What other nutrients can I add here ? I have humic acid in little pallets.
Dutch pro bloom is coming on it’s way, I’m still watering with hand distributed nutes that could have the emblems “A”+”B” mixed up. To everyone telling that it brings a big issues to the company - no - it’s just a dude most of the time buying bulk amounts and selling per liter, having the original packaging on the bottle glued up.
Anyway, any advice is appreciated.

Likes
1
Share

@LokalGrenz
Follow
7/28 some light lead pulling removing bottom area and sites that I fill be waste of time taking energy from the tops still RO water and tea every other week