
Likes
Comments
Share

@Rangaku
Follow
Beautiful looking plant that is really stinking out my place , can’t wait to get this one rolled up . Starting to fade a bit maybe another 2 wee

Likes
43
Share


@OntarioBigGreen
Follow
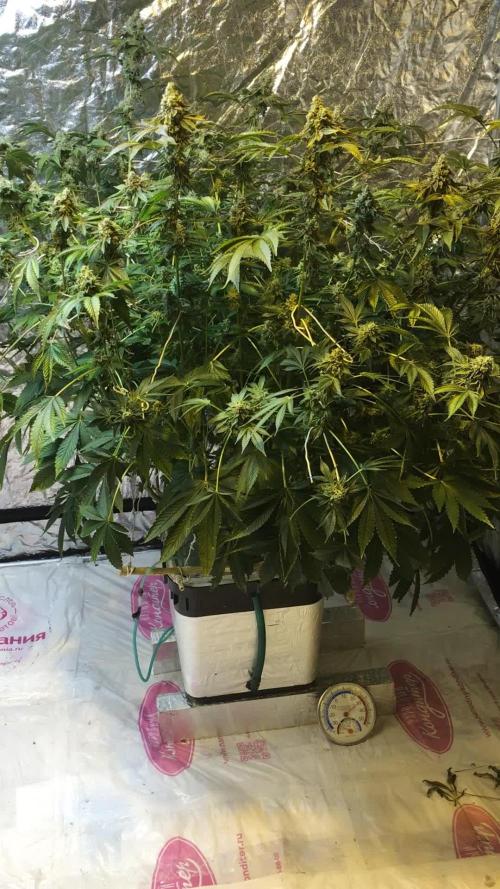
After last week crazy heat wave that stop the growth....everything is back growing almost 2” per day...Thc #1 is now standing at 87”( yes 7’ and 4” ( what a beauty) #2 is at 74 “ ...but the pests and pest are on my girls( mealy bugs ,lots of aphids and fews inch worm) ,the soap did not work so add to take drastic measures “pesticide “ I used end-all with a very fine mist and I remove lots of leaf to give more lighting inside ( even not been a fan of defoliation sometimes you need to do ) now still see fews little aphids under leafs but nothing crazy ( so I spent lots of time everyday checking new growth and under leafs to squeeze thems and I put bunch of glue stick for bugs hoping this will held me little more) .looked like the have started flowering so I’ll do one more veg fertilizer but I’ll cut
in half the strength and won’t put rapid stater as I want her to started thinking flowers and next week onto flower juice😃...
Bombseeds you guys have amazing genetics 😍

Likes
6
Share

@Wenz004
Follow
Keimung und Sämlingsphase Tag 1-9
Mal was neues probieren - Samen aus der teilweise deutlich alten Sammlung verbrauchen und so die Mõglichkeit haben mehr Varianten und Geschmäcker auf einmal probieren zu können.
2 x Special queen - promo rest - andere bisher schiefgelaufen
1 x biscotti - promo
2 x tropicana cookies - war mal großzügige Entschädigung
2 x Euphoria - bestellt als Daysmoke - wollte sowas schon immer 😁☝️
1x mexican rush - mal bestellt 1 Stück um Warenkorb auf bestimmten Wert zu bringen😁 - die wird bei dem mix Probleme machen - da Sativa lastig
2 x gg4 gorilla glue - promo
Alle extrem schnell gekeimt nach gerade mal 1.5 Tagen, euphoria sogar noch deutlich schneller 1 x gg4 und einmal SQ erst nach 2.5 Tagen.
Plan - wollte alles unberührt wachsen lassen später in 120 x 120 (keinerlei lst oder hst) mit einer kurzen Vegi - rechne ich ab Tag 10 nach Keimungs -und Sämlingsphase.
KI hat mir von diesem Plan abgeraten - oder wenigstens mexican rush und special queen zu toppen - mal sehen😁


Likes
3
Share


@Choot
Follow
un peu moins de 5 mois de culture pour ce résultat, c'est long certes mais rendu sympa
Faire attention à l'humidité, ventilation si indica ... mais sinon globalement tout à été très bien . A voir quand cela est sec .

Likes
7
Share


@fabialien
Follow
Lunes 11 de marzo 7 am de 2024:
Se dejaran hidratando las semillas por 24 hrs.
Martes 12 de marzo 7 am de 2024: pasamos a papel dejamos por 24 hrs.
Miércoles 13 de marzo 10 am de 2024: revisamos las semillas y vamos preparando macetas pequeñas para transplante.
Miercoles 13 de Marzo 3:30 pm se traspasa a tierra.
Viernes 15 de marzo 11:47 pm 2024, ya que abrieron bien se pone bajo lámpara 100w a 30 cm de distancia, tienen domo protector! El lunes en la nueva semana subimos el avance, hasta el Lunes...
Sábado 16 de marzo 2024, de las 3 semillas la 1 ya abrió completamente, 2 y 3 están por abrir completamente.
Likes
1
Share

@fabialien
Follow
Semana del 9 al 15 de septiembre 2024.
Estas Autos BSF van con todo, muy vigorosas, excepto una blueberry y una Orange Blossom que van un poco lentas.

Likes
10
Share

@carlitoshaze44
Follow
Otra semana más
Creo esta semana hoy día 27
Anunciando así el próximo día 28 inicio de esta quinta semana de floración del calendario de mis niñas,semana en la que comienzo subiendo la cantidad de comida y con ello de agua para mis niñas.
En los últimos riegos de la cuarta semana fui subiendo hasta alcanzar los 1700.
Las plantas mayoritariamente lo aceptaron,así que con ello subiré esta semana hasta alcanzar los 2000.
No defoliaré ninguna planta
Hoy ajuste la luminaria a una altura de 30cm con respecto a los 45 de la anterior semana.
Esta semana pegarán un buen apretón con la subida de PK,y la ayuda de los azúcares.
Seguimos con muchas lluvias y una humedad muy alta que dentro del armario se combate entre ventiladores extractor y desumificadores pasivos de sales de silicio.
Que me mantienen un 35% menos de la que tengo en el exterior llegando muchos días a los 45/50% de humedad.
Tengo que añadir que vivo a un kilómetro de la playa.
Día 28
Di un pequeño fumigado, de agua con ajo y jabón potásico en la entrada al cuarto de cultivo.
Como preventivo ante cualquier insecto que quiera acercarse atraído por el aroma.
Hoy e podido ver que el último riego de 1700EC,no causó ningúna sobre fertilización apreciable en el cultivo casi nula,viendo esto en el siguiente riego subiremos a 1900Ec.
Día 29
Primera impresión al abrir el armario es que había una humedad alta dentro del almario.
Un 72% que una vez encendí el pequeño desumificador de 8l de casa,a mejorado a 53%
Hoy compré la gama de completa de aptus.
Iré añadiendo alguno de estos componentes de la fase de floración,para ver qué tal se combinan con la gama de plagron.
Hoy le metí un riego de 55litros,una Ec de 1900
Sin carga de pk,desorbitada.
Este riego me centro en los azúcares junto con algunos aditivos como silicio,aminoácidos,azúcares,encinas,sulfatos y manteniendo el nitrógeno en pequeña parte el potasio y el fósforo,calcio y magnesio que nunca falte en cada riego!,las lámparas están bajas y a toda potencia.
Quiero en estos días conseguir mejorar con grandes empujones .
Saludos compañeros!
Día 30
Todo bien,todo correcto y me alegro!,buenas tardes,buenas noches.
El cultivo aceptó muy bien la subida de EC 1900,esta variedad come de buena manera!.
De esta manera seguiremos subiendo para ver,hasta donde llegan.
Obviamente no vamos a sobrecargarlas,pero vamos a ver hasta donde llegan.
El siguiente riego lo haré trabajando con pk,mineral y algunos aditivos más orgánicos-minerales.
Tengo que decir que el aporte del té frío de plátano junto a la melaza le habrán venido fantástico también a las lombrices!
Día 31
Todo perfecto dentro del cultivo ,veo que las 9 semanas de floración son fijas..
Un gran punto a favor,es que el clima empieza a ser más favorable a partir de este fin de semana..
Subirán más las temperaturas y las lluvias van a detenerse por unos días.
Espero contar con una humedad ambiental más baja para poder seguir tranquilo con el desarrollo de las flores.
Dia 1
Lo comentado en el día anterior,bajo la humedad ambiental,tenemos buenos parámetros!
Una temperatura con luz de 21 grados y una nocturna de 16.
Va aumentando mucho la resina!,eso me gusta!
Hoy le metimos una EC2100 en el riego.
Mañana veremos qué tal lo reciben las niñas.
Va aumentando de buena manera el engorde,no me puedo quejar!
A ver si llegamos al 1,7g/w que es el rendimiento que se está obteniendo con esta configuración en los cuartos de los compañeros! Sin Co2 obviamente.
Día 2
Ya veis,todo viento en popa!
Hoy hice una prueba en el cultivo con el riego ya que en el último riego cogió aire el sistema.
Aún sigue así,en el día de mañana lo purgaré.
Likes
5
Share

@Black_Widow
Follow
Привет садоводы и огородники !!!
Началась новая неделя и через пару дней поставлю ее на чистую воду

Likes
14
Share


@Bread_n_Buds
Follow
Our Black Runtz from Zamnesia are about 10 days later than the others because we had some placenta problems at birth and we replanted them, now everything is fine just a few days later than the others.
We gave Power Roots 1 Ml/l, Pure Zym 1 ml/l, Sugar Royal 1 ml/l, Alga Grow 3 ml/l -
Plagron nutrients are available at Zamnesia in convenient pack formats for all growing styles. I used this one with a simple search you can find the other products.
Try a seed of this strain that drives us crazy...
---- https://www.zamnesia.io/en/11159-zamnesia-seeds-black-runtz.html
Zamnesia Description // Black Runtz comes from a truly legendary genetic pool. Our breeders used three modern classics from the United States to create this strain: Zkittlez, Gelato, and Runtz. With 20% THC and flavors of grapes and berries, Zkittlez passed on her delicious flavors and relaxing effects. Gelato contributed to Black Runtz's immense flavor profile by passing on high concentrations of the terpenes limonene and humulene. Finally, Black Runtz inherited the high potency of the original Runtz, a strain with a respectable 21% THC. The end result of this 3-way cross is a strain with 55% indica genetics and 45% sativa. Black Runtz boasts rapid flowering times, high potency, and contrasting yet balanced terpenes that supports its delicious flavor profile.
Growbox and Air System - Secret Jardin DS120w + fans + Exhaust fans and filters DF16 kit ---- https://www.secretjardin.com
All the best that mother nature has to offer is on ----www.zamnesia.com
Likes
17
Share


@Mr_nugs_lover_David
Follow
It's been a beautiful strain to work with, the flowrs are definitely worth it after all this time, the quality is definitely high. However this pheno of ak420 smells very different from the other 2 phenos I've grown along with her. The flowrs are beautiful, very solid and frosty nuggets, I smoked a few little nuggets when trimming but I'm excited to taste the big buds, hope you guys enjoyed the process. I want to say that this pheno #1 has a different smell compared to the other 2 phenotypes of ak420 that you can see here on my page as well, so stay tuned guys! Overall result is very nice, good quality, strong weed, sticky, stinky. I can say that it's very great and also you can get them for a very cheap price so it's a very good investment if you're looking for a powerful and affordable strain. Cheers growmies! ❤️💚💛💎👨🌾

Processing
Likes
8
Share


@Alejangrow
Follow
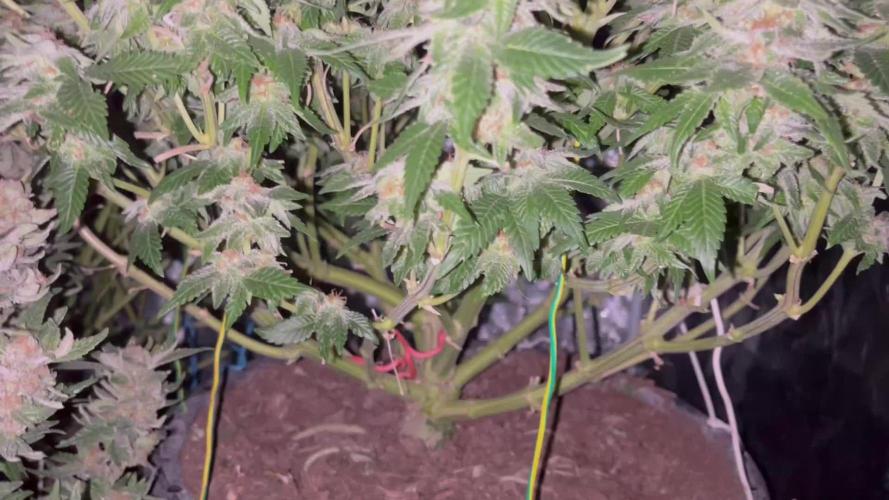
Tied her down this week, was a little too aggressive in doing so & partially snapped 2 branches off. Might try using fishing line & sinkers for lst rather than tying & retying every week with twine.

Likes
29
Share


@MrHightimes
Follow
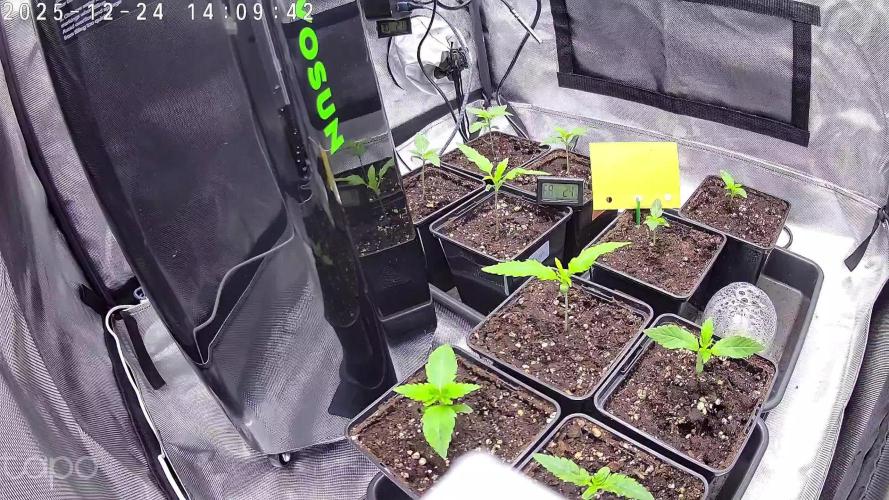
Transition week!
Not much to do but put them in the big tent
Now that they can drink whatever they will rocket off!!!!
Will put stakes in em and LST em more next week!

Likes
6
Share

@PapaTerps
Follow
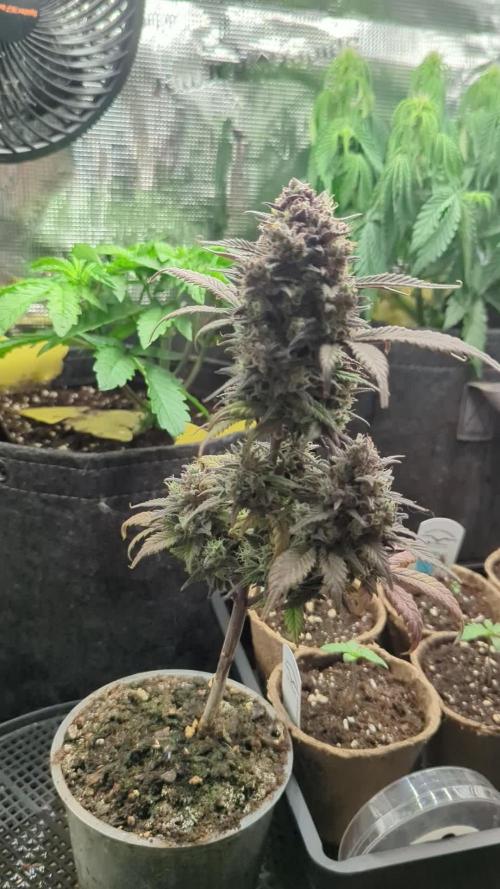
Strawberry Gorilla Automatic - FastBuds
Day 71 - watered with 1L of RO tap water with defined nutrients, mixed in order and then pHd to 6.3. This will be the last feeding with full nutrients as I now start to prepare her for harvest! Her next feed will include half of the defined nutrient units and then she will have her first flush! 👍🏻 She has taken on a beautiful purple hue on her flower now along with the deep purple on her leaves, this combined with the white and amber of the pistils, and the lime green on the bud sites, really makes her pop and shimmer, shes very beautiful!😍 Her armoa is really starting to come out now too, she smells just like strawberries and candy! Her trichomes are mostly milky with some starting to turn amber, so I'd say another few days and she'll be ready for harvest! I know she wont have a huge yield, but the point of this micro grow, was to find out more about the strain and how what a micro grow could achieve, so no matter the yield, I am super happy with the results so far - to the point where I am planning to have two micro grows in my next grow (TB SkillteZ by Bulldog Seeds & Pineapple Express F1 by Zamnesia)🙌
Likes
24
Share


@Homestickycannabis
Follow
Doing great, flushed her today with 5 gal of ph'd water and started a new feeding schedule as seen above I will alternate watering and feeding. One week water one week feed. I'll keep this gradually increasing the strength of nutes. As far as everything as a whole couldn't be better. Looking forward to her bounty.

Likes
38
Share


@Crownlaura
Follow
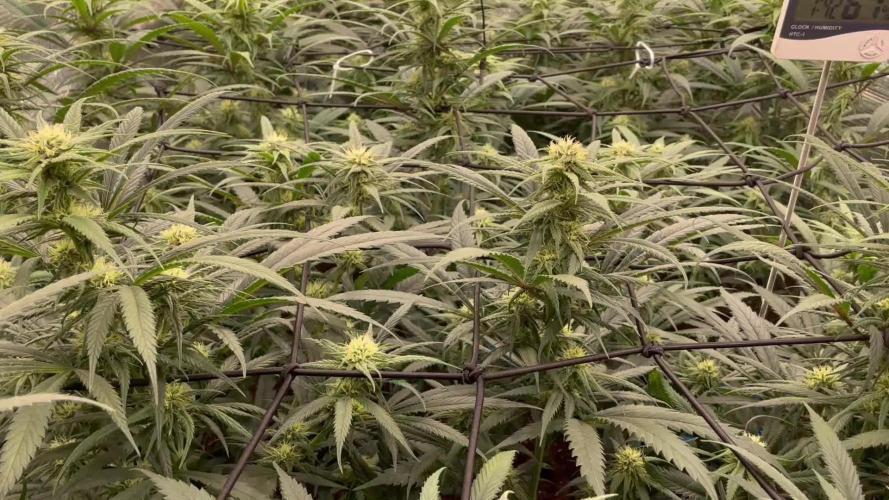
11 weeks / 77 days old today.
They’ve definitely fattened up more this week. We got to a point where we were 50% amber pistils but then both plants sprouted a load of new ones so hoping for another week of bulking up! We have a few more milky looking trichomes too. I’m hoping they’ll be partially done in the next couple of weeks.
Inspected all the buds and I’m pretty sure I’m gonna have to harvest in 2 or 3 steps and give the lower buds a bit more time to ripen up.
I don’t know what I’ve done to piss her off so much but purple skunk is now covered in brown spots on quite a lot of leaves. I dosed her up with some calmag and since then I’ve switched to water only. I’ve noticed she’s slowed down drinking isn’t taking as much as sticky orange now.
Chopped more yellowing leaves from around the bottom. Hoping this is another sign they’re coming towards the end.
My patience got the better of me this week and I chopped a little bud off sticky orange to try. I haven’t smoked for months and even though they’re not there yet it almost sent me straight to sleep. So very excited to try the finished product!
See you in week 12!


Likes
79
Share


@Salokin
Follow
Hello Growmies!
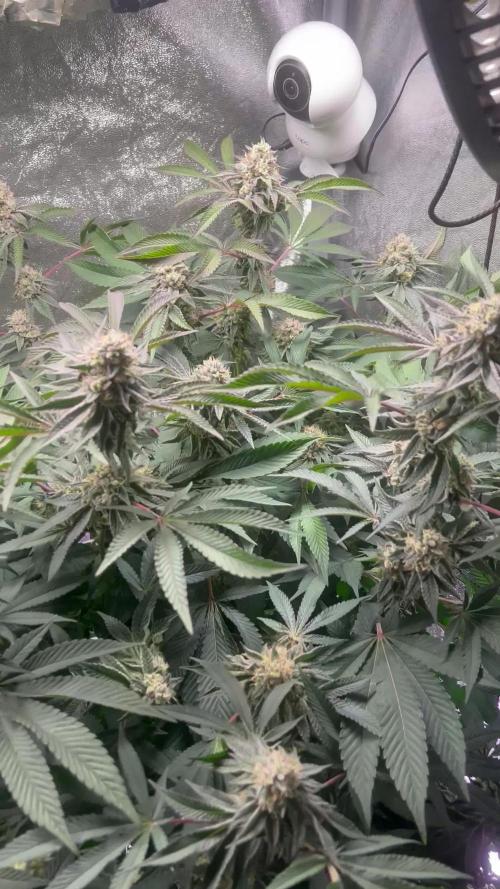
Here we are at week 15 with the Epic Buzz, and what a sight it has become. As the days pass, the natural fading is more apparent, showcasing an array of autumnal hues that captivate the eye. The aroma is intoxicating and undeniably strong, filling the space with an earthy and pungent perfume.
This week, I’ve implemented a bit of drought and temperature stress, emulating the natural environment of autumn even further. It's a delicate process, but these beauties have responded with resilience, their colors transitioning beautifully as they approach the late stages of flowering. Each bud is dense and frosty, a testament to the careful nurturing they’ve received.
The environment is controlled, but I’ve allowed for slight fluctuations to challenge the plants, encouraging them to harden and produce those precious, resinous trichomes. It’s a sight to behold and the anticipation for harvest grows daily. It’s all about patience and precision now, as each day could mean the difference between good and great.
As we approach the harvest, I'm closely monitoring each plant, ensuring they're expressing their full potential. The resilience they've shown is remarkable, a sign of strong genetics and attentive care. They're a testament to the wonders of cultivation and the rewards of dedication.
So, stay tuned as we close in on the final days. It's a journey filled with anticipation and excitement. The payoff is nearly at hand, and soon we'll be reaping the fruits of our labor. Stay lifted, Salokin!
