
Likes
Comments
Share

@BalconyBoy
Follow
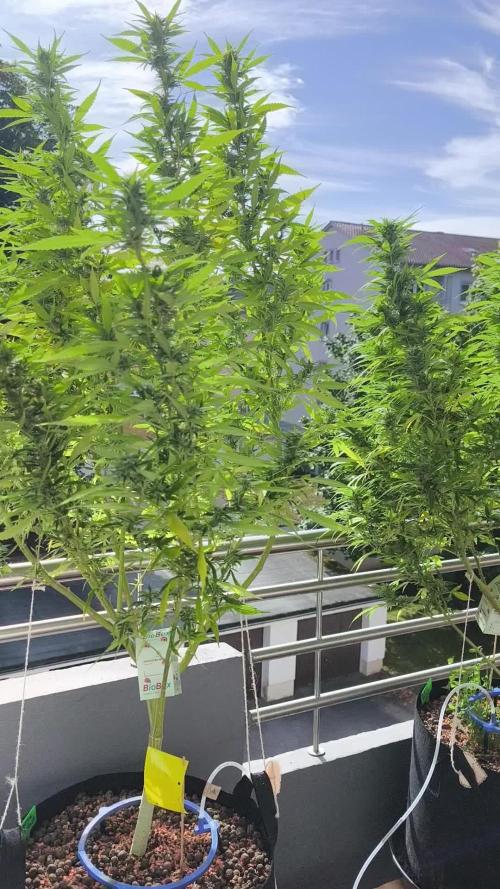
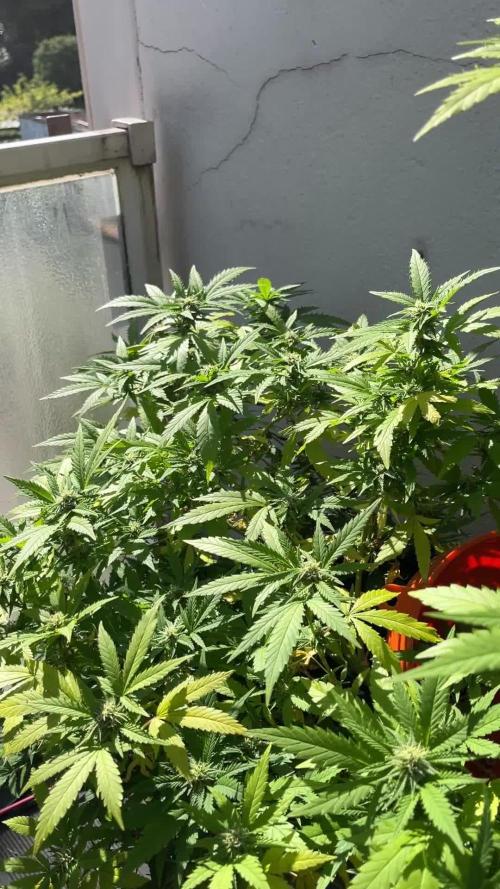
08.09.25 the first week of September was a mix of sun and clouds on the balcony. The seedsman strains continue their road to frosty flowers and the quick sherbets now also join in the tracks. Repeated H2O2 Spraying didn't fight the powdery mildew on the Sherbets enough for me to let it go, I'll get some hardware store product to have tried everything in time instead of yapping afterwards. Also I applied 100g of flower fertilizer as top dressing. Thanks to Bavarian Krauts for hooking me up with this cheaper alternative to the greenhouse feeding line, it performed very nice on the first half of flowering, now this is the dose for the last chapter of 2025 making sure nutrients last to the end of the season. There are still leaves turning yellow on the flowering plants but the amount has come down and the overall structure now seems ready to support the buds and give them good direct light as well.


Likes
13
Share


@TheHighNews
Follow
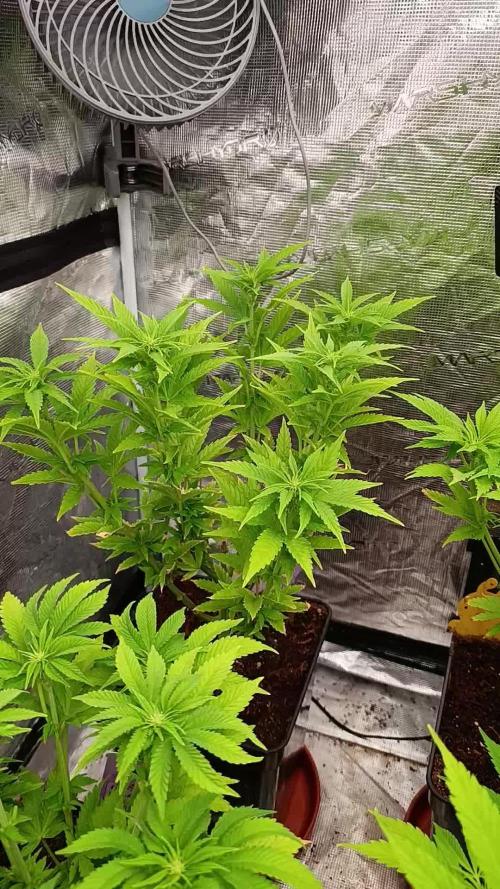
Day 30 toady, i switched to 12/12 3 days ago e the babies are already stretching hard and some are showing preflowers i'm pretty happy i'm watering with no nutrients as i'm using Canna Pro Plus soil and it should have enough nutrients for the first 3/4 weeks of flower. I cleaned the bottom of the plants from lowers branches and leaves and i will continua till day 14 of flower and i fixed it with a bamboo stick i got gifted from @AlpineGoat i will fix the other branches in the next weeks i'm pretty stocked with this grow this genetics are really solid growing strong and fast! Good job @Exotic_Seed!!🙌👍

Likes
4
Share


@Ageddd
Follow
Last week of life, she is yellowing the leaves rippening faster than the week before, and
Bad weather is here, during the middle of this week, so it rained hard dirung a couple of days, high RH and even more bugs are trying to eat the plant.... Aphids, flies, ants... They attract each other so what a jungle hahaha
Im giving the plant a H202 bath to get rid of that bugs, they are really annoying hahaha damn fuckers, but they know whats a good therpene profile hahaha, really, if you could smell this plant would intstantly know that is a piece of cake for the bugs :)
Hairs are like 90-100% orange
Buds are covered by a nice layer of resin and THC ^^ Im happy, as my second auto, ended like an homogeneous bush, all buds at the same level, but now i think i should had removed more lower leaves to increase airflow...
Take care boyzzz and girlzzz, and remember, smoke at least one joint a day if its possible hahaha :D

Likes
34
Share


@Hexus
Follow
Day 85 - We're into a new week! She's still got a way to go yet, but she's putting on mass like no other plant I've grown. Her colas, as you can see in one of the pics from last week, are bigger than gallon jugs. The whole plant is top heavy and I have to be extra careful when pulling her lid to the side to feed her. Her mass is getting wider as well, from the sheer weight of her colas. She's drinking about a gallon a day and showing no signs of letting up.
Day 91 - End of week 13! - She's not done yet, but getting there. Upkeep is pretty much just dumping a gallon of new feed into her every two days or so. I'm pretty excited to see what her yield is at this point, because lifting her out to refill her actually take a bit of muscling.

Likes
10
Share


@SgtDoofy
Follow
3/6:
Yesterday I fed half strength nutrients ph'd to both. Amnesia's runoff ph was 5.5. So I made another half gallon of half strength and ph'd it to 7.5 to get Amnesia's runoff to be 6.5. If only I had done this sooner and didn't mess up with the PH testing drops as opposed to using a ph meter, Amnesia's leaves could have still been green. I've been removing all of the dried, crispy ends as I find them, leaving the rest of the leaf intact to suck up as much light as possible. Timelapses are showing that the buds are fattening up well though. Trichome production has kicked in and is covering the leaves. Beautiful colors all around.
3/8:
I don't think I can wait any longer to feed Amnesia. Vacation starts midday tomorrow, Thursday, and I'll be away until Monday evening. I'm mixing up a half strength nutrient mix with molasses and epsom salt. I'm also going to try to set up a timer/pump system to water sunday night.

Likes
161
Share


@Roberts
Follow
GSC Extreme autoflower from ILGM has grown really well. Looking really dense, and smelling great. Full of trichromes. She was a late bloomer, but made up for it when she did. Looks like a heavy yield of some dank buds. The Viparspectra P4000 worked excellent. Thank you ILGM, and Viparspectra. I have a harvest video on my YouTube channel, link on my profile page. 🤜🤛🌱
Thank you grow diaries community for the likes, follows, comments, and subscriptions on my YouTube channel. I greatly appreciate all the support. 🌱🌱
🌱https://youtube.com/channel/UCAhN7yRzWLpcaRHhMIQ7X4g

Likes
2
Share


@Islandgrowbro
Follow
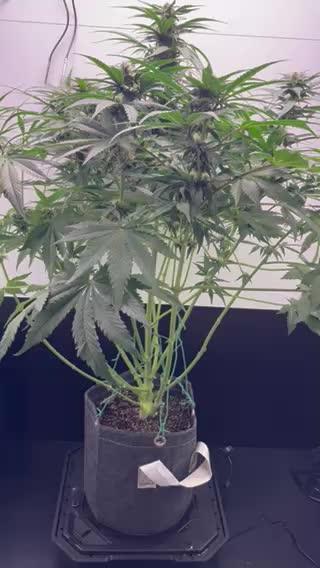
Plants need to be spread out more and more lights need to be added.
2 days later plants spaced out and more light added

Likes
226
Share


@Kitties_and_Colas
Follow
~_~_~_~_~_~_~_~_~_~_~_~_~_~_~_~_~_~_~_~_~_~_~_~_~_~_~_~_~_~_~_~_~_~_~_~_~_~_~_~_~_~_~_~_~_~_~_~_~_~_~_~_~_~_~_~_~_~_~_~_~_~_~_~_~_~_~_~_~_~_~_~_~_~
10/01/21
😻 Week 6 is here!! The girls are starting to get really heavy, we may be forced to cage the rest for support, we couldn't move them much this week for fear of them collapsing..not recognizing or stopping the runaway stretch soon enough has come back to bite us..lesson learned about this strain.. the canopy is terribly uneven lol, we're just kinda letting them do their own thing at this point, we did drop 1 of 2 lights to accommodate the shortest of the group. The buds on this strain are incredibly dense, it looks like it will be some pretty good smoke ..we'll likely cut all feed by the end of this week, giving them roughly 2-3 to flush out..thanks for reading if you made it this far and happy harvests friends!!! 😽💨❤️💡🌱
https://youtu.be/KZXdy_l_b_A
~_~_~_~_~_~_~_~_~_~_~_~_~_~_~_~_~_~_~_~_~_~_~_~_~_~_~_~_~_~_~_~_~_~_~_~_~_~_~_~_~_~_~_~_~_~_~_~_~_~_~_~_~_~_~_~_~_~_~_~_~_~_~_~_~_~_~_~_~_~_~_~_~_~
10/04/21
😾 Well it happened, they finally buckled lol, this bud is super dense..and more popcorn than we usually get ( ill make hubby clean it lol 😸) but even that will have some weight to it. We staked 2 of 3 plants and decided to switch to ph water for the remaining 3 weeks (or so)..thanks for stopping by grow family and happy harvests!! 💡🌱❤️😽💨
~_~_~_~_~_~_~_~_~_~_~_~_~_~_~_~_~_~_~_~_~_~_~_~_~_~_~_~_~_~_~_~_~_~_~_~_~_~_~_~_~_~_~_~_~_~_~_~_~_~_~_~_~_~_~_~_~_~_~_~_~_~_~_~_~_~_~_~_~_~_~_~_~_~
Likes
4
Share

@420DeepGrow
Follow
📆 Semana 3
Con el coco ya prácticamente estabilizado, la planta entra en floración funcional. El estiramiento comienza a moderarse y los puntos florales se agrupan con mayor definición en cada punta, mientras los pistilos se multiplican y la estructura se ordena definitivamente.
Los riegos acompañan la demanda creciente sin acumulaciones, manteniendo la EC y el entorno radicular en equilibrio. La respuesta aérea es clara: hojas firmes, color homogéneo y aumento notable de la expresión aromática cítrica.
Semana de consolidación y entrada en producción floral.
Seguimos creciendo fuerte 💪!

Likes
15
Share

@CCSAUTOVGROW
Follow
End of week 2 flower. I moved her into the larger grow space & she is HAPPY!!! Stacking up nicely and taking over the new space. She smells wonderful.

Likes
Comments
Share

@gonzzzac
Follow
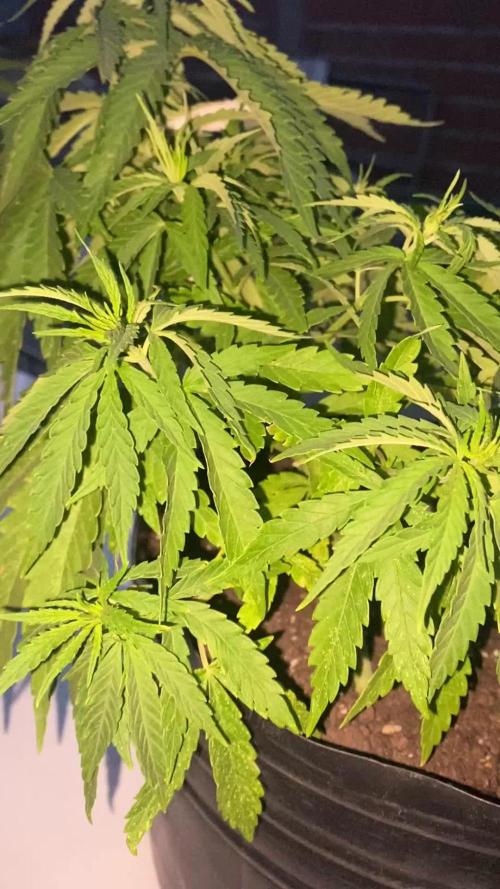
tuve la semana pasada araña roja pero ya lo pude solucionar con un insecticida foliar, también tuve una larva pero la pude eliminar rápidamente antes que se reproduzcan, esta semana que vienen parece que se viene un crecimiento más explosivo ya con efectos de el fertilizante y días más cálidos
Likes
5
Share

@OnlyBuds
Follow
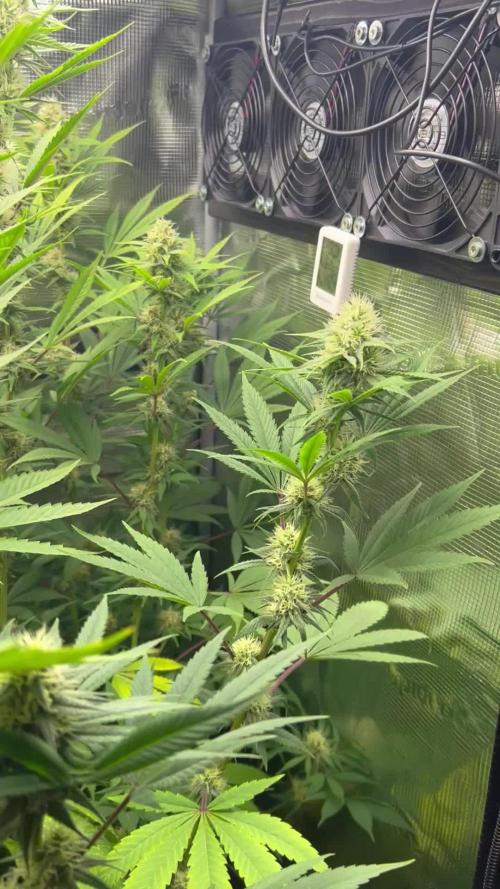
Week 12 – Frost Incoming & Finding the Peak ❄️🔥
Hey Muchachos, welcome to Week 12 – and things are getting serious now.
The girls are deep into bloom, stacking fast, frosting up, and showing their full potential.
This week I made an important adjustment:
I reduced the LED power from 100% down to 80%.
The tops were getting very bright and I could see the limits of the setup approaching. At 80%, the canopy looks perfectly balanced — honestly, I think this is the true peak of this tent. Up to now nobody reached this level in this setup… except the Princess. She’s pushing harder than anything I’ve seen before in here.
The buds are building beautifully — long spears, dense internodes, and fresh white pistils everywhere. The first layer of frost is coming in strong, and the smell is starting to speak up: sweet, tangy, a bit funky, very promising.
I’m also observing some nitrogen movement in the lower leaves. Could be natural N-mobility in mid-flower, could be a slightly reduced N level in the soil — but right now I’m not worried. The plants look healthy and focused on bud production, so I’m letting them do their thing.
Airflow is perfect, the canopy is stable, and every top is getting clean light. This is the phase where they start packing on weight day by day, and you can literally watch the buds change every morning.
Stay tuned, Muchachos – the frost season just kicked in. OnlyBuds! ❄️🌿🔥
Likes
11
Share


@Ninjabuds
Follow
Blackberry moonrocks both plants are still some of the best seedling in the tent so far. The better if the 2 is for sure the #1 plant in the tent. It has had the best start of a seedling i have seen in a wile. The leaves are angled like an airplane and they just seem thicker than the average leaf. They both seem like there going to have middium to longer indernode spacing.
It's looking like a good start to a week the plants are strong they are getting to the point I can let the dried dry out completely. I'm thinking by the end of this week the plants will be starting to be sold.
Last week I put all the plants into my bigger 2x4 tent with my medicgrow mini sun 2 the 500w version. Only a few of the plants were ready for that light. Seems like the only plants that really have good resistance and have a strong start are the weedseedsexpress.com seeds. Shout out to weedseedsexpress.com for the strong plants.
I ended up putting all the plants back into my 2x2 tent with the 55w amazon light it has alot more blue light in its spectrum. It's kinda weird b4 I switched the plants to the 2x4 tent they were getting 220umol under my amazon 55w led then when I put them under the 500w light 25% strength about 50in from plants and they were getting only about 195umol in that tent but it was stressing most the plants. I assume a larger light has more side lighting hitting the plants. I think when useing larger lights it's good to measure umols from the top but also coming from the sides. I think durring seedling stage they only need about 50% the umols coming from the side the plants as the top is receiving.
When I put the plants back in the small tent about the same umols as they were getting b4 the switch and they were still a little stressed. So for a few days I put the small light at the top the tent giving them 100umols for a few hrs then 130umols the rest the day.


Likes
8
Share

@Kitties_and_Colas
Follow
We decided on Pineapple Express (by Grower's Choice) as our summer strain this year, we veg anything going outside under 16hrs ..We only get 15hrs at peak light(Far North/East, Canadian border) and this prevents any pre-flowering and possible revegging downtime. We're going to flower 4 plants indoors ASAP (to ensure we don't run out )and bring 3 out to the field in about 2-2.5 months...

Likes
22
Share


@SirDillton
Follow
First grow. Ph 6.3 /temp 23 /RH%60 /water ppm 210 /Co2 500 ppm/18-6 light/ par value 600/ techna flora recipe for success nutrient cycle. Kryptonite organic worm casting soil. No training yet. 3.5 litres of water every 3 days . First mistake and note to growers and self when using spray bottle to wet surface make sure not rip off any leaves as your pulling the trigger... on the do Sweet dos plant. oh well she will live.
Likes
25
Share


@Grow_for_Happiness
Follow
Germination, that says it all!
#2 (ghost OG) and #3 (gravely Ghost) popped tails in 24 hours
#4 (sour Ghost Kush) popped tail in 48 hours
#1 (ghost Beach)popped, but seed did not fully crack and taproot got stuck. I did not notice in time and it died. Dropped a second seed on day 4 and germinated in 24 hours
Each seed planted in damp soil once taproot popped. Soil moistened with 250ml per pot in germination area. Voodoo juice in water and Dynomyco in soil blend.

Likes
29
Share


@EXZELENS
Follow
1st of November, HARVEST, D91
So, after the 24 hours of darkness, she is now beautiful and ready. After chopping her, I hung her for some hours – I had some stuff to do – and after that I did wet trimming since I find it more convenient and I don´t like to trim dry buds. I guess the best way for me would be to leave it drying for some days, do the trimming, then leave it drying some more, but, I sincerely don´t have patience lol.
When I was in the last stock to trim (which was the main btw) the top bud looked strange to me so I opened it and it was starting to rot.. I got really sad but what can I do except for trying to save it, right? So I took all the rotten parts out of the top bud and tore it to pieces to watch it closely and keep it from getting any more mold.
D94
Today I weighed the half part of the top bud that was already dry and it remained without any mold: 3.6 grams.
D97
Everything is dry and now curing, the total weight is 68.6, 65 of the whole plant and 3.6 of what I saved from the rotten bud. I´m really happy with the results, the buds aren´t much dense but they look beautiful.
D111
Today is the 14th day of curing.
D120
Today I´ll be doing the smoke report, it´s been curing for 3 weeks and the smells is quite good already, I know it can be better but the taste is good already so I´ll be doing it today.
More info on growing in the previous weeks and a summary of growing and also the smoke report are on the top at the strain review. Thank you very much for reading my diary!
Likes
10
Share

@Mo_Powers
Follow
Last week was just too rainy and stormy. It was in danger of being completely lost. I harvested it now to save what I could. I can't even imagine how big the harvest would have been if I had harvested the whole plant? Definitely over 1 kg. A really great landrace.


Likes
154
Share


@StarLorr
Follow
Welcome to my Lemon Mandarin 🍋🍊Diary.
In this Diary:
Seeds: Fast Buds (from contest)thanks
___________________________
Feeding:
Wed 09Apr: 2L Remo/Recharge pH'd 6.5
Fri 11Apr: 2L Remo/Recharge pH'd 6.47
Sun 13Apr: 2L Remo/Recharge pH'd 6.47
___________________________
Entering week 8 FLO.
as per fast buds 9-10 weeks of flowering
For this lady.
___________________________
Smell is still citrusy but much pungent😋
_________________________
Thanks for stopping by, likes and comments are appreciated!👊🏻😎
Keep on growin!
Keep on tokin!!!
😙💨💨💨💨💨