


Likes
Comments
Share


@Jrae420
Follow
Just finished 10 days of flush. 2 days in the dark with no water and theses ladies are coming down. Very pleased with the results. Everything looks as it should


Likes
29
Share


@nonick123
Follow
Día 13 (06/05) Nos acercamos al final de la fase plántula. A ver si ahora empiezan a crecer de forma explosiva!
He sido muy estricto con los riegos, dejando que el top hasta el nudillo se seque completamente!
Día 14 (07/05) Hago una mejora en la tienda. Hasta ahora tenia intracción pasiva, pero ahora he instalado una turbina para que impulse aire fresco dentro de la tienda
Día 15 (08/05) Con el calor que hace me sorprende que las macetas sigan aguantando la humedad, pero al hundir el nudillo sigue húmeda. Mañana haré un riego de nuevo
Día 16 (09/05) Relleno el top con sustrato para compensar la compactación y dar mas soporte a las plantas
Riego con 300 ml solo H20 - pH 6,2
Día 17 (10/05) Baño de sol de dos horas.
Día 18 (11/05) Baño de sol de dos horas
Día 19 (12/05) Riego 750 ml H2O + Regulator 0,15 ml/l + CaMg-Boost 0,25 ml/l + Startbooster 0,25 ml/l - pH 6.2
💦Nutrients by Aptus Holland - www.aptus-holland.com
🌱Substrate PRO-MIX HP BACILLUS + MYCORRHIZAE - www.pthorticulture.com/en/products/pro-mix-hp-biostimulant-plus-mycorrhizae

Processing
Likes
17
Share

@Silverback_Guerilla
Follow
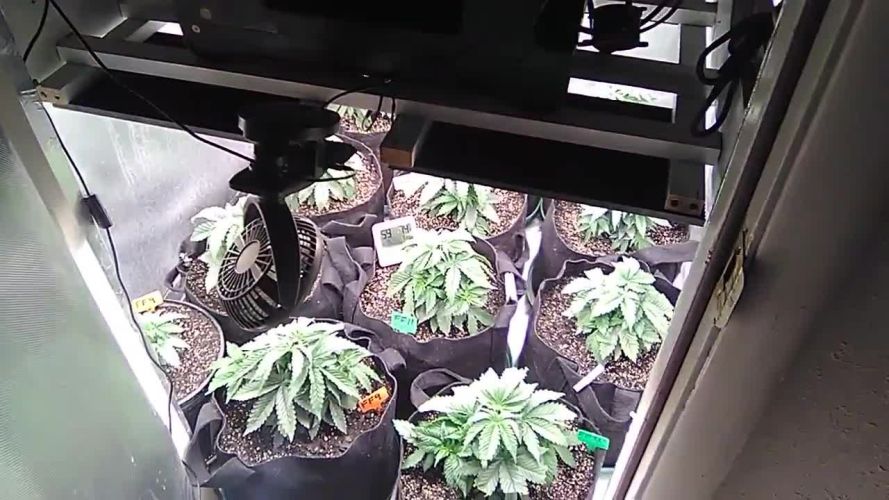
1/14:
All 3 are looking great!
This morning, I did a foliar application of big bloom and fulvic acid, then about 5 hours later I watered them with about a half-gallon of rainwater each and added armor si, humic acid, endoboost myco/tricho, liquid molasses, and a bunch of cal-mag. Today, I also I wired up and mounted my new samsung sun board strips (660nm/730nm) and my Solacure FlowerPower UVB fixture.
I'm running the deep red/far red bud boosters a few hours per day right now, but will run them for the entire photoperiod once I start flowering them. I'll run the UVB for 4 * 15-minute sessions a day for the full flowering cycle, and if they don't protest too much I'll increase each session by 5 minutes and evaluate again. Some strains are more forgiving than others and I've got 5 different strains in this space...so really not sure much time I'll get away with exposing them to the deadly rays without damaging them too much...😈
1/15:
I received one of the rapid led/growmau far red initiator pucks today. With the placement of my UVB light, I'm realizing I'll need another far red puck to have even and intense far red coverage, so I'm ordering another with Prime delivery and waiting to start flowering until I receive it.
I sprayed them down really well with ph adjusted rainwater tonight to rinse off nutrient build-up from foliar applications.
1/16:
I'm really excited to try flowering under 14/10. I grew photos indoors on an off for 15 years before I semi-retired. If I added up all the additional flowering time I could have done through the years if LED technology existed, I'd have had an extra truckload of bud to smoke.
I did another application of Axiom Harpin a|b Proteins this evening, right before dark. I'm expecting a big growth burst this week, leading up to the flower stretch. I really need them to trigger under 14/10 within 4 or 5 days🙏
...if not, I'll switch to 13/11 and wait a few more days🙏😟..if still no pistils are poppin, I'll go to 12/12 and chalk it up as bad luck or varietal indifference to Pr and Pfr manipulation.
1/17:
I fed each of them about 3/4 gallon of full strength veg nutes. This will be the last. I'll go with half-strength veg and half-strength bloom for a week, then go with full strength bloom nutrients until I start flushing them in 6-8 weeks.
1/18:
I installed the second far-red flowering initiator today and got all my timers configured for flowering:
=========================================
timer#1 - power strip with qb's and red boosters
10:00am -12:00am
timer#2 - (dual/independent setting)
sideA- 3-way cube with uva bars
10am - 3pm
7pm - 11pm
sideB- flowerpower uvb
1pm - 1:15pm
4pm - 4:15pm
7pm - 7:15pm
11pm - 11:15pm
timer#3 - far red pucks
11:00pm - 12:15am
timer#4 - sub-canopy tube
10am - 1pm
3pm - 6pm
8pm - 11pm
========================================
I also did some testing on the timers and sealed myself into the closet to check for any light leaks. All good.👌
1/19:
Tonight is their first long night. It's ON!👍
1/20:
I watered them today with about a half gallon each. I'm seeing calcium and magnesium deficiencies here and there, so added some boomerang and heavy cal-mag-Fe along with liquid molasses, humic acid, and endoboost myco. I also foliar fed with big bloom and fulvic acid.
That's it for week 4-


Likes
37
Share

@DogDoctorOfficial
Follow
Cosmic Noodles Auto — Final Strain Review
14 Weeks From Seed To Harvest — 12/12 From Seed
What a ride this one has been.
Our Cosmic Noodles Auto officially comes to an end after 14 weeks from seed to harvest, grown fully under a 12/12 light cycle from day one, side by side with photoperiods and other autoflower genetics inside the 8x8 tent — no special treatment, no isolated environment, no extended light schedules.
And honestly?
She absolutely crushed expectations.
This entire run was another reminder that autoflowers do not necessarily need 18/6 or 24/0 to produce beautiful flowers and respectable yields. With proper environment, stable feeding, patience, and healthy roots, they can still thrive and deliver excellent results even under a no-veg approach like this one.
We started this project with three plants. One of them unfortunately became part of an overwatering experiment that eventually led to losing the plant around early-to-mid flower. While painful, it became an important educational moment. We documented the process honestly so growers could learn from it — what overwatering looks like, how roots respond, and what to avoid. If anyone is interested, those reports are still available further back in the diary.
The remaining two plants, however, grew with very little resistance. Easygoing, vigorous, resilient, and surprisingly adaptable considering the mixed environment and unconventional schedule.
And in the end?
372.1 grams dry from the two harvested plants.
For autoflowers grown under 12/12 from seed, mixed together with photoperiods, we are genuinely very happy with these numbers.
But beyond numbers, what truly stood out was the quality.
⸻
Drying Process
After harvest, the plants were dried whole for approximately 10 days.
The environment stayed around:
* ~20°C
* ~60% RH
During the first couple of days, humidity was intentionally kept closer to ~45% to help remove the initial excess surface moisture from the flowers before stabilizing the drying curve more gently afterward.
The slow dry helped preserve aroma, resin texture, and overall flower integrity beautifully.
And the smell coming from the drying room… incredible.
⸻
Hand Trimming — Slow, Sticky & Worth It
Once drying was complete, every flower was separated and hand-trimmed carefully using the Zamnesia scissors together with the Trim Bin setup.
Hand trimming takes time. A lot of time.
But it also allows a level of precision and care that machine trimming simply cannot replicate. Every bud gets individual attention. Resin heads stay more protected. Structure remains more natural. And honestly, it becomes part of the ritual itself.
Our fingers were absolutely coated in resin by the end of it.
Sticky gloves. Sticky scissors. Sticky everything.
The Trim Bin itself collected a beautiful layer of golden dry sift during the process, and naturally, none of that went to waste. Everything was collected carefully and stored cold for future enjoyment.
Even the smallest parts of the harvest deserve respect.
⸻
Curing — The Part Many People Rush
After trimming, the flowers were placed into Grove Bags for curing.
For larger harvests especially, these bags are honestly an amazing tool. The TerpLoc technology helps maintain the internal humidity in the ideal curing range of approximately 58–62%, reducing the need for constant burping while helping protect the flowers from excessive moisture swings.
This matters because curing is not simply “storing weed.”
Curing is the process where the flowers slowly stabilize and mature internally:
* chlorophyll continues breaking down
* harshness reduces
* aromas become cleaner and deeper
* terpenes settle and express themselves better
* smoke quality improves significantly
This is why we usually prefer allowing at least one month of curing minimum, while many flowers continue improving for two or even three months depending on the cultivar and storage conditions.
Patience changes the experience dramatically.
And Cosmic Noodles definitely rewarded patience.
⸻
Aroma & Smoke
Even straight off the trim, the first smoke test was already extremely enjoyable.
The dominant profile came through as:
* citrus
* floral notes
* earthy depth
* creamy herbal background
As curing progressed, the profile did not change dramatically — it simply became more refined, cleaner, smoother, and more layered.
The smoke itself leans toward the relaxing side. Comfortable, calming, peaceful. Not a “race your brain” type of cultivar, but more something to slow down with and enjoy properly.
A dedicated smoke review will eventually come separately, but first impressions are honestly fantastic.
⸻
The Final Flowers
The cured flowers developed beautifully over time.
Dense but still natural. Resin-rich without looking artificially swollen. Strong aroma retention. Sticky interiors. Frosty surfaces. And some truly beautiful structure throughout the harvest.
We are also sharing photos of the cured flowers after roughly one and a half months of curing so people can see how the flowers evolved after resting properly.
Because sometimes the real magic happens after harvest.
⸻
Final Thoughts
Cosmic Noodles Auto turned out to be:
* easy to grow
* adaptable
* resilient
* productive
* aromatic
* enjoyable from start to finish
And most importantly:
fun.
No drama. No impossible feeding requirements. No extreme sensitivity. Just a solid cultivar capable of producing beautiful medicine even under unconventional conditions like 12/12 from seed.
For us, this one easily earns:
⭐ 10/10 ⭐
⸻
Thank You
Huge thanks to everybody involved in this journey:
* the breeders and genetics teams
* the companies providing gear and support
* the platforms that allow us to document these grows
* the communities following along
* the OG followers who have been here since the beginning
* the new people just discovering the diary now
* the supporters
* the skeptics
* the silent viewers
* even the haters stopping by for five seconds
Love is still sent your way.
And of course…
special thanks to Mr. Baggy for accompanying us through the cure once again. 🍃
Because in the end, this was never only about chasing numbers.
It was about learning, documenting, improving, sharing experiences, and appreciating the process from seed to final smoke.
From grower to growers — much love. 🌱
📡 DELETED @ 1K Please stay tuned.we never quit https://www.youtube.com/@TheDogDoctorOfficial NEW 🙏 Thank you for your patience and continued support.
FOR DISCOUNT CODES AND MORE JUST FOLLOW THE LINK https://website.beacons.ai/dogdoctorofficial
📲 Don’t forget to Subscribe and follow me on Instagram and YouTube @DogDoctorOfficial for exclusive content, real-time updates, and behind-the-scenes magic. We’ve got so much more coming, including transplanting and all the amazing techniques that go along with it. You won’t want to miss it.
GrowDiaries Journal: https://growdiaries.com/grower/dogdoctorofficial
Instagram: https://www.instagram.com/dogdoctorofficial/
YouTube: https://www.youtube.com/@dogdoctorofficial Deleted by Youtube - https://www.youtube.com/@TheDogDoctorOfficial NEW
Vimeo : https://vimeo.com/dogdoctorofficial Under construction stay tuned ⸻
Explore the Gear that Powers My Grow
If you’re curious about the tech I’m using, check out these links:
🔆 Lighting & Environmental Control
• Future of Grow — Advanced LED lighting technology
https://www.futureofgrow.com/
DISCOUNT CODE: DOG20
• Lumiflora — Under-canopy LED lighting
https://lumiflorade.com/
• TrollMaster — Environmental controllers and automation gear (past collaboration)
⸻
Genetics
• Zamnesia Seeds — Genetics used in this project
https://www.zamnesia.com/
⸻
🌱 Soil, Substrates, Boosters & Root Support
• Plagron — Substrates, bio mixes, and supportive products
https://plagron.com/en/
⸻
🎒 Storage, Curing & Preservation
• Grove Bags — Curing and storage solutions
https://grovebags.com/
⸻
📸 Photography Equipment & Tools
(Not sponsors, but part of my creative toolkit)
• Sony A6700
• Sony full-frame macro lens + few more
• Stacking photography workflow - learning
• iPhone (for behind-the-scenes shots)
We’ve got much more coming as we move through the grow cycles. Trust me, you won’t want to miss the next steps, let’s push the boundaries of indoor horticulture together!
As always, this is shared for educational purposes, aiming to spread understanding and appreciation for this plant. Let’s celebrate it responsibly and continue to learn and grow together.
With true love comes happiness. Always believe in yourself, and always do things expecting nothing and with an open heart. Be a giver, and the universe will give back in ways you could never imagine.
💚 Growers love to all 💚
📸 P.S. – The Eye Behind the Lens
All photos in this diary (for now — except for the ones showing the camera, which I took with an iPhone) are taken with a Sony A6700 paired with a Sony full-frame macro lens and a few more.
Photography is part of the story — it’s how we share the fine textures, the glow, and the quiet details that words can’t always capture.
I’ve also started experimenting with photo stacking — a technique where multiple images, each taken at a slightly different focus point, are layered together to create one perfectly sharp image from front to back.
It’s not digital enhancement or AI; it’s pure photography — a way to reveal the plant’s beauty in microscopic depth, from trichome to petal.
You’ll even see a few shots of "ghost me" capturing the shots — camera, lens, setup — because every grow deserves not just to be cultivated, but documented like art.
FOR DISCOUNT CODES AND MORE JUST FOLLOW THE LINK https://website.beacons.ai/dogdoctorofficial
NEW DISCORD - Official Server Invite Link : https://discord.gg/ksjAkA5T74

Likes
4
Share

@zenderman
Follow
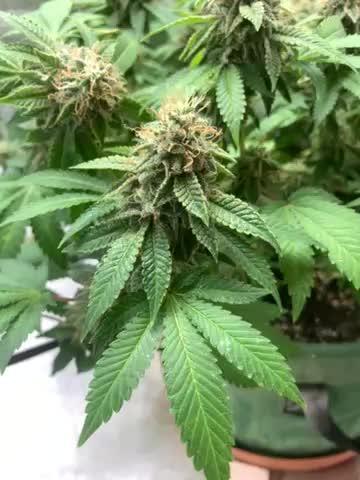
13/12/25-beginning of last week.day 50 of flowering. yesterday was flushed with flawless finish (10 ml on 5 liters of water).today was flushed with water (PH 6.2).

Likes
21
Share


@Siriuz
Follow
Honestly, we had to built a greenhouse
We figured it out, temperature outside after 10AM was getting real hot and balcony window got enough sunlight but seems like they want more, that's why we installed more CFL lights to increase light intensity and since balcony window wasn't working quite well we noticed at the very first week some of them where stretching a little and thank God we noticed early otherwise our plant would've grow leggy, phew!
Must say temperature, Humidity and light are things you really need to balance otherwise they really get messy
They are completely aware of their surroundings, it's amazing how they actually are, great plant but needs lot of care and attention if you wanna get good harvest of course!
Please fill in any comments, tips, advise, more than happy to hear you folks
Day 9
We decided to feed the ladies, they got 171ppm and 200ml of water
Day 10
Decided that the rooftop is a better place
In the morning time
Day 11
They looking good
Day 12
Wanted to give them more sun light, placed them close to the balcony window from 4pm til sun it's gone!
Then they go to CFL for the rest of the night until they have to go to sleep
Day 13
Decided to replace her pot for a bigger one, since she's growing so fast I don't want to mess with the roots, so it's better to do it now before it grows around....
Also fed them today with 1ml Flora Nova grow mix with 1 water Gallon so total PPM was 314, tomorrow they start the 3rd week so I wanted to give them what they call "a boost" on their early vegetative stage.
That was only 200ml each
And followed by a 200ml plain water with a little runoff at the end to make sure the nutrients gets all well mixed up and she can absorb it avoiding extra nutrients....
Let's see how she does this week tho!
Day 14
She seems to handle just fine the nutrients we gave her and she's growing fast and looking good

Likes
2
Share


@ediah
Follow
Hab die Ladys entlaubt. Sie wachsen richtig schön. Habe zur Zeit etwas weniger Zeit mich zu kümmern, aber sie machen es mir auch einfach. Freue mich auf die nächsten Wochen und bin gespannt, wann die ersten Blütezeichen sichtbar werden.

Likes
12
Share


@cookingwithninja
Follow
day 38 stopped giving PK, carbs. only humic, folvic fishsh!t in watering. lifted terps video sticky icky video
day 39 just humic and folvic into water.
day42 bridal party gained a lot of weight, started to lean over blackberry. I feel like I could chop today.. slight chance might meet remo :)

Likes
72
Share


@Roberts
Follow
Well it took 2 seeds to get a sprout. 1st seed was a dud, or is really slow to germinate. She just sprouted, and seed husk was still hanging on. She is looking good so far. 🤞🏻everything stays on track. Thank you Medic Grow, Xpert, and Seeds Mafia. 🤜🏻🤛🏻🌱🌱🌱
Thank you grow diaries community for the 👇likes👇, follows, comments, and subscriptions on my YouTube channel👇. ❄️🌱🍻
Happy Growing 🌱🌱🌱
https://youtube.com/channel/UCAhN7yRzWLpcaRHhMIQ7X4g
Likes
Comments
Share

@Hou_Stone
Follow
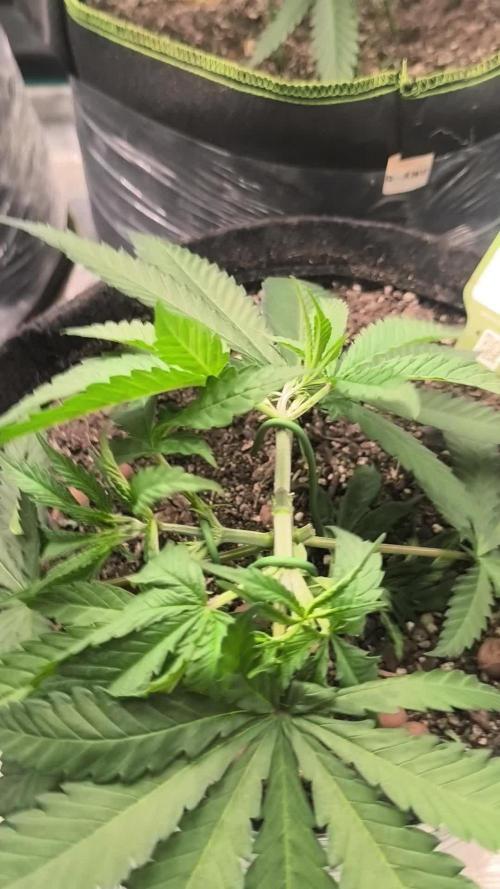
Week 4, after last week's pruning, the plant has recovered well. I'm using wires to do some LST and create space between the branches. Unfortunatly when doing that I broke one of the 4 last branches of the plant ? lets see how it turns

Likes
4
Share


Likes
9
Share
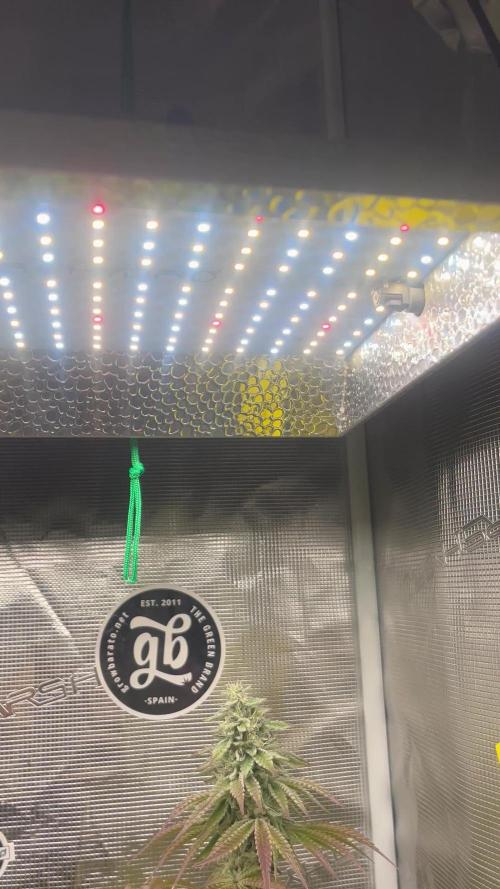

@eldruida_lamota
Follow
Que pasa familia, vamos con la séptima semana de floración de estas Pink Sunset feminizadas de silentseeds.
Vamos al lío ,se trasplantaron en macetas de 7 litros definitivamente.
El ph se controla en 6.0 , la temperatura la tenemos entre 24/20 grados y la humedad ronda el 50%.
El ciclo de floración puse 12h de luz, el foco está al 100% de potencia.
De momento van creciendo a buen ritmo y tienen un buen color.
La flor está engordando y van formándose, también empieza a producir tricomas.
Agradecer Agrobeta por el envío de un kit para la temporada, son unos jefes.
- os dejo por aquí un CÓDIGO: Eldruida
Descuento para la tienda de MARS HYDRO.
https://www.mars-hydro.com
Hasta aquí todo, Buenos humos 💨💨💨

Likes
18
Share


@berlinbeginner
Follow
Ladies doing fine.
Worm castings are magic. SD2 is getting greener. I topdressed all the plants with worm castings

Likes
69
Share

@nonick123
Follow
Día 9 (10/06) N/A
Día 10 (11/06) N/A
Día 11 (12/06) Llueve mucho. Humedad alta por aquí. Eso les favorece
Día 12 (13/06) Se empiezan a desarrollar las hojas verdaderas a una buena velocidad! Todo en marcha! 💨
Día 13 (14/06) Riego ligero 100 ml sólo H20 EC 0,5 en previsión del trasplante en el día 15 de la planta
Día 14 (15/06) Se nota que estamos en el día 14 desde germinación y la mayoría de las plántulas van viento en popa!
Día 15 (16/06) Hoy procedemos a trasplantar a las chicas a su maceta intermedia de 6,5 litros
Se prepara con 5,5 Litros (85%) de sustrato PRO-MIX HP BACILLUS+MYCORRHIZAE + 1 Litro de Insect Frass (15%) + 65 gramos de Earth Vibes Super Soil (10 g/L substrato)
Se llena la maceta de sustrato con las manos (limpias) y rompiendo los trozos más gruesos, para que el sustrato esté aireado y esponjoso, sin presionar
Se coloca una maceta vacía de 1L para que quede la forma perfecta de la maceta donde están las plántulas (ver fotos)
Se espolvorea la parte proporcional de la probeta de microorganismos sobre el agujero de trasplante
Se saca la plántula de su maceta actual (bonitas raíces 😍) y se coloca en la maceta final
Se riega muy lentamente hasta percolación profunda con H2O EC 0,5 pH 6,5
Se coloca mulch (acolchado) de paja para evitar traspiración excesiva y cuidar a los microorganismos del suelo
A ver como reacciona al trasplante!
💦Nutrients by Lurpe Solutions - www.lurpenaturalsolutions.com
🌱Substrate PRO-MIX HP BACILLUS + MYCORRHIZAE - www.pthorticulture.com/en/products/pro-mix-hp-biostimulant-plus-mycorrhizae


Likes
5
Share


@OntarioAutoGrower
Follow
03.03.23: Started in glass of water in a dark warm area for 17 hours when the seeds sank.
03.04.23: Then put them in a damp paper towel for 24/48 hrs in a dark warm area. Checking on them to keep them from drying up.
03.05.23: Seed taproots were 3/4 inches and were ready to go into the pots. I then poked a small hole into the soil with my finger and carefully put the seeds in and gently covered them with dirt. Then sprayed a little water onto them and then covered them with a dome to keep them humid. Now we wait until they pop out of the ground.
Processing
Likes
9
Share


@LittleBigTrees
Follow
The sun has been away again this week and the heavy humidity has caused some error on the cola of one of the random autoflower plants, I tried to cut out and dispose of the bad bit but it got too the stem so I've cut it off completely. More mould showed up on her so I've cut her down.
Hopefully the rest won't be affected!
Processing
Likes
15
Share


@blendmedmedman
Follow
still up and healthy been in 12/12 now for a week and waiting for take off to start on those flowers. been tucking fan leaves and exposing those lower areas. other wise waiting for things to start looking like flower sites.
Likes
24
Share


@Frank_cultiva
Follow
Siguen siendo alimentadas con los mismos nutrientes, la dosis ha cambiado de a cuerdo a la semana en que van... Las de scrog en floración 12/12 y las de maceteros de 30Lt aún en vegetación 18/6
Realmente sorprendido con la recuperación que está teniendo la última transplantada
