


Likes
Comments
Share

@FROZENGARDENER710
Follow
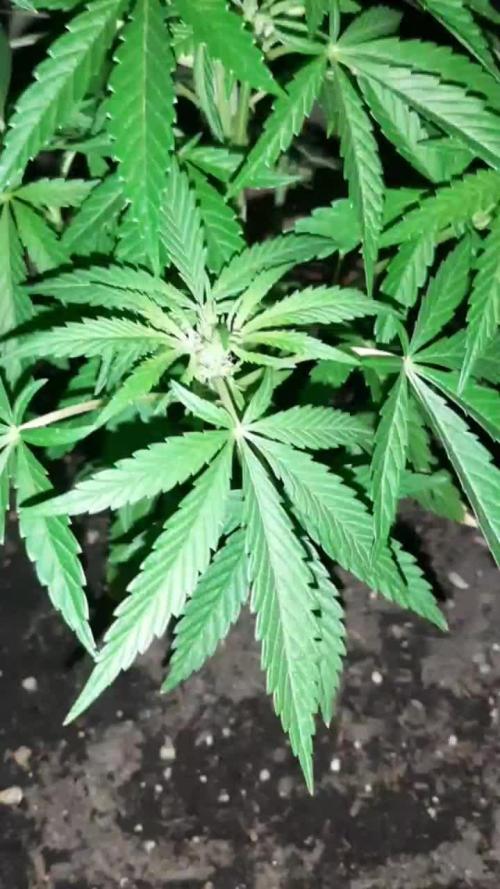
Everything was going well during the first week of flowering. I waited until I completed 7 days of flowering to record them. They were flipped on September 20th.
The first two days of flowering were difficult because the end of winter reached 35 degrees Celsius inside the tent. Some Bakers showed slight heat stress, the GMOs much less so, and Pure Glitter gave me the impression that she liked high temperatures.
I didn't add any additional nutrition other than the flora biostimulant, Tricoderma, and I did a light superficial foliar spray with Bacillus. I'm thinking of maybe adding 0.2g/L of MKP and pure water after four waterings, with an average pH of 6.8 for all solutions.
I decided to remove two plants from the tent and flower them outdoors. The goal is to explore their genetics and their development in the sun, even avoiding potential overgrowth. What led me to this decision is that at the beginning of this journey, I had a GMO #4 that only veered for three weeks and had a severe sulfur deficiency. It ended up stalling and I almost killed it. I decided to leave it in the sun with just water, and it simply responded very well. Without adding any type of nutrient, it corrected the deficiency and began flowering. The plant showed many trichomes early and shades of purple in the third week of flowering, which may indicate high anthocyanins. I'm very excited for the flowering of these outdoor and indoor plants. The smell of these girls is already infesting the entire house and even spreading outside.
The GMOs I thought were regular, I'm now thinking they might be feminized, as all the seeds I planted have sprouted and are all female. The flower's owner said it's a Mamikos genetic. It's hard to say, but I'm very happy with the smell and development of these plants!
I'm very happy with how everything is going, very excited to see the results. See you next week!


Likes
19
Share


@Scandinavia
Follow
Spiders has taken over the pot of plant C but i guess they will keep the insects away, so they welcome. Pictures from day 42. I do not think they will be ready in one month but we will see. How long do you think they have left?
Im actually going on holiday in July so its a bit of a dilemma for me whether to harvest before or after and hope for rain in the 2 weeks i will be gone. Any ideas would be helpful!
Likes
6
Share


@Walter_the_Ragamuffin
Follow
More Incredible Developments this week! I started adding General Hydroponics Bud on the first watering of the third week of flower - it has resulted in some surprisingly big and fast growth over the past week. You can see from going to the previous week and this one, the bud sites seem to just getting fatter and searching out for their neighbors above and below them with the white pistils - I know I keep saying this but as a lifetime cannabis user, this is the first time I have had the opportunity to watch my own garden closely through the entire plants development and life cycle, and so far this is VERY exciting and entertaining to see the developments each day. The topping and LST techniques I used (no experience, only watching videos and researching) have resulted in my plants taking on almost a bowl or basket shape, where the outside branches have reached far far above the middle canopy during their "final stretch" or first week or two of flowering. Now, the middle of all of my plants have numerous smaller bud sites that are developing - I am looking forward to how the lower canopy buds develop!
I am currently watering them every other day - 8 cups of water each. This past week I increased their water intake from 6 cups to 8 cups - So far I am seeing no sign of stress in any way shape or form - only VERY happy plants working on bulking up on their flowers. I plan on letting them do their thing and working on maintaining their environment so it stays consistent. Definitely a big increase in smell this week - the Cherry Gorilla x Sol Sonic seem to be moving along and bulking up a little more than the GMO. When picking leaves off the GMO, I can already start to smell and recognize hints of the tremendous gas garlic stank I have been looking forward to - Appreciate the Likes and Follows! Look forward to more photos and developments from my First Grow :)
Likes
4
Share


@Cannibalgardens
Follow
All I can say is wow for my first time growing one of their strains from start to finish it was an amazing experience .. The team at divine seeds have me the opportunity to try out some of their strains from the best cataloged seed collection they have . The fist thing I would say was the germination was fast from about 6 hours Into the soak in ph 6.5 water they were sprouting a root allready from the shell . One of the fastest to root I have ever seen in a auto flower was this #moonrockauto by divine seeds . From start to finish this strain has proven to be a fighter no matter what I threw at it as a young grower . I tried to honestly not use to much nutrients with this grow I wanted to see just what the plant could do and take with stresses . The first week was indoors and then I transplanted her outdoors I to garden soil with some promix as well .. This was when I added some mycorrhizae to the root zone and gave her a good watering .. I also used extensively every two or three weeks the miicrobial mass to help stimulate good bacteria in the soil .. week 4-7 she was just exploding with new growth both upwards and horizontally .. The plant had more internode gap distance then I would like at times but it was also lacking a full sunlight location so that doesn't surprise me . The buds were forming around the same time weeks 4 and up with the whole process just flying by . I wish that I had been able to put her into a bigger pot and more open space because she had the potential to be a monster of a plant . This plant would have been a heavy feeder and the amount of dense buds I could have gotten would have been so much more then I got now .. looking forward to what I get to run from their company again they do have some awsome sounding and looking strains . There opium and CBD crosses sound good as well . There will be an up graded page next week with the dried buds and maby a little smoke report ..so I include a small smoke report to this page .. After being hung dry and left to burp in a ziplock bag the buds were dark green with small orange Hairs .. The smell is great I love it but because of the high humidity and rain I lost my top bud to bud rot and was not going to risk smoking anything that could harm me so that was lost . The smaller buds were fine and gave me an extremely big head high . It reminds me of a sativa high with a lot of anxiety . But it was a clean white ash with great taste and smooth smoke just a early day time smoke , this was made into butter as I enjoy eating this more so ..Divine seeds has some amazing strains can't wait to harvest and smoke Some more soon !!


Likes
Comments
Share

@DogDoctorOfficial
Follow
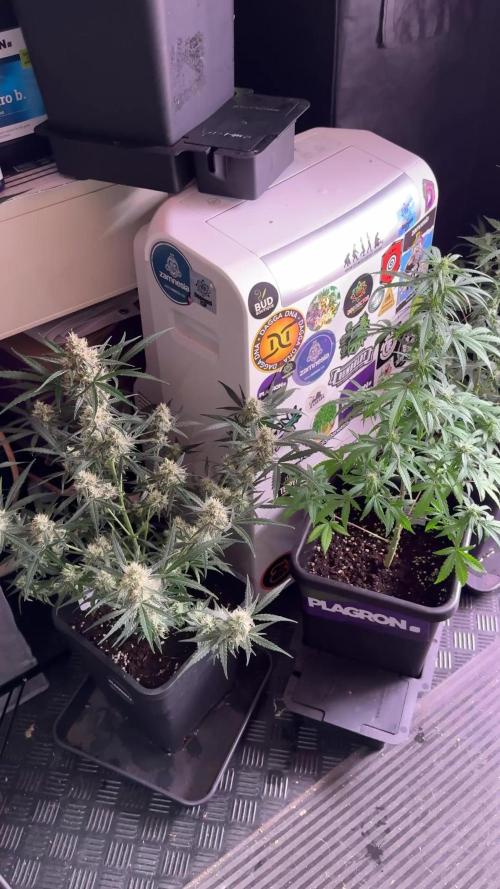
🌿 Frosted Guava Auto by Zamnesia | Pheno B | Week 8 (Flower Week 5) 🌿
Small Plant. Big Personality. And Now… A Little Less Green.
There are plants that follow the plan.
And then there are plants that write their own story.
Frosted Guava Pheno B has been doing the latter from the beginning.
She has never been the biggest plant in the room. She hasn't chased height, hasn't tried to dominate the canopy, and hasn't demanded much intervention.
Instead, she has quietly developed her own personality.
Compact.
Elegant.
Beautifully structured.
And increasingly covered in flowers.
Now, entering her fifth week of flowering, she has reached another important moment in her journey.
This week, she joined the group receiving a selective flowering defoliation.
Not because she was struggling.
Not because she was unhealthy.
And certainly not because every plant needs to be defoliated.
Quite the opposite.
She was looking fantastic.
But after looking carefully at her structure, her development, and the way light and airflow were moving through the plant, I felt that removing some unnecessary foliage was the right decision.
So we went in.
We cleaned her up.
And now we're going to see what she does with the extra space.
🌸 Week 5 Flower – Her Own Story
Frosted Guava Pheno B is currently around 108 cm tall.
That still makes her one of the more compact plants in the room.
But honestly?
I don't think she cares.
😂
She has found her own architecture and she's sticking with it.
The flowers continue developing beautifully, with increasingly visible frost and those characteristic white pistils reaching outward from the developing buds.
Her foliage has remained lush and healthy, with that beautiful deep green colour we've been following since the beginning.
The plant looks comfortable.
The flowers are developing.
And now we're starting to see more definition between the different parts of the plant.
This is exactly the kind of moment where stepping back and looking at the whole plant becomes important.
Because sometimes the question isn't:
"Can I remove this leaf?"
The better question is:
"Does this leaf still have a useful job to do here?"
And that's where this week's defoliation came from.
✂️ Defoliation – What We Actually Did
This wasn't a complete strip.
It wasn't a race to make the plant look naked.
And it wasn't about removing leaves simply because they were large.
The approach was selective.
I removed most of the fan leaves carrying their own petioles, particularly where they were contributing to unnecessary shading or creating congestion inside the plant.
I also cleaned the lower and interior portions of the plant where some flowering sites were positioned so far below the productive canopy that I didn't expect them to develop into meaningful flowers.
Those areas are what I would consider the true bottoms on a compact plant like Frosted Guava.
And that's an important distinction.
Because this plant is small.
Her lower sites really are lower.
Even with the Lumiflora under-canopy lighting helping bring additional photons into the lower canopy, the primary productive zone of the plant remains higher up.
So rather than allowing the plant to spend resources maintaining foliage and very low sites that are unlikely to contribute much, I decided to clean those areas selectively.
But I didn't remove everything.
Some lower flowering sites remain.
I want to see what they can actually do.
That's part of the experiment.
🌿 What Is Defoliation?
For anyone new to growing:
Defoliation is the intentional removal of selected leaves from a plant to alter the structure of the canopy.
The goal isn't simply to have fewer leaves.
The goal is to create a better balance between:
light penetration + airflow + canopy structure + productive flowering sites.
Leaves are extremely valuable.
They're the plant's solar panels.
So removing them should never be treated as something automatically beneficial.
Every leaf removed is a piece of photosynthetic machinery removed.
That's why I don't approach defoliation as:
"Flower started. Time to strip the plant."
Instead, I look at the plant in front of me.
Is the canopy becoming too dense?
Are leaves heavily shading developing flowers?
Are there congested areas where airflow is poor?
Are there leaves that are doing very little because they're buried underneath several layers of foliage?
Are there lower sites that realistically have very little opportunity to develop?
If the answer is yes, then selective defoliation can make sense.
If the answer is no...
Leave the plant alone.
🚫 What Defoliation Is NOT
This is probably even more important.
Defoliation is not:
❌ Removing every fan leaf
❌ Trying to expose every single flower to direct light
❌ A substitute for good plant structure
❌ A guaranteed way to increase yield
❌ Something every plant needs at the same time
❌ An excuse to strip a healthy plant simply because you can
The objective isn't to make the plant look clean for the sake of appearance.
The objective is to improve the functional canopy.
And there's a big difference.
A beautiful green leaf isn't a problem simply because it's a beautiful green leaf.
If it's healthy, receiving light, contributing to photosynthesis and helping the plant, I have no reason to remove it.
But when the canopy becomes crowded and certain leaves are contributing more obstruction than productivity, that's when selective removal becomes interesting.
✂️ How I Approach It
My approach is simple:
I observe first.
I don't start with a predetermined number of leaves that must disappear.
I start by looking at the structure.
Then I work from the outside toward the interior and from the top toward the lower portions, looking for unnecessary congestion.
Leaves that are heavily shading productive flowering sites can be candidates.
Leaves buried underneath several other leaves can be candidates.
Leaves occupying congested interior areas can be candidates.
And lower growth that is so far beneath the productive canopy that it has little realistic opportunity to develop can also be considered.
But I always keep the plant's overall health in mind.
The goal is balance, not maximum removal.
That's why Pheno B still has plenty of green.
She's not naked.
She's simply better organized.
💡 The Under-Canopy Question
This is particularly interesting with Frosted Guava Pheno B because we're running Lumiflora under-canopy lighting.
Someone might reasonably ask:
"If you have light underneath, why remove the lower growth?"
That's a very fair question.
And the answer is that under-canopy lighting doesn't magically make every lower flower equal to a top flower.
On a compact plant like this, the very lowest parts are still extremely low relative to the main productive canopy.
The under-canopy lighting is helping reinforce the lower and interior areas, but I still want to observe where the plant naturally allocates its energy.
That's why I deliberately left some lower flowering sites behind.
I don't want to assume.
I want to watch.
Will those remaining lower sites develop?
Will the extra light make a noticeable difference?
Will the upper flowers continue dominating?
That's exactly the kind of question this project allows us to explore.
And the harvest will eventually give us the answer.
☀️ More Light Where It Matters
The Future of Grow Black Series LED continues providing the primary light from above, with approximately 1,000 PPFD across the upper canopy.
Frosted Guava may be compact, but she certainly isn't short on photons.
She's been sitting underneath that light throughout flowering, converting those photons into leaves, flowers, structure and now increasingly visible resin.
And with the selective defoliation, we're changing how some of those photons move through her architecture.
We're not creating more photons.
We're simply trying to make better use of the ones already available.
That's the idea.
Don't waste energy chasing light.
Build a canopy where the available light can actually do its job.
❄️ And The Frost Is Getting Serious
The name Frosted Guava continues becoming more appropriate every week.
The flowers are developing beautifully, and the resin production is becoming increasingly visible.
Those white pistils are still everywhere, creating an incredible contrast against the deep green foliage.
And underneath all those hairs, the flowers are beginning to gain more structure and density.
This is the stage where I love looking at the same plant from week to week.
Because the change isn't always dramatic overnight.
But compare the plant to where she was a few weeks ago...
And suddenly you realize:
She's building.
She's filling out.
She's gaining flower volume.
She's becoming increasingly defined.
She's becoming Frosted Guava.
🌿 Small Plant. Big Character.
I've said this about her before, but this week makes it even more obvious.
Frosted Guava Pheno B doesn't need to be the tallest plant in the room.
She's already found something more interesting.
Character.
Her sister Pheno A has followed a different path.
And that's one of the beautiful things about running phenotypes together.
Same genetics.
Same room.
Same light.
Same nutrition.
Same philosophy.
Different personalities.
Pheno B has chosen to remain compact and elegant.
And now, as flowering progresses, she's showing us exactly what that compact structure can become.
💧 Nutrition & Hand Watering
We're continuing with hand watering throughout the room.
Current feeding remains centered around the Plagron flowering program:
Terra Bloom — 2.2 ml/L
Power Buds — 1 ml/L
Sugar Royal — 1 ml/L
Green Sensation — 1 ml/L
Lemon Kick — 0.03 ml/L
Current recorded parameters are around:
pH: 6.0
EC: approximately 2.0 mS/cm
Solution temperature: 21°C
Root-zone temperature: 21°C
Watering: approximately 1.2 L per 24 hours
Hand watering has also given me another opportunity to observe this plant closely.
Every time I water her, I get another chance to look at the flowers, inspect the leaves, check the structure and notice those tiny changes that are easy to miss when everything is automated.
It takes more work.
But it also brings you closer to the plants.
And sometimes that's where the best observations happen.
🌡️ Environment
The room continues running under stable conditions:
Day temperature: 29°C
Night temperature: 25°C
Relative humidity: approximately 72%
Solution temperature: 21°C
Root-zone temperature: 21°C
CO₂: approximately 639 ppm
With the canopy becoming increasingly dense, airflow and humidity management become even more important.
That's another reason selective defoliation can be useful at this stage.
Not because leaves are inherently bad.
But because a dense flowering canopy can create small pockets where air movement becomes less effective.
Opening selected areas gives the room a little more breathing space.
And that's particularly valuable as the flowers continue developing.
🔭 Looking Ahead
Now comes the interesting part.
We've changed the architecture.
We've removed some unnecessary foliage.
We've cleaned the lower sections.
We've opened some of the interior.
And now...
we wait and observe.
I want to see how quickly she responds.
I want to see how the flowers develop with the improved canopy structure.
I want to see what happens to those lower sites we deliberately left behind.
And most importantly, I want to see how Frosted Guava Pheno B continues writing her own story.
Because she's already made one thing very clear:
She doesn't need to follow anybody else's timetable.
❤️ Final Thoughts – Let Her Shine
Frosted Guava Pheno B has been one of those plants that quietly earns your attention.
She didn't arrive in the room demanding the spotlight.
She didn't become the tallest.
She didn't become the biggest.
She simply kept growing.
And week after week, she became more beautiful.
Now she's entered another chapter.
A little less foliage.
A little more breathing room.
A little more light moving through the canopy.
And plenty of flowers left behind to show us what she's capable of.
The important thing about this week's defoliation isn't how many leaves we removed.
It's why we removed them.
Because good cultivation isn't about following a recipe blindly.
It's about looking at the plant in front of you and making decisions based on what she's actually telling you.
And Frosted Guava Pheno B was telling me:
"I'm ready."
So we listened.
Now let's see what she does.
A huge thank you once again to Zamnesia for these beautiful genetics, Plagron for the nutrition, Future of Grow for the Black Series lighting, Lumiflora for helping illuminate the lower canopy, TrolMaster for environmental control and of course to everyone following this 8×8 Adventure on GrowDiaries.
Every week, every phenotype tells us something different.
And that's exactly why I love this project.
Until next week...
Let her shine. She has earned her spotlight. ✨🌿❄️
Growers love and happy growing! 🌱💚

Likes
35
Share


@Rap_a_cap
Follow
This is exactly the 🇲🇦 morroccan 🇲🇦 way of sifting resin from kief. Traditionally, apart the hand rubbing method, dry sifting through a mesh is the most used way to obtain resin, from 🇦🇫 Afghanistan 🇦🇫 or 🇳🇵Nepalese 🇳🇵 Mountains to 🇲🇦 Morocc 🇲🇦 Rif passing through Bekaa valley in 🇱🇧Lebanon 🇱🇧. The average size of meshes used vary from 90 to 180 microns and are mostly made by silk and for this reason uneven.
I think the most productive ways to sift are Dry Ice and rotating pollinator + CO2, I've tried a DIY pollinator built by a friend and it can reach up to 20/25% of resin extracted at 120 microns and 15% at 90 microns. But smell and taste don't reach that traditionally extracted but this is another story.
Morroccan way is good compromise between a stashbox or more evolute methods.
It requires less than 10 dollar of expenses.
You need:
a basin or pot without handles
a heavy-duty plastic bag that contains the basin
a pair of chopsticks
a good 120 microns net
an elastic band
tape
Kif or trim q.s.
Here is the link where I buy my meshes. Very high quality, customable size and material (steel or nylon) and length and very kind vendor on AliExpress
https://a.aliexpress.com/_uwfQzq
Drum for 3 minutes.
.....perhaps you will find that you have an innate talent as a drummer, throw the shit away and put your head right......
Likes
10
Share


@Gabriel_OD
Follow
On Day 01, I germinated 5 Fat Banana (Auto) in a Rockwool tube and put it in a propagation tray with a dome on it. With room temperature above 80'F and humidity above 90%.
From Day 01 to Day 03, the temperature is around 85'F with humidity above 95%. The room temperature kept rising so I gave cool air in the room and removed the dome on Day 04.
On Day 04, the temperature dropped sharply from 85'F to 70'F. Humidity also dropped from 95% to 50%. To avoid the being too cold, I increased the temperature of cool air.
I gave cool air from 6 A.M to 12 P.M.
The temperature has been steady around 75'F and humidity 55% on Day 05, Day 06, Day 07.
On day 07, 4 seeds produced 4 leaves each and showed promising. So, I transferred into air pot. I used the growing soil from Superbud - Super Living Soil. I used 1 soil bag per 2 air pots.
Throughout the whole germination process, I used no nutrients and only used water to soak the rockwools.
As for light, I gave
>1500 lumen on Day 04
>7000 lumen on Day 05
>10000 lumen on Day 06
>12000 lumen on Day 03
This is my very first time growing cannabis so let me know your thoughts about how I should improved my germination methods.

Likes
10
Share


@GoldenWeedGrower
Follow
📅 D29 - 12/09
📜 Entering in the 4th week of vegetation, almost ready for preflowering. Today I made a big defolation and tied up the main branches with LST. Focus strongly on res as it has a strange behavior (EC falling and pH static). If tomorrow will be again like this, I will completely change the water and I will set a lower EC. T and H are now under control.
✍️ 1,3 EC
♒ 5,5 pH
🌊 9,5 L (added 1 L)
📏 9 cm
📅 D30 - 13/09
📜 Today I made a big defolation, cutting all the branches not interesting. Sadly I cut also one of main branch by mistake. Too bad, I'm very upset. Added 1,5 L of water with EC = 1,43 and pH = 5,8.
✍️ 1,29 EC
♒ 5,8 pH
🌊 10 L (added 1 L)
📏 9 cm
📅 D31 - 14/09
📜 I made some LST in order to cover the space of the broken stem and leave more space to the other branches. Today I not feed her, waiting for tomorrowv to add 1,5 L. Lucy is almost ready for SCROG. I think she will start soon, for sure this week. The res EC and pH seems stable now. T and H are under strict control.
✍️ 1,29 EC
♒ 5,8 pH
🌊 10 L (added 1 L)
📏 9 cm
📅 D32 - 15/09
📜 I start ScrOG training today. Tommorow I will change the res as I don't like how pH and EC are moving. pH tester is broken again, I purchase a professional one for a lot of money. I hope this will do his job for long time.
✍️ 1,2 EC
♒ 6 pH
🌊 8,5 L (added 1 L)
📏 11 cm
📅 D33 - 16/09
📜 Big News: Lucy starts preflowering. A little bit earlier than my tought but I think I can manage, as she looks great right now. I also changed the res, pushing the EC until 1,45 and turned on the flowering lights.The ScroG Net is working fine, I guess. Update: T is really too high (now near 36 °C) as I turn on the bloom lights. I'm trying to fix the problem in a creative way: I put some dry ice just in front of area injector and T lowered a little. H is in between 70% - 85%.
✍️ 1,4 EC
♒ 6 pH
🌊 10 L (new res)
📏 15 cm
📅 D34 - 17/09
📜 Lucy in ple flowering stage and the buds are starting grow very fast. The ScrOG net works good until now. I've some problem with the Temp, cause it's always around 35 °C that is too much.. I need to keep the H in between 75% - 85% to balance such high Temp but it's quite difficult. The reason of such high T is because I turned on the bloom lights. Also, today I had a strange beahavior of pH that is decreasing. Now I fix it on 5,5 but I've to be prepared to change res again. Made also some defolation.
✍️ 1 EC
♒ 5,6 pH
🌊 9 L
📏 15 cm
📅 D35 - 18/09
📜 Last day of fouth week and last of vegetation. Today pH gone again down 5,5. I added 1 L. of water with normal nuts, pH+ and also GHE Pro Bloom, raising both pH and EC. I will change the res on monday, as soon as I will have affordable measuring tools. SCroG seems working very well and Lucy looks healty.
✍️ 1 EC
♒ 5,8 pH
🌊 9,5 L
📏 15 cm
Likes
4
Share

@fadedgreentaurus
Follow
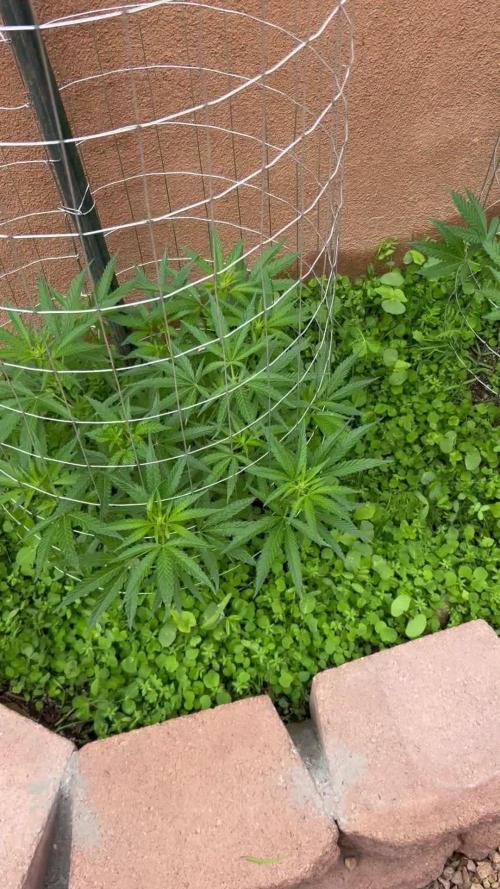
Strong week plants are bulking and showing signs of reveg, tops are all small popcorns these ladies should get huge and throw off a ton of tops.
Likes
13
Share


@smokeycropping
Follow
segunda semana de cultivo las luces son muy muy brillantes
la primera semana usando diodos samsung 120w dimmer a 50%
segunda semana aumentamos a 75% dimmer del panel
se rego 1 vez ala semana humedad del suelo duraba y se retenía muy bien,
300cc agua reposada midiendo
plantas sanas todo marcha ok
Likes
5
Share


@NoProbation4Weed
Follow
last 2 weeks no fertilizer. again a very good plant to cultivate.

Likes
3
Share


@DrBud420
Follow
17.05.
I don't have anything special to say, of course the weather is terrible... it's 6-7 at night, 15-16 during the day, so they're inside... the temperature inside is 20-21 during the day, at night from 15 to 17 when it's this cold...
the plants were exactly 3 weeks old yesterday, today they entered the fourth week and most likely they will wait inside for the fifth week as well because the weather is terrible and there is no point in transplanting yet.
Stay High!

Likes
3
Share


@mquintero7
Follow
Buds getting big and fat, smell is awesome. Everything going according to plan. A little defoliation this week of old leaves. Low fertilization, and some worm humus added on top.
Solid guano was also added and mixed on the top of the soil.

Likes
23
Share


@StantonGrowsUk
Follow
Switched it up to 600w on the digital ballast. Plants really love the extra heat. 2 plants hermied unfortunately so they were "Outta There"
Which left me with 4 healthy stretch ladies. Still no loud smell yet but it's got something there.
We got some likkle buds too 😍
Girls are doing well they took well to the foliar spray I was applying twice a week. They are loving the extra space to stretch it seems.
Feeding with water this week to regulate ppm within substrate.
Proud parent 👏
See you guys next week
Be good
Stanton..

Likes
21
Share


@420DeepGrow
Follow
Gracias al equipo de Kannabia Marshydro XpertNutrients y Trolmaster sin ellos esto no sería posible.
💐🍁 Amnesi K - Lemon:
La Amnesi-K Lemon es una semilla formada a partir de un trío de reyes, la Amnesia, la Lemon Skunk y la Jack Herer. Este matrimonio de tres dio lugar a una gran sativa que, con tonos dulces, terrosos y muy cítricos
🌻🚀 Consigue aqui tus semillas:
https://www.kannabia.com/es/semillas-marihuana-feminizadas/amnesi-k-lemon
💡TS-3000 + TS-1000: se usaran dos de las lámparas de la serie TS de Marshydro, para cubrir todas las necesidades de las plantas durante el ciclo de cultivo, uso las dos lámparas en floracion para llegar a toda la carpa de 1.50 x 1.50 x 1.80.
https://marshydro.eu/products/mars-hydro-ts-3000-led-grow-light/
🏠 : Marshydro 1.50 x 1.50 x 1.80, carpa 100% estanca con ventanas laterales para llegar a todos los lugares durante el grow
https://marshydro.eu/products/diy-150x150x200cm-grow-tent-kit
🌬️💨 Marshydro 6inch + filtro carbon para evitar olores indeseables.
https://marshydro.eu/products/ifresh-smart-6inch-filter-kits/
💻 Trolmaster Tent-X TCS-1 como controlador de luz, optimiza tu cultivo con la última tecnología del mercado, desde donde puedes controlar todos los parametros.
https://www.trolmaster.com/Products/Details/TCS-1
🍣🍦🌴 Xpert Nutrients es una empresa especializada en la producción y comercialización de fertilizantes líquidos y tierras, que garantizan excelentes cosechas y un crecimiento activo para sus plantas durante todas las fases de cultivo.
Consigue aqui tus Nutrientes:
https://xpertnutrients.com/es/shop/
📆 Semana 1:
Gran comienzo primaveral después de una germinación excelente. La etapa de plantula se desarrolla con normalidad.
Esta semana aplico tierra de diatomeas espolvoreada en el sustrato para proteger las plantas y las rocio con una solución de cola de caballo para prevenir futuros hongos.
Potencia de la lámpara: 40%

Likes
22
Share


@MadeInGermany
Follow
Flowering day 18
since time change
to 12 / 12 h
Hey guys :-)
The ladies have recovered well from the cold thanks to the heating mat and have developed beautifully 👍.
During the check today I saw that despite spraying neem oil 3 times, there are still a few trips :-( .
Now I've ordered nematodes again specifically against trips for leaf and substrate.
I will use that immediately 👍.
Watering was done twice this week, each time with 1.3 l (nutrients see table above)
Next week I will remove the lowermost shoots so that the energy goes into the upper buds.
Fresh osmosis water was mixed with tap water and put into the 100 liter tank so that the water can stand and I'll have enough next week :-)
Otherwise everything was cleaned.
Have fun and stay healthy 💚🙏🏻
👇🏼👇🏼👇🏼👇🏼👇🏼👇🏼👇🏼👇🏼👇🏼👇🏼👇🏼👇🏼
A thank you for this wonderful strain goes out to
Herzog
https://instagram.com/herzog030?utm_medium=copy_link
and the Exotic Seeds team
You can buy this Nutrients at :
https://greenbuzzliquids.com/en/shop/
With the discount code: Made_in_Germany you get a discount of 15% on all products from an order value of 100 euros.
You can buy this Strain at :
https://www.exoticseed.eu/
Water: Osmosis water mixed with normal water (24 hours stale that the chlorine evaporates) to 0.2 EC. Add Cal / Mag to 0.4 Ec Ph with Organic Ph - to 5.8 - 6.4
👆🏼👆🏼👆🏼👆🏼👆🏼👆🏼👆🏼👆🏼👆🏼👆🏼👆🏼👆🏼

Likes
237
Share


@1Right_Angle
Follow
April 5th
- First day of the 2nd week above ground. Plants were watered early yesterday, and some dilute nutes were included. Rapid start & MediOne.
- “no Foliar Mist this morning due to the breakfast meal”
- 2nd and 3rd Nodes are being built as we speak
Apr 6
- a.m. foliar mist for the tent
- waiting a day to feed as the soil feels damp. Let it dry further
Apr 7th
- attempting to Re-Pot the Congo #3 x Bangi Haze this morning as the soil seems to be a solid plug. Air Holes around the perimeter over-nite, was a great suggestion, Thanx Growmie; but new Soil is where this is going. (ps there is another congo 3 seed in water just in case): done, video uploaded of the transfer
- a little leaf discolouration led to a bit of Cal/Mag being added to a small drink for the plants. 60-80ml per plant. Overall plant moisture is dropping.
April 10
- each plant looks much stronger and the crowns are solid green. Over-watering incident is drying out nicely. 100mls per plant was added this morning. CalMag & RapidStart are the only ingredients.
- fresh Congo #3 x Bangi Haze seed germinated and placed in Soil this morning ( insurance for the one that is struggling )
- Tues pm or Wed am, I am going to run a volume of 5.9/6.0 pH water through the pots, to get rid of this 7+ pH.
- foliar mist applied at lites-out. that is also on hold now till soil-flush.
That's the plan anyway cheers


Likes
58
Share


@2x2growing
Follow
Harvested my third grow and second strain from Canuk seeds. Both plants from them have been absolute bangers! I highly recommend growing their seeds.
I ended up with 176.2 g about 6.2 oz of trimmed and dried bud with one plant. It wasn’t as high as the last plant but mainly because I didn’t let her get as big and I pruned up all of the 8 branches she had but we still got kinda close🙂
Overall, I’m very happy with this run. I learned a ton once again and I love every bit of growing these beautiful plants!
Definitely gonna enjoying smoking this one👌🤠🤘🥁
