
Likes
Comments
Share

@youdan
Follow
Ho praticato il lollipopping per cercare di traferire le energia solo in alcune parti e sembra andare benissimo. la prossima settimana pubblichero delle foto pazzesche sicuramente.

Likes
92
Share


@gottagrowsometime
Follow
D113.She was fed 300ml of water 30mins before harvest to prolong drying period. So, after her 15hrs rest, I took half of her, probably around 60% 410.5g wet after I took all the fan leafs, most sugar leafs. Left on the stuff with the most trichs, looks a little leafy but lots of that growth half way down and going into the bud is covered on long trichs. As I'll be keeping that trim, so better to let it dry on the plant. Had some trouble getting it into the boxes. I punched loads of holes and was going to put the box on its side so it could hang dry. But it was just wayyy too much hassle. I'll rotate the buds every 12hrs. Rooms RH is 40% room temp 21.5c. Tents RH has dropped down 2 44% 45% when I walk into the room, sensor is so sensitive, gives perfect RH/TEMP every time. Only a 5% difference in the room compared to the tent. Was 10-15 in it's highest before I got this great dehuimifier. As for the bud, was really really sticky. I literally have dirt/ash stuck in the groves/fingerprints. I've washed my hands 4 times. Now I'm left to rub my fingers together to roll out the stickiness. Crazy high resin filled bud. Man I'm so happy I decided to give her a dark rest period before chopping half. Have open up the whole lower half. I took some bud that you could still see prob would have gotten bigger. But as the plant has stopped feeding, I had to take what I could and leave enough young bud to kick her back into feeding. Fingers crossed. Theres at least 3-400g wet left on her. 410 so far. I'd say 50-80g of that is stem.
Let's see what happens lowered her ppm to 1100ppm. 6.25 PH. Tried keeping in the same as the flush water which is 6.3.
Update. Decided to hang dry 60% of the bud. Just strung a few line across the box and hung what I could. Sticky isn't the word for what she's putting out at the moment. Full of sugar balls. Didn't want the bud going all felt. After final trim I'll put up bud shots, smoke review. Trichs were 90% cloudy last night before lights went out. Everything turned cloudy almost but the 10-15% that was taken to help produce more explosive growth. I want at least another 3-400g wet. Bit hard to see it there, but the bud is there for there to be that much again if she takes off. If she is stalled and won't eat she finish and it'll be 100g wet of larf/bud full of stigma that'll just turn amber and be weak bud. Fingers crossed she's bloom again. Throw her back on big bud coco. Cut her PPM by 500 and will do a run off test 2moro to see if that number is gone down from the 1100 feed to 5-600 it should be. If it's above 1100 it means no nute uptake and it's also gathering the nute/flawless finish that was left behindz I tried flushing as much as I could but the PPM was still 250 after 25mins of constant flushing.
After learning more about autos over the months for the last 3 weeks I've been pushing up the light time. She's actually 20-4 now. I started her on a 18-6, down to a 15.30-8.30 pushed her back to 18-6 now after half harvest I'm hoping she's push back into feeding. I'll know on her next hard flush.
So, good new good news. Got a bit of run-off back from the 1100ppm feed. Was 490ppm. Starting to feed again. Yup Yup. Back on big bud coco for 2 weeks. Few days off that and a wk of overdrive, maybe 10 days, depends how they are getting on and how she's feeding. Am going to bring PPM back up by 100 tomorrow and get back up to 1400ppm. But this stage, there's no nute burn so I'm going to give water feeds on every 2nd day, as opposed to feeding everyday. I'm just going to fill her up on nutes, just enough so she doesn't give much back and then the next day that same amount in water. Should keep her heating regular and not be shocked by a hard flush every week. Trying something new. Let's see if we get better results. Happy so far, if I can get 300 more wet, as she is 48cm tall. Lots of bud sites, small larfy but the potential is there for them to be dense like the top side. Let's see. Going to focus heavy on PK. Gonna pull back on the enzymes&tarantula also. No need as they have done all there gonna do in an ineart substrate the plant got it's benefit of them. It kept and very big uneven plant in a state of growth, yes, she stalled, but that was explained why, the short of it is, (as the plant draws food from the top of the node, it that top is done and is only wanting water she's onot going to draw up water. And leave nutes behind. It's why the top slowed down, stopped feeding 2weeks ago and stalled the lower ends)
8/4/22 Pushed up her PPM by 200 last night by way of increasing B-52, mainly PK. Gave her 1.5l of water 12hrs later, and I got about 300ml of run-off that cane in at 480 from 1300ppm. Really well, delighted she has pushed back into feeding as she has been just drinking water. Even the flawless finish she wouldn't take any of that. She was just drinking water. So, thinking of it now and the 80-100g fry I'm gonna get back, more around the 80mark after I remove the bud from the nodes/stems, (Once it's dry, not before) I should be left in the 80range. I decided to fast track some bud, as at the moment I'm smoking dust from my box, so 6.5 stem that weighted earlier was thrown into the eletric dryer. When she hits into 4.5-5g she'll be ready to smoke. Shes frosty as f..k, already lost around 2/3s of it's wet weight, which is too fast, it dawned on me, I've the weed in the room with the dehuimifier, (fuck), not good. Weed should dry naturally, no wind/air flow from fans should be used. Yes, there needs to be air flow, but it should be o'natural. Air dried weed loses terps, resin, thc and drying to quick will give your bud a planty/earthy smell that's not meant to be coming through, yes, a cure will bring back her taste but just let her dry out natural. Trust me, I know what I'm talking about. I've compared quick dried bud to natural dried bud and the difference is like night&day. Also, air dried bud will go flat and if you are using a drying net/rack make sure to rotate your buds every 12hrs or so, this will stop them from falling in on each other. Esp if you aren't dealing with dense bud. With this though, that's not the case. The bud density is a lot better than the organic that went through a 70%RH for most of her flowering period. This bud is like 3 times stronger. Sativa buzz lasts about 15mins and then a good luck in the face from indica. But is covered in dense hard nugs, the bud for the most part is like this. The rest for density I'd give it about a 7.5/10. Yield 9/10 Quality 9/10 THC level reached 80-90% of the 22% given on paper. She's defo into or very near 20% THC. I'm even thinking of sending some to get it tested for kicks. But as not a 1grain of my bud will be sold, EVER. It'll only be for my personal use, but as she's already put out 410 wet and maybe another 200+ I'm looking at maybe 150g dry. And yes, I will be posting proof of dry weight.
9/4/22 92.5 G DRY of dehuimified bud. Yup, I used a dehuimifier. 1stly it was partly by mistake. Yday, before going out for 12hrs after chopping my bud I closed my door, it was only last night when I was emptying the dehuimifier it was so full of water, I didn't make sense, then I looked up and seen my bud, quickly felt it, weighted it and was topping out at 215. So, I decided to keep going, closed the door and it's been running since yday until dismorning and then 12 hours I let it rest. 100% pure sticky, I actually couldn't believe it. It was like it was 100% long dried. That was the plan. But the difference alone in the 4.5g of bud that was dried in the electric dryer, was a bit sticky, but this is GREAT. It's like it was 100% long dried. I know I don't have a lot of drying experience but I love this method. I'm going to dry the rest of her hang drying in the tent with TDA. And then I'll truly know, but alone the rest of the zkittlez plant has now optimal RH it'll be hard to tell as the bud will be even stronger than what I've already gotten. Which is very very close to 20% THC. Has to be 18%, has to be. It's so strong. 25%Sativa75%Indica.
Nice uplifting feeling then a strong head stone comes on. The terps are there and all, but you can get a hint of earthyness, idk if this is normal with zkittlez? But it stinks of a weird, well that smell that only zkittlez has, it's hard to explain if u haven't grown it. I've decided it's not to harsh so gonna cure the guts of it, well it'll cure as I'm smoking it, probably last about a month, if that. I'll go into more detail about the smell effects after 2wks cure should be half left by then. 2.5gs a day keeps boredom away. So first big harvest with damm good bud, I know I'm biast, but it is tops, trust me, I'd be pissed if it wasn't. Chuffed.com. hopefully another 50g dry to come. 92.5 isn't bad for a starter, oh and I took .5 or some shit last wk right, so 93 total. Yup Yup giddy up. DELIGHTED.
Can truly say, these grows haven't been without their issues, but now having the gear I do, top dehuimifier, new nute sponsor, moving into DWC fun grows ahead, with what I've learnt, the signs of the plants when to give what, extra/less when to introduce bloom and not go by a fucking chart that says give bloom after 4 wks on a plant that doesn't bloom until wk 7. After I dry the rest of this plant depending on how THE quality is ill be dehuimfying it. And top tip, be sure to fully trim as the amount of dried sugar leafs that have crowed into the bud is a bit much, smokeable and all but ill be pulling out or not depending on how stoned I get. Lesson learnt do a full trim, I was planning to do the whole box but when I seen how much water was taken out it was already too late. And i spent a good 2 hours just taking the bud off all the stems and removed 95% of unsmokeable trim. Also stuff like that with really hard to control RH, even still on this run with all the growing the plant has left and with having a top dehuimifier I know I can even get a better end product. Really excited to see what I can do. Fun times ahead guys!! Watch this space!!!
9/4/22 Plant update. She's doing well, responding well to the extra light, no droopy leafs, no light stress, just like I thought there'd be none. Hasn't stalled, if anything it helped push her back into feeding and is keeping RH below 45 for the most part. Have called it quits on the dehuimifier, has totally cleared my house of dampness whole house has been at 45-48 since she was last turned on 10hrs ago. If RH gets into the 50's I'll put it back on but for now, they are fine, more than, they've lived most there lives in 60+ so. I'm sure they'll finish fine on 50+ 55 max. Upped the PPM. She has slowed down on her amount of feed 1.2l every 24hra she can hold. She got 1.2 L of what you see above, 2moro she'll get 1.2 of 1500 again I'll Just be getting there differently. More PK. So .1ml of coco B bloom and .5 extra of .5 B-52 I'll lower coco bloom part A .5 and something else like bud factor should even it out. And keep her in the 1500 range. Then in 2 days 1.25l of water hopefully get few 100ml and she goes she's feeding. Good bye till then. Gonna enjoy my bud for a few days.
D114.5 Took a heavy feed last night on the chin, no signs of nute burn/tip burn. Buds are responding well, only a couple days, so it's hard to tell if she's gone back into making bud, but she's feeding. Can't run the run-off test till later. Seem to be taking the light increase well also. 20-4 we are going to finish them on. Yeah yeah I know, shouldn't be fucking with the light, well it hasn't done any harm I can see as of yet, so.....Yup. lots&lots of numb mistakes, massive learning from these grows. So, drying my bud fast was a mistake, thanks for the tip bro! Seen below in comments. So, will 100% be hang drying the rest of the girls. Gonna chop, full trim and then hang dry it upside down in a 50RH room. But hey, look, nothing ventured, nothing gained, or some shit like that!! Lots of lessons learnt. Your 1st grow is sadly going to be brutal for your girls, r if you wanna play it safe and pull 30-40g go for it, I want big monster buds, quality, fuck quantity. Give me 1 g of Quality of 10g of quantity bud anyday. This is quality/quantity. I done pure quality, organic bud, was beautiful and all, lovely tasty tasty smoke, very smooth were as this is a little more harsh, just a tad. You can't get 100% rid when you are using so many non organic nutes. Heavy metals galore.
BAD NEWS UPDATE: Well, it looks like as though I left it too long before taking the colas that has stopped feeding. After harvest I checked her last night and 70% of what was stigma has turned amber. So, she's gonna finish off as she is larfy and airy. Will still be good bud, just not 50g more like 20-30max.
Am going to focus on bud factor x/bud candy for the next 2 weeks. Gonna pull back on overall NPK and push sugars. And maybe I'll finish her off on the 2nd wk with overdrive. Will cut big bud coco after this week, as to make sure I don't get rust spots again by mixing overdrive/big bud coco.
Changed the PPM down from 1500 to 900 and will give 1.3 weeks on overdrive and then flawless finish for a week ppm will be around 250ppm.
D119 Tool 3 top parts of the bud that was 100% done. Will be harsh but the bud underneath is so far behind and is in stall mode as these tops were only drawing up water. So to help the lower growth I took these 17.9 G wet off to get more bud. Total 428g wet 98.2 G Dry took 4 days to dry the 17.9 I got 4.2 or something back. Still a little wet but smokes nice in the bong and joints and very strong much stronger than what I quick dried, and the taste is much much better. Still a little planty but a cure will bring out that zkittlez taste/smell, if I wasn't smoking it.
Okay, so the much stronger is right. But now the stone is COMPLETELY different.
She's defo a 50/50 indica Sativa now, idk if this is down to the way it was dried or what. So here's the stone. Extremely excited, but nit a excited get up and do stuff, hell no, Im way to stoned to be doing anything, im having trouble writing this even. Yes, I'm uplifted but also in the mood to do NOTHING. Sit back and get baked. It's defo in the middle. Still not a day time smoke though, she's just too poeerful. Really really nice stuff here. Delighted with this new type of zkittlez as I was getting a little tired and tbh fairly use to the high. Defo be growing multiple strains next time for choice.
Peace and thanks for reading! Be sure to drop a like so I can check out your grows when im back. Keep the growings a going🌱🌿🌷
gottagrowsometime


Likes
5
Share


@Smokeitup091191
Follow
This week was great once again everything is running smoothly and the plants are reacting well.
Ztrawberries= all 4 plants have gone into flowering now with plants ranging from 130cm to 100cm stretch has slowed down now but the stretch of these girls is madness.
Tropicana cookies = 1 girl is in flower the other girl not quite there, but not far behind and stretching nicely. There structure is very similar and size also.
Cherry cola = 1 plant has come out side ways so is affecting the growth but still there is very steady growth. Both not quite in flowering but are trying and both girls are starting to stretch now so looking foward to see how they react in the coming week.
All in all well happy 👍🏼
https://myfastbuds.com/?a_aid=Smkitup91
Likes
17
Share

@Bunterbiber
Follow
We’ve officially rolled into Week 7, and it has been a glorious one! We were blessed with non-stop sunshine and temperatures hitting a balmy 30°C.
I didn't touch the LST at all this week. The training did its job perfectly—the plant has a great, wide structure, the tops are leveled out, and the heavy stretch phase seems to be wrapping up. To keep up with her heavy flowering needs, her diet now consists of tap water mixed with CalMag, Bio Bloom, Top-Max, and a little touch of Fish-Mix.
Appearance & Color:
This girl has put on quite a growth spurt over the last few weeks! She actually shot up enough to slightly overtake the Black Orchid in height. But the absolute highlight right now is the color development. The flower clusters are turning a fantastic, dark purple! Even though the pistils are still bright white, the base underneath them is showing those beautiful violet tones. It looks absolutely stunning!
Don't forget to check out the Black Orchid Auto diary on my profile to see her unique dark foliage!

Likes
28
Share


@Adkguerrilla44
Follow
I cannot talk up wicked genetics enough man,they are strong and stable plants and honestly since the temps have been continuing to drop these suckers have been LOVING IT!!! I am going to start some boston kreme pie S1s very shortly for my indoor grow. I have so many amazing strains from wicked I can't wait for this winter it's going to be insanity 🤯😵😵💫😎

Likes
45
Share


@Organic_G
Follow
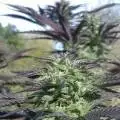
Ernte ist ziemlich nah, werde die Ernte in 3 aufteilen, damit der mittlere und untere Part nachreifen kann…
Da ich die RH nicht wirklich runter bekomme und kein Schimmel riskieren will werde ich mit hoher wahrscheinlich das obere Drittel morgen ernten und direkt zum Trocknen aufhängen…
Time will tell


Likes
8
Share


@jaydee702
Follow
she finally showing pistels after three weeks(21) days in 12/12 tent.she is Thriving in its tiny pot dwc hydro spam.she is about 16 inches tall was 4 inches 21 days ago .She has a min of 5 weeks to go still hope she slows her stretch some to stay in the baby bears bed for light distance.

Likes
2
Share


@SecretC8keSociety
Follow
This will be the 7th week in flower . Fitting to go into 8th week in flower. I learned that I was heavy feeding and the mite I figured a way to get rid of em completely. I was using Plant Therapy which is oil and has peppermint smell to it. I just use that for spray bottle and back using hydro peroxide to kill the insects far as mite or clean up anything that may harm the roots inside the soils. I want to see these girl strive to the end. Definitely running London Pound Cake again after the Birthday Runtz . MSLN will try their LPC next up in 2024.

Likes
21
Share


@AutoCrazy
Follow
Week 2
There has been an explosion of growth over the last week. I am amazed by how explosive it was. There are some nice bud sites forming as well. I did get a little bit of yellowing at the tops of a few fan leaves so I don’t think I will go quite as high feeding wise. I’ll go a 100ppm or so lower than what the feeding schedule recommends.
I had a bit of an accident though. I was doing a little LST and I snapped a top clean of 🤦♂️ So now I am down to 15 tops, doh!
Cooler internals for the week were:
6.0 pH
420 ppm on the 500 scale
0.9 EC
66F water temp.
I can’t wait to see what week three brings!
Onward 😎🍻🌱
Likes
3
Share


@BucketHathead
Follow
This plant was super resilient and my first harvest. I stunted it in every way possible. Got thrips and took back every fan leave stopping photosynthesis but pushed thru to the end and got some buds to smoke.
Ultimately I learned a hard lesson and molded my buds bc I didn’t dry them long enuff. Lesson learned.
I actually had a couple clones, one took off and revegged. It’s growing now keep an eye on the other diary.

Likes
90
Share


@DreamIT
Follow
I've already said a lot about this particular plant, but I'm sure I'll have more to say in the future. Try it !!! : 1:😉🦄

Likes
2
Share

@Trees_of_weed
Follow
It just goes to show great results can come from Autoflowering plants !
This is a incredible strain plenty of taste and smell. With a lovely relaxed stone great for anytime of the day ! But smoke to much and you will feel sleepy ! Great strain helps me sleep and feel relaxed !
Big smile on my face when I smell the buds crushed up in the Grinder 🔥🔥💨💨 zambeza seeds have got some fire at amazing prices !!🔥🔥💚

Likes
3
Share


@JeyGanesha
Follow
Prima settimana di fiori 12/12...
Stiamo per terminare la prima settimana di fioritura...Si dovrebbero vedere già i prefiori........,.. vediamo tra un paio di giorni 💪🔱🙏

Likes
13
Share


@knicko
Follow
Jetzt sieht man deutlich das die Ladys sich auf die Blüten Produktion konzentrieren nächste Woche werden sie nochmal etwas entlaubt.
Dazu haben die einen ordentlichen Stretch hingelegt bin beeindruckt bis jetzt sind zum gluck auch keine Probleme aufgetreten bin sehr zufrieden mit der Sorte bis jetzt.
Likes
83
Share


@Hydro_Hiebs
Follow
Hello everyone! 🤗 We have more autos from Ganja farmer seeds started today and I'm really excited for this one specifically I'm a huge fan of NYC diesel and now ganja farmer seeds has created an auto flower version⛽. I sowed them directly into the soil. The hydroponic ebb and flow system I am using this round is new and is called AirCube from growace. If your interested in looking for more info on it here's a link to there website 👇
https://growace.com/?rfsn=7577242.b784c7&utm_
source=refersion&utm_
medium=affiliate&utm_
campaign=7577242.b784c7
This will cut out my automatic watering and help bring more oxygen to the roots while still maintaining a fully organic grow.

Likes
14
Share


@Silence
Follow
Ich denke, das wird die letzte Woche sein unter der Lampe
Tag 60 es wird Zeit für die Trockenzeit und 2 Tage Dunkelheit und dann wird geerntet.
Likes
8
Share


@Johnny_0G
Follow
I flipped the girls over to flower last Wednesday and gave them a good defoliation and trained a few more of the branches. My last autoflower carmalicious is closing in on the finish and she's getting frosty and by far the most dense buds I've felt so far. I'm using 2tbl of 444 and 2 tbl of 284 with a tbl of basalt with my water as feed. I'll feed them everytime once we start to have fuzz balls but I think I'll be feeding every other time for right now.
Likes
11
Share

@Smokeitup091191
Follow
This week has gone well again end of the upcoming week I’m gunna give them one last strip down then just let her do her thing. She’s a big girl and the smell is amazing grapefruit peels with a very sour background can’t wait to try this girl as grapefruit is one of my favourites and this girl has it all 😍


Processing
Likes
10
Share


@MadeInGermany
Follow
Hey everyone 😃.
First of all, many thanks to Zamnesia for the support 👏🏼👍.
I'll start germinating next week 😋.
Until then, I wish you all the best 😊 stay healthy 🙏🏻 and let it grow 🍀

Likes
2
Share


@High_Grade_Dadli
Follow
So far nothing to complain about buds sites are putting on some size....clone piece is holding up pretty good....hoping she get some roots this upcoming week...never really clone before