
Likes
Comments
Share

@MandaleApical
Follow
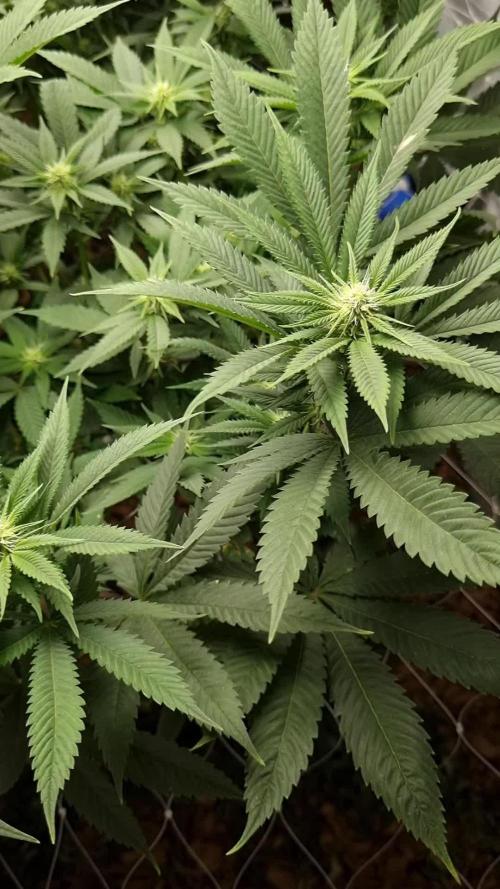
Bueno me tomé mi tiempo para subir esto van dos semanas de flora las plantas se pueden observar estiraron bastante. Bueno solo queda esperar. Hice una pequeña exfoliación esta semana para darle entrada a la luz en la primer semana de flora regué con bioinsumos de @cogolit busquenlos. La segunda con agua.
La próxima semana nos vamos a la expo cannabis y vamos a adquirir nuevas variedades de este banco y vamos a adquirir Barney fans también. Vamos a ir por variedades frutales y vamos a ir por variedades de pastel y crema.

Likes
12
Share


@GanjaFarmerGrow
Follow
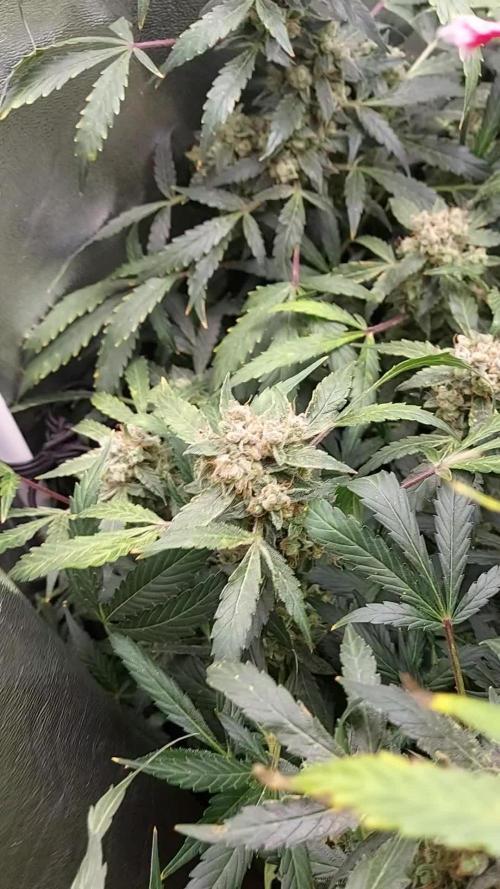
She is going very well..
She is streched out and the buds are pulp..
Big Seedbank deliverd a very productive genetic...
Smells amazingly citrusy...
Fingers crossed all goes well 🙏

Likes
13
Share


@BigDaddyK
Follow
Crazy growing going on , looking we’ll see for yourselves, I don’t want to say anything as pictures speak louder than words 💪
Also we now have conclusive proof that soil plants ripen faster , the soil ones look at least 1 week ahead with flowers forming
Adding biobizz nutrients to Soil plants , watered 3l each Friday
Changed solutions Saturday
Reduced daytime to 1130
Watered 3.5 l monday soil ones definitely ahead - why ? They all exactly the same plants

Likes
5
Share


@RFarm21
Follow
Another grow that has come to an end. I loved it, Simple and quick, i recommend it. It has started to dry. It will take between 10 and 14 data. Thanks!

Likes
55
Share


@mr_smooke
Follow
These strain deserves to bee in each groow . But i have to try anoder strains from Humboldt Next time i will go with CMOG in "one Plant Shou"
Thanks to everyone who followed And commented
Thank you very much Humoldt on your suport, you've done the best job here : 1:😉
And soory too all four my bad english In Grow room was these Blue Dream and 3 special Queen and those 3 are giwen 160g that means I produce 0,56g/w
Next time i will chase 1g/w
To the next time Happy growing and smooking allot of good weed0


Likes
8
Share


@GYOweed
Follow
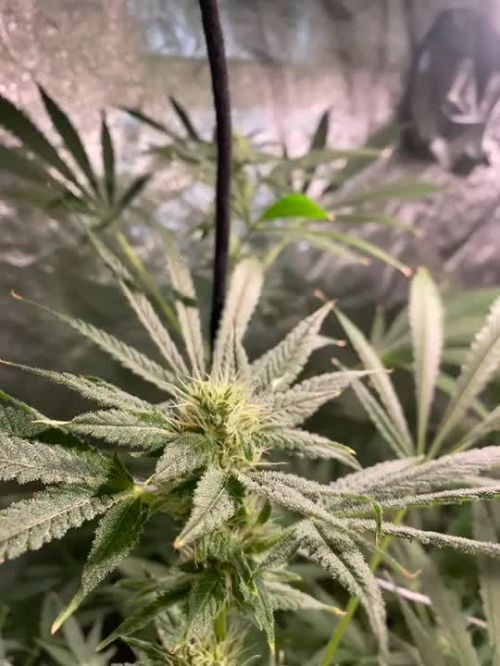
This is a long story but basically cloned from custom IBL of a 10 week pheno of Strawberry Sorbet.
All grow kinda slow in veg and mid yield in flower as it makes sativa structured stretchyness with gold balls on her.
I have used some SA and will do another natural steroid and pgr boost in week 2 flower in a week.
Flipped 6/13 I will port update of flower week 1 soon.


Likes
216
Share


@Ju_Bps
Follow
Hello my friends 👨🌾👩🌾,
The cherry cola 🍒🍒 looking good, a bit slowly but healthy 💜💜,
This mid week the first pistils are poped.
I've continued to give 250ml each 2 day, since start week I give 500 ml/plants each 3 days.
And started fertilizer
I've given
200 ml water + rhizo
500 ml water + rhizo + canna tera
500 ml water + cannazym
PH@6
I've set up my new jewelry today 🔥🔥🔥🔥, this fc3000 look very nice.
Lamp @50% and 50 cm of the canope.
Next week, will be first blooming week 🌲🌲
See you next week and have a good week end my friends 🔥👨🌾👩🌾
Thank to Mars Hydro and @marshydrococo2 for sponsoring the FC3000 ❤️❤️, as well as @Fast_Buds for sponsoring the Seeds ❤️❤️
If you want a litle discount on your Mars Hydro order, add this coupon to your cart,
Ju_Bps
Thanks community for follow, likes, comments, always a pleasure 👩🌾👨🌾❤️🌲
Mars Hydro - FC3000
https://www.mars-hydro.com/fc-3000-samsung-lm301b-led-grow-light
42 Fast Buds - CHERRY COLA 🍒🌲
https://2fast4buds.com/seeds/cherry-cola-auto


Likes
58
Share


@Mr_Motalovah
Follow
Hello growers and tokers! 👋 👩🌾 🧑🌾.🔥💨
There has been much change this week!!
First there was a big defoliation done, I cleaned the bottom of the plant.
All the growth that wouldn't amount to anything because the light doesn't penetrate that low.
Also took off the biggest fan leaves to give more room for light.
Then finally switched to 12/12..
After just 36 hours after the defoliation there was a major change.
New growth everywhere, colas started stretching upwards fast.
It's like she already knows it's flowering time.
Great reaction to the defoliation and 12/12 switch.
I'm still watering every other day, After the defoliation I watered with only Enzymes 2ml/L to clean the roots a bit then started with the nutrientes again.
I dropped the amount of grow nutrients from 3ml/L to 1ml/L and started adding bloom nutrientes 2ml/L for now.
I'll slowly be upping the bloom nutrientes and after week 2 I'll no longer add grow nutrients.
That's it for this week. Stay tuned to see how she flowers.
Stay safe!
Likes
13
Share


@tresplantes
Follow
Smell is Even more amazing now al swellin up pretty good
Bluezy has a lil lighter bud structure for now but started swellin up just now
Dantes Inferno has already some good nuggs
Tomb Rider is really headbound and a lil too close to the lamp
Starting to lower the EC from 3 to 2.5
Starting With fade 2 days earlier than planed will give them a 5 day flush instead of 3

Processing
Likes
2
Share


@Grower_Zuko
Follow
This week I kept low stress training the ladies.
Am watering them approximately every 4 days.
As you can see they are doing mighty fine.
Gorilla (front left) is getting really bushy.
Solomatic (front right) is looking nice, but small.
Stress killer (back) has recovered and is stretching.
Likes
9
Share


@JardineiroBr
Follow
São 3 plantas da CBD Auto da Fast Buds , qualidade comprovada , duas estão bem parecidas e uma deu uma alongada no caule mas tem também boas flores achknqje as 3 me deram uma boa colheita geral.
Likes
89
Share

@squalino
Follow
🌿 Journal de Culture : Mac 1 Autoflower – "Bee Happy" 🐝 (Semaine 12)
#Dryrocket
Nous y voilà, l'avant-dernière étape avant le grand jour. Ma petite abeille a reçu son tout dernier apport de nutriments la semaine passée et est entrée officiellement dans sa phase finale.
Un Grand Merci
Un immense merci à @mia_biotabs pour avoir été présent à chaque étape de ce run à travers ses conseils. Un grand merci également à @Dryrocket : l'appareil va bientôt arrivé et est prêt sera pret à entrer en action pour le séchage, j'ai hâte de voir le résultat !
Merci enfin à toute la communauté qui vibre avec moi depuis le premier jour.
Paramètres de Culture & Climat Extrême
Taille : Stable à 91 cm.
Climat : C'est le gros point noir et la principale bataille de cette fin de run. La chaleur dans la cave est devenue excessive avec de grosses hausses de température ces derniers jours. J'atteins des pointes compliquées à 29 - 30°C. Malgré ces conditions loin d'être idéales, "Bee Happy" fait preuve d'une résistance remarquable et encaisse le coup sans broncher.
Humidité : Toujours stabilisée à 50% pour éviter tout problème de moisissure sur les fleurs compactes en fin de vie.
Gestion de l'eau :
Le rinçage est entièrement géré par l'Autopot. Le réservoir a été basculé à 100% sur de l'eau claire pour nettoyer le substrat et pousser la plante à consommer ses dernières réserves.
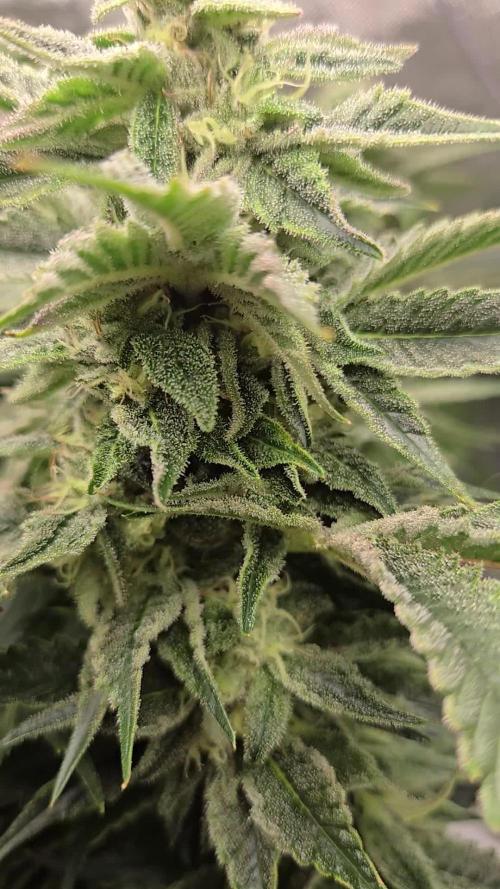
État des Buds & Observations Visuelles ❄️
Les têtes sont devenues extrêmement denses et sont littéralement blindées de trichomes. Le manteau de résine est lourd et collant.
En jetant un œil attentif aux détails des photos, on constate que le cycle se termine en beauté.
Malgré le manque de contrôle global que je regrette sur cette session (entre la colocation serrée avec Spirit, les caprices de pH du bulleur au début et les températures actuelles de la cave), la génétique a fait des miracles. Les calices sont gonflés au maximum, formant ces fameux blocs compacts typiques de ce phénotype "chou-fleur". La sénescence commence doucement à s'installer sur les pointes et les petites feuilles, signe que le rinçage à l'eau claire fait son travail en profondeur et que la plante puise ses derniers retranchements.
Cap sur la récolte ✂️
Le compte à rebours est lancé. Les têtes sont dures, la résine est mûre, et le rinçage libère les derniers arômes de la plante. La semaine prochaine sera celle de la récolte ! ---
Merci à tous d'avoir suivi ce run mouvementé mais ô combien riche en enseignements ! Rendez-vous dans sept jours pour le point final, la coupe, et le passage officiel dans le Dryrocket. Restez connectés, le meilleur reste à venir !

Likes
Comments
Share


Processing
Likes
142
Share


@MadeInGermany
Follow
Hey everyone :-).
There is not much to tell this week :) A few came to the flowering tent, 2 are still in the vegi phase for 2 days and then come last to the flowering tent :-)
The Blue Cheese and the Kosher Tangie Kush smell very good and how they should 😍👍
It will be difficult to choose 2 mums :-).
I wish everyone a nice week 👌 Let it grow


Likes
5
Share


@Weedseed
Follow
Muy buenas geneticas las de fastbuds a mi me dejan loco las recomiendo a todos los cultivadores esta es la ultima en indoor hasta que acabe el verano ahora empezaremos con la exterior, expresando nuevas geneticas para poder mostraros mas sobre este grandisimo banco de semillas
Likes
3
Share

@fabialien
Follow
semana del 14 al 21 de Marzo 2026, lamentablemente tuvo un estres por contaminación lumínica debido al deshumidificador dentro del tent y se hizo hermafrodita sacando bastante semilla. Sad
Likes
14
Share

@MrGrowDiarie
Follow
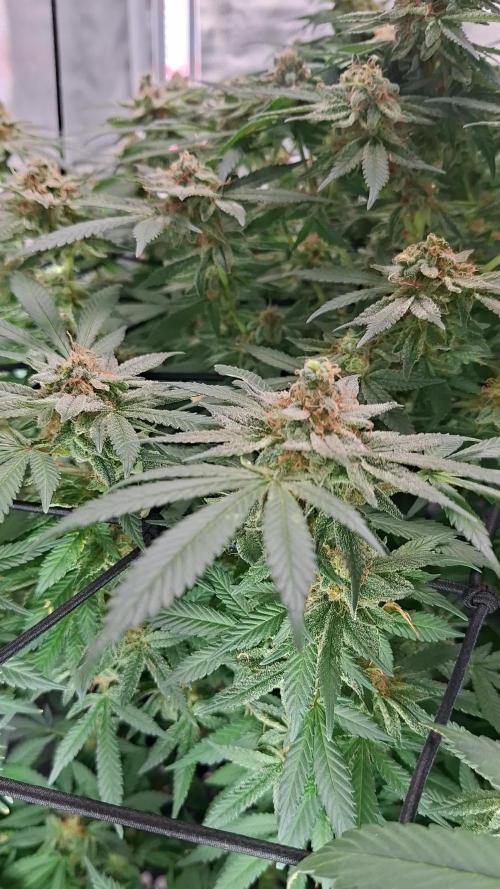
Day 113
The leaves are still a healthy green, with only minor fading visible on the lower foliage, which is expected at this stage as the plant begins to draw stored nutrients from older leaves. The sugar leaves surrounding the buds show a perfect balance of color, and the pistils are gradually turning amber and curling inward, signaling that the harvest window is approaching.
The plant's overall posture is strong, with branches supporting the weight of the buds nicely - a good indicator of strong stems and well-managed airflow. The grow space looks clean and stable, maintaining ideal environmental control for these crucial final days.