


Likes
Comments
Share

@IslandTerps
Follow
Strain: Divine Seeds – Auto Candy
Grow Type: Indoor
Pot Size: 7 Gallon
Medium: Peat Moss & Perlite
Nutrient Line: Athena (Bloom)
Week 6 Update
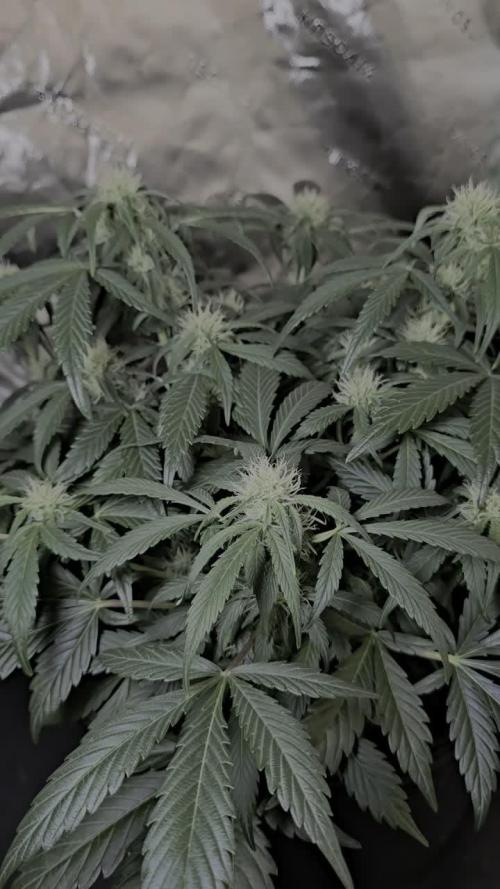
Her bud sites are looking huge this week she’s really starting to fill out! 😎 I can already tell these are going to be some big girls in the coming weeks.
Things have been great; she’s focused on fattening those buds while taking her nutrients perfectly with zero issues or deficiencies. She’s loving the environment and pushing through flower strong.
Feeding
1.9 L Athena Bloom nutrient mix (steady from this point).
Indoor Climate Conditions
Temperature: 26°C
Humidity: 48%
VPD: 1.8 kPa
See y’all next week!


Likes
10
Share


@nonick123
Follow
Día 21 (27/05) Lento crecimiento...
Día 22 (28/05) Se estiran mínimamente
Día 23 (29/05) Riego con 500 ml H2O
Día 24 (30/05) Stretch. Tendremos unas nenas chiquitas!
Día 25 (31/05) Empieza el stretch! Se van a quedar pequeñas, pero voy a dejarlas experimentalmente
Día 26 (01/06) Preparo Té de Compost de Floración! Healthy Harvest 8 ml/L + Insect Frass 16 ml/l + Melaza 1 ml/L + 24 horas oxigenándose!
Día 27 (02/06) Riego con 500 ml de Té de Compost de Floración
💦Nutrients by Lurpe Solutions - www.lurpenaturalsolutions.com
🌱Substrate PRO-MIX HP BACILLUS + MYCORRHIZAE - www.pthorticulture.com/en/products/pro-mix-hp-biostimulant-plus-mycorrhizae

Processing
Likes
16
Share


@Naturalist
Follow
Topped Gelato #1 twice on different stems on days 52 & 56, Gelato #2 on day 56
Started feeding 4ml Foliage-Pro & a dose of Zyme on day 54.
Color & health seems to be back on track.

Likes
7
Share


@OfficerJoe
Follow
So things are getting serious!
The smell gets stronger and was amazing when I defoliated the plants.
The G-13 is forming very nice buds, but the reason it is a bit later than the Strawberry Banana is I accidentally used Strawberry Banana auto, so as soon as the first pistils appeared and I realized what was going on I switched the light schedule to flowering to have it on a similar time. This is also the reason why I started flowering them so small.
Looking forward for next week!
Likes
10
Share

@GoodTimesOrganics
Follow
Welcome Back!💚🥦
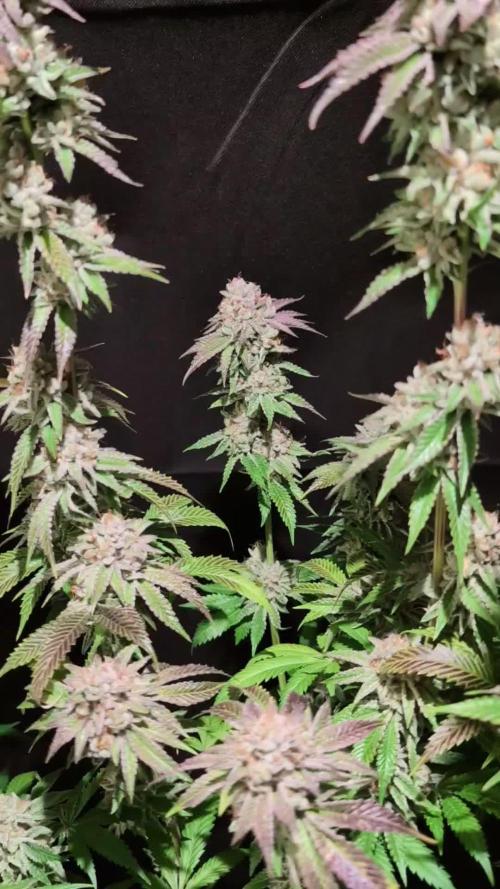
Peach Frosting!
Zu Beginn möchte ich gerne beschreiben, das die Pflanze sehr gut handhabbar ist und auch ein super Wachstum hinlegt.
Seit Beginn der Blüte könnte Mann kontinuierlich beochaten, wie sich ein Dichter Trichomwald ausbildet.
Der Geruch der sich entwickelte, war Anfangs eher wie frisches Gras oder so, wie wenn Grünpflanzen im Frühjahr anfangen zu wachsen. Ab BW 6 allerdings kam dann immer mehr ein süßes und fruchtigeres Aroma hinzu.
Am Ende dominierte auch das eher süßliche Aroma jedoch dicht gefolgt von eher Grünen und sogar Basilikum ähnlichen Aromen. Sollte sich der Geruch nach dem Curing nochmal ändern, werde ich dass dann noch beschreiben.
Die Blütenstruktur ist eher kurz und fest gehalten. Es bildeten sich kompakte und eher kleiner Blütenstände aus.
Dafür ist die Trichomdichte tatsächlich beeindruckend.
Ich bin gespannt wie das Raucherlebnis ist.

Likes
21
Share


@Bluemels
Follow
Seit 4 Tagen befindet sich die Cookie Gelato in der Blüte. Ich hoffe das sie noch etwas in die Box reinwachsen wird, ansonsten habe ich wohl zuviel weggeschnippelt 😶

Processing
Likes
12
Share


@XxxAuto
Follow
Wooow.... real uplifting smoke.. very easy to grow, and extremely fast finish
👽 Test smoke at my birthday 😋BIG THICK HARD AND HEAVY BUDS !!
Likes
10
Share


@HerbalEdu
Follow
(Expected flowering: 9 weeks)
Germination:
24h 7/9, 48h 8/9, 72h 9/9
Transplant:
4(6)/9 not sure yet, some issues with overwatering, rot and previous week Paris heatwave prolly
luckily i have some back up plant nearly ready for transplant in the veg area, so gonna use them to fill the tent empty slot this cycle.
Likes
4
Share


@Trinidad
Follow
Dried her for a total of 10 days. Give her a rough trim nothing fancy, just enough to put her in glass jars. The final dry weigh was 83grams after smoking a couple of grams. Her smoke gives me an energy high that keep me motivated complete my chores. The taste is citrus and fruity. Good grow decent weight and final product.
Likes
5
Share


@TheWeedaltor
Follow
She was the “free seed girl” and she got last place available in the grow room 😬
Likes
8
Share


@Bryankush
Follow
Giorno 1 tra 4 giorni effettuerò il taglio della parte superiore. annaffiata con 2L di acqua
Giorno 5 taglio parte superiore della pianta

Likes
105
Share


@Tropicannibis_Todd
Follow
💩Holy Crap Growmies , we are outdoors and in the Ground and there Doing Great💩
👉It's been another full week and she's almost ready to be chopped down , just a few more days 👈
So due to horrific weather as of late , I've had to deal with some slight bud rot 👈 removed it , and hopfully we are good to go 👊
I GOT MULTIPLE DIARIES ON THE GO 😱 please check them out 😎
👉THANKS FOR TAKING THE TIME TO GO OVER MY DIARIES 👈
👉NutriNPK NUTRIENTS USED FOR FEEDING 👈rain water to be used entire growth👈

Likes
43
Share


@hinterhofgrower
Follow
🌱: started this week with intensive LST and little Defoliation, Day 46 Lollipopping
💧 : 8l, 10l SIP
💡 : Dli: 45 mol/m²/d,
🤔: The plant has a rectangular area in the middle where it is not growing as quickly. The difference is almost 10cm. I suspect the lamp. Could it be that the centrally installed UV LEDs are triggering it? I noticed this in previous grows. There is actually less light outside, which can lead to slower growth or even stretching, right? I taped up the LEDs.
Likes
6
Share


@Grey_Wolf
Follow
Mephisto Genetics Double Grape 4th week of Flowering 29th December 2019
This plant is really starting to impress me with it's smell and stickiness. Also the main stem seems to filling in with bud beautifully with very little spacing between branches that arent covered with bud growth. I gave her a 1/3rd of a cup of Mr B's Green Trees Bloom mix and a 1/4 tspoon of Great White.
Thats it for this week See you back here in 2020 😁

Likes
21
Share


@MicrowGrow420
Follow
Bushy little mama. Removed the tobacco plants as they were taking over the tent. She is on her lonesome now so she can make full use of the space available. Looking like she needs some defoliation pretty soon.
3/10 Gave her a radical defoliation. Took away about 85% of all the larger fan leaves and some lower canopy growth. I want all the plants energy to go into flowering and developing large kolas.
Don't expect the auto clone to get much bigger, so won't be potting up, but she may produce a decent kola.
Likes
13
Share


@AutoCrazy
Follow
This fine lady is really starting to add some nice colours due to some cold temps in our neck of the woods. She has a ton of trichomes development now! I am really impressed with the look of the buds. They aren’t all full of leaves which should make trimming her a pleasure. 😎
She has really been fattening up this week. I am guessing she needs another week or so to finish up. Her colouring should be quite something once she is done. 🤩
I am still having the odd spot of powdery mildew pop up but nothing too serious. I have been treating it with greencure every 3-4 days and it’s keeping it under control. I haven’t found any affecting the buds yet which is a win! This is the reason a good effective regimen of treating plants for pest and mould/mildew is an outdoor growing must!! I have yet to lose a plant to mould or peat so I swear by it. I’ve seen a bunch of my associates with some powdery mildew beast. Such a shame to see😱
Stay tuned for the final week
😎🍿

Processing
Likes
6
Share


@Mr_nugs_lover_David
Follow
Such a top quality strain 🔝 very very terpy, stinks like OG kush, rock hard dense nuggets, they're literally rocks. Very frosty nuggets, full covered in resin flowers. Those orange hairs just make her irresistibly delicious 😋 I just can't wait to smoke such a high grade. This is gonna be a good year. Hope to always have this lady in my garden every year 🤤👨🌾💎🍪

Likes
11
Share


@TheThiccBud
Follow
Alles ist einfach perfekt diese Damen machen überhaupt keine Probleme und duften einfach herrlich 🤤ich kann nur wieder ein Großes Lob an Royal Queen seeds aussprechen ❤️


Likes
55
Share


@Belverde
Follow
I delayed a few days to update the week because video was not loading
.
.
.
.
Welcome growers
Week n°4 ended for these three phenos of SORBET#4 🌿🌿🌿🍧
Like you have probably see in the video, a few days ago i have made a one topping, on the central stem, for increase the power of the lower branches exposing them to a better lights conditions..
I have also cut two or three leafs, not too much for now, just for increase the airflow and also again for a higher lights exposure of the lowers parts✂️ 🍃
About the lights 💡
Doing that, i have increase the potency of my two Mars-Hydro SP3000, from 25% to 50% ⬆️
The two led panel are connected with a cable and i have only to adjuste the dimmer of one of them for change the intensity of each one, in just one move..
Pretty useful 💯
In the middle of the week i have switch from 18/6 on/off to 16/8 on/off..
Always tryed to mimic the natural cycle of the sun light, works good to me 👌
Anyway..
About nutrients 👇
In this week i have giving their always organic/veganic nutrients..
A little bit of silicium (Bionova) / Activator (Biomagno) / Crescita (Biomagno) / Activera (Biobizz) / Grow vegan (Bionova) / The Missing Link (Bionova) / X-Cell (Bionova) and a little bit of P-K 3-5 (Bionova) {This last one i have used in a foliar spray solution}
Like i usually do, a little bit of everything at any watering 💧
And that's all..
Another week in vegetation and then we can thinking abot flowering 🌻
See you next..
Thank you for stopping by and reading 😎👍
FC ✌️
🇮🇹
