
Likes
Comments
Share


@Master_weeda
Follow
Bonjour à tous les padawans et maîtres jedis
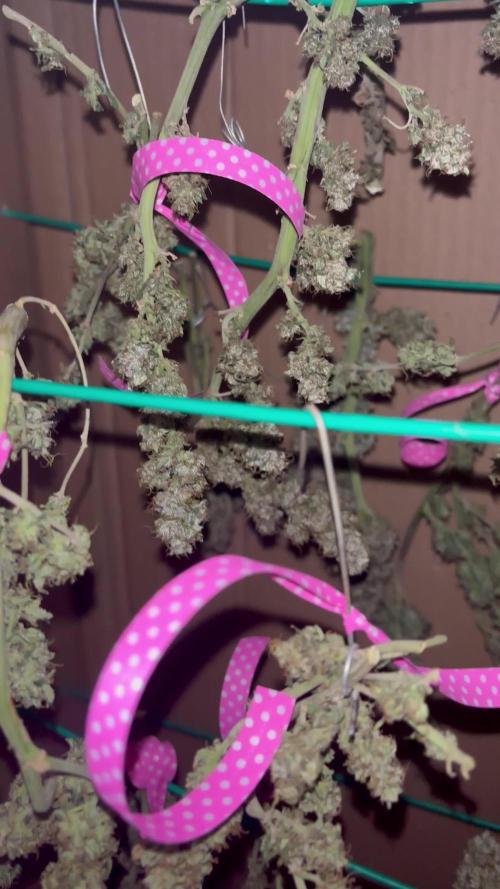
Jour84 arrosage avec 2 litres d'eau ph6.3
Jour86 arrosage avec 2. 5litres d'eau ph6.3
Jour89 arrosage avec 2 litres d'eau ph6.3
LE MEILLEUR MOMENT POUR RINCER SON CANNABIS
Le rinçage commence en général deux semaines avant la récolte. Si le plant a une période de floraison de huit semaines, le rinçage doit commencer six semaines après le début de la période de floraison. Il est préférable de regarder de près les trichomes sur le plant pour déterminer quand votre cannabis est prêt à être récolter. Si les petits trichomes commencent juste à passer d’une couleur transparente à une teinte laiteuse et blanche, c’est une bonne indication que les plants peuvent commencer à être rincés. Il faut s’arranger pour que la majorité des trichomes aient changé vers la couleur désirée pour la récolte après deux semaines – ça devient plus facile à faire avec l’expérience, alors accrochez-vous !
Le rinçage peut également être un bon moyen de remettre à zéro la terre quand un plant est toujours en phase de croissance végétative. Parfois, un cultivateur suralimente par accident son cannabis, ce qui provoque un changement de couleur et un flétrissement du bout des feuilles. Ceci est appelé une « brûlure par nutriments ». Rincer la terre peut éliminer les nutriments excédentaires, ce qui aide à résoudre le problème. Cependant, c’est une mesure drastique à ce stade de la culture, alors assurez-vous que le problème soit bien une brûlure par nutriments et non quelque chose d’autre.
Le rinçage ne concerne pas que le moment de la récolte. Cette technique peut aussi être mise en place durant la phase de croissance afin de débarrasser le sol des nutriments. Bien évidemment, les nutriments permettent à votre plante de rester en bonne santé et vous assurent des rendements maximaux, mais une trop grande quantité peut causer une accumulation et un état statique durant lequel la plante ne peut plus y accéder.
Le blocage des nutriments peut être causé par une accumulation saline ou des niveaux de pH incorrects. Ces deux causes peuvent être résolues par un rinçage de votre plante à l’eau claire. Les fluides viendront pousser les nutriments en dehors du substrat et le débarrasseront de l’accumulation, permettant ainsi aux racines de pouvoir accéder à nouveau aux nutriments.
EMPÊCHER LE BLOCAGE D'ABSORPTION DES NUTRIMENTS AVANT QU’IL NE POSE PROBLÈME
Au mieux, le blocage des nutriments peut être un problème, au pire, il peut être un vrai désastre. Comme le dit l’adage, il vaut mieux prévenir que guérir. Il vaut mieux prendre de l’avant pour empêcher le blocage des nutriments plutôt que de s’y atteler lorsque c’est trop tard.
Empêcher le blocage des nutriments peut se faire par le biais d’un rinçage de routine. En rinçant vos plantes une fois avant la floraison et une fois au milieu de cette dernière, vous minimiserez l’accumulation de nutriments.
LES ENZYMES À LA RESCOUSSE
Après le rinçage pour contrer l’accumulation ou le blocage des nutriments, vous remarquerez peut-être que vos plantes ont une apparence vert foncé, c’est le signe d’un excès de nutriments. Dans ce cas, certains cultivateurs choisissent d’ajouter une formule riche en enzymes à leur substrat.
Au cas où vous auriez oublié vos cours de biologie, les enzymes sont des protéines qui catalysent les réactions. Elles aident à rincer le substrat en décomposant l’amidon, les glucides et les nutriments. Il existe sur le marché toute une variété de produits qui contiennent des formules d’enzymes très efficaces.
Si l’eau ne suffit pas à vos plantes, ces petites protéines ne feront qu’une bouchée de l’accumulation de nutriments !
COMMENT BIEN RINCER SON CANNABIS
Rincer votre plant de cannabis est un processus simple. À chaque fois que vous apporteriez normalement des nutriments, vous rincez à la place. De l’eau du robinet non traitée est tout ce dont vous avez besoin pour rincer, assurez-vous juste que son pH est sans danger pour le cannabis. La plupart de l’eau de puits a un pH sain et ne nécessite pas de traitement, mais s’il est nécessaire de traiter l’eau de rinçage pour avoir un pH adapté, faites-le. Les ajustements du pH seront donc la seule chose à considérer.
Inonder la terre avec autant d’eau fraîche qu’elle puisse contenir. Laissez l’eau durant quelques minutes pour qu’elle puisse absorber les nutriments, puis inondez la terre encore pour rincer les nutriments loin du plant. Si vous cultivez en intérieur dans des pots, notez la couleur de l’eau qui s’échappe du fond des pots. Elle sera tâchée et aura une couleur sale. C’est à cette étape qu’un appareil de mesure des TDS (Total des Solides Dissous) est utile. Si vous récupérez et mesurez le TDS de l’eau « évacuée », elle devrait avoir un taux de 1300ppm, ce qui est assez élevé. Il est important de rincer le plant jusqu’à ce que total baisse à un niveau de 50ppm, ou du moins qu’il s’approche du TDS de l’eau fraîche que vous utilisez pour rincer le plant. La couleur de l’eau d’évacuation va s’éclaircir et apparaîtra plus propre. Vous devez tirer autant que possible de minéraux dissous du plant.
Comment et Quand Rincer les Plants de Cannabis
Rincer les plants de cannabis avant la récolte peut faire la différence entre les meilleurs têtes ou la plus rude pour la gorge. Cette petite tâche est simple et facile à faire. Ajoutez juste de l’eau ! Attention car le moment du rinçage joue un rôle critique.
Le b.a.-ba du rinçage de ses plants de cannabis.
Sommaire:
1. Qu’est-ce que le rinçage ?
2. Le meilleur moment pour rincer son cannabis
3. Empêcher le blocage d'absorption des nutriments avant qu’il ne pose problème
4. Les enzymes à la rescousse
5. Comment bien rincer son cannabis
6. Comment rincer ses plantes en hydroponie
7. Les résultats du rinçage de son cannabis
8. Quand éviter de rincer son cannabis
Vous avez enfin fini vos cultures et vous vous retrouvez avec un magnifique plant couvert de super têtes, maintenant sèches, vous avez fait le curing et vous êtes prêt à fumer – et pourtant quelque chose ne va pas. La weed semble ne pas vouloir se consumer et quand vous tirez une bouffée, c’est comme si on vous avait donné un coup de poing dans les poumons et vous toussez en craignant pour votre vie ! Le goût est rude et décevant. Si c’est une situation que vous avez vécue, il y a des chances pour que vos plants n’aient pas été rincés correctement avant la récolte.
Cette fumée bien loin d’être agréable est provoquée par la présence dans le plant des nutriments et minéraux utilisés lors de la culture, ce qui altère la façon dont le plant se consume. Rincer le plant élimine ces nutriments restants, ce qui améliore la qualité des sensations. Heureusement, le rinçage des plants de cannabis se fait facilement et sans effort, et cela vous permet de produire des têtes douces et délicieuses en un rien de temps.
ARTICLE LIÉ
Comment Utiliser les Nutriments pour Cannabis
QU’EST-CE QUE LE RINÇAGE ?
L’acte de rincer un plant implique d’utiliser de l’eau pour éliminer tout nutriment présent dans la terre. Une grande quantité d’eau est passée à travers la terre et drainée sur une base régulière. Tous les minéraux et nutriments présents dans la terre sont rincés avec le temps avec l’eau, ce qui laisse une terre propre.
Mais pourquoi vouloir éliminer tous les minéraux de la terre ? N’est-ce pas mauvais pour la récolte ? En fait, cela aide à la récolte de manière significative. Quand les nutriments sont éliminés de la terre, ceci force le plant de cannabis à utiliser tous les nutriments toujours présents dans le plant. C’est comme pour le corps humain. Quand on consomme beaucoup d’aliments, ce que nous n’utilisons pas est transformé en graisses. Dans les situations extrêmes où la nourriture est rare, le corps s’appuie sur cette graisse stockée pour tirer de l’énergie.
Comme rincer force le cannabis à utiliser tous les nutriments restants dans le plant, aucun ne devrait rester et altérer les têtes récoltées. Cependant, si vous le faites trop tôt, cela peut nuire à la santé du plant, le moment est donc clé.
LE MEILLEUR MOMENT POUR RINCER SON CANNABIS
Le rinçage commence en général deux semaines avant la récolte. Si le plant a une période de floraison de huit semaines, le rinçage doit commencer six semaines après le début de la période de floraison. Il est préférable de regarder de près les trichomes sur le plant pour déterminer quand votre cannabis est prêt à être récolter. Si les petits trichomes commencent juste à passer d’une couleur transparente à une teinte laiteuse et blanche, c’est une bonne indication que les plants peuvent commencer à être rincés. Il faut s’arranger pour que la majorité des trichomes aient changé vers la couleur désirée pour la récolte après deux semaines – ça devient plus facile à faire avec l’expérience, alors accrochez-vous !
Le rinçage peut également être un bon moyen de remettre à zéro la terre quand un plant est toujours en phase de croissance végétative. Parfois, un cultivateur suralimente par accident son cannabis, ce qui provoque un changement de couleur et un flétrissement du bout des feuilles. Ceci est appelé une « brûlure par nutriments ». Rincer la terre peut éliminer les nutriments excédentaires, ce qui aide à résoudre le problème. Cependant, c’est une mesure drastique à ce stade de la culture, alors assurez-vous que le problème soit bien une brûlure par nutriments et non quelque chose d’autre.
Flushing
Le rinçage ne concerne pas que le moment de la récolte. Cette technique peut aussi être mise en place durant la phase de croissance afin de débarrasser le sol des nutriments. Bien évidemment, les nutriments permettent à votre plante de rester en bonne santé et vous assurent des rendements maximaux, mais une trop grande quantité peut causer une accumulation et un état statique durant lequel la plante ne peut plus y accéder.
Le blocage des nutriments peut être causé par une accumulation saline ou des niveaux de pH incorrects. Ces deux causes peuvent être résolues par un rinçage de votre plante à l’eau claire. Les fluides viendront pousser les nutriments en dehors du substrat et le débarrasseront de l’accumulation, permettant ainsi aux racines de pouvoir accéder à nouveau aux nutriments.
EMPÊCHER LE BLOCAGE D'ABSORPTION DES NUTRIMENTS AVANT QU’IL NE POSE PROBLÈME
Au mieux, le blocage des nutriments peut être un problème, au pire, il peut être un vrai désastre. Comme le dit l’adage, il vaut mieux prévenir que guérir. Il vaut mieux prendre de l’avant pour empêcher le blocage des nutriments plutôt que de s’y atteler lorsque c’est trop tard.
Empêcher le blocage des nutriments peut se faire par le biais d’un rinçage de routine. En rinçant vos plantes une fois avant la floraison et une fois au milieu de cette dernière, vous minimiserez l’accumulation de nutriments.
LES ENZYMES À LA RESCOUSSE
Après le rinçage pour contrer l’accumulation ou le blocage des nutriments, vous remarquerez peut-être que vos plantes ont une apparence vert foncé, c’est le signe d’un excès de nutriments. Dans ce cas, certains cultivateurs choisissent d’ajouter une formule riche en enzymes à leur substrat.
Au cas où vous auriez oublié vos cours de biologie, les enzymes sont des protéines qui catalysent les réactions. Elles aident à rincer le substrat en décomposant l’amidon, les glucides et les nutriments. Il existe sur le marché toute une variété de produits qui contiennent des formules d’enzymes très efficaces.
Si l’eau ne suffit pas à vos plantes, ces petites protéines ne feront qu’une bouchée de l’accumulation de nutriments !
Comment et Quand Rincer les Plants de Cannabis
COMMENT BIEN RINCER SON CANNABIS
Rincer votre plant de cannabis est un processus simple. À chaque fois que vous apporteriez normalement des nutriments, vous rincez à la place. De l’eau du robinet non traitée est tout ce dont vous avez besoin pour rincer, assurez-vous juste que son pH est sans danger pour le cannabis. La plupart de l’eau de puits a un pH sain et ne nécessite pas de traitement, mais s’il est nécessaire de traiter l’eau de rinçage pour avoir un pH adapté, faites-le. Les ajustements du pH seront donc la seule chose à considérer.
Inonder la terre avec autant d’eau fraîche qu’elle puisse contenir. Laissez l’eau durant quelques minutes pour qu’elle puisse absorber les nutriments, puis inondez la terre encore pour rincer les nutriments loin du plant. Si vous cultivez en intérieur dans des pots, notez la couleur de l’eau qui s’échappe du fond des pots. Elle sera tâchée et aura une couleur sale. C’est à cette étape qu’un appareil de mesure des TDS (Total des Solides Dissous) est utile. Si vous récupérez et mesurez le TDS de l’eau « évacuée », elle devrait avoir un taux de 1300ppm, ce qui est assez élevé. Il est important de rincer le plant jusqu’à ce que total baisse à un niveau de 50ppm, ou du moins qu’il s’approche du TDS de l’eau fraîche que vous utilisez pour rincer le plant. La couleur de l’eau d’évacuation va s’éclaircir et apparaîtra plus propre. Vous devez tirer autant que possible de minéraux dissous du plant.
COMMENT RINCER SES PLANTES EN HYDROPONIE
Le rinçage des plantes en hydroponie est bien plus simple que de se débarrasser des nutriments en terre. Les cultivateurs en hydroponie pourront simplement drainer leur système et le remplacer par une eau au pH neutre.
Le rinçage des plantes en hydroponie est aussi un processus bien plus court. Une fois que la réserve d’eau aura été modifiée, les plantes en hydro n’auront pas accès aux nutriments externes. Pour cette raison, un rinçage de deux jours suffira.
LES RÉSULTATS DU RINÇAGE DE SON CANNABIS
Après la récolte des têtes, prenez du temps pour bien faire le curing pour atteindre le potentiel le plus élevé. Un affinage correct par curing permet de réduire encore plus le côté rude des têtes, en éliminant des choses comme un excès de chlorophylle. Vous serez étonné de voir la différence que ce petite effort peut avoir sur votre produit. Tout votre travail se sentira dans la première bouffée de cette weed douce comme de la soie, qui caresse la gorge comme du miel. Le plus doux de la nature. Vous pouvez donc améliorer la qualité de votre cannabis en ajoutant juste de l’eau !
QUAND ÉVITER DE RINCER SES PLANTES
Le seul moment où nous recommandons d’éviter le rinçage de son cannabis est lorsque l’on travaille avec une terre biologique amendée ou un super soil. Ces substrats ont été développés avec précaution afin d’héberger des micro-organismes bienfaisants tels que des bactéries ou des champignons. Cette délicate biodiversité pourrait être éliminée et endommagée par le rinçage.
Une fois de plus, l’absence de rinçage ne devrait pas poser de soucis, car aucun nutriment externe ou synthétique n’aura été ajouté au substrat. À la place, les plantes comptent sur les micro-organismes pour décomposer la matière organique et la livrer aux racines.
May the force be with you 💪

Likes
13
Share


@GrowGuy97
Follow
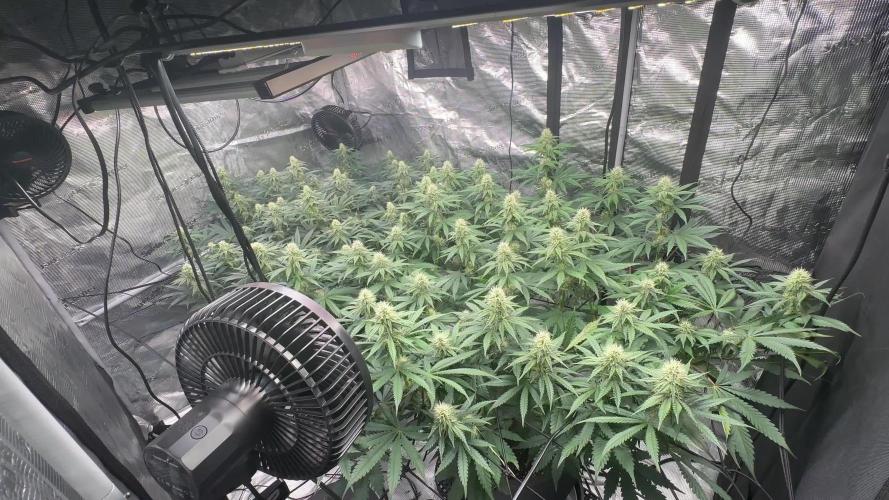
Flower day 31 - Having a little trouble with the temperature getting higher than I would like because my dehumidifier puts off some heat while it’s running so it’s been a constant struggle to keep the environment in this tent stable! Definitely will not have so many plants next run lol, but all in all the ladies are growing great & I can’t wait to see how they turn out! Thanks for following friends & happy growing!✌️🏼🌱
Flower day 33 - Fed half the plants today with PH at 6.4 to try and keep the humidity down some I’ll water the other half tomorrow!


Likes
200
Share


@Ferenc
Follow
Day 72, 21st of November 2020:
Hi! Wao this is what I can say and luckily stoppe streching....
All LST has been removed as the plants remain the same so no need to keep them in "chains".
Those Original Sensible girls 3 of them (Gelato, Runtz Gum, Do-Si-Dos OG)went crazy, except Black Ghost OG she did not strech much typical little indica lady. And the THC crystals alrady on the leaves on the Runtz Gum and Do-Si-Dos OG just simply beautiful.
Buds are coming getting thick they are gorgeous only I can see some some sort of deficiency on Do-Si-Dos OG a bit on some leaves.
The fertilization schedula isnthe same every 2nd day and happens with the mix and ratio above.
Wedding Gelato is beautiful also I hope the nice purple colour will come out as well in late flowering stage. :)
The lamp is on 11.30 min and off 12.30 min.
Last week was 15 min longer light cycle....
So every week 15 min shorter light cycle until the 5th week. So far -30 min. It switches on at 6 am and off at 17.30 pm.


Likes
2
Share


@GhostBlvckPhant0m
Follow
Week 5 Veg and things are cruising along. The lanky girl in the 2 gal pot is starting to look better structure wise than the other 5. Thinking about transferring her to a 7 gallon pot for clones! The Tri leaf mutation is really taking off, throwing tops for days with out training or topping. 3 of the ladies have been topped to make bushes and the other are growing natural with some defoliation.
Likes
26
Share


@gr3g4l
Follow
A week of noticeable growth acceleration and the appearance of the first pistils.
As the days passed, the substrate became compacted and it was necessary to fill the pots a little with more substrate.A week in which it was very cold and windy outside again, making it difficult to maintain a comfortable environment inside the grow tent. Since the grow tent is outside, I have to deal with this problem.
Una semana de una clara aceleración en el crecimiento y la aparición de los primeros pistilos.
Pasados los dias el sustrato se va apelmazando y tocó rellenar un poco las macetas con más sustrato.
Una semana en la que volvió hacer mucho frío y viento en el exterior y me fue complicado mantener un mejor ambiente dentro del armario. Al tener el armario fuera de casa tengo que lidiar con este mal.
Likes
86
Share


@CANNASIM
Follow
------GENERAL COMMENT------
Girls are moving forward, a lot of growth for the week, the two strains are absolutely different in terms of structure. Unfortunately the three Candy Kush did not sprout, so I will run only this two girls for this cycle. Down a bit the watering mainly doing a feed every other day, trying to manage the root mass to expand. Choose to do natures candy also in veg since i'm using recharge regularly, is 0-0-0 not noticing a lot of EC raise with it, velo kelp came in to play also. One dose of sensi Cal Mag this week since i notice some paling going on, my medium is inert by the way.
------GG.AK COMMENT------
This strain is going slower compared to her sister, looks good though, less foliage, stretching more, I see more sativa elements taking over.

Likes
13
Share


@Growyourownathome2x2
Follow
25th April day 46 4 plants stripped I will give them a few days to recover and flip to the 12/12 cycle

Likes
12
Share


@Visions
Follow
The purple pheno looks to be a easy 56 to 63 dryer. Green phenos same maybe slightly longer as well as the light pink pheno. They smell phenomenal from the chosen parents and are putting off a fucking show. These f2s were a treat to make. Thanks everyone for tuning in. I'll be putting more details within harvest time for each week as I have been quite busy testing other genetics as well as more of mine own.
I will have a few packs of F2s I'll be releasing via email later on to the public. These are fully tested and I will continue to test. Harvest will have the full details as well as the stressing and findings during my testing.
I'm seeing us go to day 63 for the group. Around 10 days more.
Likes
23
Share


@Piorkeed
Follow
Week 8 (04/05 - 10/05)
D50: -
D51: -
D52: added 0.5 ml of Calmag, 1.5 ml of Bio-grow, 3 ml of Bio-bloom and 1ml of Top-Max to 1 liter of tap water @ pH 6.3
D53: -
D54: added 0.5 ml of Calmag, 1.5 ml of Bio-grow, 3 ml of Bio-bloom and 1ml of Top-Max to 1 liter of tap water @ pH 6.2
D55: -
D56: -

Likes
5
Share


@AgroCultiveta
Follow
Son fotos y videos de múltiples cultivos debido a que nunca e realizado un seguimiento como tal, espero realizar uno ahora!
Nutrientes Utilizados en general Trybac y Trypack biobizz.
Las criticas siempre serán bien recibidas!😋
Espero les guste el contenido!


Likes
5
Share


@Bluethum94
Follow
All and all I popped 19 seeds lost one after it came above ground 5 of those I will be posting on here which are mandarin cookie crossed with zweet og they are regular photoperiod plants so I will have to sex them it is a small pheno hunt looking for something to keep as a mother plant didn’t use any nutes for the first week
Likes
7
Share


@ItsCannaDog
Follow
Overall very easy to grow, next time I will do more training to increase airflow and hopefully get bigger buds


Processing
Likes
6
Share


@Eggnacious
Follow
Took some time to remove all paperclips from plant and clean up a bit leaving the top fan leaves and removing everything else, from here on out ,im letting the branches where i topped grow upward before switching to 12/12, still dont have confirmation on the sex?
Likes
32
Share


@LockDownGrow
Follow
So the flower is a stunning colour and a lovely thick and dense flower , the smell and taste is fantastic ,
And the high is mild but a real nice euphoric head high and vapes a lovely gassy yet flavourful vape ,
I really am a fan of the balckberry kush gene , not only is it a joy too watch growing , but the end results are amazing too look at , hold , and vape ,
I think the photos in this diary speak for them selfs without all the fancy words ,
I highly recommend this strain and this seed bank as Dutch passion never fail too impress ,
A massive thank you too green buzz nutrients for all there help support and nutrients and Dutch passion for these free seeds too ,
I sometimes have too pinch my self that I am blessed with the support and help with free nutrients , seeds , and lights from kingbo ,
I just hope that I show all these amazing products off how they should be ,
Some of us are disabled ether physically or mentally and cannot compete with some of the growers on here diariys with the 500 word essays and big fancy words ,
But this for me is not a business , I do not make thousands of pounds too buy fancy lights or A/C units ect ,
Growing cannabis is a jail term for me if caught and with no financial gain at all , I turn absolutely everything into oils and tinctures
And make my own medicine too treat autism and let me tell you it has given me a new lease of life ,
I have worked out that a single grow is costing me £500 in electric alone for a 3 month grow , and if I was not blessed with the help of green buzz nutrients and Dutch passion it would be much much more ,
I do not know people who smoke weed or any dealers if it too sell it even if I wanted too , so what I do is purely for medical reasons and the fear of getting caught , the noise of the fans , smell , and the cost is a real struggle some weeks , but it's all worth it when you know you have bottles of fantastic medicine in the freezer that you know will last you a very long time ,
Is a fantastic feeling ,
I really pray the day legalisation is soon for us,
But for now I am so very thankful too grow diariys for this fantastic platform and all the sponcers for all there help ,
Likes
2
Share


@Hidden
Follow
Yes, they are really getting big—so much that the grow tent is now completely full. It has been quite a challenge to keep the humidity under control since I don’t have a proper extractor yet (that will definitely be my next purchase). For now, leaving the tent open has allowed the air to circulate well, and the humidity stays around 45%, which is acceptable. Apart from that, everything has been calm and steady, continuing with the BioBizz feeding schedule and gradually increasing the nutrients to encourage the development of larger colas. The only drawback is that the colas are not turning out as thick as I had hoped. Interestingly, RHC #2 and #3, even though they are not the most robust plants, ended up being the tallest ones, and their colas actually look bigger than RHC #1. Overall, I’m happy and counting down the days with excitement.


Likes
73
Share


@HirdoWeirdo
Follow
Welcome to the first week of my Anesia Seeds Bola Mintz!!💪
A new adventure begins and in the new cycle I have decided to put this powerful and fruity wonder 🍓
The seed germinated in just over a day and four days after sowing the cotyledons opened, revealing the first leaflets. Good job!
News are not over, I have recently received a new line of fertilizers from @greenbuzzliquids which I sincerely thank for the vastness of products sent to me. I started using More Roots to stimulate the roots, Growzyme to help the seedling and Humic Acid Plus to enrich the soil. We will see how it goes on! 😎
I deeply thank the Anesia Seeds team for sponsoring this new grow and @greenbuzzliquids of which I can't wait to use every single product!🙏🙏❤️
Likes
35
Share


@Greengirl420
Follow
Harvested this beauty on day 79 and we got two ounces of amazing dry, sticky bud 🔥
This girl grew nice and tight and looked like the perfect bouquet! Nice tight dense buds that break up real good and fat! She is so sticky and smells super good! The buzz for me is strong and good and goes mostly to my head but doesn’t make me tired.
I will definitely grow this strain again
💨 💨