
Likes
Comments
Share

@DevilsBud
Follow
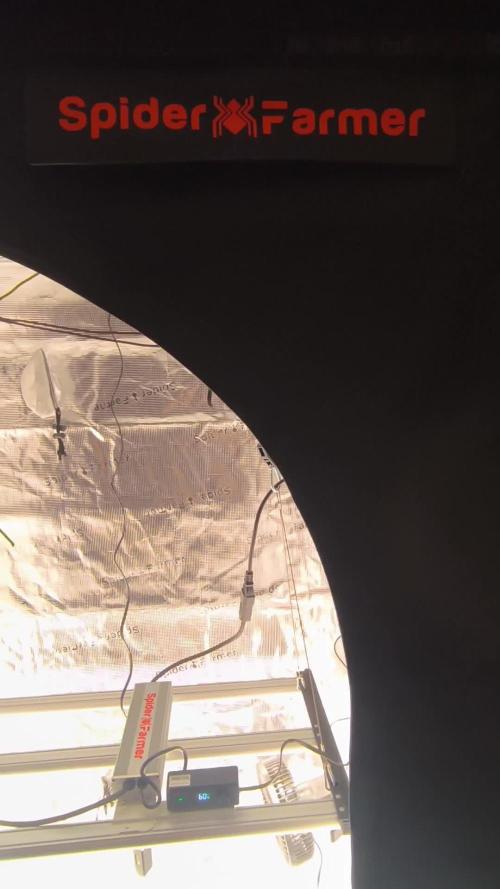
Start of week 2
There growing like clock work taking the first nutrients like a champ and now we have improved there invoirment they going to take off.
Finally have put up the new setup from spider farmer together and I am very pleased with a modern version more control and can watch from distance what's going on .
More info and picture Tru the week


Likes
57
Share


@Kmikaz420
Follow
Et voici le reste du jardin (sans la cherry cola qui sèche deja;)
Rien à signaler à part les 2 monstre dans la tante qui n arrêtent pas de grandir ;) j ai fais une defoliation aux 2 ainsi qu aux dos i dos (qui produisent pas mal de feuilles à enlever;)
Mais autrement elle aussi évolue bien .
Demain la 2eme cherry cola va être recolter ainsi que la gorrilla x purple punch , et le reste du jardin ça continuer sont chemin encore une semaine avec nutriment puis on passera au flusch voilà voilà on y arrive tous doucement à cette douce et tendre recolte;)
En espérant que se que vous voyez vous plaît ;)
Bon dimanche à toute et tous je profite de vous postez quelque photo du jardin presque au complet (vue que j vais couper la cherry cola 2 ..et la gorrilla x purple punch
Mention spécial à la dos i dos de barney qui m étonne de jour en jour plus une odeur folle de kusch ,des têtes dur comme la pierre, et pour une plante de 40cm elle va faire une bonne recolte !! (A voir d ici une semaine voir 2 ) et j ai dans les dos i dos comme pour les strawberry x gorrilla 2 pheno différent
Un des pheno de strawberry prend 2 voir 3 semaine de plus à finir (j avais se pheno à mon premier journal de strawberry x gg4..
Dommage car l autre pheno est juste magnifique avec des têtes énormes (c celle de droite ) et elle fini bien plus tôt que l autre.. bon c été à peut près tout j voulais juste mettre quelque souvenirs en plus de ces magnifiques ladys 😀
Processing
Likes
87
Share


@ThrashedTV_BakedByGlaze
Follow
Week 4 - 01/22 to 01/28 2021
Pictures from Days 25 + 26
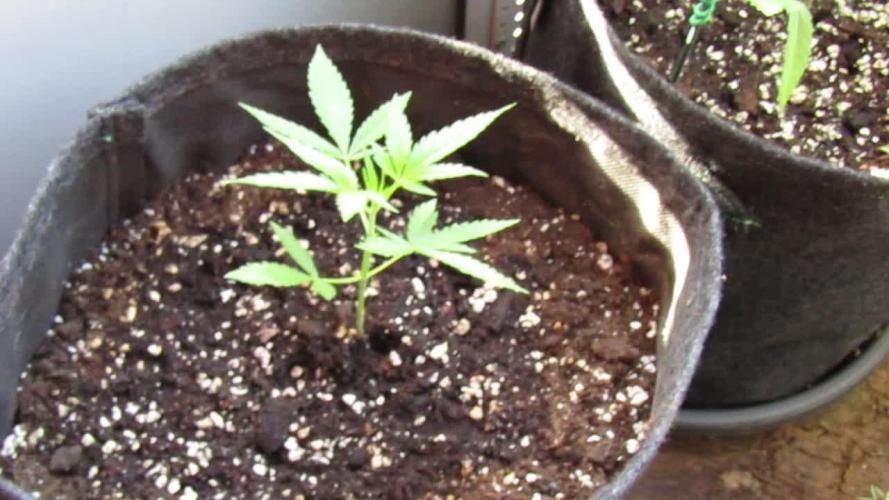
TRANSPLANTED! Might have waited too long but hopefully the transplant and LST stress might slow the plant down since i think it's already flipping to flower like the other @SweetSeeds Dark Devil Auto and the Purple Lemonade from @FastBuds. I think the Red Poison might have been the first one I noticed to flip but at least this one will be quick.
More and more reasons to go back to a photoperiod grow after this for more control/really test out the new lights 🙌
Ended up more 50/50 ratio of Destiny Organic's Dark Matter Living Soil + ProMixHP since I had to make the Destiny last. Apparently they went out of business just after I decided it was my favourite/new soil :( Would rather stay away from Ocean Floor since I haven't had the best experiences with it (bugs/rust fungus etc) Feel free to drop some recommendations other than Fox Farms below 👍
The Red Poison Auto is going strong other wise, keeping the LST basic to see if I can still get the screen in the tent but it wouldn't be practical at this point.
I raised the @ViparSpectraLED P1500 another eight inches after transplant and started basic LST. I really wanted to get these four under a ScrOG but if 3/4 are already flipping and the LSD is still runty I might have to wait it out again.
Just like the Dark Devil in my other Sweet Seeds diary, there is a solid smell on the fingers after adjusting it/when the fan hit it just right 😍
I have the @MarsHydroLED TSL2000 set up and ready to go once the girls settle into their new pots. Have the new surge protector/heavy duty power cords/power tool grade timers as mentioned in Week 3. Some of it shown in the pictures.
Threw some videos in this week as well with some Queen's Radio GaGa, Beastie Boys' Brass Monkey, and a little hint of Arkells ....COME TO LIGHT on the short @ViparSpectraLED ..GET IT.. 😓
I thought the Red Poison had the streaks in the leaves but turns out it was the Purple Lemonade, My Chocolate Mint OG Auto just finished curing so I must have made that update during the test session 😎
Chocolate Mint OG Auto Diary:
https://growdiaries.com/diaries/77696-humboldt-seeds-chocolate-mint-og-auto-grow-journal-by-glazedgrow
--
Thanks for checking in! Throw down a like and/or follow so I can return the favour 🙌
Check out my Diary of the Year 2020 Entry for my Original Auto Sour Diesel: https://growdiaries.com/diaries/54258-fastbuds-original-auto-sour-diesel-grow-journal-by-glazedgrow
IG: @GlazedGrow
CannaBuzz: @GlazedGrow

Likes
12
Share


@Northern_Ent
Follow
Aug 2: Mimosa Shot is hitting her stride now. She didn’t like the cooler temperatures as much as Sunday Punch EV, for example, but she’s loving this hot start to August.
Aug 3: done with force flowering and will now just leave her in the yard. So, back up to 15.5 h of daylight here now. Still using far red light at dusk.
Aug 6: Mimosa Shot has stretched again, likely mostly due to 3 days of hot weather.

Likes
56
Share


@Wastent91
Follow
Eccoci ragazzi alla terza settimana! La pianta sta crescendo ad un ritmo davvero elevato, nn ho mai visto nulla del genere crescere con questa velocità! E anche il colore delle foglie di un verde intenso, è la grandezza totale della pianta sono fenomenali! Sono davvero impressionato, non mi sarei mai aspettato che la coltura in idroponica sia così poderosa e significativamente molto più sviluppata rispetto ad una coltivazione in terra! Me ne avevano parlato molto di questa capacità di crescita così rapida, ma davvero nn sto credendo ai miei occhi! Sto imparando molto grazie anche al manuale di texier, ma sopratutto penso siano i suoi nutrienti a fare gran parte della differenza! Le radici sono davvero ben sviluppate e per adesso non ho mai cambiato l acqua xke mi è sempre sembrato di un ottimo colore, e non noto alcun problema per adesso dal out o di vista radicale, probabilemnte grazie alle basse temperature della soluzione che nn supera i 20 gradi celsius e questo penso sia un grande vantaggio che tende a non far sviluppare funghi o microrganismi maligni per lo sviluppo della pianta! Per adesso sono davvero piacevolmente sorpreso dei risultati che sto ottenendo! Spero di continuare in questa direzione e di avere sempre la giusta conoscenza di questo nuovo tipo di coltivazione così chiamata da William texier "bio - ponica" una giusta terminologia per descrivere qualcosa di coltivato biologico senza uso di pesticidi o altro, e che sia fatta in acqua senza suolo! Garzie anche al sistema di Mars Hydro Dwc che per adesso si sta rivelando un ottimo sistema idroponico! Posso solo dire garzie di far parte della loro famiglia e anche quella di Terra Aquatica, è spero di continuare con questi ottimi risultati! L unico problema del loro sistema è il cambio Dell acqua, che xo penso si aver risolto comprando una pompa che mi aiuti a svuotare completamente la soluzione vecchia e sostituirla con quella nuova.. Grazie a tutti voi che mi seguite che siete da stimolo per continuare questa battaglia di coltivare questa mia passione per la cannabis che nel mio paese "Italia" è ormai perseguitata e sta diventando illegale pure il CBD nonostante nn sia psicoattivo, e sta portando al. Collasso l intero settore produttivo della filiera della canapa! Siamo perseguitati peggio dei mafiosi, i quali hanno ottimi avvocati che li fanno uscire di prigione! Un buon 420 a tutti voi! 🙏💪😸🌱🌿🧑🌾😽💨🔥💥💣
Likes
91
Share


@DogDoctorOfficial
Follow
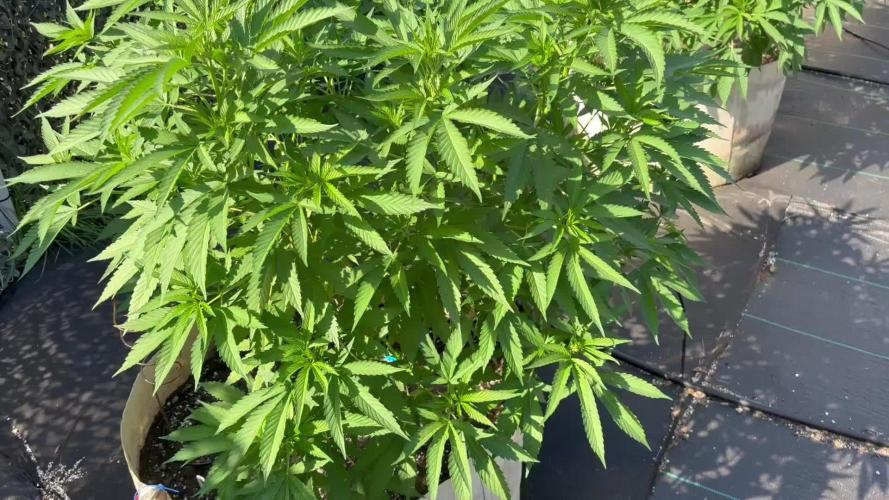
They are responding amazing to everything, they dont even look the same is just crazy retarded how well they are doing now , ate least to my eyes they do lol love the green, love how full is getting , love it all, if she keeps like this next week mb less i will put them in flower mode other way i wont have space for them after lol
For now i have my PPFD around 560 but i will bring this up wen in flower, i did IPM on them just in case with nematodes and a bunch of beneficial bugs and mites lol
As always thank you guys for your love , your time, your support and it all, i fell blessed and i am truly thankful <3 <3 <3
All i grow is medicine for myself, for me and for my best friend with is me nothing to sell, so don’t even ask
<3 <3 <3
All info and full product details can be find in can find @
https://www.zamnesia.com
https://aptus-holland.com
#aptus #aptusplanttech #aptusgang #aptusfamily #aptustrueplantscience #inbalancewithnature #trueplantscience #zamnesiaseeds #growerslove
With true love comes happiness <3 <3
Always believe in your self and always do things expecting nothing and with an open heart , be a giver and the universe will give back to you in ways you could not even imagine so <3 <3 <3
More info and updates @
https://growdiaries.com/grower/dogdoctor
https://instagram.com/dogdoctorofficial
https://youtube.com/channel/UCR7ta4DKLFMg2xxTMr2cpIg
Growers love to you all

Likes
Comments
Share

@Anon73
Follow
Week 5 and the plants are bursting out now.
I am very pleased with the electroculture, seems like the bugs do not want to touch the plants.

Likes
42
Share


@JohnDee
Follow
Hello all! This plant looks mature and I have a microscope but the thing is I thing it has over ripened and, some trichomes fell off? Or let me tell you my trichomes never turned MILKY OR WHITE. Some of them are amber tho. Anyways, on growweedeasy.com there is a guide that says : Harvest even if your trichomes are not ready. I guess it will be more a gut feeling to chop or not chop. Any input greatly appreciated.
And yes, I have chopped down the main cola and dried and smoked it. I guess it gets me high but I smoke all the time so it's hard to evaluate because I have also bought quality weed to smoke
So guys, only from the photos, what do you think?
My trichomes looks like half clear %10 amber. Do you think it could go to amber without stopping at milky? Or milky trichomes fell of but there was new growth and I could never see clear trichomes?
INPUT ? :)

Likes
2
Share


@Green_Peace
Follow
Increased Buddy to 1mm p/l. Really impressed with these nutrients so far, there's been no problems or defeciences the entire grow. All plants look happy, healthy and green. This plant is on the left of the timelapses.

Likes
8
Share


@Kitties_and_Colas
Follow
They seem to be coming along fine, no real PH issues despite reusing old Promix, more low stress training :) ... I may flip in another week or 2..
Likes
30
Share


@TightNugs
Follow
Budding like crazy under the new light,getting frosty.
Plant 2 now catching up a bit,no purps though 😡 dropped temps.
Around 20 days since first pistils
No issues 🤞🏴🍁
🍁🍁🍁🍁
Breeder-White label purple bud auto
🍁🍁🍁🍁
Light-Voost VST 240(discount code TightNugs) https://voost.com/

Likes
3
Share


@4D2
Follow
Ich habe letzte woche Ableger aller Mutterpflanzen gemacht und vorerst den Besten ermitttelt . Dies ist ganz wichtig falls eine der Pflanzen ein KEEPER sein sollte .
Likes
16
Share


@Marijuanaisland
Follow
Não aguentava mais espera para provar esse botões resinados ela não teve muita força no os ramos entao tive que colocar estacas para seguradas


Likes
26
Share


@MG2009
Follow
03/13/2021
Side branches are developing nice, I may do a little more lst to help lower tops to catch up before flowering starts
Ps.
Couple videos uploaded
Day #6 doing some bending, and broke a branch off so I dipped in rooting powder,threw it in some vermiculite soaked with Bonide Garden Rich Root & Grow 4-10-3 with (IBA) Lets see if she will root! Fingers crossed🙏
Likes
26
Share


@Stash074
Follow
This week went well..no complaints on my end..as you can see the ladies are starting to produce bud..the stretch is pretty much over..for some reason Bruce banner # 1 didn't stretch as much. These past few days involved hours and hours inside the tent defoliating the girls..I didn't know how much more defoliating would be involved when Scrogging..but I know it'll be worth it at the end..just trying to have control over all the variables I can control for a successful harvest. Did a slight increase with liquid kool bloom from 10 ml to 15 ml per 5 gallons. Will keep an eye on how they respond..will keep yall updated in my next upload. Happy Growing 😎
Likes
26
Share

@DrGruen
Follow
Diese Woche hat sich die Sonne von Ihrer besten Seite gezeigt und alles gegeben...........😊
Den beiden Ladies hat es sehr gut getan und sie sind schön in die Höhe und Breite gewachsen.......
Auch das Sorgenkind der beiden hat die mega Sonne nichts ausgemacht und ich denke das sie endgültig übern Berg ist.......😁
Jetzt hinkt sie natürlich der normal gewachsenen Pflanze ca.2 Wochen hinterher.....😌
Bei der grösseren Lady sind auch schon erste Blüteansätze zu erkennen.......
Ausser etwas LST habe ich die beiden in Ruhe gelassen und sie in der Sonne chillen lassen......😜
Drücke allen Outdoor-Bauern die Daumen, dass es so schön sonnig bleibt und die Temperaturen sich auf Normalwerte einpendeln.......


Likes
65
Share


@Dedon
Follow
Hi everyone !
Everything is OK !
Roots are stronger day after day. i think i'll switch to 12/12 tomorrow and change the water at the same time 👌