


Likes
104
Share


@Wastent91
Follow
Ehi ragazzi come potete vedere anche questa ragazza sta crescendo più che bene! Grandi foglie e nuovi internodi e diramazioni si sono sviluppate dall ultima settimana, sono più che soddisfatto di come è in grande salute nonostante abbia toppato due volte, mi aspetto un buon numero di cime più o meno della stessa grandezza e produzione, mi aspetto tanto dalla solita qualità che Barney'S Farm offre da decenni ormai! Buon 420 a tutti ringrazio Mars Hydro come al solito che ha reso tutto ciò possibile e tutti voi che mi seguite, spero che che vi piacciono le mie ragazs quanto a me! 💪✌️😸😎🙏🌲💖

Likes
11
Share

@GERGrowDesigns
Follow
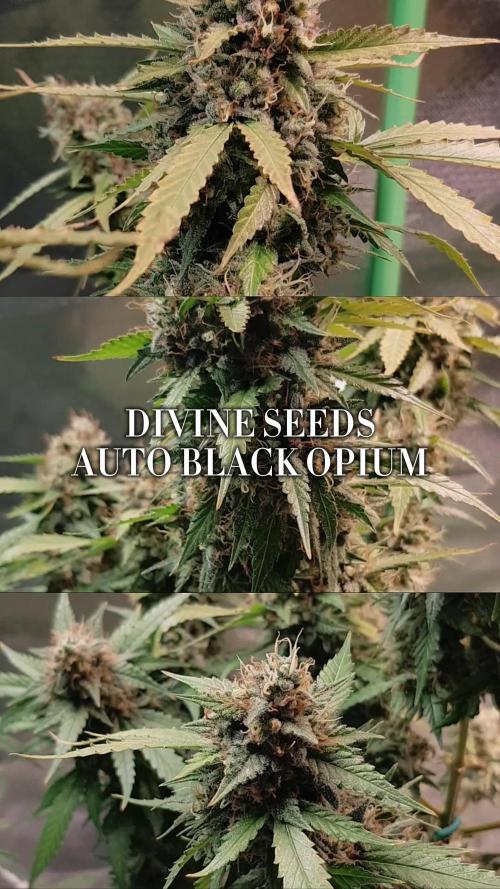
Welcome to Flower Week 8-9 of Divine Seeds Auto Black Op1um
I'm excited to share my grow journey with you all as part of the Divine Seeds Autoflowering Competition 2025. It's going to be an incredible ride, full of learning, growing, and connecting with fellow growers from all around the world!
For this competition, I’ve chosen the Feminized Automatic strain: Auto Black Op1um
Here’s what I’m working with:
• 🌱 Tent: 120x60x80
• 🧑🌾 Breeder Company: Divine Seeds
• 💧 Humidity Range: 50
• ⏳ Flowering Time: 8W-10W
• Strain Info: 25%THC
• 🌡️ Temperature: 26
• 🍵 Pot Size: 0.5l
• Nutrient Brand: Narcos
• ⚡ Lights : 200W x 2
A huge thank you to Divine Seeds for allowing me to be a part of this amazing competition and Sponsoring the Strains. Big thanks for supporting the grower community worldwide! Your genetics and passion speak for themselves!
I would truly appreciate every bit of feedback, help, questions, or discussions – and of course, your likes and interactions mean the world to me as I try to stand out in this exciting competition!
Let’s grow together – and don’t forget to stop by again to see the latest updates!
Happy growing!
Stay lifted and stay curious!
Peace & Buds!


Likes
23
Share


@M_J_KllrAutoSystems
Follow
These girls I’m sure are going to be my new #1 and possibly #2 for harvest’s
(DAY4) fill water
Processing
Likes
10
Share


@GIJOSE
Follow
Hello everybody! Hope everyone is doing well with all its going on in the world. Today's week 5 of my clones. They all seem to be doing very well except one leaves her kind of showing signs of lockout. All the others are rooting very well there's a couple of more the roots are coming up the bottom of a cup. My next weak I'll go ahead and up pot all the plants into .5 gal pots. Until next time Cheers! -G.I.JOSE


Likes
19
Share


@TopNotchBud
Follow
Very easy strain to grow. I grew the White Critical Express previous to this grow, I really liked it and wanted to try growing an Autoflower so I went for the Critical 2.0 and it was worth the grow.


Likes
55
Share


@pifflestikkz
Follow
Day 158
07/10/24 Monday
Feed today using de-chlorinated tap water and calmag, pH to 6.2.
Picture and video update 📸
Day 160
09/10/24 Wednesday
So she has started to seed again in only 3 places I can see on different tops I have one bean.
So flush STARTS NOW,
Using 10L of De-chlorinated tap water pH 6 with flawless finish
Day 162
11/10/24 Friday
De-chlorinated tap water pH 6 only today again pH 6.
Day 163
12/10/24 Saturday
Another Flush today, using 10L de-chlorinated tap water pH 6 with flawless finish.
Day 164
13/10/24 Sunday (End of week)
She is starting to generate a tangy pineapple 🍍 😋.
Picture update 📸💚
Likes
7
Share


@HIAZ_urbanbudfarmer
Follow
These buds are absolutely awesome, very frosty solid dense nugs👍 have been flushing this week as there ready to harvest . Orange pistills cloudy trichomes with some amber's & the clusters have closed up . Will give them 48 hours of darkness before harvest.


Likes
4
Share


@AlpAge_Cino
Follow
Still on rain water... looks better! Now in 9th week of flowering, I removed almost all big leaves from motherplant. Clones look OK, buds getting bigger and bigger.
2023/04/21 : I vaporized about 0.5g of dried popcorn buds from mother plant. I was high at the begining and stone at the end, I fell asleep watching a movie. The bad news is I found some seeds in these buds : it won't be sinsemilla! 😪


Likes
6
Share


@DeepRootsGrowTrees
Follow
Week#11 Gnomo Auto By Kannabia
Week#11 Jan. 6th-13th
Gnomo Auto is a superb 👌 strain to grow for any grower. She is covered in trichomes and her buds are dense she has a nice aroma to her and she looks amazing 👏.


Likes
22
Share


@Appoldro420
Follow
All going well now, just lowered my setup by 35cm to gain more space for the ladies... also now my reservoir is below the cabin instead of inside, so much cooler water now (in fact I had to pace a heater to avoid temperature below 18˚C)

Likes
3
Share


@ojulhao
Follow
At this point, I’m wondering if there was something I could have done earlier to avoid the significant height difference between the two plants. Jack Herer turned out compact, while Northern Lights grew taller, with buds more scattered and spaced out.
A few weeks ago, I did some lollipopping to remove very low, underdeveloped buds, and also some defoliation to help light reach areas that were shaded.
I’ve been really struggling with the Berlin summer. I can’t get the tent temperature below 28°C. Sometimes the humidity outside the tent is higher than I’d like, but since I don’t have a dehumidifier, I usually just leave it as is, especially since it rarely stays above 55% for too long.
Just a quick note about the nutrient Vegan Phosphor Boost:
I’m following the recommended dosage of 3g per 10L of pot size (not per liter of water). Unfortunately, GrowDiaries only allows nutrient input based on volume per liter of water, so I can’t log it exactly as used.

Likes
11
Share


@TheThiccBud
Follow
sooooo... I have now harvested the plants and they looks so pretty 😍😌 I'm really proud of myself to have produced such THICC BUDS!!! 😅😍 and the smell is so awsome 😵 this strain is a 11 from 10 👌 a realy big Thanks to Royal Queen Seeds for this 2 awsome strains 💪 A detailed rating comes after drying with a detailed score board 😄

Likes
35
Share


@SooSan
Follow
90x60x140 (Mars Hydro)
FC-E4800 (Mars Hydro)
Easy2go Aquavalve5 (Autopot)
Living Soil (Demetearth)
Bruce Banner (PEV Seed)
Gorilla GG4 (Ganja Farmer)
Cream Caramel (Sweet Seed)
Gorilla Gelato (Ganja Farmer)
Blueberry (00 Seed)
Kalini Asia (Zamnezia)
Biscotti Mintz (Barney's Farm)
Blackberry Cake (Sensi Seed)
Amsterdam Amnesia (Dutch Passion)
Gelato Cookie (Ganja Farmer)
Purple OG Punch (Ganja Farmer)
Sweet ZZ (RQS)
Rainbow Road (Paradise Seed)
Substrat ~50L:
30L Super Light Mix Biotechnologie
18L coco
2L perlite
1,7kg lombricompost
350g guano de chauve-souris
350g Zéolithe
350g Basalte
170g guano vers de farine
170g biochar
0,7g Endomychorise glomus intraradices
0,7g Bacillus Amyloliquefaciens
Paillage de luzerne alfalfa
Arrosage avec 2ml/L de mélasse de canne 1x par semaine
Pulvérisation avec 1% d’huile de neem


Processing
Likes
10
Share


Likes
14
Share


@MrReeferMadness
Follow
From the floor to the top bud site these girls are sitting at 4ft (18days into flower)
I took just ander 30 cuttings from this grow 2 weeks ago (half gorrila and half psyk) and kept only 6 psychosis clones for a new diary starting soon 😉😎
The remaining clones went to New homes.
