The Grow Awards 2026 🏆 


Likes
Comments
Share
@btcywtsitw
Follow
These were quite an experience to grow. My second grow ever and they are great. I loved the way they flowered and how they responded to topping. They absolutely loved it. I would 10/10 grow again. Strong genetics and a very strong high.

Likes
Comments
Share
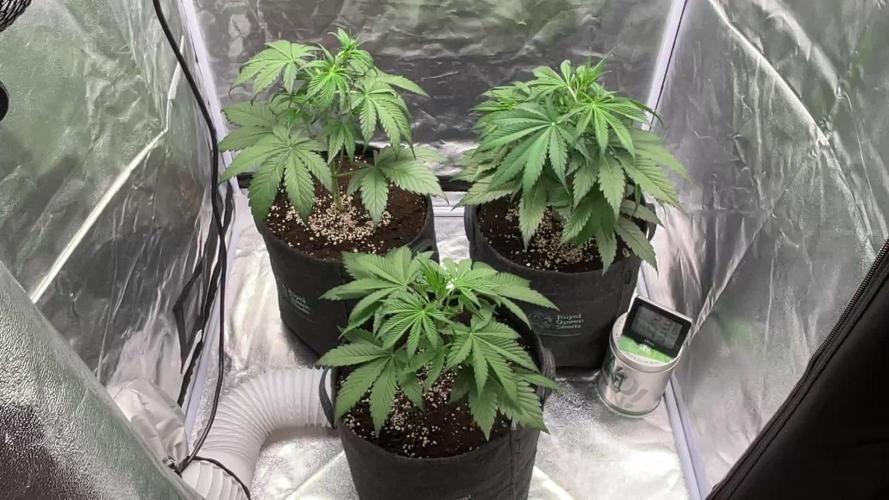
@eldruida_lamota
Follow
Vamos familia, actualizamos la primera semana de floración de estas Fruit cake de Seedstockers, salieron las 3 de 3, 100% ratio éxito.
Aplicamos varios productos de Agrobeta, que son increíbles para aportar una buena alimentación a las plantas.
Temperatura y humedad dentro de los rangos correctos dentro de la etapa de crecimiento.
La tierra utilizada es al mix top crop, por cambiar.
De 3 ejemplares seleccioné los 2 mejores para completar el indoor, también cambié el fotoperiodo a 12/12 y apliqué una buena poda de bajos, se ven bien sanas las plantas, tienen un buen color y progresan a muy buen ritmo por el momento, también marcaron las preflores.
Agrobeta:
https://www.agrobeta.com/agrobetatiendaonline/36-abonos-canamo
Hasta aquí todo, Buenos humos 💨💨💨


Likes
2
Share
@Coman
Follow
My ladies are growing fast, except Gelato, which is a little smaller. But she looks fine to me.
I’m awaiting them to stretch a little bit next week.

Likes
48
Share
@Rangaku
Follow
GSC is doing great she’s covered in nice bud and winding down now , she’ll back off on the feed this week and start flushing next week . I’ve already picked a few smokes off of this little monster and it tastes so nice . I super cropped a few of the taller buds just to get them out of the light so much and gave her a defol, she’s happy as .
Likes
27
Share
@Bluemels
Follow
Nun ist es bald geschafft und ein holpriger Grow geht der Ernte entgegen.
In 3 Tagen plane ich die Ernte.
Glücklicherweise waren die letzten Wochen für die Mädels nicht mehr so stressig, um so mehr für mich 😜
Die Temperatur und Luftfeuchtigkeit aufrecht zu erhalten war nicht immer leicht.
Ich habe viel Zeit mit basteln verbracht 😎
Es hat sich gelohnt!
Mittlerweile sind die Blätter schon recht hell und haben sich stark zusammengezogen.
Die Trichome sehen milchig bis leicht bräunlich aus.
Sie richen appetitlich 😋 wie ein Gewürz
Likes
16
Share
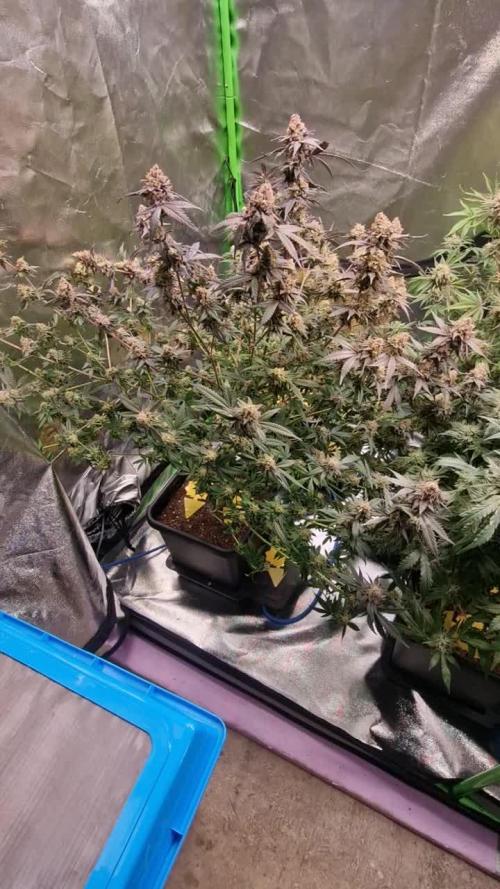
@EazyRider
Follow
I just took down the rest of the Grape Deebo harvested last week, this is the red Deebo with green stems. The other one looks like it might have another week. I have taken off one stem as a control
So enjoy some bud pr0n.

Likes
37
Share
@Reyden
Follow
Ho saltato una settimana per corbezzolo che è solo cresciuta con il ramo principale e senza laterali, si vede che ho cambiato luce troppo presto e anche lei, essendo che era la più piccola, è andata sempre cercando la luce…oltre questo ho sbagliato e ho dato troppa acqua 💦 qualche settimana fa e la pianta ha avuto tante carenze e altri problemi radicali…spero di recuperarla almeno un po’ ma parlando di resa mi metto il cuore in pace… procediamo e vediamo come evolve 🙂✨🌀🌱💚💥🤞


Processing
Likes
43
Share
@Jack_Greenstalk
Follow
week 6 seeing strong new growth in both plants, trying to contain vertical growth with low and high stress training before I add the double layer trellis netting next week. started roots by heavy 16 at 1 ml per gal, and i have foliar 2 times past week (once every 3 days) heavy 16 foliar at 40 ml /1 l (breaks down to 4 ml per 100 ml of water, mist about 50 mls on bottoms of plants then all over an hour after lights turn off.
did some defoliation on lower fans to allow light penetration to potential mid level tops

Likes
18
Share
@Wicked_Stix
Follow
Had a lot going on this week so the plants didnt get any care or maintenance at all other than just checking on the water level a couple times. They need some major defoliation which I wanted to do this week but procrastination is the vibes currently. Will probably get some done next week.... the plants are looking good and most of them are bushing out pretty nice. They dont seem to be stretching as much as they normally do by this time, but they are transitioning to flower. Will probably do a flush and water change soon since they haven't had one in over a month. I'm just anxious to see some frosty buds at this point.

Likes
72
Share
@JUNGLE_B4RNS
Follow
Week 4 of flowering, time to switch to the Bloom nutrients. All the ladies have been cleaned/trimmed last week, I will go for another unexpected buds hunt, the plants are gonna make some few shoots, usually on the nodes, I will pinch off those lil new growth under the canopy to avoid any waste of energy. And I will keep on plugging off any big fan leaves if it starts to recover a lower bud.
Last week using the humidifier, I will swap it versus the dehumidifier next week.
Unfortunately the 2 Afghan Hash Plants were males and have been pulled down.
[Day 80]
Water + AllZymes + Flower Stimulator 👈👍😉 + Alga-Max + Earth Bloom Mix
Bad Azz
[Day 81]
Water + AllZymes + Flower Stimulator + Alga-Max + Earth Bloom Mix
Acapulco
Tangerine
Ams L
Water
Vanilla
G13
[Day 82]
Water + AllZymes 1ml/1l + Flower Stimulator 2ml/1l + Alga-Max 2ml/1l + Earth Bloom Mix 4ml/1l
J.H
BBG TH,SS
Remo
Y Griega
GSC
Chitral
Cookies
(P.S: I’m looking for a job in the Cannabis industry as, Master Grower, Mineralogist, Quality Control 🐞)
This diary is updated daily ☝️
Likes
8
Share
@NoProbation4Weed
Follow
Very Nice looking and good Smelling Plant. Buds after Trim are medium dense but very tasty.
Flavourwise it goes into ripe Berrys with a hint of Citrus and Soapyness in the background.
The Plant looks exactly like on the pictures High-Giraffe-Seeds shows on their website.
All in all definetly a recommendable Plant to grow.
Likes
10
Share
@MG2009
Follow
12/15/202
looks good she is Starting to stretch above the leaves. Starting to smell mom turned out very potent even at 50 days flowering. This will hopefully be earlier because of Hydroponics.🙏


Likes
5
Share


Likes
2
Share
@johnjoe9525
Follow
Without really knowing i think its starting to look pretty good, few mistakes with the way the stem is bent.


Likes
27
Share
@GrowBro1981
Follow
Jaaa, was soll ich da noch sagen... 😅😅 Hat Spaß gemacht und das Ergebnis ist Top!!
Folgt mir auf Facebook für mehr Infos, Bilder und Videos 🤗 🤗 🤗
Likes
6
Share
@south420terps
Follow
Just one more week for harvest the smell is crazy trichomes milky and amber
Likes
5
Share
@Sur_cannabico
Follow
7semanas desde la apertura de cotiledones, vamos super. El spectrumboard de heavengrowligths y abono orgánico de wonderlandAgronutrients.
Que mejor combinación 🔥