
Likes
Comments
Share


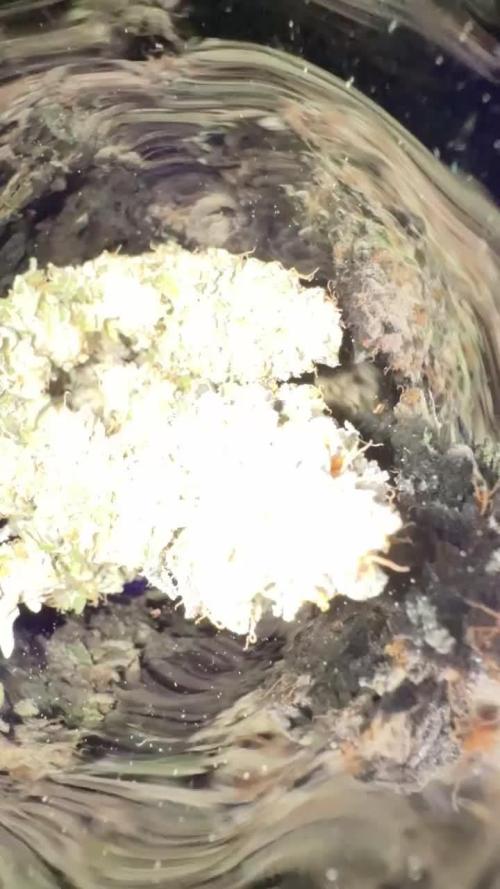
@FlavoursUk
Follow
So, very first run with the new set up which I'm excited for. Currently just getting the environment dialled in. Running a RDWC system, along with LEDs, the recipe for success.
Running some great genetics from seed stockers (purple punch).
Will be back with an update soon, for now enjoy the pictures and videos I upload. FlavoursUK
Day 6. Girls doing well. Roots hit the water so expecting some nice growth now. pH fluxing between 5.9/6.0 which is good as that's where I want it, especially for veg. Cant wait to see what I can do with this. Stay tuned.

Likes
33
Share


@MrStryker
Follow
Time wasnt right going to 48 hours of darkness tomorrow !!! Wednesday they’ll get the chop !!!!


Likes
6
Share


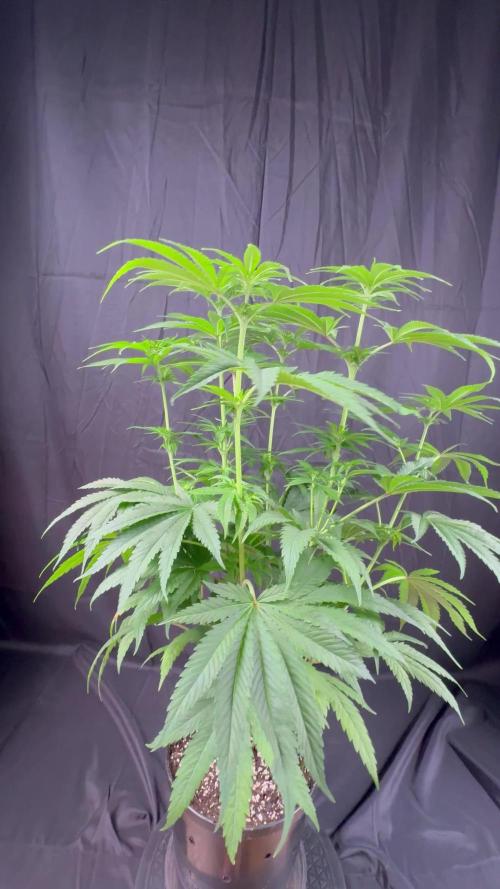
@Growstopher
Follow
5.30.25.
3rd week of flower! Plant is starting to put on some more bud sites and tie down method is done. She is drinking about 1 gallon a day and finally growing like she should!!
Thanks for checking out grow!

Likes
8
Share


@Kaotic_Herb
Follow
What's happening?! Sorry for being a day late. But the buds on WISDOM and PATIENCE are very sticky and have a great fragrance. I have cut the feeding servings down to one nutrient, which is the Tiger Bloom, to focus on the last stages of flowering.
With ANNIE and LOYALTY(White Widow), I only feed them Morbloom. When growing outside, your cultivation takes a bit longer. You have to allow nature to run it's coarse. To all growers, stay dangerous. There is no point playing defense.

Likes
29
Share


@Myrcene_Dream
Follow
-Pretty close to being done but trichomes are not ready yet. I usually like about 70% cloudy and 30% amber.
Likes
10
Share


@BigDaddyK
Follow
Looking lush bottom 2 , change Wednesday
Friday day 38 quick video fir you
I’ve been working on m6 videos , so I did another
Have lights on full power for 10 hrs , equivalent of 1.5 suns


Likes
31
Share


@MadeInGermany
Follow
Info:
Unfortunately, I had to find out that my account is used for fake pages in social media.
I am only active here on growdiaries.
I am not on facebook instagram twitter etc All accounts except this one are fake.
Have fun with the update.
Flowering day 8
since time change
to 12/12 h.
Hey everyone ☺️.
As the flowering begins you can already see a clear stretch of the lady :-).
Yesterday 2 g GHSC Bio Bloom per l coco were added.
In 2-3 weeks I will add another 1 g per liter 👍.
The tent was cleaned and everything was refilled.
Have fun with the update.
Stay healthy 🙏🏻
You can buy this Strain at :
www.Zamnesia.com
Type:
Runtz
☝️🏼
Genetics:
Zkittlez x Gelato
👍
Vega lamp: 2 x Todogrow Led
Quantum Board 100 W
💡
Bloom Lamp : 2 x Todogrow Led
Cxb 3590 COB 3500 K 205 W
💡💡☝️🏼
Soil : Bio Bizz Coco
☝️🏼
Nutrients : Green House Seeds Company Powder Feeding Bio
☝️🏼🌱
Water: Osmosis water mixed with normal water (24 hours stale that the chlorine evaporates) to 0.2 EC. Add Cal / Mag to 0.4 Ec Ph with Organic Ph - to 5.8

Likes
3
Share


@Probation2Propagation
Follow
We had a 100 percent germination rate on the iced up cherries and tropixx by square1 genetics. Today we transplanted the plants into our 1 gallon Veg pots into our organic living super soil. We fed the girls our bounce back recipe to help with the stress of transplant and topping. We will let the girls adjust for a week and then begin our LST. Video is 6 hours after transplant.

Likes
1
Share

@Ninjabuds
Follow
Super boof is doing amazing like expected. The nodes are real close and stacking well medium size leaves with fast growth and a super strong smell. I bet this one finishes fast it’s ahead of the others
All of the plants have really taken off. Usually I have a couple plants that are much smaller but all of these plants are getting huge. Seeing I got a new eluefah uap1500 the other day and I have my 2 fastbuds plants under that now I have my spider farmer light free. So I popped up another 2x2 and moved 3 of the 10 plants into the 2x2 and left the 7 other in the 2x4.
Likes
47
Share


@Kief_Richards
Follow
I've had one busy month. Been able to make time for the ladies, but not enough to update GD. Not enough days in the week it seems. Things are coming along nicely. Only about 5 - 10 % amber trichomes. Still has a few too many clear. Maybe another three weeks?

Likes
37
Share


@Smoking_Joe_Frasier
Follow
Progress and Observations
In week 6 of flowering, my plants are displaying significant development. The buds are swelling noticeably, and resin production is increasing, filling the grow area with a rich aroma.
Weather Conditions and Plant Health
Unfortunately, the weather in Germany has turned to consistent rain over the next five days, which is less than ideal for the final growth phase. To protect the plants, I've moved them into the greenhouse full-time. This controlled environment shields them from adverse weather conditions, ensuring stable conditions for continued growth.
Pest Management
I'm pleased to report minimal pest issues thus far. Nightly patrols continue to manage the snail population effectively, supported by lettuce leaf traps. There have been no signs of spider mites, aphids, or thrips, providing relief. With the ongoing rainy weather, I remain vigilant against potential snail problems.
Low-Stress Training (LST) Update
The plants I trained with LST have responded positively and continue to develop well. I did some more LST to maximize light to the colas. The canopy remains even, and the bud sites are receiving ample light, allowing for a slight upward stretch to maximize bud growth during these final weeks of flowering. I try not to cut off any fan leaves because I think they're here for a reason. I like to tug them behind the steam or the side branches. Only if the leaves show significant signs of illness or pest then I remove them.
Looking Ahead
As we move further into the flowering stage, my focus will be on maintaining optimal conditions to maximize bud development and resin production. I am also diligently monitoring the humidity levels in the greenhouse, as this is crucial for preventing mold growth. The plants are looking promising, and I’m excited to see how they progress in the coming weeks.
Update 03.07
What is noticeable is that both untrained plants are entering the full flowering mode faster than the trained ones. Have you had similar experiences?
Update 05.07
Today I checked the girls and found the Banana purple punch with the top leaves starting to curl down. After asking the community I found out that everything looks like a starting nitrogen toxicity. But only on that plant. Seems kind of strange that the others having no issues at all despite having the same amount of nutes. I decided to treat the symptoms a once so I flushed with 5l PH water. The first runoff was a little lower (5.5 / EC 1.09) but not really concerning.
Afterwards I give the plant the half amount of the tripart flowering scheme (with added CalMag 2 ml/l PH 6.2).
Thanks again to AsNoriu and Hashy
Stay tuned for updates and like always, feel free to give feedback about things I can improve🍀🥦
Processing
Likes
9
Share


@JetgrowerTv
Follow
Add some Astro flower the schedule I think I ran in to some issues with one but the smell coming off of them is amazing lemon candyish i guess smell but still kinda small but I’m in the basement fighting humidity issues and cold temps but doing ok cheers
Likes
13
Share


@Bryankush
Follow
Bene finite le 3 settimane di fioritura ha dei calici ben gonfi e con un profumo tropicale spettacolare😁🤤
Giorno 2 la sera viene annaffiata con 2L di acqua a 980ppm
Giorno 7 viene annaffiata con 2L di acqua a 1000ppm

Likes
79
Share


@JUNGLE_B4RNS
Follow
Week 2
Needed to pop more seeds. I will make the count next week and see which phenotypes are the best to select to grow. Some batch of seeds didn’t sprout at all, i.e: AK. Super Skunk only 1/3. Spliff Strawberry sprouted after 1 week in cotton when I was about to give up counting on them.... this is why it’s always better to pop more seeds than expected to grow !
This isn’t the best start, but things shall go back to normal in a couple of weeks.
The fan is on speed 1 and not blowing directly on the seedlings. The Mars-Hydro LED is definitely an excellent light for growing Cannabis when you keep it at the right distance. Cellmax BIO soil is perfect, no need to start in plugs you can directly put the germinated seeds in the soil without being worried about the nutrients and the EC/mS.
Let’s see next week how it goes.
(I’m looking for a job in the Cannabis industry as Master Grower, Mineralogist, Quality Control)


Likes
8
Share

@Psychopat_od_vedle
Follow
zdravím všechny začínám 8 týden.den 49 holky vypadají skvěle a ta vůně ?stále hnojim dostávají co proto od všeho trošku navíc 😁 jinak fuh musela ven potřeboval jsem místo na zillions který jsem krásně roztahnul ale to znáte 😂nepadnul mě do oka ten škaredý fuh 🤣pár fotek na kukando 🤣🤣🤣🤣
Likes
7
Share


@Ieiogrow94
Follow
Eccoci qui...
Tutto va per il meglio, questa settimana ho eseguito Lollipopping e Defoliation per far si che le cime principali sprigionino al meglio il loro vigore.
Siamo verso la fine del progetto ora bisogna solo aspettare la fine...
Grazie a tutti per il supporto🔥🌲❤️

Likes
25
Share


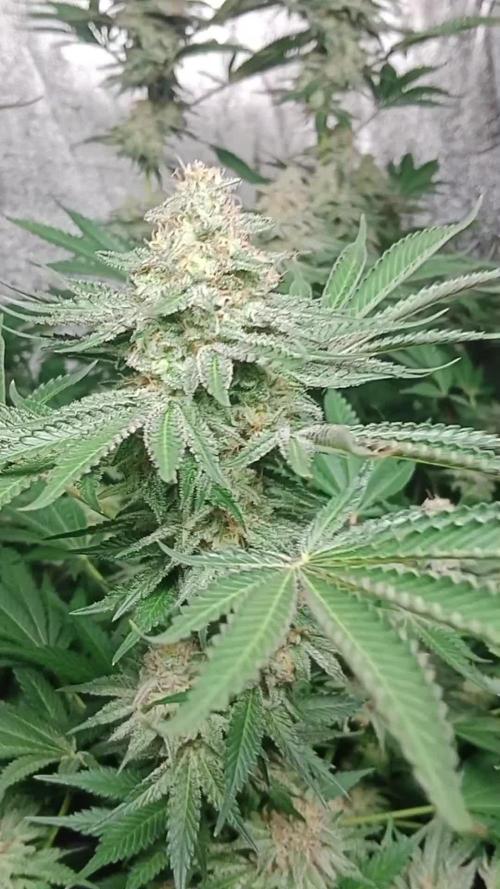
@Dingle
Follow
WEEK 8 🌻
Seeing really good bud development again over the last week.
Both strains are showing a majority of cloudy trichomes with some amber ones starting to appear so I decided to give them there final feed at start of the week and then their first flush 6 days later using only ph’d water and some cannazym.
Defoliating and using sticks again to get as much light to the lower buds as possible.
Lights out for 48 hours hopefully some stage next week.
🤞🏻☺️✌️