The Grow Awards 2026 🏆 


Likes
Comments
Share
@GREENPHOENIX6262
Follow
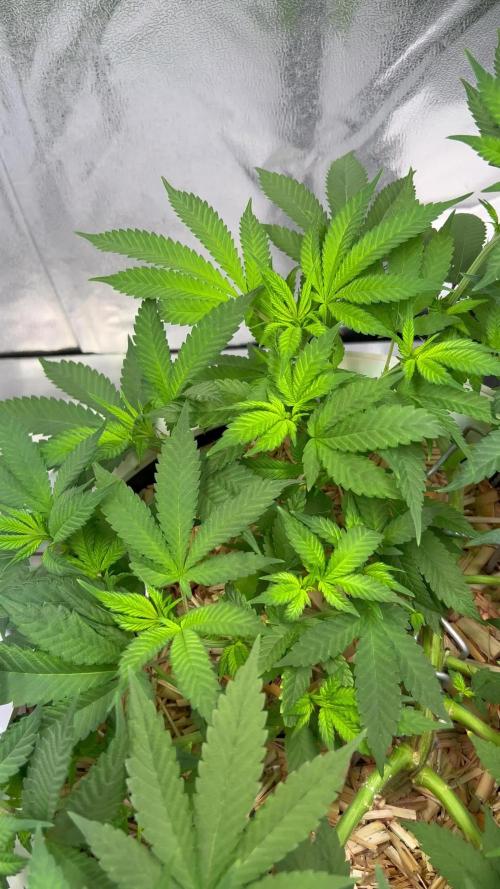
10/28 - (2x2-4x4) Both tents running at 18/6 (Clones) - flush feeds next 2 weeks - flipping into flower by next week - had a small PH issue since addressed.
11/03 - (2x2-4x4) Both tents running at 18/6 (Clones) - flush feeds this weeks - flipping into flower by this week - new humidifier added - only running during lights on - both tents will be flipped at the same time by 11/08 - before then just water and carbo flush feeds.

Processing
Likes
33
Share
@Eyeduno
Follow
I’ve topped these plants quiet abit the super silver haze seems to accept the way I do things more than the g13


Likes
8
Share
@Timbo_Growz
Follow
Some beautiful colors coming through as we head into week 10! I removed the scrog net because I needed it for my other grow… had to tie a lot of buds up because they are so dense and heavy!
I’m only watering from now on until I don’t have much nutrients left in the excess water. You can already see how the plant gets rid of its chlorophyll as the leaves are getting darker and darker.

Likes
15
Share
@HeavyHead
Follow
Flushed and using fresh water from here out :) starting to really smell strong, very sweet smelling. had to setup the carbon filter lol. Definitely looking forward to harvest time ;)
Will add more pictures as the week continues.

Likes
8
Share
@Australianbuds
Follow
In start week 4 flowering! Doing well! Starting to fatten out now! The 2 smaller ones are Bruce banner and are 2 weeks behind the rest in flower!

Likes
5
Share
@alafmalaf
Follow
This week was all upgrades and preparing for a 2 week vacation where my gf would need to take care of the plants but that would end to almost killing all of them lol stay tuned.
Likes
12
Share
@MadeInGermany
Follow
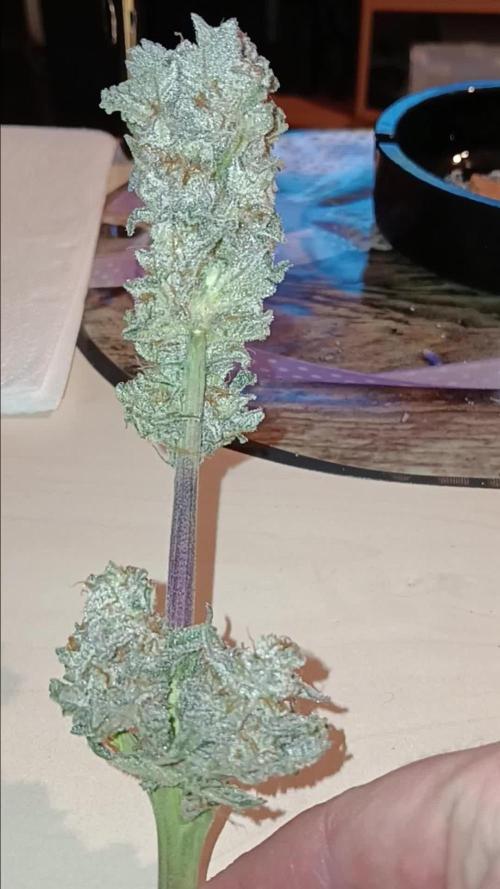
Harvest day 64
since time switch
to 12 / 12 h
Hey guys :-)
Finally it's time 💚
The lady is done the large leaves have been removed and hung upside down to dry in the dark drying room.
You can now stay there for 11-14 days at a temperature of 18 degrees and 55-60% humidity.
After 11-14 days it is neatly trimmed by hand and placed in jars with boveda packs 58.
After 4 weeks Boveda 58% come in and are ready for testing ;-).
Let's get to the plant 💚.
The smell is great I'm curious about the taste 💚 It is very fruity and has a touch of Tangie 😍
The taste remains on the palate even after a few minutes 👍
The look is very nice even if it looks very loose and not as nice and firm as other buds it is still a 10 out of 10 because of the taste 😀
Their growth behavior was perfect from start to finish 👌
I hope you liked the diary and wish you all a nice week.
If you have any questions, please contact us 💚
stay healthy 💚🙏🏻
👇🏼👇🏼👇🏼👇🏼👇🏼👇🏼👇🏼👇🏼👇🏼👇🏼👇🏼👇🏼
‘Powered by GreenHouse Feeding’
Copy the link for 10% off all Nutrients 👇🏼
http://shop.greenhousefeeding.com/
affiliate/madelngermany_passiongrower/
👇🏼👇🏼👇🏼👇🏼👇🏼👇🏼👇🏼👇🏼👇🏼👇🏼👇🏼👇🏼
Water
💧 💧💧
Osmosis water mixed with Cal/Mag (24 hours stale that the chlorine evaporates) to 290 ppm and Ph with Ph- to 5.8 - 6.4

Likes
13
Share
@Farmerskr
Follow
Terminando la primera semana de floración en 12/12, muy linda estructura, los brotes ya formaditos y listos para florar.
Gorilla Banana - bsfseeds
Saludos
Ig: @farmer.skr

Likes
16
Share
@Rinna
Follow
The ladies are still doing great and stacking very nicely! The trichomes on both pheno’s are insane, super dense buds too. The leaves do look very very dark green with slight tip burns, so I dosed down the nutrients slightly from 1100+ to 950 ppm. The grow light makes the leaves look more light green than they actually are (check the night shots). Both plant smell super super sweet, not really blueberry (yet) though.

Likes
2
Share
@YehGreen420
Follow
tem dias melhores tem dias piores, estão um pouco sensíveis, talvez muita agua na rega (1l) vou reduzir a ver se melhora.
Algumas estiraram ate os 55/60 outras ficaram pelos 25/30 mas estão abertas já e com varios buds ao sol! :)
Likes
5
Share
@Lagriculteur420
Follow
The two first topped plant show good start of flower but i don't think this will be my best run, i've started tobguve them more nutrients


Processing
Likes
10
Share
@Barcelona_Farmers710
Follow
Empiezo lo bueno Farmers pasamos a la preflora... este cultivo probaremos Delta 9 para probar aumentar la resina!👌🏻

Likes
Comments
Share
@Growhome_90
Follow
30/07:
Wir starten heute in Blüte-Tag 1.
Die Pflanze hat sich super entwickelt und viele gesunde Triebe entwickelt.
Das Netz habe ich auch schon eingehängt, so kann ich die Triebe noch Lenken
und möglichst vielen von ihnen Licht geben

Likes
5
Share


Likes
60
Share
@Clutch
Follow
Back to moving the plant in and outside. Bad weather coming up😕
This week was average, a few good sunny days but also cold nights. Started up with the green sensation and alga bloom. There are fan leaves that are showing a pretty quick yellowing. Not so healthy and green anymore now 😁This is maximum week 5 of flowering so it's a bit too soon to be losing leaves like that.. I'm Thinking she has a N defenciy because I barely gave grow nutrients since it was in the soil for the first 6 weeks. Second thing is a lack of light for those leaves. the Alga Bloom has N in it so I hope they revocer it a bit. The leaves on the buds themselves look good so it's probably the plant using the leaves for nutrients in this stage. Let me know what u guys think....?
Update, look at the video, dirty bugs😠😠😠 caterpillars I think🤔
took away some infested leaves. And some of those fuckers. Hope it doesn't get worse
Buds are starting to thickening, she has a little smell on her too by now. They already have some brown pistils on them. Nice plant but I hope the yellowing doesn't go to fast. 1,5L water with 4ml alga bloom and 1ml of green sensation was given this week. Will continue to give this for the next 3 to 4 weeks. Happy growing friends.
Likes
20
Share
@Swollen
Follow
The overall experience of growing and smoking this genetic is an 8 star in my opinion, definitely good! I'll grow it again just for the good smell ahahah
Likes
20
Share
@Dunk_Junk
Follow
18cm vertical growth this week. She's growing well. Not much else to report.