Likes
Comments
Share
@DevelGrow
Follow
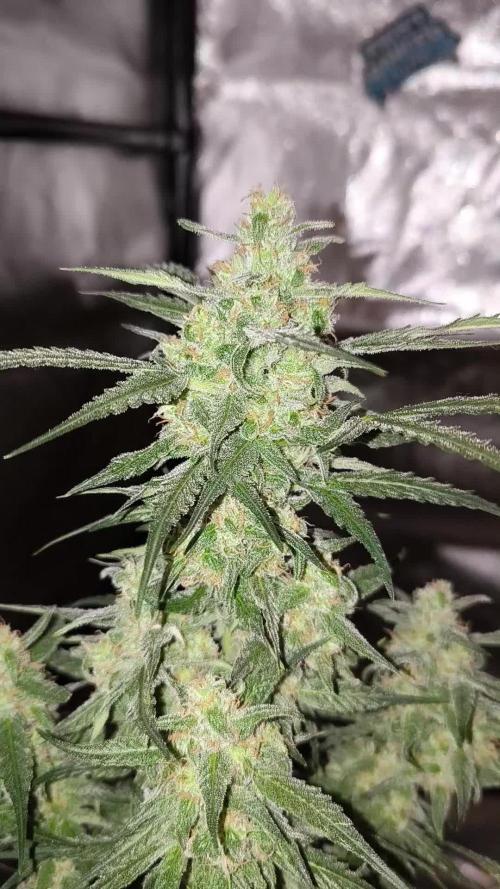
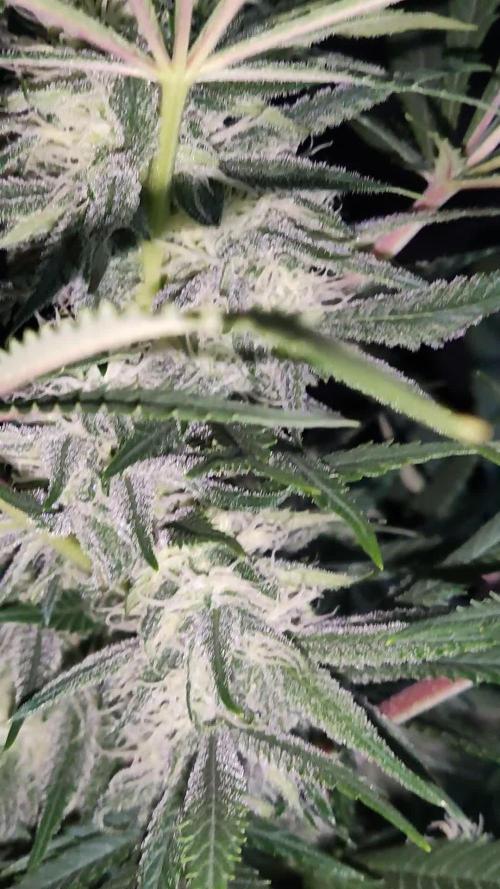
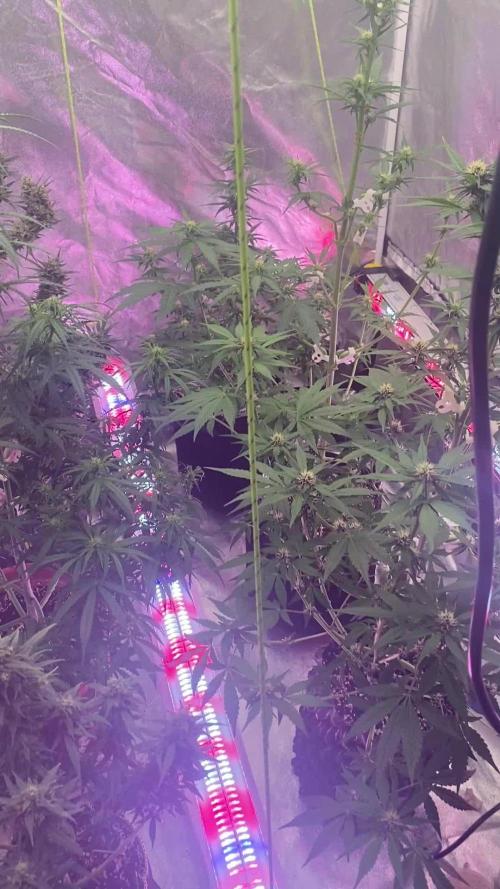
Hallo Freunde 👋 Dream Sherbet ist 70 Tage Alt und verwandelt sich nun in einen Winter Traum! Sie wird nun jeden Tag Dichter und zuckert sich zu! Bin sehr gespannt wie sie nächste Woche aussieht bis dahin keep Green! ✌️🍀🧡🍀

Likes
5
Share
10 weeks from seed to harvest. The nutrient line I was using didn’t give me optimal growth, for this strain and my level of experience. Had some great growth and veg time, about 4 weeks, but when flower kicked in they got beastly. I would say I had two different phenos of this strain, and the one pheno that is unique, had slightly looser buds than the other two. This could be because of the LST/super cropping of the main cola. The other two had nice rock hard frosty buds and have similar smells and profile. The other one has more citrus, and was a bit lanky, more sativa in looks. Overall, easy enough to grow, no major surprises, and decent enough yield for 10 weeks. This is a strain that could have been better had I not had some issues with either lockout/deficiencies.
Likes
26
Share
Finishing up week 9 flower. She's looking great! I have had a few small issues this week. Noticed she has a few crispy tips this week. I have been feeding pretty heavy and the drip system has been getting clogged up with the Big Bud coco. Not a great product to feed using a drip. So I'll be top feeding for the remainder. Her buds are ripening nicely. Thinking she's not going to end up with very large buds however she does have a lot of them so I'm super happy!!!
Likes
19
Share
Legend Timestamp: 📅 EC - pH: ⚗️ Temp - Hum: 🌡️ Water: 🌊 Food: 🍗 pH Correction: 💧 Actions: 💼 Thoughts: 🧠 Events: 🚀 Media: 🎬 D: DAY, G: GERMINATION, V: VEGETATIVE, B: BLOOMING, R: RIPENING, D: DRYING, C: CURING ________________________________ 📅 D70/B08 - 24/01/24 ⚗️ 🌡️ 🌊 🍗 💼 🧠 pH is finally stable on the lower side (hopefully) 🚀 The Tent-X is on its way, I can't wait to get it.. 🎬 Added Timelapse video ________________________________ 📅 D71/B09 - 25/01/24 ⚗️ EC: 1.2 pH: 5.6 🌡️ T: 23 °C H: 45% 🌊 🍗 💧 💼 I put T-H Sensor of TrolMaster on the SCroG net 🧠 🚀Tent-X from TrolMaster received, I'm going to set it up tomorrow 🎬 Added Timelapse video ________________________________ 📅 D72/B10 - 26/01/24 ⚗️ EC: 1.2 pH: 6 🌡️ T: 23 °C H: 40% 🌊 Added 6L 🍗 Added Bloom A-B - CalMag - Big Bud - Bud Candy - B52 💼 Tent-X set up done ! 🧠 It works perfectly and as I just see so far, from now on, I'm going to experiment a new way to grow ! 🚀 🎬 Added Timelapse video and Set-Up videos and pics ________________________________ 📅 D73/B11 - 27/01/24 ⚗️ EC: 1 pH: 5.5 🌡️ T: 23 °C H: 40% 🌊 🍗 💧 Added a little of pH- 💼 🧠 🚀 🎬 Added Timelapse video ________________________________ 📅 D74/B12 - 28/01/24 ⚗️ EC: 1 pH: 5.5 🌡️ T: 23 °C H: 35% 🌊 Added 4L 🍗 Added CalMag - Bloom A-B - B52 - Bud Candy - Big Bud 💧 Added some pH- 💼 🧠 🚀 🎬 Added Timelapse video and 4 pics ________________________________ 📅 D75/B13 - 29/01/24 ⚗️ EC: 1 pH: 6.0 🌡️ T: 23 °C H: 50% 🌊 🍗 💧 💼 🧠 🚀 🎬 Added Timelapse video and "TM+ Pro" App screenshots. This is the app used to monotoring the Tent-X controller ________________________________ 📅 D76/B14 - 30/01/24 ⚗️ EC: 1.2 pH 6.1 🌡️ T: 18-26 °C H: 30-55% (from now on, I'll put the Min-Max values of T-H as I can easily read them from the app.) 🌊 4L 🍗 CalMag - Bloom A-B - Bud Candy - Big Bud - B52 💧 💼 I added a Humidifier as the H falls down to 30% 🧠 With the help of Humidifier, according with "TM+ Pro" app, I got the perfect VPD (Vapor Pressure Deficit) rate !! (see screenshots) 🚀 I have to face a very low rate humidity of the external enviroment 🎬 Added Timelapse video and T-H values daily graph, and perfect VPD from the Tent-X controller ________________________________
Likes
3
Share
Likes
8
Share
Great first harvest. I took her out of the tent a little early but I'm still happy with the results. The last two days the plant was under total darkness. I will update with dry weight and more details of the nug in the next weeks. Just hung up the stalks to dry. Thanks to the people who helped with my fungus nat issue as well. Ended up with 107 grams of dry nugs, couldn't be happier. Can't wait for my new grows!😎00
Likes
6
Share
Se acerca campaña de corte Las demás las seguimos cada 10 días con tes
Likes
1
Share
@Dunk_Junk
Follow
I'm thinking another week... Not sure. She's bloody frosty though! 😲
Likes
29
Share
Hi all! The plant develops excellently! everything is just perfect for her. shape color scent of trichomes! all !
Likes
567
Share
We are at 27 days of flowering now and they are starting to change colors now. The gorilla is really turning yellow. I could of gave her a bit of nitrogen but this is just a practice run with my custom bred seeds so I'm letting it go. Alot of frost showing now. They are loving the new fc4800 and 8x8 Grow Tent for sure🤘 another couple weeks and I should know more about the smell of them. Right now they smell more like the nuken but they are slowly changing to have their own unique smell. None of them smell like what the parents did. Except at the beginning of getting frosty they all kinda smelt like nuken. Like marshmallows. The monkey dough nuken smells like fruit loops and the gorilla smells like skittles. More than the original skittles does👍 WWW.MARS-HYDRO.COM PROMO CODE: rocknroll Instagram: @marshydropenny Shout out and thanks to: https://greenbuzzliquids.com/ #greenbuzzliquids @GreenBuzzLiquids Hers more information on the mars hydro products: GET THE MAX FROM MARS👍: Welcome one of  the newest members of the Mars Hydro family🤜🤛🤘. The Mars Hydro FC 4800 480W LED Grow Light can accommodate up to a 4' x 4' area for flowering. It has OVER 2000 LED chips consisting of the best selling Samsung LM301B diodes which has a Luminous Efficacy of: 220 lm/W 0.2 W, 3 V mid power, Osram 660nm Diodes, Infrared light and UV LIGHT👍. It boasts the incredible efficiency of 2.8 µmol/J, maximum 2.5gram yield per watt with 30% higher Average PPFD. This High-intensity spectrum is beneficial for plants at all stages - from veg to bloom, and creates Big dense Buds👍. achieve 50% higher yields & quality compared with the old lights! Only consumes 480W for 4x4ft personal grows, and 3x3ft for commerical grow. It comes with a dimmer and daisy chain function with a  maximum of up to 15 lights, the master light controls the rest👍. Wide 6-bar design offers even & wide canopy coverage and can maximizes your grow space. slim 180° FOLDABLE DESIGN... YES I SAID FOLDABLE🤘🤣 , making it compact and easy to install, it's IP65 WATERPROOF and will give you no worries while growing in a humid environment and makes it a flexible high performance commercial grow light for enormous  SUPER FROSTY yields.😛😛😛. MARS GETS EM FROSTY BOYS👍 AWESOME HEAT DISSIPATION: The Low energy consumption FC4800 growing light has 6 passive-cooled bars and an aluminum heat-sink a removable driver  you can upgrade later or have it outside your tent. with zero noise  you can save up to 50% in your electricity bill compared to HID's or HPS lights! It also has a removable driver so you can upgrade it in the future or have it outside your grow space for better heat control in your growroom👍 UPGRADED FULL SPECTRUM: Yield Max Spectrum with enhanced red (Top-Bin Samsung 3000k-5000knm, Osram 660nm Deep Red), speed up blooming & fruiting, perfectly suited for full-cycle growing. The FC4800 LED grow lamp was born for Big Buds, perfect for commercial, grow tent, grow room, hydroponics, and all soil grows.👍 THE BEST SAMSUNG DIODES: THE FC4800 has Top Bin genuine Samsung Osram Diodes, combined with remarkable 2.8 µmol/J Efficacy, 30% higher Average PPFD, 50% less energy consumption, to maximize your yields. They give you a TRUSTED 3 years warranty 100% Satisfactory guaranteed!!! The MARS HYDRO 8x8 Grow Tent interior is made of a unique diamond design mylar which is highly reflective. (Other companies mylar and reflective rate is as low as 50%, and it won't provide efficient light. They use thick 1680D oxford canvas, and being double stitched, it is tear proof and perfect for locking in the light. Their grow tent keeps 100% of the light inside the tent and helps your plants absorb more light. EXTRA-THICK material means No light leaks or rips at all.👍 Strong Stable metal corner adapters and poles are the trustful supporters of the tent. It's very sturdy, neither rusting or paint flaking off. quick and easy tool-free setup. They use heavy-duty metal zippers, with double layer black lining, by far the best on the market which creates a light-proof seal. The Easy observation windows are made by double layers of cloth. Observe the growing conditions of your plants without opening the tent and avoid disturbing your plants. The observation windows also serves to dissipate heat and ventilate the air. The tent includes 2 removable waterproof floor trays to hold soil and water. The removable tray can be taken out to wash easily. They guarantee the grow tents are easy to install even if you've never done something like this before. Clear Instructions and no tools needed! They also offer 30-day unconditional refunds for quality problems. Just contact their friendly 24 hours customer service 👍 WWW.mars-hydro.com PROMO CODE:rocknroll Instagram: @marshydropenny https://greenbuzzliquids.com/ #greenbuzzliquids @GreenBuzzLiquids Please check out my YouTube👍 Like and subscribe right Now!!! LoL
Likes
74
Share
@Ferenc
Follow
Day 64, 22nd of November 2021: Hi there! Here we go..... so basically pistils are appearing stronger this is the 2nd weeks since they started producing pre flowers. The plants getting a bit light might be some air circulation problem? However they look good and of course closer to the end the gettin' older so the leaves also die. Set up and timing is the same since flower season started. ViparSpectra XS2000 is on full power which is 240W so 100% capacity. Ventilation: 12 hours period when the lamp is on it switches 1 hour on and after one hour off mostly to keep the temperature and of course because of fresh air flow. When the lamp is off it switches on in every 2 hours for 15 min at the same time with the extraction fan. The extraction fan is on 12 hours when the lamp is, and then it switches on in every 2 hours for 30 min. That's all a bit more water for them from today also. Humidity quite the same approx 50%, temperature as well approx 26-27 Celsius. Fertilization remains the same since last week, the BioBizz family raised up to be 2ml/L each so it is like 2ml/L of BioGrow, 2ml/L of BioBloom, 2ml/L of TopMax... see the ratio above. The schedule of the fertilization has not changed happnes 2x a week except epsom salt just 1x a week.
Likes
14
Share
@Jcannaf
Follow
Very nice, can’t wait for it to cure fully
Likes
12
Share
30-01: The first day of week 6 and I already saw a few small flowering hairs on every plant, which means that they are officially in the pre-flowering phase. Now I have to say that I'm not super happy with how they look. I wanted them much bushier. So I started to google and landed in a rabbit hole of info about par, umol and leave light penetration. So i ended up with an order of a Mars Hydro TS1000 and this will arrive next week. they will maybe not grow a lot in this phase but the budds should be wayyy bigger. In the last 3 weeks I will germinate 4 new brain damage seeds and start a 2nd grow report with the TS1000 from germination. 01-02: Today I removed some leaves to provide the heart of the plants with full light again. As you can see the ''side'' bud area's are already stretching upwards to get even with the main tops, in theory I should have 8 bud area's on each plant. When they are almost in full bloom i will add an scrogg net to keep al the buds sides even in height trough there last stages. When it comes to nutrition they have today 1L water with 2ml orgatrex + 2ml plagron terra bloom each plant. This is half the recommended maximum dosage for terra bloom. I will increase the dosage as by week.
Likes
13
Share
I am very pleased with this harvest, my buds are fragrant and very strong, I did not use too much of them, it gives me the ability to concentrate and think highly, the aroma and taste of mango and lemon. I have come very far with it. So great. And happy grow.
Likes
19
Share
This week I just let her stretch.. Normal feeding schedule with no training.. With this strain I would love to test how she does with absolutely no pressure on her..
Likes
1
Share
Week 6 of flowering 10/23/24 Changed nutrients to fit week 6 Buds are getting even bigger and thicker. Defoliated a little. Noticed a PH of 4.8 in runoff, same as the late stage of flower in my previous grow. After lowering feed EC, CalMag on max strength, flushing with 0.8ec nutes for 3 days in a row, nothing changed and PH stayed the same. Read in a forum thread about constant low PH in the rootzone when growing in coco. Got great info about CEC, water, nutrients and little chemistry from a detailed explanation. (https://www.icmag.com/threads/recurring-problem-with-low-ph-in-coco.338385/page-2#post-10843765) Flushed plants with tap water + calmag, PH 6.5. Used 120L total for 4 plants in 2 days. 1st day: flushed after lights on, did not water until 2 hours before lights off and flushed again. Runoff PH went up a little, but not to the correct range. 2nd day: flushed after lights on and checked runoff EC + PH, of each plant. Fortunately, PH got corrected to 5.8, and I returned to automatic watering 4 times a day (with 10%-20% runoff). Thoughts: In the last grow, I thought I had a problem because of salts buildup in the media with constantly low PH in late flower. I didn't fully correct the problem till chop day. Same problem here in the same stage of flower without the salt buildup. After reading every forum I could find about the problem, I understood that my bloom nutes were the main problem because of their chemical composition. The coco ability to exchange ions lead to the low PH in the rootzone. It got worse quickly because I did not use any tap water with the feedings, so the PH could swing easily and drastically without resistance. After I looked online for the T.A. feeding chart, I saw they used TriPart Grow till week 7 of flower, the Nitrogen type they are using will up the PH. CocoForCannabis chart that I'm using, has not enough nitrogen to combat the bloom nutes PH down effect in flower. It gets even worse with RO water because there are no minerals that can resist PH down. Now I'm using 30% tap water with rest RO water, T.A. TriPart feeding chart with calmag and silica. Hopefully I have corrected the problem for the rest of the grow. It wasn't easy, because there were lots of variables that worsened the problem quickly. Now I'm checking runoff PH and EC daily. Update on next week :)
Likes
4
Share
Harvest time! The colas have swollen up; the main ones are the size of a palm or bigger. I estimate the dried plant will weigh in at just under a kilo. It’s getting 7 days of drying in the tent—in the dark, with a carbon filter running. Then, at least 2 weeks of curing in glass jars. The plant was fed plain water for the entire cycle, so there was no need to flush out nitrogen, and the buds don't spark when smoked. Dense, sticky buds—remotely reminiscent of GHS Super Lemon Haze. I grew Lemon before this, and it really won me over with its flavor and bud density—I even ordered 4 more autoflower seeds of it. Once it’s dried and I’ve had a taste, I’ll write up a smoke report. I’ll also post a review of the gear, nutrients, and anything else you guys ask for in the comments, bros :)
Likes
9
Share
Training This week was the start of the LST and, with that, a continuous gentle defoliation to ensure that the new shoots are getting a lot of direct light. Leaves (especially sun sails) growing over new shoots are either pressed down or, if necessary, removed. When LSTing, I always focus on gently bending the branches in the desired direction every day, without disregarding the natural structure of the plant. Once they reach a length of about 5 cm, I start to secure them with training stakes(*1). This way, the risk of damage (as well as overall stress for the plant) is kept to a minimum. Setup The lamp is now at max. intensity and min. distance (35 cm) at around 650 - 700 PPFD. (*1) I built the training stakes myself to match my needs (enough length, natural material, no sharp edges, slightly downward facing angle). Pests + Living Soil + Environment The combination of nematodes and sand seemed to work immediately, because the number of Sciaridae quickly dropped to about 2 - 3 adult flies per day. Still, on day 40 (8 days after adding the sand) I removed it again, because: - it was rather intended to support the nematodes (fewer new larvae), - the Sciaridae had fallen to a level that seemed acceptable, - it would keep the soil too anaerobic and moist in the long term. The decision also had a positive effect on the RH(*2) (approx. 10% increase). (*2) Relative humidity fluctuated slightly from day to day, but generally remained around 50%. Although removing the sand (at the end) of this week increased the RH, I only evaluated this ‘new average' RH from the following week onwards. Environment + Plants The stabilization of the environmental conditions and the increase in light, have allowed the plants to grow intensively this week. In the beginning, the relative humidity was still a little lower than I would like, but acceptable since the plants were still quite small and didn't need to be watered as often (large amount of substrate with corresponding buffering effect to keep the plants healthy. Plants During the seedling phase, I observed slight deficiency symptoms that at first glance looked like a nutrient problem (potassium, calcium, ...?). Since I cannot control the nutrient content as precisely as I could with a hydroponic system e.g., and the damage was manageable and occurred during a phase in which I also stressed the plants by allowing them to become too dry, I simply ignored it... with success. Since the system has been back in balance, there have been no further incidents of this kind. *Gorilla Z Auto was 20 cm tall, Mimosa Cake Auto 12 cm. (Pre-)Flower I have also been able to observe pre-flowering, which is consistent with my other observations. [Autoflowering genetics in particular do most of their growing during this phase, which lasts just under two weeks, roughly starting from week 3 - 5.]