



@Dr_4NdY
Follow
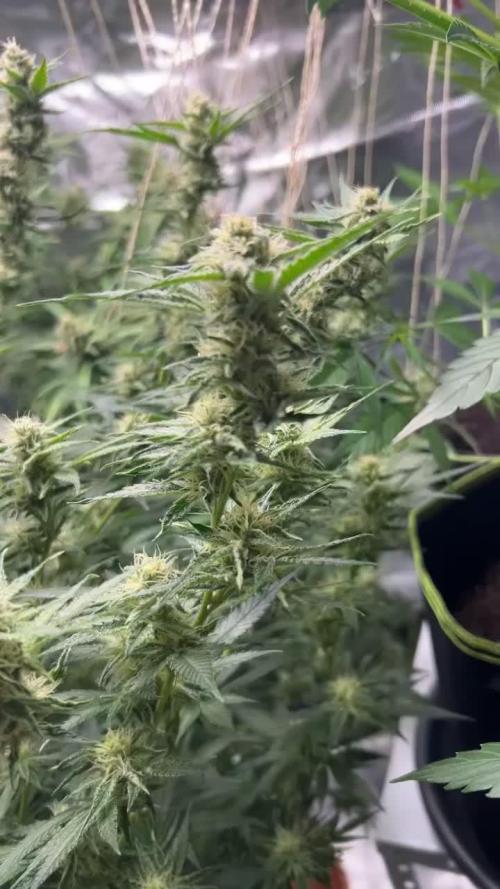
Bended the main bud to the side so it wouldnt touch the light
Had to attach string to a lot of branches because they had bend down due to the weight
Did not lollipop at all - first run ever


@Cogollo_eu
Follow
**Encontrarás la traducción a español al final de la descripción**
From/Desde: 10/05/19 || To/Hasta: 16/05/19
From day/Desde día: 78 || To day/Hasta día: 84
You can find the Money Maker Diary here:
** Podéis encontrar el diario de las Money Maker aquí:**
https://growdiaries.com/diaries/25667-gorillamakingmoney-gorilla-vs-money-m
-----IMAGES & VIDEOS-----
5 - HomeMade Organic & Cheap CO2 generator (more info in week summary)
9, 10, 11 & 12: The bud on the right is a Gorilla one, the buds in the left or/and in the middle are Money Maker ones.
15 - Same Gorilla plant buds, one affected by CO2 in the roots and the other not.
-----WEEK SUMMARY-----
The smell is more sweet and intense every day, friends that came home turned them eyes into crystals when they see this little babys. The size isn't awesome, but the high ammount of buds full of crystals plus the strong sweet aroma makes them awesome. Buds are growing and fattenning very very well.
This week i added a boost of HomeMade CO2, i never measured the results of this invention so i can't give CO2 measurements. This method is widely used in home aquariums and there is where it comes from. For those interested i'm going to write here more detailed instructions. The 4 liters i've made will last for about 2 weeks.
---NEEDINGS---
- 250 ml Bottle
- 6~10 l Bottle
- 400 g Sugar / l water
- 1 Envelope of organic baker's yeast / l water (CHEMICAL WILL NOT WORK)
- 3 mid plastic tubes 40~50 cm
- 1 short plastic tube 5~6 cm
- 4 tube adapters
- Hot glue to seal adapters
The process of creating CO2 is simple, mix water, organic yeast and sugar in a bottle, and the sugar will free CO2 in the process of fermenting to alcohol due to the yeast.
1. Make a hole in the center of the big bottle cap, insert an adapter and secure it with hot glue
2. Make 3 holes in the small bottle cap and glue the other 3 adapters
3. Link both caps with one of the mid tubes and insert the other tubes on free adapters
4. Insert a short tube in the bottom of the small cap in the adapter that came from the big cap
5. Watch the Video!!
-----WATERING CALENDAR-----
Plants are beginning to drain the pots a bit faster so from now on i will raise the water ammount on each watering day 0.25 l.
11/05/19 - 1,5 l with All week nutrients -(Nirvana & Blombastic) also Big Bud half dosed @ PH6.4 & 2 E.C.
14/05/19 - 1,5 l with Bud Candy, Big Bud, Nirvana, B52, Bud Factor-X, Sensizym & Blombastic @ PH6.4 & 1.5 E.C.
*****ESPAÑOL*****
-----IMÁGENES Y VÍDEOS-----
5: Generador de CO2 casero, barato y orgánico (más info en el sumario semanal)
9, 10, 11 & 12: El cogollo que sale a la derecha es de una Gorila, el de la izquierda y/o el de en medio son de una Money Maker
15: Dos cogollos de la misma planta, uno afectado por CO2 en las raíces y el otro no
-----SUMARIO SEMANAL-----
El olor es más dulce e intenso día a día, los amigos que vienen a casa a verlas se quedan ojipláticos al verlas. El tamaño no es una maravilla, pero la gran cantidad de cogollos llenos de cristales añadido al aroma que entra por las fosas nasales las hacen increíbles. Los cogollos crecen y engordan de maravilla.
Esta semana he añadido un boost de CO2 casero, nunca he hecho mediciones de los resultados por lo que no puedo darlas. Este método es ampliamente usado en peceras caseras y de ahí saqué la idea. Para aquellos interesados dejo aquí instrucciones más detalladas. Con los 4 litros de agua que he preparado yo da para unas 2 semanas.
---NECESITAMOS---
- Botella de 250 ml
- Botella de 5 a 10 litros
- 400 g de azúcar por litro de agua
- 1 sobre de levadura de postre orgánica (LA QUÍMICA NO FUNCIONARÁ)
- 3 tubos de plástico de tamaño medio 40~50 cm
- 1 tubo de plástico de tamaño pequeño 5~6 cm
- 4 adaptadores para los tubos
- Cola caliente para pegar y sellar los adaptadores
El proceso de generar CO2 es simple, mezcla agua, levadura orgánica y azúcar en una botella, y el azúcar liberará CO2 en el proceso de fermentación a alcohol.
1. Haz un agujero en la tapa de la botella grande, inserta un adaptador y séllalo con cola caliente
2. Haz 3 agujeros en el tapón pequeño y haz lo mismo con los otros 3 adaptadores
3. Conecta los 2 tapones con uno de los tubos y conecta los otros 2 tubos a los adaptadores restantes
4. Conecta el tubo pequeño en la parte libre del adaptador del tapón pequeño que viene del tapón grande
5. Mira el vídeo
-----CALENDARIO DE RIEGO-----
Las platas comienzan a secar los tiestos un poco más rápido, asi que de ahora en adelante incrementaré 250 ml de agua adicionales en cada riego.
11/05/19 - 1,5 l con todos los nutrientes semanales -(Nirvana & Blombastic) BigBud mitad de dosis @ PH6,4 & 2 E.C.
14/05/19 - 1,5 l con Bud Candy, Big Bud, Nirvana, B52, Bud Factor-X, Sensizym y Blombastic @ PH6,4 & 1,5 E.C.


@Pajakvaca
Follow
Transplanted to a bigger pot. (I know, not the best timing because the plant just entered pre flowering stage). The weather is getting better now


@GTools
Follow
I've been waiting for at least some trichomes to turn amber. I prefer to harvest when there are at least a few amber. I took the PL2 3 days before the PL1. Flushed them for a week only


@Hitthejuan
Follow
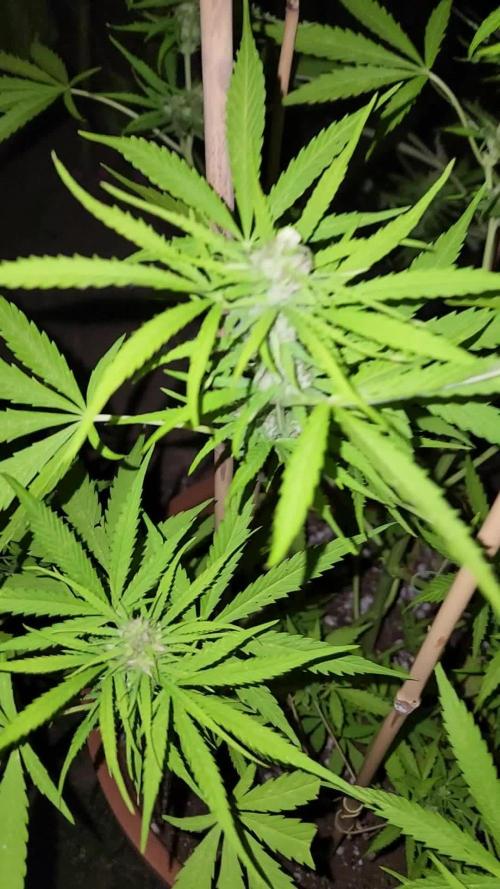
August 23rd 2026. Mix Pack Auto RF3
This week's weather has been a mix of clear skies, mild to warm daytime temperatures ranging from highs of 67°F to 78°F, and comfortable overnight lows dropping into the mid-50s to low 60s. Ive water once this week. I will stop watering plant B. Plant A will probably be water twice before she's done.
Temperature: 78°F -50 °F
Humidity: 50% - 40%
Daytime: 13 hr 45 minutes
Tall: (A. 2 feet 7 inches ) (B. 1 foot )
Smell: yes
Water: rain water
Plant A has finally released pollen from a few of the pollen sacks. I did leave a couple of stems so the plant can self pollenate. Not sure the strain but I think its might be the apple strudel auto. Im just very happy that the sts spray worked. Im ready to start new projects after this harvest. I won't be able to smoke any of these plants but I got something better.
Plant B is almost done. I think its the cherry cola auto. But not sure yet. I did take a couple (2) pollen sacks and pollunated a bottle stem bud.
Hopefully i get some seeds out of it even if its like .
Thanks for watching 👀 🙂


@Seldom_Seen
Follow
I have grown RQS a few times but this is my first RQS diary. The seed took 36hrs to pop and sprout in the wet paper towel. It only took another 36hrs to come fully out of the ground and loose it’s shell.
I started with the lights 70cm’s from the soil which was giving a LUX💡reading of 25,000lux💡.Once the seedling 🌱 got to 5cm’s I raised the light by 5cm again to keep the distance at 70cm’s maintaining a reading of 25,000Lux💡 at the top of the seedling 🌱.
On previous grows I started with the light at 80cm’s but I was getting stretching. I find if I start at 70cm’s and don’t raise the light after a day or two that the seedling 🌱 can get light burn.
HUMIDITY: As you can see in photos I have milk bottle tops full of water next to the seedling. I’ve been this for a while now. I have my seedling next to a plant only a few weeks away from harvest so I need to keep the overall humidity low. I might be crazy and wasting my time but it makes sense to me. I leave these bottle tops near the seedling and over the space of a day the water evaporates off and then I refill them again with water (PH’d water). I reckon if the water is evaporating off so close to the seedling that it must be creating some extra humidity around the seedling 🌱.
For the record I don’t think the earth 🌍 is flat.
*I’m using RQS nutrients for this grow. I am recording the nutrients as 0.5ml as there is not a tablet option so what I mean by 0.5 is half of one tablet per 2ltrs of water.
🦍Day 3: Watered around the edges of the seedling 🌱 just to dampen the soil a bit
🦍Day 5: Dampened soil again. Looking good so far.
🦍Day 7: Gave very light watering. Happy with the height of the seedling 🌱. The light distance seems to have worked well.


@NSABND
Follow
Day 43 a new week starts 💪😃👍
Day 44 every single Day a little bit more 😋🙏👍
Day 45 the queens doing well 😃👍


@Chumpkilla
Follow
7/7/23 - Day 25 - Another water coming up tomorrow. She looks great. She is drinking so much water I have to add a ton of water every morning.
7/8/23 - Day 26 - The root is MASSIVE. This is a great sign that the plant has been doing well. The thing that gets me is how white the roots are. It's looking good for bud sites on the plant too. She has a ton of Cola areas forming now. I tried to count but lost track around 15+ cola areas, so when we move to Flower, I bet this gal gives me a ton of big buds.
7/9/23 - Day 27 - Every day, I wake up and get excited to see how much bigger she has gotten. The growth has been crazy, I've grown weed in the past, but it has never gone this well. I honestly spend 15 min a day on it. With this LEAF system, it's been super easy. The proof is in the pudding with this unit. Easiest weed I've ever grown.
7/10/23 - Day 28 - The growth is not slowing down. I refilled 1" of water to the pot today. This is the most water I have seen used in a day. Ideally, we would want to flip flowering when the plant has hit 12in. We are cutting it really close, actually, we are beyond what's rated for height. I'm going to Scrogg them some more and I would imagine Ill flip them to flowering very soon.
7/11/23 - Day 29 - Moving the tops around a bit, I'm trying to let it go as long as I can before flipping to flower.
If you are looking for this experience, check out https://www.getleaf.co/


@OwlGang_Uk
Follow
The Girls Are Looking Healthy. There’s A Bit Of Deficiency In The Stardawg Leaves But That’s Because Of An Experiment I Was Doing With The Great White Mycorrhizae Where I Sprinkle Some On The Plant Saucer Because There’s So Much Roots Poking Out Under The Smart Pots. The Root System On These Girls Are Massive, I’ve Come To The Conclusion That I Will Try 7 Gallon Smart Pots My Next Grow.
3 Of The Girls Have Done Start To Bud But I’ve Still Been Giving Them The Grow Nutrients Rather Than The Bloom. I Was Waiting Till I Reach Week 5 And Now That I’ve Reach I Will Be Feeding Them The Bloom.
Height:
Gorilla Glu: 17 inches
Stardawg: 28 1/2 inches
Girls Scout Cookie: 25 inches
Purple Power: 27 inches
Lemon OG: 22 inches
Girls Scout Cookie: 25 inches (3 Gallon)


@TheCannaProphet
Follow
~ GG4 SHERBET FAST FLOWER by FastBuds ~
Well fam, here we go again with another epic strain from FastBuds Fast Flowering stable. After having such tremendous success growing their Gorilla Cookies Fast Flower outdoors last year, I've decided to run another of their fast flowering strains outdoors this year... GG4 Sherbet Fast Flower!
The best description of this awesome cultivar comes directly from my friends at FastBuds which is as follows:
"Bred from extremely potent and flavorful Gorilla Glue and Orange Sherbet genetics, GG4 Sherbet FF (Fast-Flowering) takes all the best traits to the next level, offering a high-yielding strain that can produce up to 600 g/m2 in a 7-week flowering time. This super resilient Indica-leaning hybrid thrives indoors and outdoors, and in all types of climates while producing mouth-watering sweet, fruity, spicy and earthy terps that translate into a delicious sugary hazelnut aroma. Expect an extremely relaxing and overall happy effect that’ll leave you with a huge smile from ear to ear. It’s the perfect strain for growers of all levels of experience seeking low-maintenance yet highly productive photoperiod varieties that deliver quality and quantity without extra effort.
GG4 Sherbet FF grows chunky buds with long dark orange hairs and spade-shaped calyxes that get encrusted with trichomes by harvest time, giving them a gorgeous silvery-white appearance. This medium-sized photoperiod can reach up to 200 cm in height and yields up to 650 g/m2 while developing that typical hybrid structure. GG4 Sherbet FF grows with a stocky, bushy appearance, developing one sturdy main cola and fat side branches that support huge yields without much effort. This super-fast variety produces distinctive light-green buds with a high bud-to-leaf ratio, making your trimming sessions a breeze. It’s a top-notch resin producer that doesn’t need much maintenance and will thrive in almost every climate, rewarding growers of all levels with extremely flavorful resin that makes for outstanding hash end extracts."
________________________________________________________________________________________________________________________________________________________________________________________________________________________________________________________________________________________________________________________
The Setup:
This is going to be an outdoor grow, but I have started the GG4 Sherbet Fast Flower indoors as our weather is still too cold to put her outside (nighttime temp's dipping regularly into the 30's℉).
The plan is simple... let her grow inside under a 19/5 light schedule until the nighttime temperatures stay above the mid 40's℉, at which point she'll be moved outside and transplanted into the soil which I have already setup and inoculated with beneficial microbes, and then let the fun begin!🤪💚
________________________________________________________________________________________________________________________________________________________________________________________________________________________________________________________________________________________________________________________
Weekly Updates:
8/10- Wow! Here we go into Week 4 of flower for the GG4 Sherbet Fast Flower by FastBuds and this lady is on a mission! The GG4 Sherbet FF has large cola's forming all over her and they are rapidly stacking up. Her flowers are continuing to develop and are beginning to get a thick layer of trichomes on them!
8/12- Today, the daily watering routine continues at sunset with around 5g of well water from the hose. I also went into the canopy and removed a bunch of dead and/or completely yellowed leaves to keep the foliage clear of debris which can cause insect and fungal issues if allowed to get out of hand.
8/14- I am continuing to water the FastBuds GG4 Sherbet Fast Flower daily with 5-8 gallons of well water from the garden hose.
Yesterday, I top dressed the FastBuds GG4 Sherbet FF with 3 cups of Gaia Green 2-8-4 Power Bloom which I watered in with well water from the hose. I then applied 1/2 gallon of a nutrient mix I made up in 2 1/2g of well water consisting of: 1/4 cup Neptune's Harvest Seaweed(kelp) plant food and 2 1/2 tsp. of Plantonics Amino Bliss.
8/16- We have rain in the forecast over the next three days. There were a couple of passing light rain showers today which didn't provide a lot of rain so I went ahead and watered the GG4 Sherbet FF with approximately 5g of well water just to make sure that she didn't get thirsty.
There's a month in flower for this beautiful fast flowering cultivar from the experts at FastBuds and all I can say is WOW! I can't say enough positive things about this strain and will, for sure, be running it again! See you next week!😎✌️
Thank you for checking out my diary, your positive comments and support make it all worthwhile! 💚Growers Love!💚😎🙏




shorts_status_processing


@MrWolfe
Follow
What an awesome thing to walk in on starting off week three all the girls were praying and just getting so fat, I really need to strip some fan leaves off the mom.
They look great, the smaller cuts definitely aren't as good as the 4-6" cuts are, they were MAYBE 3-4" cuts and pretty small, but they are extras anyways so it doesn't matter, just seeing what they do. I'm excited for them to have all this space to stretch out when I pick up another light.
Last day of week three and I couldn't be happier, I absolutely have to cut thicker clones , these smaller ones all got a bulbous base? Not sure what that's about but we will see how they develop. They are extras anyways but still nice to figure it all out.




@GermanGrow182
Follow
Sonne satt. Auch beim 2. Lauf läuft's sehr gut. Die Autos fangen an, zu blühen, die Photos wachsen stark und gesund, wurden nun alle getoppt. Hier und da hab ich die Autos entlaubt, um den Knospen mehr Licht zu verschaffen. Es läuft gut 👍 bis nächste Woche ✌️
shorts_status_processing


@eldruida_lamota
Follow
Que pasa familia, hemos vuelto para actualizar las skunk que ya tenemos cosechadas.
Que gran genética, y muy típica entre fumadores de hierba, un crecimiento más indico pero floración lenta bastante lenta, en teoría se supone que es Sativa, 17% thc en la tas con un tamaño medio pequeño pero flores mi compactas y dulces, un cultivo ni fácil ni difícil, sin más, bastante neutral para los cambios climáticos algo sensible con el aspecto alimentación.
La recomendaría en verdad, sobre todo para aquellos amantes del dulce.
Nos vemos en próximos proyectos fumetillas





@GreenEldritchGardens
Follow
Growing again this amazing strain! I love la bomba and those Dope seeds from the breeder Antonio are fire 🔥, also they seem to be in cooperation with Green Connection, one of my favorite YouTube channels ou there.
48h in the glass of water then directly to the soil. 4 days later she appears.


@Hou_Stone
Follow
2 Gran Jefa au 53ème jour de floraison. 45G de bourgeons sec et effeuillés
J'ai commis des erreurs durant cette culture et je n'avais malheureusement pas la possibilité de m'en occuper comme je le voulais.
Je vous suggère de ne pas reproduire mon dosage pour les nutriments(+serait mieux) et ma fréquences d'arrosage(moins d'eau et + souvent serait mieux).
Je compte modifier certaines choses pour ma prochaines culture en espérant améliorer le rendement 👌
Merci pour votre visite les amis 💪


@FeebleSnane
Follow
Today is day 70 since the plants have sprouted, and day 27 of 12/12 light schedule.
The buds have gotten a little plumper this week, particularly on the Train Wreck, but that plant seems to be a few days ahead in the flower process. I've been trying to overcome the yellow leaves on the Train Wreck plant, and I keep feeding the plant according to the "aggressive" feed chart from General Hydroponics, but it just isn't enough. I was a little worried about the pH in the soil getting too low or something, but the meter I have says it's actually on the high side.
This point represents about halfway through the flower stage since I plan on going about 5 more weeks. The Train Wreck is expected to flower for 9-10 weeks, and the Royal Runtz for 8-9 weeks. The purple color on the Royal Runtz seems to be growing on each of the buds, and has a clear correlation to the amount of light hitting the bud. I'm interested to see if the buds below the canopy get the same purple coloration as the top buds.
Temperatures were getting a little high early this week when I turned the light up to 95%, getting to about 82F. I moved the power supply for my light outside of the tent hoping it would reduce temperatures, but it only brought the temperatures down to 80F. On the bright side, my controller is generally keeping the humidity at 60% or less, compared to when the temperatures were at 82F and the humidity was closer to 65% most of the time.
I measured the PAR for the tallest bud in the tent, which is getting about ~1200PAR, compared to the ~650PAR the Royal Runtz is getting. I wish I could lift up the Royal Runtz more to get it closer to even with the Train Wreck, but I've already lifted it up and both plants are bound by the scrog net.
I noticed powdery mildew on a few leaves on the Royal Runtz, which I've been worried about given how bushy it is. The fan in the tent also doesn't blow directly on the plant, so I added a fan from my other tent to blow directly through the plant from the bottom, and moved the original fan to blow more directly on the Royal Runtz. I'll be turning off the humidifier completely for a bit while keeping a close eye on the plant to see if any more PM develops.
Edit:
While looking closer at what I thought was white powdery mildew, I noticed there were pollen sacks dropping pollen on the Royal Runtz plant. I sprayed the areas I saw polled/sacks with water and removed any buds I thought may have been affected as well as anywhere I saw pollen sacks. I'm sure I missed plenty, but I'll be watching the plants extra close from now on and assassinating any potential sacks I see. We'll see how seedy the tent gets, I guess.


@tomerakoo
Follow
buenas pues seguimos con la floracion donde van maravillosamente os hice videos para que lo viereis como evolucionas esta excelente marca todas van genial donde no da aun ningun sintoma pero ahora empieza los grandes problemas donde hay que controlar todo en general can comiendo muy bien pero ahora es cuando empieza lo bueno de verdad donde igual el minimo despiste te lleva al desastre
espero que os guste buenos humos gente


