


Likes
Comments
Share

@DogDoctorOfficial
Follow
🌱 Animal Mints — Week 3 VEG Report
12/12 from seed | Vegetative phase ongoing
General Overview
Week 3 of vegetative growth closes with Animal Mints standing out for exceptional leaf detail, natural structure, and active branching behavior. Both plants are thriving, each expressing itself according to its own timeline, yet sharing the same healthy rhythm seen across the room.
This is one of those cultivars where detail becomes the story.
⸻
Growth & Structure
• Stage: Vegetative
• Flowering signs: None confirmed
• Pre-flower: Possible very early indication on one plant (not yet definitive)
Plant A — with prior vegetative period
• Veg history: ~15 days under 18h light
• Node count: ~8
• Size: Significantly larger (as expected)
• Branching: Strong and active
• Leaf size: Large, dominant, highly detailed
On this plant, light leaf bending / leaf tucking has begun.
Large fan leaves are gently tucked or repositioned underneath the canopy to:
• Improve light penetration
• Encourage lower branch development
• Balance apical dominance
• Promote a more even structure
This is not aggressive training — no topping, no tying, no stress.
It’s a soft, observational approach, simply guiding leaves out of the way so the plant can express its natural branching potential.
⸻
Plant B — 12/12 from seed
• Node count: ~4
• Size: Smaller, as expected
• Branching: Surprisingly active for its size
• Training: None
Even without any intervention, lower branches on this plant are already reaching upward naturally, showing excellent hormonal balance and structural intent.
⸻
Leaf Expression & Detail
Animal Mints truly shines in leaf morphology:
• Extremely fine serration detail
• Subtle curves along each leaf finger
• Clean edges, no deformation
• Deep, lush green coloration
The level of detail is remarkable — almost sculptural — and clearly genetic rather than environmental stress–related.
⸻
Training Status (Clarified)
• Leaf bending / tucking:
• Applied only on the larger, vegged plant
• Gentle, non-stressful
• Focused on opening the canopy
• No other training performed:
• No topping
• No LST
• No defoliation
The goal remains support, not control.
⸻
Veg vs 12/12 Comparison
This folder offers a clear and valuable comparison:
• The plant that received a veg period is larger and more developed
• The plant run 12/12 from seed is smaller, but structurally similar
• Both show strong natural branching
Notably, the vegged plant is still not flowering, despite already spending three weeks under 12/12. This suggests the plant is still prioritizing structure and energy storage.
⸻
📸 Photo Documentation
This week includes studio-style photos, including images of the plants held close during documentation.
One of the photos features the Plagron jacket, included as a natural thank-you for the nutrition program and gear used throughout the grow.
⸻
Environment — Room Conditions (Week 3)
• Photoperiod: 12/12 from seed
• Day temperature: ~26 °C
• Night temperature: ~18 °C
• Relative Humidity: 60–65%
• VPD: In optimal vegetative range
• Airflow: Gentle, constant, non-stressful
• Solution temperature: ~21 °C
• Substrate temperature: ~21 °C
Environmental stability remains consistent across the room.
⸻
💡 Lighting
• PPFD: ~600–700 (plant-size dependent)
• Plants growing naturally into the light
• No stretch, no light stress
⸻
💧 Watering & Nutrition
• Watering method: Hand-watered
• pH: 6.0
• EC: 1.0
Nutrient program:
• Plagron Terra Grow
• Power Roots
• Pure Zym
• Sugar Royal
Foliar:
• Vita Race
• Used selectively and intentionally
⸻
🔍 What to Expect / What Not to Expect (Next Week)
What to expect:
• Continued vegetative expansion
• Stronger lower branch response on the vegged plant
• Possible clearer pre-flower signals
• Increased structural definition
What not to expect (yet):
• Full flowering
• Explosive stretch
• Need for aggressive training
⸻
Final Thoughts
Animal Mints closes Week 3 as expressive, detailed, and naturally structured. Leaf morphology and autonomous branching are already setting the tone, while gentle leaf tucking is helping guide the canopy without disrupting the plant’s rhythm.
No forcing.
No shortcuts.
Just support, observation, and respect for the process.
FOR DISCOUNT CODES AND MORE JUST FOLLOW THE LINK https://website.beacons.ai/dogdoctorofficial
📲 Don’t forget to Subscribe and follow me on Instagram and YouTube @DogDoctorOfficial for exclusive content, real-time updates, and behind-the-scenes magic. We’ve got so much more coming, including transplanting and all the amazing techniques that go along with it. You won’t want to miss it.
GrowDiaries Journal: https://growdiaries.com/grower/dogdoctorofficial
Instagram: https://www.instagram.com/dogdoctorofficial/
YouTube: https://www.youtube.com/@dogdoctorofficial
⸻
Explore the Gear that Powers My Grow
If you’re curious about the tech I’m using, check out these links:
🔆 Lighting & Environmental Control
• Future of Grow — Advanced LED lighting technology
https://www.futureofgrow.com/
DISCOUNT CODE: DOG20
• Lumiflora — Under-canopy LED lighting
https://lumiflorade.com/
• TrollMaster — Environmental controllers and automation gear (past collaboration)
⸻
Genetics
• Zamnesia Seeds — Genetics used in this project
https://www.zamnesia.com/
⸻
🌱 Soil, Substrates, Boosters & Root Support
• Plagron — Substrates, bio mixes, and supportive products
https://plagron.com/en/
⸻
🎒 Storage, Curing & Preservation
• Grove Bags — Curing and storage solutions
https://grovebags.com/
⸻
📸 Photography Equipment & Tools
(Not sponsors, but part of my creative toolkit)
• Sony A6700
• Sony full-frame macro lens + few more
• Stacking photography workflow - learning
• iPhone (for behind-the-scenes shots)
We’ve got much more coming as we move through the grow cycles. Trust me, you won’t want to miss the next steps, let’s push the boundaries of indoor horticulture together!
As always, this is shared for educational purposes, aiming to spread understanding and appreciation for this plant. Let’s celebrate it responsibly and continue to learn and grow together.
With true love comes happiness. Always believe in yourself, and always do things expecting nothing and with an open heart. Be a giver, and the universe will give back in ways you could never imagine.
💚 Growers love to all 💚
📸 P.S. – The Eye Behind the Lens
All photos in this diary (for now — except for the ones showing the camera, which I took with an iPhone) are taken with a Sony A6700 paired with a Sony full-frame macro lens and a few more.
Photography is part of the story — it’s how we share the fine textures, the glow, and the quiet details that words can’t always capture.
I’ve also started experimenting with photo stacking — a technique where multiple images, each taken at a slightly different focus point, are layered together to create one perfectly sharp image from front to back.
It’s not digital enhancement or AI; it’s pure photography — a way to reveal the plant’s beauty in microscopic depth, from trichome to petal.
You’ll even see a few shots of "ghost me" capturing the shots — camera, lens, setup — because every grow deserves not just to be cultivated, but documented like art.
FOR DISCOUNT CODES AND MORE JUST FOLLOW THE LINK https://website.beacons.ai/dogdoctorofficial
NEW DISCORD - Official Server Invite Link : https://discord.gg/ksjAkA5T74

Likes
5
Share


@Hawkbo
Follow
On cruise control now, done some defoliation here and there but that's it, feeding every 2-3 days and they are swelling up very nicely. I took a nice slow video instead of photos of each plant individually below is the order they appear in the video.
1st is 31?
2nd is #29
3rd is #35
4th is Orange Sherbert
5th is #33
6th is Wedding Cheesecake
7th is Wedding Cheesecake #2
8th is #37
REMEMBER , IF YOUR SHOPPING FOR GEAR YOU CAN USE THE CODE “BANGDANG” FOR 10% OFF YOUR ENTIRE PURCHASE FROM ANY OF THE FOLLOWING COMPANIES.
@greenbuzzliquids
@rainscience_growbags
@gorilla_grow_tent
@growlightscience.led
NEW* @Rocbudinc Seeds on his website *
*****Gorilla grow tent discounts extend to all companies affiliated with grow strong industries which include..*****
@super.closet
Lotus Nutrients
Kind LED grow lights

Likes
81
Share


@UnorthadoxDude
Follow
Hello growmies! Welcome to week 13 for Karen, this Kings Kush Auto. Last week is complete so please check it out!
She is fully focused on bud maturation now and the smell is incredibly strong. Due to external factors, there is a 90% chance I'll be chopping her at the end of this week even if she isn't ready.

Likes
8
Share


@Kirsten
Follow
14.1.25:
I've been readjusting the LST. I just took all the pegs out and reshaped her.
I got some new LST equipment in the mail today, have been glad to have more pegs. I got some clips too, but they don't seem to stay on 😕
I'm currently only using the pegs, I have some thicker soft wire, but I forgot I don't have pliers to cut it!
Also I'm running very low on Biobizz nutrients, so that could be bad 🤞
18.1.25:
I have done another large defoliation on PPP1 and PPP2.
Also, moderate defoliation on all other plants today. All LST ties and pegs are readjusted.
I have turned up the light to 90%. Same distance of between 24-28 inches, depending on height of specific plant.
I have increased the dosage of Biobizz Bio-Grow and Fish Mix to give an extra boost of Nitrogen as several plants were showing yellowing. They have responded very well to this. Unfortunately I ran out of my Biobizz nutrients and PH UP. I'm currently using Bicarbonate of Soda to increase the PH after the nutes PH comes out to about 4.1. Obviously, that uses a lot and I only had a 250ml bottle, which I used last run too.
This run I have 9 plants. The only thing I'm worried about is the salt build up.
Have you used it before? Or any other natural way to increase PH? Please let me know!
I've also added Biobizz Fish Mix to help with the extra Nitrogen needed.
Watering with 1ltr of dechlorinated water PH'd to 6.3 with the following nutrients;-
♡ 4ml Biobizz Fish Mix
♡ 4ml Biobizz Bio-Grow
♡ 2ml Biobizz Bloom
♡ 2ml Biobizz Top Max
♡ 2ml Cal-Mag
♡ 2ml Ecothrive Flourish.
I water with this every 3 days.
I did order some more Biobizz Bio-Grow and Bio Bloom.
I found some at a reasonable price on Amazon. I still have about 800 ml of Biobizz Fish Mix left, too.
It is fairly expensive this time as the plants are hungrier this run.
I also got a new bag of Canna coco, which I may use to add a top dress with some dry amendments.
Which hopefully will save some cash on the bottled nutrients and stretch out until the end of this run without having to buy anymore.
I have purchased a funnel to pour the water. It is difficult, due to the shape of my LST, to water precisely. I have spilt it all over the tent several times 🙄
I've also ordered a 2 litre jug. Currently, I'm mixing water for 9 plants individually in a 1 litre jug. It's tideous. Hopefully, this will solve the issues.
Cleaning the tent after watering every time isn't my idea of efficiency 😅
Thanks for checking out my diary 🍃 ✌️

Likes
3
Share

@FeebleSnane
Follow
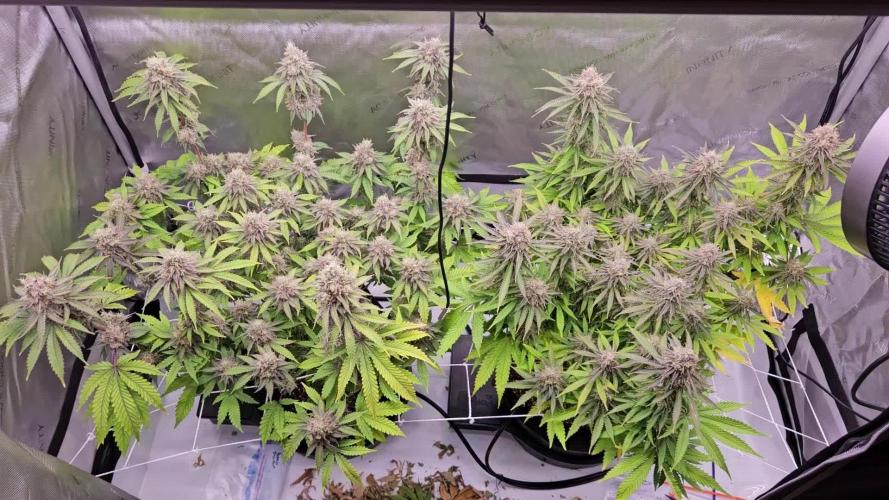
Today is day 105 since the plants sprouted, and day 49 of flower (week 7).
The plants look like they'll be finishing up nicely. I haven't seen any more pollen sacks or nanners forming on the Papaya Sherbert, and the buds on that plant don't look like they've been affected by pollen.
The buds on both plants are hard as rocks, and still getting a little bulkier. The buds on the Papaya Sherbert (left plant in the tent) are getting pretty big, and I really look forward to seeing them after getting trimmed. The buds on the Orange Sherbert have definitely been smaller than the buds on the Papaya, but the buds still look nice. I think the Orange Sherbert naturally has more buds sites, however.
Trichomes are developing nicely. The flower time on Orange Sherbert is 7 weeks, and I think it still needs closer to 2 weeks to form more amber trichomes, but the milky trichomes are looking great. The Papaya Sherbert has a 9-10 week flower time, so hopefully it lines up with the Orange Sherbet. The trichomes on Papaya Sherbert are noticeably behind, but not too far.
Likes
16
Share


@Ultraviolet
Follow
Seedling managing 93F 30%RH, around 20 DLI. Vpd is in the 3's. No I don't recommend.
Signum Magnum.
"A great sign appeared in the sky
a woman clothed with the sun
with the moon under her feet
and on her head a crown of twelve stars.
Sing ye to the Lord a new canticle:
because He has done wonderful things.
Glory to the Father, and to the Son, and to the Holy Spirit
As it was in the beginning, and now, and ever shall be, world without end."
The plant nutrient nitrogen exists in forms with both positive and negative charges. Ammonium (NH4+)(immobile in soil)(Cation) has a positive charge, while nitrate (NO3-) (highly mobile in soil)(Anion)has a negative charge. Nitrogen is unique among plant nutrients in that it can exist in both positively charged (ammonium, NH₄⁺) and negatively charged (nitrate, NO₃⁻) forms in the soil. This makes it a special nutrient. In that it is responsible for providing balance for reactionary trade offs when it comes to ph. Because ph itself in the medium will always slowly drift towards acidicity, such is nature. 80% of nitrogen should be nitrate and no more than 20% ammoniacal nitrogen.
Ca, mg, and K are the big 3 cations related to soil composition, pH & base saturation.
When nitrogen is in the form of ammonium, it can compete with calcium, magnesium, and potassium for absorption sites in the plant root. This competition can lead to a reduction in the uptake of these other essential nutrients. Nitrogen, particularly in its nitrate form (NO3-), can increase soil acidity, which can also affect the availability of calcium, magnesium, and potassium. The form of nitrogen applied (ammonium vs. nitrate) can influence its interactions with other nutrients. Ammonium nitrogen can have a more pronounced negative effect on the uptake of calcium, magnesium, and potassium compared to nitrate nitrogen.
Common forms of ammonium nitrogen include ammonium ion (NH4+), urea, and ammonium compounds like ammonium nitrate, ammonium sulfate, and ammonium phosphate.
Common forms of nitrate nitrogen include potassium nitrate (KNO3), sodium nitrate (NaNO3), calcium nitrate (Ca(NO3)2), and ammonium nitrate (NH4NO3).
Phosphorus is an essential plant nutrient, and its availability in the soil is strongly linked to the presence of oxygen. Plants primarily absorb phosphorus as phosphate (PO4), and oxygen is a key component of this molecule. Furthermore, the availability of phosphorus in the soil can be impacted by factors like soil aeration and temperature, which in turn affect the oxygen supply to the roots.
Phosphorus uptake in plants is most critical during the early stages of growth, particularly within the first few weeks of plant development.
Young plants actively growing tissues have a high demand for phosphorus. They may absorb up to 75% of their total phosphorus requirements within the first few weeks of vegetative growth, with up to 51% of uptake happening overnight, primarily in the first few hours or early nightfall.
⑨Anaerobic root respiration, or respiration without oxygen, is detrimental to plants because it's less efficient and produces toxic byproducts, leading to reduced energy production, nutrient uptake issues, and ultimately, root damage and plant stress.
⑨Anaerobic respiration, unlike aerobic respiration, doesn't utilize oxygen as the final electron acceptor in the electron transport chain. This results in a significant drop in the amount of energy (ATP) produced, which is necessary for various plant functions, including growth, nutrient uptake, and maintenance of cellular processes.
⑨In the absence of oxygen, plants produce byproducts like ethanol and lactic acid during anaerobic fermentation. These byproducts can be toxic to the roots and inhibit their function,
⑨When oxygen is depleted in a medium, the pH tends to decrease (become more acidic) due to the production of metabolic byproducts. This is particularly relevant in biological systems where aerobic respiration relies on oxygen as the final electron acceptor.
⑨When oxygen is scarce, plants may switch to anaerobic respiration. This process produces carbon dioxide (CO2) as a byproduct.
⑨CO2 dissolves in water to form carbonic acid (H2CO3). This acid lowers the pH of the medium, making it more acidic.
⑨Anaerobic conditions can impair a plant's ability to regulate its internal pH, leading to a drop in cytoplasmic pH and potentially cellular acidosis.
⑨The change in pH can also affect the availability of certain nutrients to the plant, as pH influences the solubility of micronutrients like iron, manganese, zinc, copper, and boron.
⑨The lack of oxygen in the plant medium leads to a decrease in pH due to the production of carbon dioxide during anaerobic respiration and impaired pH regulation within the plant.
In plant cells, cellular acidosis, a drop in the internal pH of the cytosol, is a significant stress response, particularly during conditions like flooding or hypoxia. This acidification can be triggered by a decrease in oxygen levels, leading to the production of metabolic byproducts like lactic acid and CO2. The plant's ability to tolerate and recover from these conditions depends on its cellular mechanisms to regulate pH and mitigate the effects of acidosis. When plants are subjected to low oxygen environments, such as those experienced during flooding, anaerobic metabolism, which produces lactic acid and ethanol, becomes the primary source of energy. This can lead to a build-up of these acidic metabolites in the cytosol, causing a drop in pH.
OXYGEN
Atomic oxygen (single oxygen atom, O) is the lightest form of oxygen, as it has the lowest mass of the oxygen molecules. Oxygen also exists as a diatomic molecule (O2) and an allotrope called ozone (O3), which have higher masses due to the number of oxygen atoms combined.
Atomic Oxygen (O):
This refers to a single oxygen atom, which is the most fundamental form of oxygen.
Molecular Oxygen (O2):
This is the common form of oxygen we breathe, consisting of two oxygen atoms bonded together.
Ozone (O3):
This is an allotrope of oxygen, meaning it's a different form of the same element, consisting of three oxygen atoms bonded together.
Since atomic oxygen has the fewest oxygen atoms, it naturally has the lowest mass compared to O2 or O3.
Ozone (O3) Lifespan:
Ozone has a relatively long lifespan in the stratosphere, particularly at lower altitudes. For example, at 32 km in the middle latitudes during spring, ozone has a lifetime of about 2 months.
Oxygen (O) Lifespan:
Atomic oxygen, on the other hand, has a much shorter lifespan. At the same altitude, its lifetime is about 4/100ths of a second.
Ozone-Oxygen Cycle:
The ozone-oxygen cycle involves the rapid exchange between atomic oxygen (O) and ozone (O3). UV radiation can split molecular oxygen (O2) into atomic oxygen (O), which then reacts with O2 to form ozone (O3). Ozone can also be photolyzed by UV radiation, creating atomic oxygen again, which can then react with O3 to reform O2.
Dominant Form:
The partitioning of odd oxygen (Ox) between ozone and atomic oxygen favors ozone in the lower stratosphere. This means that a much larger proportion of odd oxygen exists as ozone than as atomic oxygen, especially in the lower stratosphere.
Recombination:
Atomic oxygen has a high energy and reactivity. When it encounters another oxygen atom, they can combine to form O2. This process releases energy, contributing to the heating of the atmosphere.
Ozone Formation:
Atomic oxygen can also react with molecular oxygen (O2) to form ozone (O3). Ozone plays a significant role in absorbing harmful UV radiation.
Other Reactions:
Atomic oxygen can react with various other molecules in the atmosphere, like nitrogen (N2), water (H2O), and carbon dioxide (CO2), forming different compounds.
UV light below 240nm (peak 185nm) creates ozone (O₃) through a process called photolysis, where UV light breaks down dioxygen molecules (O₂) into single atomic oxygen atoms (O). These single oxygen atoms then react with other oxygen molecules to form ozone (O₃). Specifically, UV-C light with wavelengths shorter than 240 nm can cause this photolysis.
UV light with wavelengths between 240-280 nm, (peak 254 nm) breaks down ozone (O₃) into dioxygen molecules (O₂) and atomic oxygen atoms (O). 280nm does not have the energy potential to break apart the stable bond of (O₂) into enough (O) to make (O₃)
At ground level, atomic oxygen (single oxygen atoms) has a very short lifespan. This is because it's highly reactive and quickly combines with other molecules to form stable diatomic oxygen (O2) or other compounds. While the exact timeframe varies depending on the specific circumstances, its lifespan is typically measured in nanoseconds or picoseconds.
Likes
133
Share


@Kitties_and_Colas
Follow
She's filling out nicely and is definitely due for a haircut...she has about 1 more week of stretch and in week 3 we like to do a heavy defoliation (and remove the ties). she's currently sharing the flower tent with (and is 10 days behind)our mystery strain... thanks for reading friends 🐱❤️
Likes
200
Share


@Ferenc
Follow
Day 96, 15th of December 2020:
Wao and wao... this is what I can say.
A bit late I was on holiday I usually start the week with the first day but now with the last one.
So let's start with the "black sheep" of this group as she is alone here RQS Wedding Gelato.
Easy growing issue free little bushy lady. Absolutely great choice of grow. Pretty much ready for Christmas but she can be cut even now lol....
And now let's speak about the Original Sensible Seeds' girls...
Well Black Ghost OG similarly to RQS Wedding Gelato is calm little bushy and issue free lady.... no problem all good ready for Christmas....
Runtz Gum the thick chick with heavy big buds and excellent appearance is really amazing. I placed a stick there and fixed her to look better... It was not necessarily but i have done it.
She needs more time pretty much done ny Christmas or a bit after....
Gelato from Original Sensible Seeds is similar in terms of acting such as streching and all that ...
The same situation applies not much to really say we wait ;)
I am really happy to have these ladies....
Well, Do-Si-Dos OG is the craziest one ever... lol.... not only due her crazy kind of streching style but the trichome developement that comes along to the fan leaf "holder" stem is pretty crazy....
Those buds are like a diamonds sticky and she would be ready to harvest but need to wait because I need to go....
I really had to fix her by placing a stick there I broke one stem but fixed as it did not come off... so crazy especially now because of the weight of the buds... now she looks even more beautiful...
I think she is the most challenging grow ever.
Original Sensible Seeds genetics is unique really high quality just look at them.
Royal Queen Seeds as well but this is my second grow from them my first was a Green Gelato which is the same calm littlw bushy plant. Amazing very good for newbies ;)
I am going on holiday again and back on 28th of December so after harvest starts.
Girls will be cut after.
The 7th weeks starts with tomorrow 16th of December....
Only flushing and no more nutritient will be used.
Soon full report comes. Lamp is the same 11 hours on and 13 off....
The last 4 days they will get 4 days darkness and only ventilation will be working no even more water ;)

Likes
5
Share

@Chrisandweed
Follow
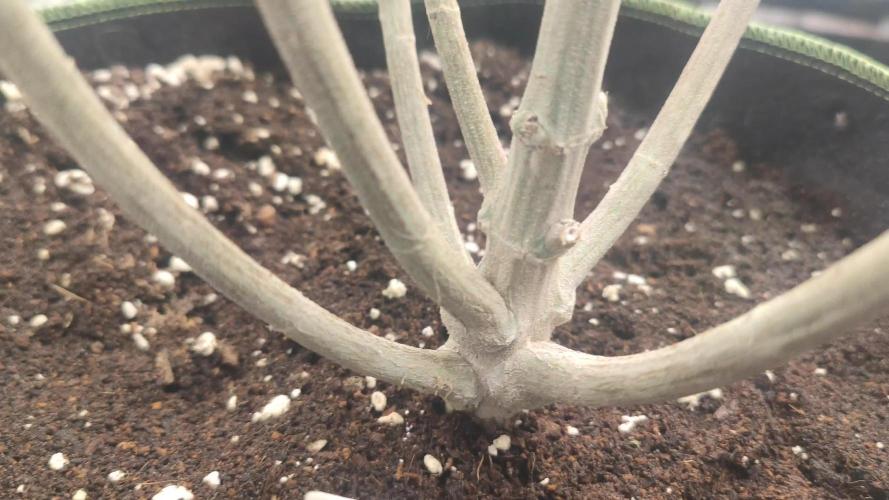
Engorde weenooo engoorde real jajajajaja
Bueno, pues buenas noticias dado que la población tan bestia de araña roja ha descendido a minimos! Por lo general ni veo ya, pero se que aún queda alguna, por ello, les meteré una limpieza mas con aceite de neem y jabón potásico, pero una sola mas, quizá esta noche o ya mañana. A partir de esta aplicación ya se acabo el uso de estos productos, y el siguiente lavado foliar que le haré será un té de canela, haré un concentrado hirviendo agua y con canela en polvo, filtrándolo para wue no quede residuo. Esto lo haré con intenciones antifungicas y de controlar un poco mas la humedad para mantener los bichos controlados.
PD: de verdad! Estoy encantado con esta variedad. La compré en la web de Alchimia y en su sección de comentarios la peña hablaba mal de esta variedad, en concreto de esta, la selección de Grower Choice, y ya os digo que estoy esperando terminar el cultivo para irme para allá a esos comentarios y poner el link de este cultivo porque para mi, está siendo de verdad de las plantas mas bonitas, resistentes, olor, estructura, recuperación, toodo, para mi esta está sin duda en mi top 3!!

Likes
2
Share


@fabialien
Follow
13 Agosto 2024. selección de semillas y colocación en vaso con agua ph 6.0 con agua Oxigenada.
14 de Agosto se ponen en agua las semillas por 24 horas para hidratación.
15 de Agosto, con las semillas con muestra de radicula procedemos a pasarlas a papel absorbente.
16 de Agosto se muestra la radicula avanzada.
17 de Agosto en la mañana se puede apreciar el crecimiento de la radicula.
17 de agosto en la noche trasplantamos a "Peat Pallet" y una a maceta de cartón ya que la radicula creció bastante.
18 de agosto ya en los "Peat pallet" se pueden mostrar qué las semilla se cayo por completo e iran abriendo en el transcurso de las horas, las tenemos en un domo germinador dentro del Indoor.
🌡️ 27.1 ⁰C
💨 75% Humedad
🌫️ 0.9 VPD kPa.


Likes
202
Share


@CrazyHorse
Follow
Hello my beautiful friends 😊 😊 😊
2nd week arrived and he is here 💪 💪 💪
Girls looks very happy and I am happy with them 🙂
Day 9- like you can see on picture a humidifier was temporarily removed. I have to clean and maintain it, so humidity is low but tomorrow unit going back inside 😇 😇 😇
Please have a beautiful day and I wish you all to have a fantastic Christmas 🎄 ♥️ 🌲


Likes
Comments
Share

@MrOgchemist
Follow
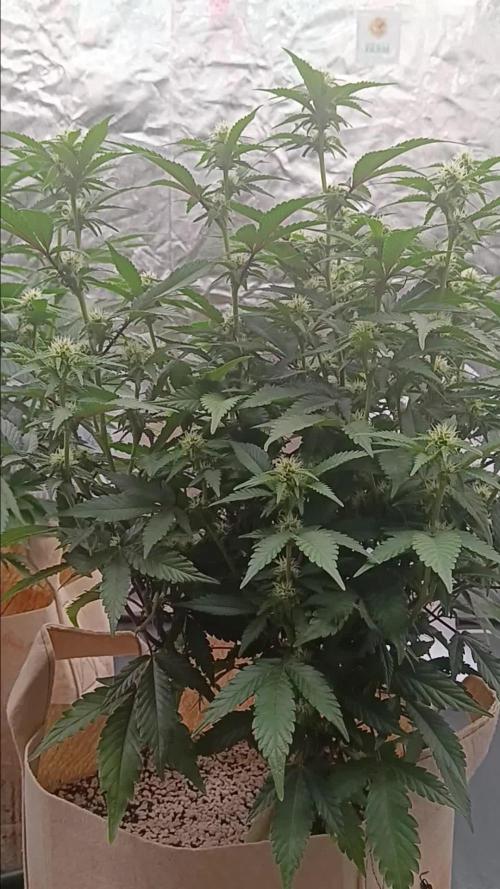
She's turning out pretty nicely, alot of colas .. they might be small but they are enough for me... plants are starting to smell strong.

Likes
8
Share


@StonedandSteady
Follow
AutoFlower/Outdoor Vine Flowers plants & plans Update!
They're Budding out like Crazy and looking Beautiful at their 6th Week of Flower! Outdoors Update! 2nd Feed of #HumboldtCountysOwn
#AutoWhiteRussian and #AutoMontreal *Fems* breed by Team #DivineSeeds #DivineSeedsSquad #DivineSeedsBreedingCompany Looking Magnificent and Amazingly Great in thier 6th week of Flowers! Thier Growing under the #Growatt600w and in my #TopoLite 24×24×48 Grow Tent! I'm also using #TNBNaturals #TheEnhancer Co2 Despersal Canister and using thier Ph⬆️⬇️ for my Decolinated Tap Water!
#AutoWhiteRussian breed by Outstandingly Awesome Team #DivineSeeds #DivineSeedsSquad #DivineSeedsBreedingCompany
Yo!!! This Lil Beauty popped open in under between 16-18 hours of Germination using this Wet Papertowel Method, this New Heat Mat, Baked potato ToGo Container and Regular Tap Water Helped Tremendously! Heck Yeah Growmies and Growmets!!! Let's Grow!!!
DivineSeeds:
#AutoWhiteRussian
Origin:Afghanistan
Type:Indica/ Sativa/ Ruderalis
Flowering:65 days
THC:24 %
Harvest:400-600 g/m2
Height:100-150 cm
#AutoMontreal breed by Top of The Line Team #DivineSeeds #DivineSeedsSquad #DivineSeedsBreedingCompany
Yo!!! This Lil Beautiful Bean Popped under between 20 hours of Germination using this Wet Papertowel Method, this New Heat Mat, Baked potato ToGo Container and Regular Tap Water Helped Tremendously! Heck Yeah Growmies and Growmets!!! Let's Grow!!!
DivineSeeds:
#AutoMontreal
Origin:Canada
Type:50% Indica/ 40% Sativa/ 10% Ruderalis
Flowering:65 Days
THC:23%
Harvest:550-750 g/m2
Height:120-160 cm
https://divineseeds.net/
https://instagram.com/divine.seeds?igshid=osxe2v7en33v
HumboldtCounty'sOwn:
Email: [email protected]
Phone: (707) 725-4119
Toll free: (866) 872-9434
Humboldt Bottling
Po Box 429 · Fortuna, CA 95540
HumboldtCounty'sOwn Website Link: https://humboldtcountysown.com/
HumboldtCounty'sOwn Instagram Link: https://instagram.com/humboldtcountysown?igshid=1qj809qkkwych
I love and Appreciate Everyone!!! Thanks Again Teams! Cheers Famz!!! Much Props and Much Topz!💯

Likes
15
Share


@Spirit4i20
Follow
It is a fantastic plant, very strong in its growth, easy to cultivate, root system is not comparable to the others I have here...💪
It has an incredible fullness predominating over the others 😏
The productivity is really great being the heaviest I have harvested 😎
Now it's waiting to try it out 👌
Thanks to everyone who enjoyed this girl...
And good vibes and trips to all!🙏🙌
👊

Likes
39
Share


@eldruidamx
Follow
Day 106. Watering with fertilizers.
Day 107. Watering with clean water.
Day 108. Watering with fertilizers.
Day 109. Watering with clean water.
Day 110. Watering with fertilizers.
Day 111. Watering with clean water.
Day 112. Watering with fertilizers.

Processing
Likes
21
Share


@Excalibur
Follow
25th September 2018 -
Day 92 -
Buds looking good, decision made to flush from Weekend (T- 4 days)
Conditions are perfect.
Trichomes are looking impressive with some very dense buds.
Day 93 -
pH down added and pH balanced water.
Day 96 -
14 days left of curing
Cold snapped has occurred and heater added 18 degrees
Fans removed.
Day 97 -
Water removed and pH balanced 5.5 & Zero nutrient *** Flushing begins ***

Likes
29
Share


@Spliffing_Around
Follow
I did not log all the weight, cuz my “wine cellar” run out of place , so a lot I just tossed in a big bucket for later hash. All the larf is not weighted, next grow i will do larf mitigation and proper lightning for each plant. For now I got a lot of larf, but I also see that some of my plants got great nugs even under low light exposure. Purple lemonade is less in big density In comparison to Tangie Matic. As well as not purple appeared, even though it is claimed to be genetically stable. Maybe wrong seeds ? Doubt it. But the lemon terps are present.
Tent size 240x240

Likes
18
Share


@RFarm21
Follow
20 abril - 26 abril
22 abril - o gráfico representa a alimentação da cheese #2
24 abril -cheese #1 início do flush 😀😀 (2L só água)
Likes
11
Share

@Rangaku
Follow
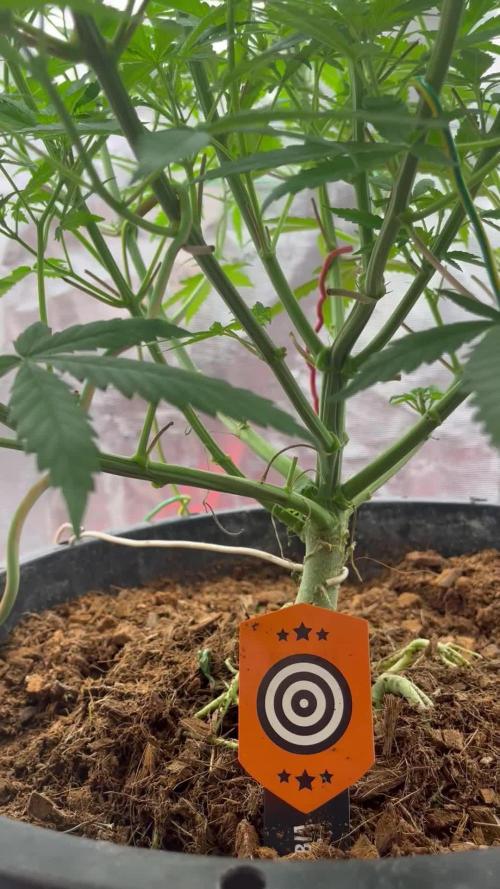
RS11 is the queen of the tent , looking beautiful green and healthy. She strutted into the first week of flower and stacked on the height and mass production of tops . Keeping up the defol and tying her down as needed to get the light where it needs to be all week . Pretty much same same next week .
