
Likes
Comments
Share


Likes
27
Share


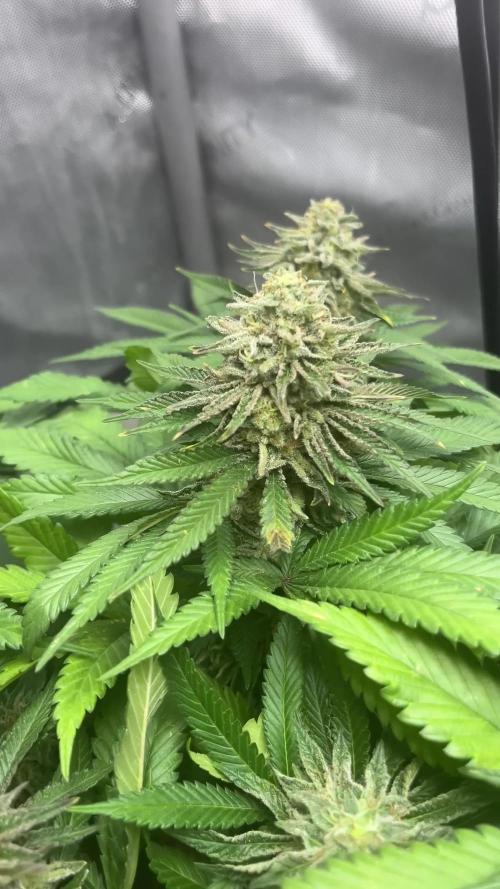
@Jens_420
Follow
Ganz schön Lila geworden dir Buds, aber das liegt wohl an der nächtlichen Tempe

Likes
3
Share


@JackJolla
Follow
Diesel: The plant has slowed a bit after topping but now growth seems stable.
Wedding Cake: Still the lil one of the three, growth is now more stable after topping.
Sunset Sherbet: It was the one with the least expectation of the three, but after FIMIing, growth continued without a hitch and is now almost as tall as the other two.


Processing
Likes
5
Share


@Mr_nugs_lover_David
Follow
She's looking very healthy just like ger sister amnesia pro #1 this othe pheno (#2) is looking very bushy too and responding sensational to the training, I just cannot wait to see this lady in fulk flower, let's get the job done! 💯💚


Likes
27
Share


@KidAlienGrows
Follow
This has been by far the best results I have ever seen. Ladies are all progressing super quickly, I attribute this to the addition of the Blurple light and the brand of soil I am using.
Earlier in the week I added some training clips to the Lemon AK & Gelato to better control the structure I was waiting for the stems to harden before I took them off but they seem to be breaking them!
Excited to see what this week holds.

Likes
6
Share


@Snakeking
Follow
Barely feed them with terra aquatica tripart and compost tea every 2 week.
They are happy and lush

Likes
10
Share

@Borberad
Follow
Samen 3 lässt auch an Tag 5 noch nichts von sich sehen. Zu Absicherung unseres Keimprozesses haben wir einen Vergleichssamen unter gleichen Bedingungen mitgezogen, nur um zu schauen ob ein Systematischer Fehler vorliegt. Dieser hat jedoch schon die Erde durchbrochen und aktive Keimblätter. Am Vorgang kann es somit nicht liegen: Temp. konst. 25°C Luftfeuchte ca. 75- 80° mit Osmesewasser durchgezogener Easyplug. Öffnung im Plug zuvor großzügig aufgelockert. Wir warten ab so lange muss die wenige hübsche Pflanze als Model hinhalten. Evt. bekrabbelt sie sich ja noch.
An Tag 6 wurde der Samen mal etwas freigegraben er ist zumindest gekeimt ein Stück gewachsen. Wir warten mal noch ab ob er noch weiter wachsen will.
Tag 7 Nr 2
Um Feuchtigkeitsschwankungen gering zuhalten wurde sie in den größeren Cube gesetzt, um Algenbildung wie bei Nr.1 entstanden zu vermeiden, wurde mit Kokos gemulcht.


Likes
10
Share


@ButterfliesLittleFarm
Follow
Hello Diary,
I'm starting a new round on my little farm, the 18th since I started growing these beautiful plants.
There are again three different Autoflowering strains at the Farm: Cherry Pie Auto, Purple Lemonade Auto and one of the legendary strains White Widow Auto.
This journal will be dedicated to the Purple Lemonade Automatic.
To begin with, I will write a few words about Purple Lemonade Auto itself.
Purple Lemonade Auto ranks as one of the strongest autoflowering strains available and offers sweet, fruity, and floral flavors to boot.
Not only that, but she races to harvest at lightning speed and delivers ample returns.
Breeders from RQS created this variety by starting out with Purple Haze, a legendary sativa-dominant strain known for its euphoric high and sweet and spicy flavor.
Then, they added Lemon Skunk to the mix to add an uplifting effect and boatloads of skunky phytochemicals.
Finally, Sweet Skunk Auto was selected to contribute speedy growth and more mouth-watering flavors.
Purple Lemonade Auto emerged from this triad as a fast and potent indica-dominant hybrid.
Purple Lemonade Auto seeds produce vigorous and fast-growing plants that burst from sprout to harvest in just 10–12 weeks.
The plant's indica and ruderalis genetics are really put on display when it comes to its height and internodal spacing.
Plants remain quite compact, both indoors and out, but hardly to the detriment of yield quantity.
Indoor plants maintain a stealthy height of 60–100cm but churn out 425–475g/m².
SET-UP ON MY LITTLE FARM:
Box - Secret Jardin DS120W 120x60x178
Lights - MIGRO ARAY 4 - 240W
Ventilation - TT Silent-M 100
Filter - Primaklima filter PK 100/125
Fan - Oscillating Koala Fan
Soil - BioBizz Light - Mix
Pot - 11L fabric pots
Seed - Royal Queen Seeds
Nutrition - RQS Organic nutrition
Let's officially start the diary.
16/07/2024
Planting plants.
This time I decided on 11 lit. fabric pots, my dear friends at RQS sent me these nice pots and it's not like this is my first time using them.
They are great to handle and prevent me from over watering the plants.
For soil, I use BioBizz's Light Mix, mixed with Easy Boost organic nutrition in the form of pellets. I put 50g of pellets on the 11 liter pot.
After that I put Seeaweed, 1g/lit and finally Mycorrhiza Mix which I put 5g/lit.
After that, I mixed the soil in the pot well and soaked it with water.
I put Seed Booster in the water, a new product from the rich range of organic nutrients from RQS.
I made a hole in the middle of a few centimeters and put a seed inside.
I did the same with the other two strains and after that I put them in the grow box.
20/07/2024
In the morning I sprinkled the surface of the soil with water, not too much, and by the end of the day all three plants had sprouted.
21/07/2024
I watered the plants, I gave each approximately 1 liter of water to which I added Seed Booster again.
Before that, I photographed the plants.
23/07/2024
Watering. I repeated the same procedure as two days earlier.
That's all from me for now, I'm looking forward to a new trip as always.
See you soon.


Likes
10
Share


@barlobruz
Follow
7/26/2021
- 1st week of flower.
- Mites are super active on the layer of trim I left on the soil surface. They're not on the actual plant, so I'm much more confident in thinking they're beneficial soil mites.


Likes
16
Share


@Mopish
Follow
17 Jan - 23 Jan
19 Jan
Kush del Arriero: Looking good in color and size, planning to flush next week, hope those possible nanners don't develop enough, not removing due to harvest time being so close and this one being the one that will probably give me the best yield. Some buds and leaves getting purple colors.
Choco Cookie: Still very small, hope they grow a little more before harvest. Some buds and leaves getting purple colors.
Banana Cake: Small buds, decent trichomes.
I hope that KDA won't cause much trouble to the other two plants, I hope I'm wrong about the nanners... Keeping my plans, finish with nutrients this Sunday and flushing for 7-14 days after that.
I'll add a few more pics later today.
Sat 22
Yesterday a friend with more experience in these things took a look at my plants, he seemed impressed by what I've accomplished on my first grow so far. He also confirmed that the weird things on the KDA buds aren't nanners... phew !
He also confirmed my plans for flushing tomorrow are good.


Likes
18
Share


@EaRtH
Follow
7.11. - Entering second week of flowering with some buds already developing. Leaves around are getting covered in sugar. I think even the smallest one might have some decent yield. I cut off some of the lowest branches so the bigger ones will get more energy. Watered.
9.11. - I did a decent defoliation on the biggest plant. Basically just the lowest leaves without any light and few small branches.
11.11. - I've decided to cut back on the nutrients as plants are starting to show signs of toxicity. Today I gave them just pure water.
7.11. - 13.11.


Likes
19
Share


@Basementganja
Follow
Light was at 16" from days 1-7, which was way too close! The light was moved up to 32" and normal growth begun! The light is an SF4000 that's dimmed to 333watts while being cooled.
day 21-Defoliation begins! removed 1 fan leaf, and one node(on oposite side of 1st node) already!
Day 22, two more LST wires added, to expose the lowest node to equal light with the rest!