
Processing
Likes
Comments
Share


@MidwestBudz
Follow
Off to another great start, with feeding can’t wait to see what adventures these girls will test my learning knowledge in this hobby I’m enjoying!!


Likes
9
Share

@Ninjabuds
Follow
Huge plant huge nugs with a crazy dank and candy smell I wish I had a clone the bugs are so round and uniform and the plant had a crazy amount of vigor


Likes
13
Share


@NanoLeaf
Follow
Very happy overall, had some difficulties hitting the sweet spot through the cycle but managed to pull it through brilliantly at the end.
This is definitely a very deserty and cookie like strain. Oven baked freshness!


Likes
17
Share


@HowtoBubatz
Follow
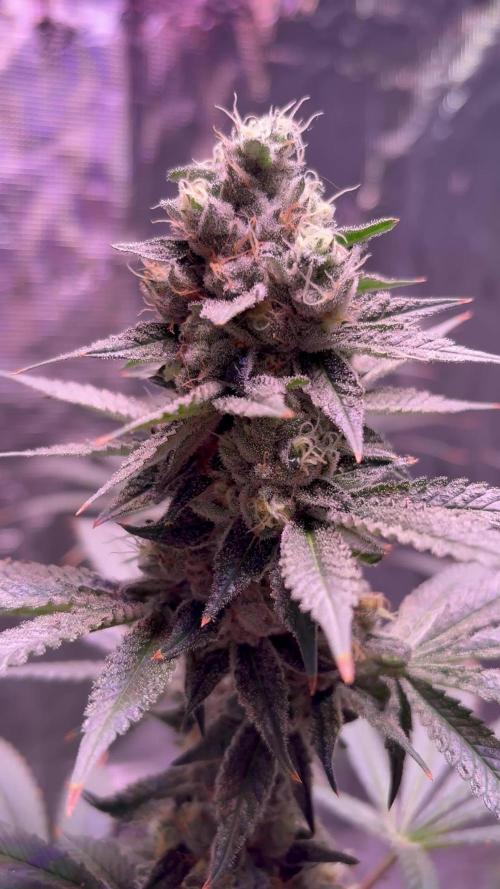
It’s the eighth week of flowering, and the plant is looking absolutely gorgeous!
The buds and leaves have turned a deep purple with rich autumn hues, giving the plant such a unique, almost magical appearance.
The sweet smell has become even stronger and fills the whole grow space with a powerful, sugary aroma. 🍬🌿
I’ve noticed the trichomes starting to turn an amber color—just the sign I’ve been waiting for!
Most of them are still milky, but the amber hints show we’re getting close. This week, I’ve started the flushing process to clear out any remaining nutrients and prepare for harvest. 💧
Everything’s on track, and I couldn’t be more excited for the final steps! 😁✨
Likes
19
Share

@eldruida_lamota
Follow
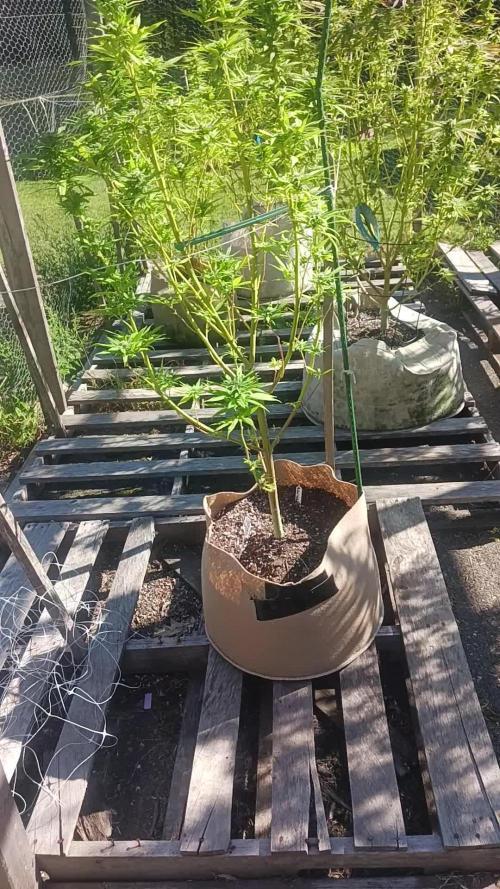
Que pasa familia, vamos con la séptima semana de floración de estas Green Gelato feminizadas de RoyalQueenSeeds.
Vamos al lío ,se trasplantaron en macetas de 7 litros definitivamente.
El ph se controla en 6.0 , la temperatura la tenemos entre 24/20 grados y la humedad ronda el 50%.
El ciclo de floración puse 12h de luz, el foco está al 80% de potencia.
De momento van creciendo a buen ritmo y tienen un buen color.
La flor también va formándose y engordando, también empieza a producir tricomas, estaban muy bien enraizadas al realizarle el trasplante se notaba la abundancia radicular.
Agradecer Agrobeta por el envío del kit gold series en cuestión, unos maestros 🙏
- os dejo por aquí un CÓDIGO: Eldruida
Descuento para la tienda de MARS HYDRO.
https://www.mars-hydro.com
Hasta aquí todo, Buenos humos 💨💨💨

Likes
47
Share


@Jimmy89
Follow
Had another major defoliation this week to uncover more flowering sites and to help lower the humidity, given a top dress of bat guano too and upped some of the nutrients. Still have more shades of green in there than I would like, as said before all clones from the same mother.. all photos taken day 25 of flower


Likes
41
Share


@MR_Poof_K93
Follow
Están creciendo muy bien! 😁 😁 He notado que el Rino Skin está haciendo que los tallos engorden bastante!! no lo había probado nunca y me está gustando.
🔴 He comenzado a hacer la técnica
-LST -
hay algunas Runtz que están germinadas después y la verdad es que están un poco pequeñas parece que la genética ha salido un poco rarita.
Las Zkitllez hay dos que germinaron solo con un cotiledón, una de ellas está a la par pero otra está un poquito atrasada... creciendo poco a poco pero luchando 😊😊 y otra de ellas la que salió bien está espectacular me encanta! 😍😍
Las Banana Cream 🍌 están super grandes! Creo que un poquito más de lo normal la distancia internodal parece un poco larga no sé a qué se debe... y están alimentándose de lujo

Likes
2
Share

@Ninjabuds
Follow
Getting closer and closer to the final days it’s the last plant and I have it under my new phovivis opticgrow x240 I felt it was a decent test to throw a plant under the light for the last week just to make sure plant do like the specific spec it puts off. All in all this plant is some gas and still looks healthy
Processing
Likes
10
Share


@Barcelona_Farmers710
Follow
Empiezo lo bueno Farmers pasamos a la preflora... este cultivo probaremos Delta 9 para probar aumentar la resina!👌🏻
Likes
52
Share


@Santica_Garden
Follow
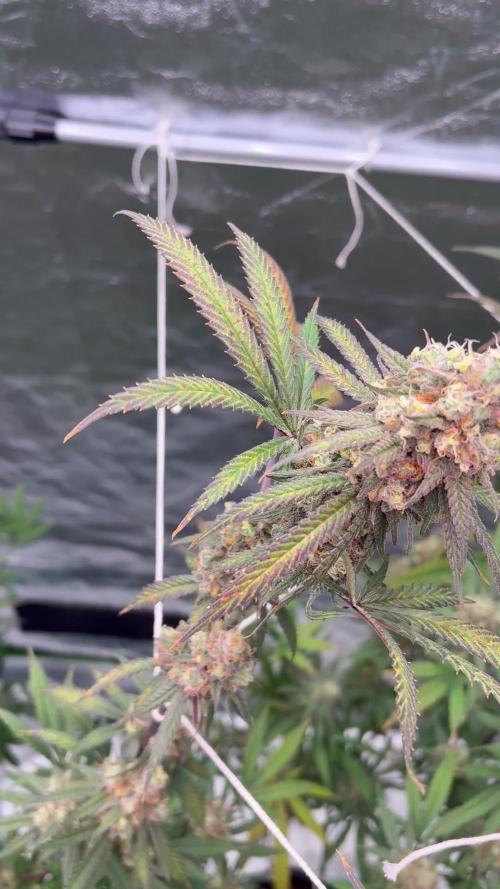
This is how things are looking for the King's Juice at the end of Week 8 of Flower, I have uploaded a video where I am checking out the Trichomes using my USB jewelers loop. Any questions just ask away guys. 👍🏾🌱💚....... Also a guy I know that has finished their King's Juice before me, has finished the cure, had a smoke and told it that I will absolutely love the smoke 🤤🤤 by the way she smells I can only imagine the flavour!

Likes
17
Share

@masterofsmeagol
Follow
9/6 Didn't do a video this morning. Went over again around noon and defoliated what needed it. I noticed what looked like stem mold on the special kush that those locusts have STRIPPED and saw what looked like mold but I left it and assumed it was just a bite out because it wad right at a node. I removed a major branch the other day. When I got back around noon the spot had tripled in size and was 100% mold. I cut that branch off too. It was a large main limb. The plant IS frosty but it's not ready. You cant see it but the calyx is pink. There are some branches that are completely stripped. They like the special kush for some reason and seem to target that. I should go over at night and see what I can see. Pink kush is flowering fairly aggressive. Not as much as the natural mk ultra though. I cant believe how fast those are exploding. As long as weather permits the pink kush will finish. I tried the special kush #1 which I'm almost done trimming and it wad amazing. Really eases anxiety and hits me square in the eyes. Very sedative happy strain. Tastes like pine, skunk and something I can't quite identify. Maybe the forest? I'm incredibly happy with the outcome.
9/7 Holy shit. It's STILL raining. Just for the ones that didn't hear it in the back, 'I' am so glad I harvested that plant when I did!" I got super lucky. I hate having to cut off limbs or come in the morning to find a branch eaten. Next year I'm 100% getting floating row covers. That will fix most problems. Buds are exploding in size. On everything. We've had some pretty high winds as well. The natural mk ultra continues to surprise me. It seems like the flowers get noticeable bigger day to day. Finally the pink kush has some small buds. This is an October strain though. I had already popped them or I would've been running more 10th planet or mk ultra. Hey maybe this strain will make it through the fall and give me some crazy quality nugs. It's an exciting time to be a cannabis grower. I processed and jarred that Special Kush #1. I trimmed almost everything. I have a jar of "smalls" buds that didn't come off a cola and another jar that is "trimmed" but needs to be "manicured" like the rest. I'll finish today and continue the curing process. It's always great to get an early phenome. Especially when it does what you want. Oh, I noticed a couple spots on leaves that COULD be septoria showing again. With all the rain I'm really not worried. I haven't been giving the preventative dose of Plant Doctor but I might do so when I need to water next. If I have a little while before harvest. That would help with budrot or any kind of fungal issue. I don't want to water when it's saturated. I'll wait until next water and even then I may not apply it. We shall see.
EDIT: Stopped raining around 1 but it's been off and on. I shook everything off and found a pillar in one of the special kush plants. The one I had to cut to major limbs off. I got the moth larvae and removed all the debris inside. Did that with the other special kush and it was fine. I'm going over after dark to see what is munching on plants so fast. While I was removing the pillar a bird flew behind my head and grabbed something on the plant behind me. This morning a little feather was resting on a leaf. After the dive bomb I turned and found another. I can't help but smile. Nature can take her claim. It usually isn't much and I'm fine with that. The birds however are on my side. We've got a synergistic relationship.
9/8 Finally the rain ended. Didn't have time to take a video and everything was soaking wet. I'm noticing that things are getting a lot more frosty. I found my loupe so it will be easier to look at the trichs. The special kush that ive had to take two main limbs off (because they were totally stripped) is losing more. Long stalks with all the nodes eaten off with just the cola at the top. I'm not going to get much off this plant but I don't want to lose everything. The calyxes are pink and starting to retract. I'll take a look at it with my loupe when I get home. We are supposed to have a pretty good week. The natural mk ultra's buds are exploding in size! For the most part EVERYTHING is. It's going to be a good year.
9/9 Everything is exploding in growth. I'm doubting whether the pink kush will finish. I know I have the rest of September at least. Still losing a little bit on the 2 special kush. Not going to get much from them. I found my loupe and checked everything. One of them is done. As it shows in the video SOMETHING has been eating buds off right at the node. It happens much less after trichs start developing. That sk I had to cut two limbs off and IS done but I may not get over to grab it today. There's not much left. When i cut off the branches there was nothing on them. Hopfully the quality will make up for it. Both mk ultras are looking GREAT. Won't be long on the big mk ultra and the 10th planet. I'm planning on a staged harvest. The special kush I harvested is the bees knees but I'll wait for the smoke report to talj about it.
9/10 Had to shake the plants off. They were soaked and the fog was so thick I could barely see. I've got a two hour appt at 4pm and one at 930 this morning but I'm going to find a way to take that special kush that I had to cut those limbs off. It's done and I've reached diminishing returns with that plant. Buds are exploding but I've lost a lot. AR least what I get will be fire. The big mk ultra has tops that are done too. I'm thinkong I mat take some of those if I have time. I'm not sure what I'm going to do. The pink kush is flowering rapidly. It's in the low 40s at night so I think September will be the end of the season. I was hopingvfor more time bit we'll see. I'll keep things updated.
9/11 Went over in the morning amd took a video I'm the afternoon. I tried a sample bud from the mk ultra and it was awesome! I checked the trichs on that plant and it looks ready. If I had more time and the weather wasn't going to be good I'd take it. I want to try the sample joint first before I take the top of the plant. Everytj8ng else is exploding. The other mk ultra is frosty as hell and hard as a rock bit needs to come together. These grasshoppers or locusts are fucking chewing shit up! I noticed a branch on the pink kush completely stripped. I FOUND ONE on my mk ultra natural! It wasn't the first time and it wad huge! Big female FULL of eggs. It took a grade stake to kill it. If I threw it in the air and hit it with a waffle bat it would soar through the air! Definately a little lower quantity. I noticed a little damage on the chem dog but it's not ready. We have a few more days of good weather. If things go good with the tester bud then I'll take the top of that mk ultra.
9/12 Went over and found some more damage from those fucking grasshoppers. I'll do a video when I get back. Mk ultra monster cropped is ready. We've got some rain coming and I dont want to risk it. I'll check the trichs of the other special kush too. If it's close I'll take that too. I'm not going to just watch colas turn onto top hats. I smoked that tester bud and it was awesome. I'll probably take that plant on stages. The other mk ultra won't be long and looks like it might become best one. Pink kush is late flowering but it seems like it might finish. I WATERED EVERYTHING A GALLON BUT THE PLANT IM PLANNING ON TAKING. I'll keep this updated.
EDIT: WENT BACK OVER AND TOOK A COUPLE VIDEOS SHOWING THE GRASSHOPPER DAMAGE. I HARVESTED THE MONSTER CROPPED MK ULTRA. THE TESTER BUD WAS AMAZING SO IM SURE THIS WONT DISAPPOINT. BIG YIELD FOR THISCPLANT DESPITE ALL THE HURDLES. ILL PUT THAT IN THE FINAL REPORT THOUGH. I DIDNT TAKE THE LAST SPECIAL KUSH. JUST THAT ONE PLANT. I WAS TIRED AND IT WAS GETTING LATE. IF I SEE A BUNCH MORE DAMAGE ILL YANK IT TOMORROW. PINK KUSHES ARE FILLING UP BUT BOTH 10TH PLANETS ARE SWELLING TO BEAT HELL! I WET TRIM EVERYTHING AND THEN MANICURE ONCE DRY. IM STILL GOING TO BE IN TRIM JAIL FOR A WHILE.


Likes
2
Share


@Green_Peace
Follow
Got back from 2 weeks holiday and immediately lollipopped and defoliated all 4 plants heavly. Will wait a few days for them to recover from the battering I gave them before flipping to 12/12.
This plant is at the back of the 4 in the timelapse.


Likes
5
Share


@GrowmieDeLaStreet
Follow
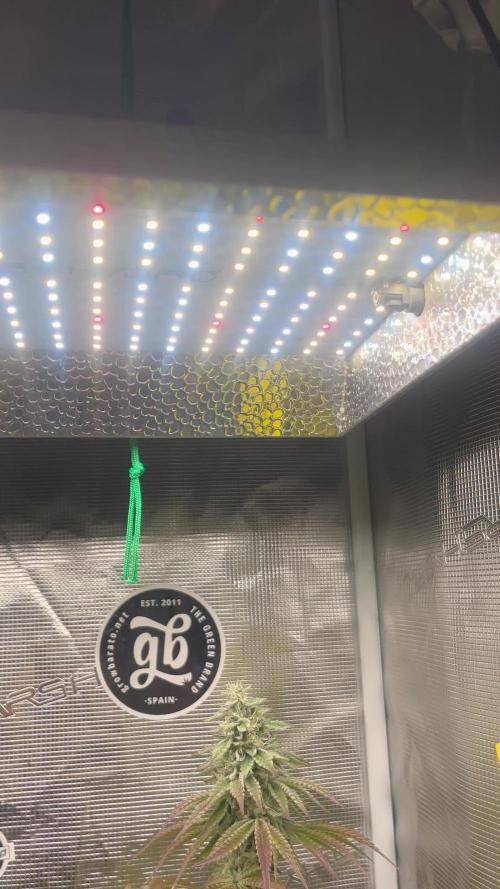
Last vegetating week, I'll flip tomorrow on the 14th. I got an auto drying in the tent which is the only place where I can do it, so she's now waiting for let's hope less than 3 days in my bathroom. I fixed the light to the ceiling and to the walls in the same set-up as in the tent. With one less plant in the tent, I was also able to expand the stems to the sides to let more light in the center.
Week breakdown:
2021-03-07: Nothing to read.
2021-03-08: Nothing to read.
2021-03-09: I could finally identify one male plant and removed it from the tent. Plus the other auto plant in the tent is almost done. I will do the switch at the end of this week.
2021-03-10: Nothing to read.
2021-03-11: Nothing to read.
2021-03-12: Last feeding before the flip, still with 8ml of each in 2L of water. 6.5pH 23,7C 1284ppm
2021-03-13: She's now in the bathroom waiting for her sister to dry in the tent. I reshaped the LST to expand the stems to the sides to let more light in the middle and I will flush her tonight and defoliate one last time.

Likes
5
Share


@DieGrowerAG
Follow
29.09.2024 Honey Cream Indoor
1/2 grew with out complications so I toopt her and trains her lower leaves out to create a even canapé. The other had to much water an the leaves start curling so I just let her recover and then I can top her as well and start training her leaves out l.
Likes
2
Share


@TTerpz
Follow
Fed with nutrients on 4/16/25
Watered with 6.8 ph plain water on 4/18/25
Day 5: fade began
4/20/25: fed with nutri
Likes
39
Share


@AestheticGenetics
Follow
4/15/25 Things are progressing nicely. Some plants dont seem to be doing too much but 3 of them or so that are really standing out.
Im curious if some of these are going to be longer flowering time than anticipated with the very obvious sativa dominant plants.


