


Likes
Comments
Share


@BossHogg6
Follow
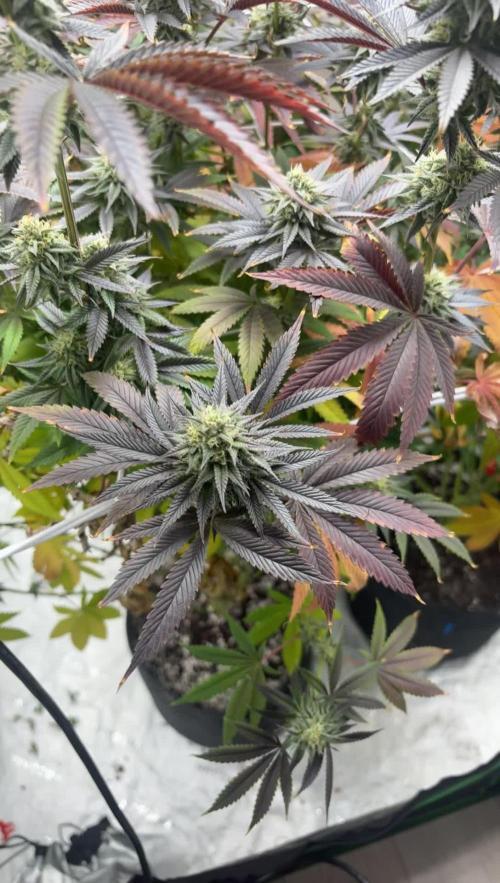
I started using Botanicare Hydroguard to take care of the roots and it works great. Got them back healthy. The light leaks to the reservoir have hopefully been resolved as well. The smell coming from the box isn't too strong and will catch you off guard here and there, but not too noticeable. You can also get a good look at the trichomes forming on the buds and leaves.

Likes
2
Share


@vilahaze
Follow
primera semana despues de la germinacion , las fotos son justo del dia despues del transplante , le puse mykos microrizas y velokelp de remo

Likes
18
Share


@xtchill
Follow
Onto week 7
Gave them a proper lst as you can see.
Think I'm going to put into flower 2morrow and see what the results are doing a 7 week veg instead of a 12 week veg.
Going to set the scrog net up and get tucking.
Looking lovely and healthy atm
Peace

Likes
29
Share


@JeyGanesha
Follow
Quinta settimana di fioritura 💪 forza bella mia,vai avanti così e fammi delle belle e grandi pannocchie 🙏🕉️💚💛❤️

Likes
2
Share


@Chubbs
Follow
What up Fam,
Week 1 update on these beautiful little ladies. So far germination was a dream, and now they're starting to get there first set of leafs which is cool to see. I did do my first hand watering the other day and probably fed a little to early as I'm seeing a couple burt tips on the leafs. Or it could have been spraying ipm which I've had to do every 3 days since planting. One of my bags of soil where infested with Fungus knots so been trying to get rid of them without being to evasive. All in all though glad to start the first run in the new room and get it all dialed in. Happy Growing.

Likes
4
Share


Likes
9
Share


@Vet4weed
Follow
Really happy with the progress. Not as full as others I've seen, but I've learned a lot in the process and will be better prepared from the start to grow big beautiful plants next time. Especially happy that Chonga has grown so much stronger and is now the exact same height as sister Chonga. Both plants have reached 21 inches.

Likes
22
Share

@Doofy
Follow
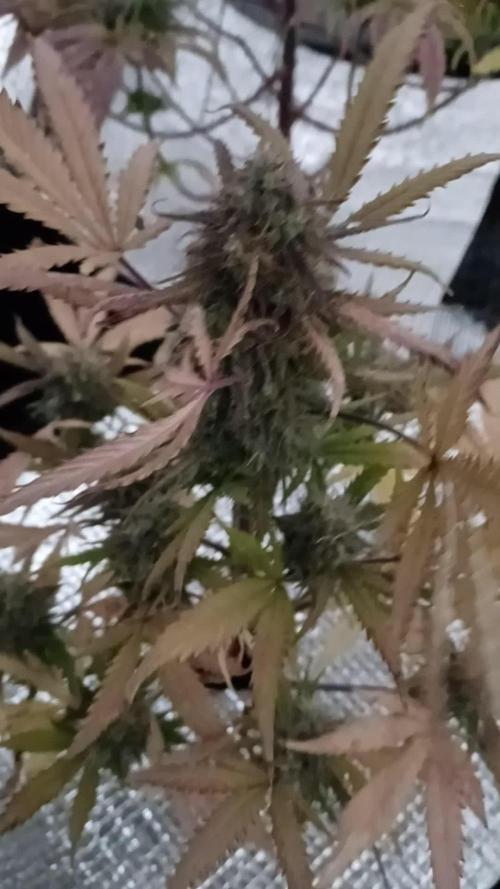
Turnin very yellow the last few days, she goin nicely though, hope she keeps it up, because she is very small... hope she delivers!!
Looks good! 3th lamp in the tent 🤞🤞
Gainin nicely, turnin white on the buds
She´s juicier than her bigger permanent marker sister
Likes
19
Share


@AsNoriu
Follow
Day 57. In this grow at certain stage i was happy that my cam is broken, but now i hate it !!! Girls are all purpling out, defoliation don't help to get colours, but even now - they are amazing ! That smell, frost, nuggy structure, i love them !!! Especially when i write it under influence of Tallest Kush ;))))
Only water, keeping tent doors open, that way temps are in low 20s and humidity ridiculously low (40 -50) for me ;)))
Middle Kush caught up sister by maturity, one cola starts to foxtail a bit.
Hope to get two weeks, but 9 days at least till chop...
Happy Growing !!!

Likes
11
Share


@TOTEM
Follow
Hello buds! I’ve actually splitted the Dance World diary in two since I took the other one out of the grow box and started some hard training with her (see the diary).
This one has FINALLY started flowering, after two weeks passed creating something that looked like flowers, which was definitely not flowers. Like the shape of flowers with no pistils. Pistils now came out from that “shape”, and there we go! After last week flush I’ve started (again) with bloom nutes (week 1). I hope to be able to complete previous weeks with some photos I took, but for the moment, if you want to follow the veg growth of this one, please look at the other Dance World diary. Enjoy and happy growing 😃

Likes
23
Share


@Firepharmer
Follow
Flushed and chopped down!!
Vert impressed with the Futur vert flora max series led’s killer quality killer yield


Likes
2
Share

@KickSweets
Follow
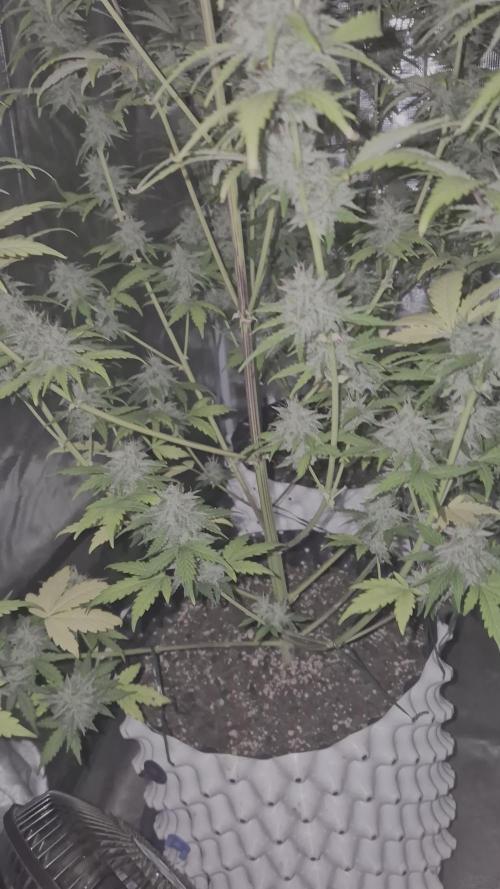
Week 9 is allmost done we are at day 5 , wanted to share video and in 2 days i will add pictures , grow is allmost finished around 7-10 days more maybe faster depends on trycoms . Week 9 done , we have one more Final Week , i feeded them yesterdy with Bloom TopMax and Bioheaven around 450ppm and next watering it is RO + Cannazym 2ml /L

Likes
18
Share


@Diips
Follow
d.85 really fading hard, and buds are growing in size. just letting her do her thing, we are taking this to the end. also got my humidity down.
d.87 buds are fattening up 😍
all i have to say about that is, bigger boots, bigger roots = bigger fruits.
mainlining is possible with auto, as long as you choose a big enough pot size and time the topping and lst. after that part is done, then the auto just needs time to do its thing.
Likes
8
Share


@Northstar_cannabis
Follow
11/17 stopped all nutrients and started flushing the medium until harvest. Watering the same schedule and amount, just plain well water ph between 7.3 to 7.6
The trichomes on this plant are crazy, sugar leaves, fan leaves and even the stem is covered in trichomes. Not much defoliation needed as leaves were pretty minimal throughout the grow.
Processing
Likes
26
Share


@Dunk_Junk
Follow
11.5cm/4.5" growth this week. She may need some water, look at her droopy lower leaves. I will monitor this situation.

Likes
2
Share


@Ensign420
Follow
|»» LOG DISCLAIMER: Not intended as a grow guide. Grow logs are posted 3 weeks later and are for my own personal learning reference. ««|
Introduction - Week 09 Summary -
Ensign's log, stardate 17505.5,
Another great grow week!
Growth is ramping up and wow TKO is thriving! Compared to the beginning of the week, growth has just exploded! By the end of the week, she’s bushed out with growth! Almost time to start scrogging!
Most of the week was tending and training the veg tent.
As for the Heady OG BX1 phenos, got the DNA sex test results and found my first regular female! One ended up being a male and had to be culled. The female (#1 pheno), was planted into the 30-gallon fabric pot and has already begun to take off with growth!
Veg tent has been looking green and healthy! The gnat population was ramping up towards the middle of the week. Received the nematodes and inoculated the entire garden.
Plan to start stringing up the scrog frame soon. Anyways,
Onwards to next week!
[START OF WEEK 09]
==========================================================
---------- [ 4x4 MAIN TENT ] ----------
Heady OG BX1 #1 - WEEK 09 - Full Veg
Heady OG BX1 #2 - WEEK 09 - END [Culled]
TKO - WEEK 08 - Full Veg
----------- [ 3x3 VEG TENT ] ------------
Garlic Budder OG#1 - WEEK 02 - Full Veg
Garlic Budder OG#2 - WEEK 02 - Full Veg
Gorilla Goat #1 - WEEK 02 - Full Veg
Gorilla Goat #2 - WEEK 02 - Full Veg
06/16/25 → 06/22/25
This Week's Estimated Goals
----------------------------------------------------------------------------------------------
DLI: ~19 mol/m²/d
PPFD: ~300 μmol/m²/s
VPD: ~1.0 kPa
This Week's Meter Readings & Averages
----------------------------------------------------------------------------------------------
Light On/Off: 16:00 - 10:00 | Wattage: ~325.5W [LV04]
Distance From Canopy: ~48”, 0.00”, 36”
DLI: ~16.46 mol/m²/d
PPFD: ~254 μmol/m²/s
VPD: ~0.99 kPa
Soil %: [46.3, 43.0, 47.9, 56.0, 43.0, 42.6, 42.1, 45.6]
==========================================================
Day 01 - Monday - 06/16/25 - Total Days: 064
-----------------------------------
Daily Averages ~[+01:00]
- Temps: 86.4°F [30.2°C]
- Humidity: 76.4%
- VPD: 1.02 kPa
- Soil %: [46, 43, 48, 57, 42, 41, 41, 46]
-----------------------------------
- [+01:39]: Night check on the 4x4 tent.
--- Aye! The garden is looking green and healthy!
--- Both Heady OG BX1 phenos are ramping up with nodal branching. Definitely can transplant, but still waiting on the DNA sex test results.
--- Wow TKO is raging with growth! She has grown beyond her 20-gallon pot and has almost reached the sides of the tent.
- [+01:43]: Took the starting weight range of each pheno before watering,
------ Heady OG BX1 #1 » 338g → 217.9g
------ Heady OG BX1 #2 » 351.5g → 252.6g
--- General Solo Range: [Dry] » ~65-75g - [Initial Cup Weight] + ~25-45g « [Wet]
--- All phenos were last watered 2 days ago.
--- While on a scale,
--- Gently misted the straw mulch of each cup with RO water.
--- Focused on the straw and sprayed as evenly as possible.
--- Misted 10-20 sprays. Waited a moment, then misted again.
--- Repeated this process for each cup.
--- There was a bit of runoff. Had to wait longer for the soil to re-hydrate before watering slowly again.
- [+02:36]: Took the saturated weight of both phenos after watering,
------ Heady OG BX1 #1 » 325.1g
------ Heady OG BX1 #2 » 343g
--- Marked the final wet weight on the back of each cup. Also marked the watering date on the front.
- [+02:41]: Decided to tape the Farmer Freeman DNA plant tags to the side of the solo cups. They were getting in the way of growth.
--- Placed both phenos back into the tent.
- [+02:45]: Checked the Ecowitt soil moisture sensor data:
------------------ [ 4x4 MAIN TENT ] ---------------
------ 45% - [CH01 FT » G30 - Pheno #1]
------ 43% - [CH02 FB » G30 - Pheno #1]
------ 45% - [CH03 BT » G20 - TKO]
------ 57% - [CH04 BB » G20 - TKO]
------------------ [ 3x3 VEG TENT ] ----------------
------ 40% - [CH05 BL » GR7 - Garlic Budder OG#1]
------ 40% - [CH06 BR » GR7 - Garlic Budder OG#2]
------ 41% - [CH07 FL » GR7 - Gorilla Goat #1]
------ 44% - [CH08 FR » GR7 - Gorilla Goat #2]
--------- Veg: 38% - 45% | Flower: 45% - 55%
--------- General: 30% [Dry] | 45 - 60% [Moist] | 70% [Wet]
- [+02:48]: Checked the 3x3 veg tent.
--- Wow the veg garden is growing along beautifully!
--- All mother phenos are looking healthy and thriving!
--- Gnats are continuing to increase and still waiting on the nematodes.
--- No signs of flooding and environment looks stable. Great!
--- Not much else to do tonight. Grow strong ladies!
Day 02 - Tuesday - 06/17/25 - Total Days: 065
-----------------------------------
Daily Averages ~[+01:00]
- Temps: 86.7°F [30.4°C]
- Humidity: 75.6%
- VPD: 1.07 kPa
- Soil %: [46, 48, 47, 57, 42, 41, 42, 43]
-----------------------------------
- [16:11]: Evening check on the 4x4 tent.
--- Garden is looking healthy!
--- Heady OG BX1 phenos are looking green and wow growth is exploding! May need to defoliate soon, but looking green! Grow strong little ones!
--- Ooo yea! TKO is bushing out! Growth is looking really healthy and perky!
--- Getting warmer in the garden, but VPD levels look okay and all plants are thriving in the higher humidity. Nice!
- [16:16]: Checked the Ecowitt soil moisture sensor data:
------------------ [ 4x4 MAIN TENT ] ---------------
------ 45% - [CH01 FT » G30 - Pheno #1]
------ 42% - [CH02 FB » G30 - Pheno #1]
------ 45% - [CH03 BT » G20 - TKO]
------ 56% - [CH04 BB » G20 - TKO]
------------------ [ 3x3 VEG TENT ] ----------------
------ 42% - [CH05 BL » GR7 - Garlic Budder OG#1]
------ 41% - [CH06 BR » GR7 - Garlic Budder OG#2]
------ 41% - [CH07 FL » GR7 - Gorilla Goat #1]
------ 42% - [CH08 FR » GR7 - Gorilla Goat #2]
--------- Veg: 38% - 45% | Flower: 45% - 55%
--------- General: 30% [Dry] | 45 - 60% [Moist] | 70% [Wet]
- [16:20]: Checked the 3x3 veg tent.
--- Looking great ladies!
--- Veg growth looks healthy and perky!
--- Gnats are still ramping up, but no signs of flooding.
- [16:22]: Quickly checked on the auto-watering system.
--- System is still charged and no leaks or kinks found in the tubing.
- [16:33]: Checked the humidifiers.
--- Tanks are still full and no leaks found.
--- Not much else to do in the garden today. Great!
Day 03 - Wednesday - 06/18/25 - Total Days: 066
-----------------------------------
Daily Averages ~[+01:00]
- Temps: 87.0°F [30.6°C]
- Humidity: 76.8%
- VPD: 1.02 kPa
- Soil %: [46, 42, 48, 56, 42, 44, 42, 42]
-----------------------------------
- [13:05]: Alright! Got the email with the DNA sex results from Farmer Freeman!
--- CA-CAW!!
--- Ahh yea!
--- Got a FEMALE!
--- Also got a male.
--- The #1 is the one!
--- Not looking for males so gonna have to cull the #2 pheno.
--- Anyways, hyped that I finally got a female Let’s go!
- [22:57]: Night check on the 4x4 tent.
--- Ahh yea! Garden is looking beautiful!
--- Ca-Caw! I got Headies!!
--- First off,
--- Females only! Heady OG BX1 #2 has gots to go!
--- RIP.
--- Alright!
--- Need to water the female #1 pheno and plan to transplant tomorrow!
- [23:12]: Took Heady OG BX1 #1's starting weight range.
------ Heady OG BX1 #1 » 325.1g → 215.5g
--- General Solo Range: [Dry] » ~65-75g - [Initial Cup Weight] + ~25-45g « [Wet]
--- She was last watered 2 days ago.
--- While on a scale,
--- Gently misted her straw mulch with RO water.
--- Tried to keep the top growth dry.
--- Misted 5-10 sprays. Waited a few seconds, then misted again.
--- Made sure to reference the watering weights.
- [+00:03]: Repeated this process until the cup weighed 331.7g
--- There was a bit of run off again. Waited a bit before re-watering. Need to slow down Ensign.
--- Marked the watering date on the side of the cup. Marked the saturated weight on the back.
--- Placed her back into the tent.
--- Looking great girl!
--- Ca-Caw! Finally found my very first regular female!
--- Until now, every female cultivar I’ve grown has been feminized.
--- Wow she looks healthy! Already 7-fingers deep into veg and looking green!
--- Could easily have transplanted by now, but going to wait until tomorrow.
--- Personally I like the rootball to be nice and well established before transplanting.
--- Anyways,
- [+00:08]: Checked the Ecowitt soil moisture sensor data:
------------------ [ 4x4 MAIN TENT ] ---------------
------ 50% - [CH01 FT » G30 - Pheno #1]
------ 42% - [CH02 FB » G30 - Pheno #1]
------ 46% - [CH03 BT » G20 - TKO]
------ 56% - [CH04 BB » G20 - TKO]
------------------ [ 3x3 VEG TENT ] ----------------
------ 40% - [CH05 BL » GR7 - Garlic Budder OG#1]
------ 42% - [CH06 BR » GR7 - Garlic Budder OG#2]
------ 41% - [CH07 FL » GR7 - Gorilla Goat #1]
------ 48% - [CH08 FR » GR7 - Gorilla Goat #2]
--------- Veg: 38% - 45% | Flower: 45% - 55%
--------- General: 30% [Dry] | 45 - 60% [Moist] | 70% [Wet]
- [+00:10]: Checked the 3x3 veg tent.
--- Looking beautiful and healthy!
--- All mother plants are green and perky!
--- Woah the gnat population is ramping up!
--- Glad I received my order of nematodes and already have them stored in the fridge.
--- Plan to inoculate tomorrow!
- [+00:23]: Did a bit of super-crop training.
--- Pinched and bent over the taller branches.
--- Oops! Broke a few more branches. The Garlic Budder pheno’s branches are way more brittle compared to the Gorilla Goat phenos. Mulched the trimmings.
--- Heal and grow strong my ladies!
- [+00:27]: Checked the humidifiers.
--- Tanks are still full and no leaks found.
--- Getting hyped for the transplant! Let’s go!
Day 04 - Thursday - 06/19/25 - Total Days: 067
-----------------------------------
Daily Averages ~[+01:00]
- Temps: 85.9°F [29.9°C]
- Humidity: 76.5%
- VPD: 1.00 kPa
- Soil %: [47, 42, 48, 56, 46, 43, 43, 47]
-----------------------------------
- [16:02]: Evening check on the 4x4 tent.
--- Garden is perky and looking healthy!
--- Heady OG BX1 #1 is looking green and ready to be transplanted!
--- Woah TKO is getting larger by the day! Defoliation aside, haven’t done anything but (auto) feed straight RO water.
--- Even the cover crop is raging in both pots. Nice!
- [17:04]: Ca-Caw! Okay! Time to transplant Heady OG BX1 #1 into the 30-gallon fabric pot!
--- The 30-gallon pot has been already pre-amended and ready for some Headies!
--- Alright let's go cutty!
- [17:06]: Gently removed the solo cup from the fabric pot leaving a perfect hole.
------ Sprinkled 1/16tsp of Great White,
--- Dusted the sides of the hole.
--- Also sprinkled a bit around the top soil.
--- Great! Time to transplant!
--- It’s been a day since her last watering.
--- To loosen and unstick the rootball from the cup, I gently squeezed the sides before pressing the bottom upwards.
--- Once fully loosened, I simply Vulcan-gripped the base of the plant and flipped her upside down.
- [17:14]: Heady OG BX1 #1 easily dropped straight out of her cup!
--- Ca-Caw! These are my roots!
--- Wow roots look white and healthy!
--- Did not break up the rootball.
--- Gently flipped her over before carefully placing her into the pre-inoculated hole.
- [17:16]: Pressed and evened out the top soil.
--- Also decided to chop and drop the cover crop.
--- Using a pair of trimmers,
- [17:25]: Trimmed most of the cover crop. Basically trimmed everything above the pot.
--- To help with the transplant, going to give 2 cups of wetting solution.
--- Adding in a few extra microbes.
- [17:36]: Filled a measuring cup with 2 cups of RO water.
------ Added 1/64tsp of Quillaja Saponaria Extract [60]
------ Added 1/64tsp of Recharge
------ Added 1/16tsp of Horticultural Aloe
------ Added 1/16tsp of Horticultural Coconut
------ Added 1/8tsp of Mycrobe Complete
--- Mixed the solution and poured both cups straight into a pump sprayer.
- [17:42]: Misted the straw mulch with the wetting solution.
--- Took my time and tried to go as evenly as possible.
--- Done with the transplant!
- [17:44]: Took the weekly height and light distance measurements.
------ Heady OG BX1 #1 was about 4.75" tall.
------ TKO was about 17.5" tall.
------ Heady OG BX1 #1 was about 48" away from the grow light.
------ TKO was about 36" away from the grow light.
- [17:54]: Took general PPFD readings.
------ Heady OG BX1 #1 was around 254 μmol/m²/s which gives a DLI of 16.46 mol/m²/d under an 18/6 light cycle.
------ TKO was around 312 μmol/m²/s which gives a DLI of 20.22 mol/m²/d under a 18/6 light cycle.
- [18:05]: Checked and updated the Ecowitt soil moisture sensor data:
------------------ [ 4x4 MAIN TENT ] ---------------
------ 45% - [CH01 FT » G30 - Heady OG BX1 #1]
------ 42% - [CH02 FB » G30 - Heady OG BX1 #1]
------ 48% - [CH03 BT » G20 - TKO]
------ 56% - [CH04 BB » G20 - TKO]
------------------ [ 3x3 VEG TENT ] ----------------
------ 43% - [CH05 BL » GR7 - Garlic Budder OG#1]
------ 41% - [CH06 BR » GR7 - Garlic Budder OG#2]
------ 39% - [CH07 FL » GR7 - Gorilla Goat #1]
------ 42% - [CH08 FR » GR7 - Gorilla Goat #2]
--------- Veg: 38% - 45% | Flower: 45% - 55%
--------- General: 30% [Dry] | 45 - 60% [Moist] | 70% [Wet]
- [18:07]: Checked the 3x3 veg tent.
--- Veg garden is looking great!
--- Pots are flood free, but gnats are definitely back!
--- Oops!
--- Found a couple branches that did not survive the last super-cropping. Both found on Garlic Budder phenos.
--- Cut and mulched the dead branches.
- [18:38]: Okay! Time to apply the nematodes!
--- This time going to also add in some microbes along with some Beauveria Bassiana and Bacillus Thuringiensis (subspecies Israelensis).
- [18:48]: Filled a pitcher with 16 cups (1 gallon) of RO water.
--- Also filled another pitcher with 8 cups (24 cups total).
------ Added 1/64tsp of Beauveria Bassiana Plus
------ Added 1/8tsp of Quillaja Saponaria Extract
------ Added 1/4tsp of Recharge
------ Added 1tbsp (3tsp) of WDG3000 Extra Strength BTI
------ Added the entire packet of (5 million) Nematodes
- [19:26]: Mixed the solution before pouring 4 cups straight into a pump sprayer.
--- Misted the solution onto each pot in the veg tent.
- [19:53]: Took my time and watered each pot slowly.
--- Also switched out the yellow sticky traps.
--- Going to also inoculate both pots with the nematode solution.
- [19:57]: Filled the pump sprayer with 2 cups of the solution.
--- Misted the straw mulch for the 20-gallon fabric pot.
- [20:03]: Repeated this process for the 30-gallon fabric pot.
--- Nice! Heady OG BX1 #1 is looking a lot happier!
--- As for the rest of the solution (~4 cups), inoculated various houseplants throughout the house.
--- Should help to prevent or at least reduce the chances of another infestation.
- [20:22]: Checked the humidifiers.
--- Tanks are still full and no leaks found.
--- Wow what a day!
--- Finally have this grow cycle’s veg phase started!
--- As for the veg tent, will continue to check back on the gnat population. Hopefully this treatment works!
--- Grow strong my little ones!
Day 05 - Friday - 06/20/25 - Total Days: 068
-----------------------------------
Daily Averages ~[+01:00]
- Temps: 85.6°F [29.8°C]
- Humidity: 76.9%
- VPD: 0.97 kPa
- Soil %: [47, 42, 48, 56, 46, 46, 43, 49]
-----------------------------------
- [23:03]: Night check on the 4x4 tent.
--- Ca-Caw!!! Ah yea!
--- Heady OG BX1 #1 is looking beautiful and really starting to perk up!
--- Also wow TKO is dominating the tent! Growth is blowing up and nodes are continuing to branch out while staying pretty short and bushy.
- [23:14]: Checked the Ecowitt soil moisture sensor data:
------------------ [ 4x4 MAIN TENT ] ---------------
------ 46% - [CH01 FT » G30 - Heady OG BX1 #1]
------ 42% - [CH02 FB » G30 - Heady OG BX1 #1]
------ 45% - [CH03 BT » G20 - TKO]
------ 55% - [CH04 BB » G20 - TKO]
------------------ [ 3x3 VEG TENT ] ----------------
------ 44% - [CH05 BL » GR7 - Garlic Budder OG#1]
------ 44% - [CH06 BR » GR7 - Garlic Budder OG#2]
------ 45% - [CH07 FL » GR7 - Gorilla Goat #1]
------ 45% - [CH08 FR » GR7 - Gorilla Goat #2]
--------- Veg: 38% - 45% | Flower: 45% - 55%
--------- General: 30% [Dry] | 45 - 60% [Moist] | 70% [Wet]
- [23:15]: Checked the 3x3 veg tent.
--- Wow! Incredible mother growth!
--- All phenos are looking perky!
--- Pots are also looking great and gnats seem to already ramping down. Nice!
- [23:18]: Checked the humidifiers.
--- Tanks are still full and no leaks found.
Day 06 - Saturday - 06/21/25 - Total Days: 069
-----------------------------------
Daily Averages ~[+01:00]
- Temps: 84.5°F [29.2°C]
- Humidity: 76.6%
- VPD: 0.94 kPa
- Soil %: [46, 42, 48, 55, 41, 42, 42, 42]
-----------------------------------
- [08:02]: Quick morning check on the 4x4 tent.
--- Ca-Caw! Good morning my ladies!
--- Heady OG (BX1 #1) is looking green and healthy!
--- TKO is continuing to do her thing and wow she is a beauty! She has almost filled the entire quadrant.
- [08:06]: Quickly checked on the 3x3 veg tent.
--- Veg garden is looking beautiful and healthy!
- [20:23]: Night check on the 4x4 tent.
--- Ahh yea! Garden is beautiful and raging with growth!
--- Heady OG (BX1 #1) is starting to fill in her pot and growth is looking healthy!
--- TKO is looking bushy and perky! In terms of veg growth she’s way ahead of Heady OG and will probably need another defoliation soon. Her fan leaves are getting huge again!
- [20:39]: Checked the Ecowitt soil moisture sensor data:
------------------ [ 4x4 MAIN TENT ] ---------------
------ 46% - [CH01 FT » G30 - Heady OG BX1 #1]
------ 41% - [CH02 FB » G30 - Heady OG BX1 #1]
------ 53% - [CH03 BT » G20 - TKO]
------ 55% - [CH04 BB » G20 - TKO]
------------------ [ 3x3 VEG TENT ] ----------------
------ 40% - [CH05 BL » GR7 - Garlic Budder OG#1]
------ 41% - [CH06 BR » GR7 - Garlic Budder OG#2]
------ 40% - [CH07 FL » GR7 - Gorilla Goat #1]
------ 41% - [CH08 FR » GR7 - Gorilla Goat #2]
--------- Veg: 38% - 45% | Flower: 45% - 55%
--------- General: 30% [Dry] | 45 - 60% [Moist] | 70% [Wet]
- [20:40]: Checked the 3x3 veg tent.
--- Veg garden is growing along beautifully!
--- Mothers are all looking healthy.
--- Growth is looking perky and ready for more training!
- [20:48]: Super-cropped all phenos in the veg tent.
--- Flattened out the canopy by bending a few taller tops.
- [20:55]: Quickly checked on the auto-watering system.
--- System is still charged and no leaks or kinks found in the tubing.
- [20:59]: Checked the humidifiers.
--- Tanks are still full and no leaks found.
Day 07 - Sunday - 06/22/25 - Total Days: 070
-----------------------------------
Daily Averages ~[+01:00]
- Temps: 84.3°F [29.1°C]
- Humidity: 76.3%
- VPD: 0.95 kPa
- Soil %: [46, 42, 48, 55, 42, 41, 42, 50]
-----------------------------------
- [20:04]: Quick morning check on the 4x4 tent.
--- Ahh yea! Headies is looking perky!
--- Heady OG (BX1 #1) is green and getting larger!
--- Wow! TKO has been doing her thing and bushing out with more tops! Growth has reached the scrog frame and looks extremely healthy!
--- Will need to start stringing up the frame in a week or two.
--- Grow strong my girls!
- [20:06]: Quickly checked on the 3x3 veg tent.
--- Mothers are looking healthy and growth is perky!
--- Pots are also looking great and gnat population is definitely lower. Nice!
- [19:00]: Night check on the 4x4 tent.
--- Garden is vegging along beautifully!
--- Heady OG (BX1 #1) is looking great and starting to stretch upwards!
--- TKO is just raging with healthy veg growth! Tops have already stretched beyond the scrog frame! Will definitely need to string the frame next week.
- [19:06]: Checked the Ecowitt soil moisture sensor data:
------------------ [ 4x4 MAIN TENT ] ---------------
------ 46% - [CH01 FT » G30 - Heady OG BX1 #1]
------ 41% - [CH02 FB » G30 - Heady OG BX1 #1]
------ 48% - [CH03 BT » G20 - TKO]
------ 54% - [CH04 BB » G20 - TKO]
------------------ [ 3x3 VEG TENT ] ----------------
------ 40% - [CH05 BL » GR7 - Garlic Budder OG#1]
------ 41% - [CH06 BR » GR7 - Garlic Budder OG#2]
------ 40% - [CH07 FL » GR7 - Gorilla Goat #1]
------ 52% - [CH08 FR » GR7 - Gorilla Goat #2]
--------- Veg: 38% - 45% | Flower: 45% - 55%
--------- General: 30% [Dry] | 45 - 60% [Moist] | 70% [Wet]
- [19:08]: Checked the 3x3 veg tent.
--- Veg growth is healthy and green!
--- Gnats population is down and no flooding. Great!
--- Easy night in the garden!
- [19:15]: Checked the humidifiers.
--- Tanks are still full and no leaks found.
- [19:41]: Time for another grow board wipe!
--- Been an interesting month or so.
--- Finally made it through the germination struggle along with a couple rounds of DNA sex testing.
--- Cycled all mother plants and did a full veg tent reset.
--- Also applied more nematodes. Still have more on the way and plan to apply again more for a preventative integrated pest management regiment.
--- Still need to string the scrog frame next week.
--- Onwards Ensign!
[END OF WEEK 09]
Likes
1
Share

@Moe_Mr_X
Follow
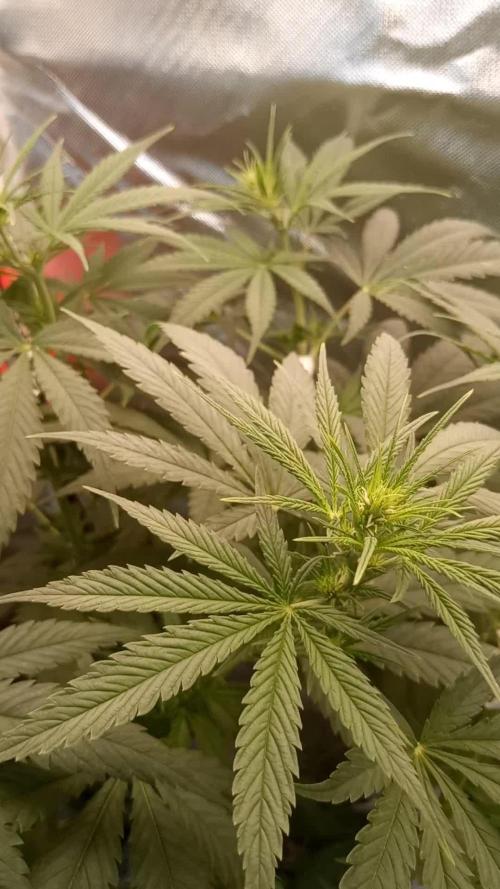
Diese Lady will nicht aufhören zu wachsen und das am Tag 42, was für eine hervorragende Entwicklung. Am 43.Tag habe ich die Fächerblätter (Ausdünnen/Entlauben) entfernt, damit sie im unteren Bereich besser Licht bekommt. Auch LST musste ich erneut machen, weil kein Platz nach oben mehr ist.
Likes
5
Share


@HoddZ
Follow
Absolutely stoked with my first grow.
On the scales wet is 92oz so i am thinking dry maybe 35 ish. No major dramas along the way now to dry and cure. 🤙🏻
Likes
67
Share


@GanjaReaper
Follow
Welcome back everyone,
As you can see are almost all seedlings growing. Some where still in the soil.
Might happend when giving water(seedlings can turn or get deeper), checked it out and they are alive and well.
All pictures are from day 4.
The humidifier had been added, so I had to adjust the room.
I spotted a corner of the room that gets dryer faster. I adjust the fan for now and see what happens.
Corners are always hard to get perfect. Sometimes the light, air, watering doesn't come there properly.
Seedlings don't need much nutrients, neighter do autoflowers. with normal soil I would recommend to only give water for 1-2 weeks, since it holds nutrients in it as well.
But since I'm using Cocos for this grow, I might have to add some basic nutrients in the upcomming week.
For this week I gave/give only water turns and Startbooster/rhyzotonic turns.
Update day 5:
- Lowerd the lights to avoid stretching, they are now at 75cm distance from lamp to pots.
I want them at 40-50 cm, but I don't want to rush it.
- Added another layer of cocos to avoid the soil from drying up therefore the roots from dying.
This will happen because of lowering the lamps down, the soil will get exposed more to heat.
As you can see, the humidifier is doing his thing haha. Pictures and videos where taken without the lights + fans on.
because of that, it will look like this. Still fun thought.
Arround 7 seeds didn't reach the surface yet, lets hope they make there way up soon.
Enjoy!