
Likes
Comments
Share

@PapaTerps
Follow
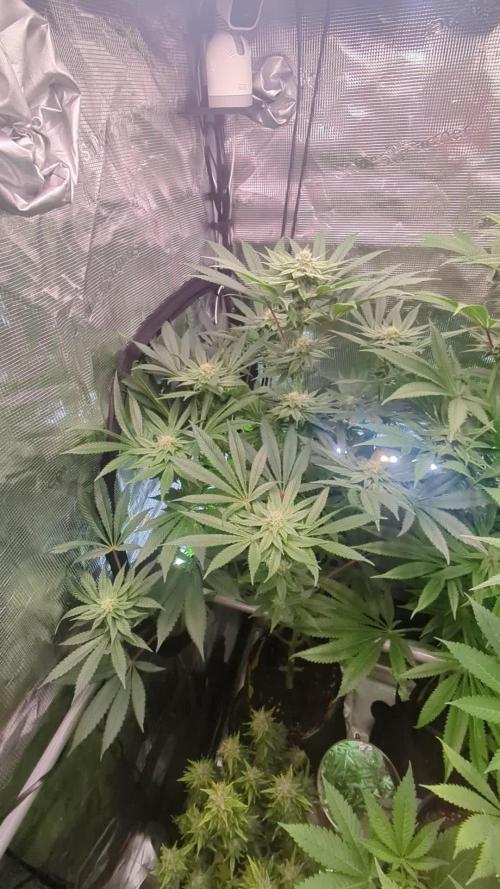
Black Cherry Gushers - Barney's Farm x Backpack Boyz
Day 80 - Watered with 3 litres of RO tap water, with defined nutrients, pH'd to 6.3. She has stopped stretching and is now focusing on developing her flower, and her smell is starting to shine; sweet floral. She has a a nice structure, but she is a little bushy as the top, which will reduce the light penetration just below the canopy, so I have added under canopy lighting to supplement this.
Notes:
- She has been moved into the 3x3 on a 12 hour light schedule, to give her more space.
- I have added under canopy lights to help increase the PPFD at the lower bud sites.

Likes
18
Share


@Stonyways
Follow
flower week 8,
2nd week of flush and my 15th week of crappy sleep due to this VIVOSUN 4"high cfm fan. I would just get rid of it as it does not owe me anything (2 full grows) but I am planning on gifting my old complete set up to someone I know that's in need.
and shit.... Spider Farmer never even got back to me....so my next grow will include my first HLG to supplement the Spider....
no contest this month due to...... well I gotta move. I don't think id be winning any contest but on the off chance I would.... address change. lol
HAPPY FRIDAY
Processing
Likes
27
Share


@Reaper
Follow
START OF WEEK 8 of the critical
start of week 7 for the girl scout coockies.
the critical is the plant u see first the coockies are in top left corner and bottom right. the midle and top right are my 2 new criticals who are still in VEG but i put them in the flowertent to speed it up a litle (the light is stronger and i got the space) when the flower light goes out i move those back to my veg room (bathroom uhum) 😅
nothing too special this week ill probably harvest the critical next weekend and let the coockies go another 3-4 weeks. the buds are fattening and i see the tips of those leaves have slight signs of nute burn so just water from here.
see u next week
(edit: lol the critical has major calmag issues do not watch those leaves shes almost done and surviving my heatwave torture tent)


Likes
3
Share

@mjumbo
Follow
Week 11 / April 19
The plants are growing a lot these days. I think they Will love the tricomas and flora booster. Its been 1 or 2 weeks that I have stop the 12/12 cycle
Likes
13
Share


@smokeycropping
Follow
segunda semana de cultivo las luces son muy muy brillantes
la primera semana usando diodos samsung 120w dimmer a 50%
segunda semana aumentamos a 75% dimmer del panel
se rego 1 vez ala semana humedad del suelo duraba y se retenía muy bien,
300cc agua reposada midiendo
plantas sanas todo marcha ok


Processing
Likes
27
Share


@Silverback_Guerilla
Follow
1/14:
This morning, I did a foliar application of big bloom and fulvic acid, then about 5 hours later I watered them with about a half-gallon of rainwater each and added armor si, humic acid, endoboost myco/tricho, liquid molasses, and a bunch of cal-mag. Today, I also I wired up and mounted my new samsung sun board strips (660nm/730nm) and my Solacure FlowerPower UVB fixture.
I'm running the deep red/far red bud boosters a few hours per day right now, but will run them for the entire photoperiod once I start flowering them. I'll run the UVB for 4 * 15-minute sessions a day for the full flowering cycle, and if they don't protest too much I'll increase each session by 5 minutes and evaluate again. Some strains are more forgiving than others and I've got 5 different strains in this space...so really not sure much time I'll get away with exposing them to the deadly rays without damaging them too much...😈
1/15:
I received one of the rapid led/growmau far red initiator pucks today. With the placement of my UVB light, I'm realizing I'll need another far red puck to have even and intense far red coverage, so I'm ordering another with Prime delivery and waiting to start flowering until I receive it.
I sprayed them down really well with ph adjusted rainwater tonight to rinse off nutrient build-up from foliar applications.
1/16:
I'm really excited to try flowering under 14/10. I grew photos indoors on an off for 15 years before I semi-retired. If I added up all the additional flowering time I could have done through the years if LED technology existed, I'd have had an extra truckload of bud to smoke.
I did another application of Axiom Harpin a|b Proteins this evening, right before dark. I'm expecting a big growth burst this week, leading up to the flower stretch. I really need them to trigger under 14/10 within 4 or 5 days🙏
...if not, I'll switch to 13/11 and wait a few more days🙏😟..if still no pistils are poppin, I'll go to 12/12 and chalk it up as bad luck or varietal indifference to Pr and Pfr manipulation.
1/17:
I fed each of them about 3/4 gallon of full strength veg nutes. This will be the last. I'll go with half-strength veg and half-strength bloom for a week, then go with full strength bloom nutrients until I start flushing them in 6-8 weeks.
1/18:
I installed the second far-red flowering initiator today and got all my timers configured for flowering:
=========================================
timer#1 - power strip with qb's and red boosters
10:00am -12:00am
timer#2 - (dual/independent setting)
sideA- 3-way cube with uva bars
10am - 3pm
7pm - 11pm
sideB- flowerpower uvb
1pm - 1:15pm
4pm - 4:15pm
7pm - 7:15pm
11pm - 11:15pm
timer#3 - far red pucks
11:00pm - 12:15am
timer#4 - sub-canopy tube
10am - 1pm
3pm - 6pm
8pm - 11pm
========================================
I also did some testing on the timers and sealed myself into the closet to check for any light leaks. All good.👌
1/19:
Looks like the FIM job didn't take on one of them..but she's got perfect symmetry. WIll probably have to just top her again next week...gonna be a tall one I think. Tonight is their first long night. It's ON!👍
1/20:
I watered them today with about a half gallon each. I'm seeing calcium and magnesium deficiences here and there, so added some boomerang and heavy cal-mag-Fe along with liquid molasses, humic acid, and endoboost myco. I also foliar fed with big bloom and fulvic acid.
That's it for week 4-


Likes
19
Share


@GrowGuy97
Follow
Day 89 - Harvest day has finally came for this lady & I beyond impressed, to only be in a 2 gallon pot she has put off some massive rock solid buds that smell amazing! Very strong stable genetics that’s can handle really anything you throw at it, would highly recommend especially to first time growers because this strain is so forgiving! Stay tuned for the harvest update & another run from spliff seeds because I will definitely be getting some of their strains🔥💪🏻 Thanks for following & happy growing friends!✌️🏼🙏🏼🌱

Likes
12
Share


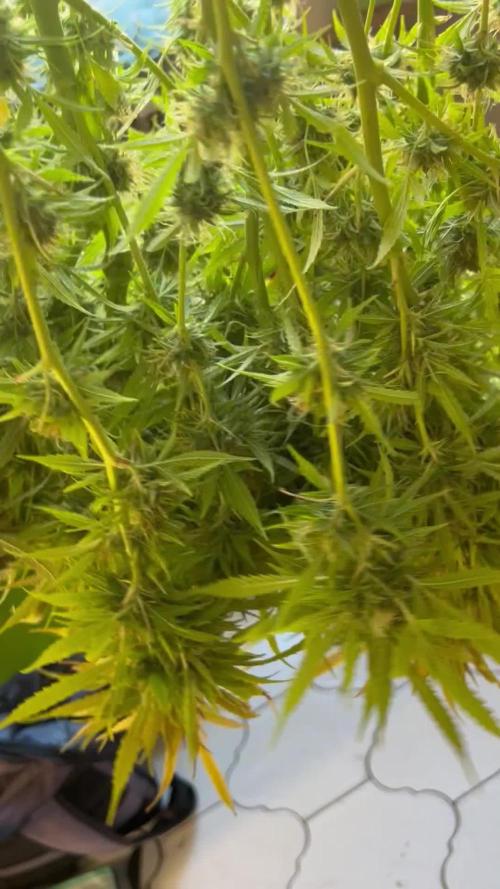
@Jays_Not_Here_Man
Follow
The girls are starting to wrap up their cycle. I have been watching the trichomes closely, and we are getting very close

Processing
Likes
12
Share


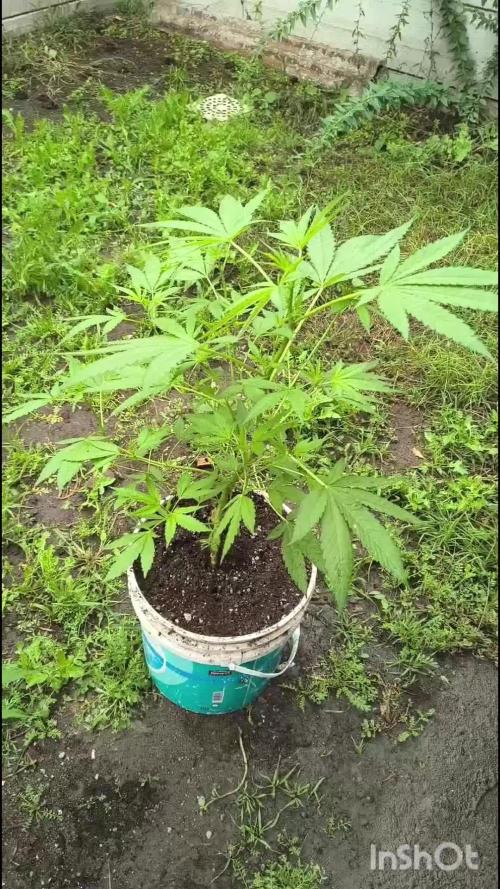
@Tazard
Follow
These are clones that I managed to take from my summer garden that became a disaster due to a heat wave that we had breaking 100 year records. I expect everything to be 48” in height at maturity.

Likes
5
Share


@LittleBigTrees
Follow
One week of 12/12 and there stretching out nice
I've defoliated the central cola to allow the side branches to catch up.
Will start to feed soon

Likes
46
Share


@Chubbs
Follow
420 Fastbuds Week 6
Gorilla Punch Auto
What up what up everyone. Week 6 update on these two has been interesting non the less. The bigger of the two still showing signs of some calmag deficiency from what it appears. I've added one teaspoon/gal of General Hydroponics 3 part flora series to the feeding to give them an added boost as well as the one/gal teaspoon of GH Calimagic. All in all they seem to be flowering OK. The Temps have dropped the last week making a constant 55'f-60'f in the day and down to the 30's at night so keeping the tents warm enough will have to be part of the battle from here on out. Happy Growing
Likes
76
Share


@BB_UK
Follow
Start by saying 2 are in flush now! (Black cream and sunset sherbet) I used flawless finish on them and then water from then on! Started to see some fades within a few days with the black cream and sunset sherbet leaves have lightened up, just awaiting some fades! And I’m watching under a 50x loupe to aim for the perfect harvest! The aromas are crazy in there got all sorts going on until I touch one and identify it’s aromas but as expected everything is going to be full of terps and resin! On the end road now! Flush next feeds for the purple punch and forbidden runtz! I’ve added a picture of the royal creamatic I took out as it’s just jumped into flower! Glad I took her out now too as she has some coverage and I wouldn’t want to lose no light at this stage! End result with dynomyco! IS… use it highly recommend. I’m using it in all my grows from now on! It’s a great additive providing your plants with a lot more beneficial bacteria that aid the myco and allow the plant to uptake nutrients better and gain a lot more stability so it’s a must! Contest or no contest I’m glad I got to use it or how would I have known! Thank you Ari 🙌🏽🙏🙏🙏💚

Likes
5
Share


@Bdawg
Follow
Tied up few branches opened canopy up abit fpr better airflow for the last 2-3 weeks.
Likes
26
Share


@DevelGrow
Follow
Hallo Freunde 👋 Auto Candy ist von uns gegangen! 😢 Aber 😀😋sie hat uns schöne Zucker Blüten hinterlassen! Wusste erst nicht wie Ich sie trimm und habe entschieden nur große und überstehende Blätter zu entfernen! Bin gespannt wie es aussieht wenn es trocken ist! Growers Love keep Green and grow High 🤩☺️✌️🍀💚🍀

Likes
7
Share


@Minuteman_Organics
Follow
Smoke 2 joints in the morning....smoke 2 joints at night....smoke 2 joints in the afternoon.....my plants are growing alright. Another easy week. I love organic growing 💗
One of the indigo childs is starting to fade out

Likes
1
Share

@Amboss
Follow
Have a dream about mold
That’s the reason why I chopped her
But only 3 days earlier 😅🙈
Likes
2
Share


@Nientjexo
Follow
Hi all!
Welcome to my diary about the Lemon Wonder Strain from Zamnesia.
Not a lot of things happend since last week.
She is 13 weeks old now and no where near being in flower stage.
I wonder how long it will take for her to flower
I cut away some Leaves to make room for the small branches to grow
Happy growing!
xo Nientje
Likes
18
Share


@berlinbeginner
Follow
beginning of second week of flowering. I have been underfeeding the sour diesel for a while now. I noticed when i measured ppm of the nutrient solution that i was feeding them. Will give 900 ppm next feed

Likes
7
Share

@CheeRz
Follow
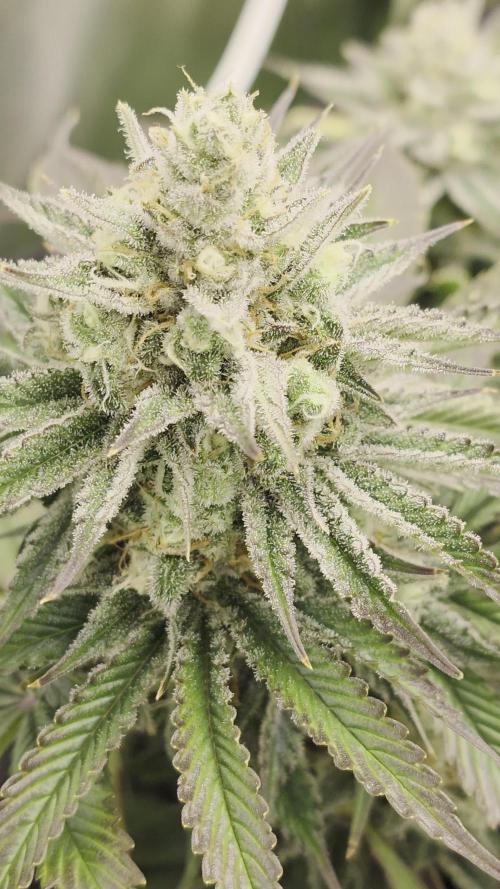
WEEK 12 - FLOWERING: Late Flowering Phase
🌼 FLOWERING PROGRESS
The Monster Maker is progressing through Week 8 of flower. The buds are continuing to gain density and are starting to show slight purple tints in some areas. The plant is handling the current nutrient levels without signs of stress, showing consistent growth across all sites.
👃 TERPENES & AROMA
The terpene profile is characterized by a sharp, sweet tangerine scent. The aroma has remained stable and pronounced throughout this week.
💧 NUTRIENT FEEDING & WATERING
Currently irrigation is 1.67L with the full BioBizz mix. I will maintain this schedule for two more applications this week to support the final bud development.
Current Feeding Schedule:
Calmag: 0.5 ml/l
Acti-Vera: 5 ml/l
Bio-Heaven: 5 ml/l
Bio-Bloom: 4 ml/l
Top-Max: 5 ml/l
Bio-Grow: 1 ml/l
💭 GROWER'S NOTE
Week 12. Bud density is increasing and the tangerine terpene profile is very distinct. Everything is proceeding according to the established plan.