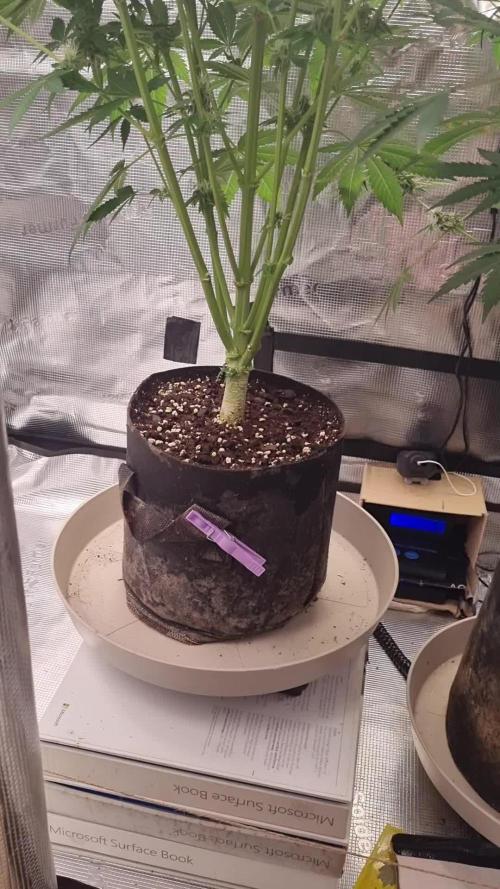
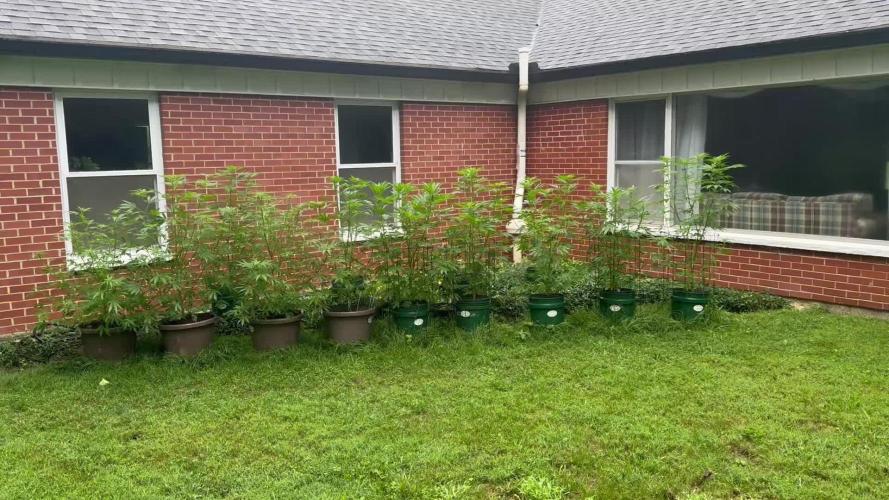
Likes
Comments
Share
@Dr_4NdY
Follow
Very nice skunky flavor mellow effect not for strong smokers Good daily Would not grow again but happy it was my first run Just found the 2 latest videos of the harvest + the trim
Likes
47
Share
👇 This week: --- Watered again as usual with the standard Plagron scheme + Calmag (last feeding with Alga Grow) (PLEASE CHECK YOUR WATER BEFORE USING CALMAG) Phosphorus foliar spray - red stems pretty much gone now PPFD at canopy height approximately 350-400, VPD ~1 Performed a major defoliation again Ordered more Autopots 😂 --- Happy growing and thanks for checking out my report! I really appreciate you! 😁💪🙏
Likes
55
Share
@valiotoro
Follow
FBA2507 Super soil finito✔️ Trichomes 15% amber🔬 Buds rockdense⛰️ Families fruity & sweet🤤 Head notes peach & mango🍑 Heart notes citrus,sweet & floral🍋🍭🌸 Base notes vanilla & tart crust🥧 Light soil it’s the last week🤩 Coco same feeding,watering 2/day🔥 Have a good wk😎
Processing
Likes
19
Share
Hi everyone :-) This week it has developed really well 😍. it was also topped for the first time. Like the Cup, I will not do an LST here either, just top it a few times 😃. I wish you all a nice week, stay healthy 🙏🏻 and let it grow 🌱
Likes
5
Share
Bit of a late update, but all doing well. 14 weeks in 8th april.
Likes
35
Share
Bonjour à tous les padawans et les maîtres jedis Pour cette semaine je prévoit de pratiquer comme technique spéciale le LST et juste un arrosage. Pour cela comme à mon habitude j'attend le cinquième noeud ou que je juge la plante robuste. Je profite que cette semaine qui va être relativement calme pour faire un LST appliqué et vous faire un rappel de ce qui est pour moi la meilleure technique pour arroser une autofloraison et la façon dont je pratique le LST. En suivant ces quelques simples conseils vous obtiendrez un résultat optimal tout au long de votre culture : Le cannabis est une plante qui n’aime pas recevoir un léger arrosage en continu. Il est impératif de l’arroser en grosse quantité, puis d’attendre que la terre soit bien sèche avant d’arroser à nouveau! Pour calculer la quantité d’eau nécessaire à chaque plante, suivez cette règle : Le volume d’eau à donner lors de chaque arrosage doit représenter au moins environ un quart du volume du pot !! Exemples : pour un pot d’1L, donnez 0,25L d’eau à chaque arrosage pour un pot de 4L, donnez 1L d’eau à chaque arrosage pour un pot de 12L, donnez 3L d’eau à chaque arrosage pour un pot de 30L, donnez 7,5L d’eau à chaque arrosage !etc… Pour donner un tel volume d’eau, il est souvent nécessaire d’arroser en deux (voir trois) fois, lentement et uniformément sur toute la surface. Disposez de bonnes coupelles sous les pots, celles ci se rempliront d’eau qui remontera dans le pot par capillarité en moins d’une journée. Il est également très important d’utiliser un bon terreau de qualité, avec une bonne capacité de rétention d’eau mais qui assure également un bon drainage (celui ci doit contenir de la perlite, et/ou de la coco, etc..) Il vous faut alors maintenant attendre quelques jours en sous-pesant régulièrement les pot avec vos bras. Quand ils seront redevenus très légers, vous pourrez arroser à nouveau !! En effet, comme l’eau pèse beaucoup plus lourd que la terre, un pot gorgé d’eau pèse plusieurs fois le poids d’un pot d’une plante prête à être arrosée. Avec un peu d’entraînement, vous apprendrez donc très rapidement à sous-peser vos pots pour savoir quand une plante a soif. C’est une technique à la fois très facile et très efficace, et qui peut être appliquée à toutes les plantes en pots ! En arrosant de cette façon, en général vous devrez arroser vos plantes tous les 3 à 6 jours. Pour cette semaine 3 au jour 17 ma plante fais 12 centimètres et son cinquième noeud apparaît je décide donc de pratiquer un LST sur ma plante. Pour ce j'utilise du fil de fer galvanisé que je plante directement dans le substrat en faisant attention de ne pas endommagé les racines car n'oublions pas que ce qui pousse dessus pousse aussi dessous. Jour 17 je pulvérise du une solution composé d'une cuillère à café de savon noir mou dilué dans un litre d'eau en prévention d'éventuels nuisibles. Je corrige mon LST suivant la pousse de ma plante ... Pour ma par c'est la manière dont je procède. Comme promis petit rapel de: Quand commencer à appliquer la technique LST De nombreux cultivateurs commencent la manipulation dés que les plantes possèdent entre 3 et 6 nœuds ou une paire de feuilles. Durant cette première étape de la croissance, le tronc encore flexible est pliable sans risque qu’il ne se casse, même si au fur et à mesure du développement de la plante il sera de plus en plus difficile de le plier. Nous pouvons continuer à guider la croissance des branches durant toute la culture, même durant la floraison, ce qui pour cette étape représente un grand avantage face à la taille, qui n’est pas du tout recommandé une fois que la formation des têtes commence, cela stressera en effet la plante, ce qui aura pour effet de retarder la récolte. Comment appliquer la technique de guidage LST Si nous sommes prudents, la flexibilité naturelle des fibres du cannabis permet de plier leur tronc et branches avec une relative facilitée, même durant la floraison des plantes. En utilisant une corde fine, nous pouvons accrocher la pointe de la plante à la base du pot par exemple ou à un tuteur que nous aurons planté dans le substrat. Nous plierons le tronc avec précaution et nous le fixerons avec la corde, à partir de là, nous pouvons augmenter progressivement la tension de la corde, chaque jour un peu plus, jusqu’à obtenir la position souhaitée. Soyez attentif à la réaction de la plante, essayez de ne pas appliquer trop de pression sur la corde et rappelez-vous que la flexibilité des branches peut varier d’une plante à l’autre. Pour obtenir de meilleurs résultats, il suffit de suivre quelques règles simples. Pour commencer, nous devons choisir une corde fine mais pas trop pour ne pas blesser les troncs au fur et à mesure qu’ils grandissent et qu’ils deviennent plus gros. Nous pouvons utiliser des crochets en plastique souple ou de n’importe quelle autre matière flexible pour éviter d’endommager les plantes. Spécialement en intérieur, utiliser des cordons en plastique de couleur (voir les diaries de @Silky) est très pratique pour voir facilement les accroches et faciliter le travail au milieu du réseau formés par les cordes, les tuteurs, les mailles ou les supports que nous aurons dans la culture. Bien entendu, en culture extérieure et surtout en guerilla nous ferons juste le contraire et nous utiliserons des matériaux de couleur qui n’attirent pas l’attention pour que notre jardin reste discret. Pour stresser les plantes au minimum, la mieux est de réaliser ces manipulations le soir ou juste après que les lampes en intérieur s’éteignent, ce qui leur permettra de se remettre durant la nuit. Normalement, le jour suivant nous pourrons observer comme les pointes des branches que nous avons pliées se dressent de nouveau vers le haut à la recherche d’une source de lumière. Que la force soit avec vous
Likes
11
Share
My plant smells really strong :D
Likes
53
Share
Hello, my amazing green-thumbed friends! Welcome to the Week 1 flower report for our beloved P.C.R.s. The transition from veg to flower is a magical time, and our plants are already showing signs of their future glory. Let’s dive into the exciting details of this week! Entering the Flower Stage Our P.C.R.s have officially entered the flowering stage, and the transformation is already visible. The stretch has begun, and you can see the plants reaching up, preparing to produce those beautiful buds we’re all waiting for. This stage is all about supporting their growth and ensuring they have everything they need to thrive. NutriSpray Magic This week, we’ve been diligently spraying Aptus Holland NutriSpray, and the results are phenomenal. NutriSpray is like a spa treatment for our plants, providing essential micronutrients directly to the leaves. It helps with nutrient uptake, reduces stress, and boosts overall plant health. Our P.C.R.s are absolutely loving it, standing tall and proud with their leaves praying to the light. Nutrient Transition With the start of the flowering stage, we’ve made some important adjustments to our nutrient regimen. We’ve stopped using StartBooster and replaced it with TopBooster, which promotes flowering and bud formation. Additionally, we’ve introduced P-Boost, a phosphorus booster that enhances root development and flower production. TopBooster: Encourages larger and more abundant flowers. P-Boost: Provides essential phosphorus for robust root and flower development. NutriSpray: Continues to support overall plant health and stress reduction. Optimal Conditions Maintaining the perfect environment is crucial as we move into the flowering stage. Our TDS is now at 360, with a pH of 5.9 and a temperature of 21°C for watering. These conditions are optimal for nutrient uptake and overall plant health, ensuring our P.C.R.s have everything they need to produce those beautiful, resinous buds. Care and Attention Paying close attention to our plants during this stage is key. Regularly inspecting for any signs of stress or nutrient deficiencies and adjusting care as needed ensures our plants stay happy and healthy. The love and care we put into this process are reflected in the vibrant health of our plants. In Conclusion Week 1 of flowering has been all about setting the stage for a bountiful harvest. With the help of Aptus Holland NutriSpray, TopBooster, and P-Boost, along with our careful attention, our P.C.R.s are off to a fantastic start. The excitement is building, and I can’t wait to see how they develop in the coming weeks. Shout Outs A huge shout out to @aptusholland, our main sponsor, for their incredible products that keep our plants thriving. Another big thank you to @artgenetix for creating the phenomenal P.C.R. strain. And to the wonderful community at Grow Diaries and all our followers, your support and enthusiasm keep us going. Let's continue to grow together! Until next time, happy growing, and may your gardens be full with love and green! Genetics - P.C.R. @Art_Genetix_Team https://artgenetix.world/ Nutricion @aptusholland https://aptus-holland.com/ LED Power @Lumatek and @viparspectra As always thank you all for stopping by , for the love and for it all, i fell blessed to have you all with me for one more love journey Thank you Thank you Thank you , you guys are great and have been amazing , thank you for everything ! #aptus #aptusplanttech #aptusgang #aptusfamily #aptustrueplantscience #inbalancewithnature #trueplantscience #dogdoctorofficial #growerslove
 With true love comes happiness , Always believe in your self and always do things expecting nothing and with an open heart , be a giver and the universe will give back to you in ways you could not even imagine so ! Growers love to you all
Likes
7
Share
@NYGROW
Follow
Growing good so far .. she gets sad very easily other than that she’s great the smell I love ❤️ she smells like sweet lemon tea amazing
Likes
2
Share
Plant is growing good. Still really pretty to me. Hoping to flip around day 60
Likes
15
Share
@Sergi0
Follow
Buenass, las Frisian Dew creo ya están para cosechar, tienen casi todos los pelos naranjas, y las flores se caen del peso, asique el lunes que viene seguro las cosecho, ayer ya las regué solo con agua, a la única que le puse agua con fertilizante es a la The Ultimate de la izquierda que esa tiene toda la pinta de que puede engordar un poco mas, detecte de forma temprana una plaga de arañas rojas, aparecieron por la baja humedad y las altas temperaturas, asique estuve cortando varias hojas que vi afectadas, y ya me encargue de bajar la temperatura (bajando el calefactor) y subir la humedad (riego en mayor cantidad), cuando revegete usaré algún producto orgánico como jabón potásico y aceite de neem para mantenerlas a raya, y si puedo incorporar mariquitas mejor (el tema es conseguirlas jeje). A la The Ultimate de la derecha solo le puse agua con un producto anti estrés, si veo que está bien en la semana capaz le mando un poco de fertilizante, pero con respecto a antes está bastante mejor, al final era un problema de PH, un amigo trajo su medidor de PH y el agua con la que riego tiene un PH de 9, asique voy a comenzar a comprar vinagre para reducir el PH del agua, pero se la bancaron bastante bien todo este tiempo, el suelo vivo ayuda bastante a regular el PH... saludos :) (Adición: la semana 19 se me subió recién cuando agregué la semana 20, se me había bugueado jeje)
Likes
10
Share
Week 10 of flower, looking to chop next week. The trichomes are about 70/30 cloudy/amber. Doing a few days of darkness and really cold night temps to hopefully push out the colors and resin production here towards the end.
Likes
49
Share
Likes
Comments
Share

Likes
18
Share
Hello Diary. The second week of flowering is behind me. I did a little defoliation this week, I honestly didn’t dare remove more leaves and branches, I didn’t know how they would react to it. Maybe I needed more? The temperature is still high, sometimes rising to 29, 30 degrees, but mostly around 28. Humidity in the air is an average of about 55% but sometimes rises to 60%. The problem is frequent rains this summer which creates high humidity in the air and this affects the humidity in the box as well. But plants tolerate these conditions very well. The flowers are developing nicely, and they have started to smell as well, but let the pictures speak for themselves. Green Gelato is twice as small compared to her roommates, but there is still a big crowd in the box. Gelato grew with very dense branches and spread more than it grew in height. The 120 x 60 box size is perhaps too small for three plants (two Hulkberries and one Green Gelato), so the real jungle is in the box. Due to the height of the Hulkberry in the box, and the spreading branches, it has become difficult to take them out every week for photography, but I am extremely careful with them. The Green Gelato has grown to 48 cm and does not look like it will grow much in height. Probably due to the excessive distance from the light, which I had to raise because of the Hulkberry which reached a height of 1m. 18/07/2020. - Day 30. Defoliation. I removed the leaves at the very bottom of the plant to make it easier for me to water them, after that I watered the plants but this time I didn’t put BioBizz, I just watered them with clean water. 21/07/2020. - Day 33. Watering. This time I gave them BioBizz, on schedule for the second week of flowering. I also added CalMag 1.5ml / L, preventively. While they don’t show they’re missing anything, I’ll keep adding CalMag. 23/07/2020. - Day 35. Photography and height measurement. Green Gelato Auto - Day 35. - 48cm That’s all for this week, see you soon.
Likes
21
Share
@Golden
Follow
Week 4: Day 21 The stretch is finally over and the ladies have been successfully defoliated. All energy is now being put into trichome production and sensing up. Even the larger fan leaves are developing trichomes. Golden adding more nutrients to the soil - Bat guano at 15ml per liter of soil. Harvest is getting closer by the day.
Likes
3
Share
@syoung
Follow
So 15 out of 16 germinated, luckily i had extra seeds. So i went ahead and germinated another, which you will see under the plastic dome in the video. All in all the girls are doing great. Watering with just distilled water no ph about 40-50ml around the sprouts.
Likes
46
Share
This plant was an absolute dream to. Grow, no issues at all with health of plant, just struggled to tame her as she was a a thick strong climber 💪💪. I'm so impressed with how this turned out, I could have flushed for another 3 days to make it 12days but I needed the space. After The 2 days of dark I was recommended I can definitely say it has vastly boosted her trichomes and the smell when I opened the tent blew my head away 😍😋 Aiming for a 10-14 day hang dry, The 10-12 weeks curing in jars with humidity packs. I will update with a dry bud weight and smoke test 👌 Bud wet weight is just 500g+ Final bud dry weight is 298g. Of juicy resinous purple and orange buds 😍 smells like sherbert and hang dry smoke test revealed a candy sherbert, no banana yet but hoping like the grow it matures with cure process now. Hits eyes straight away, sandy bottom kids, giggles, munchies, fun time with Mrs, bed. Full cycle with this one very happy over here 😉😁💚 FAT BANANA AUTO FROM ROYAL QUEEN SEEDS, big thank you to the team, and the breaders. What a pheno I received. I appreciate you all