


Likes
Comments
Share

@GrowersCorner
Follow
Week fifteen followed the same approach: the UV channel remained active, feeding and environmental conditions were stable, and the canopy was monitored to ensure even bud development.
Plants continued to develop healthy, dense flowers, with no signs of nutrient stress.

Likes
2
Share


@Islandbuds420
Follow
I found this strain very easy to grow and responded very well given the hot/humid weather we have here on the island. This strain held up very well to pest and mold/mildew
Likes
3
Share


@Barcelona_Farmers710
Follow
Esta variedad suele ser poco productivas pero una pasada para fumar o hacer cualquier tipo de extracción. La Blue Gelato 41 todo fue para ice y la verdad que un sabor increible! Una buena genética farmers!🍁




Likes
Comments
Share

@XanHalen
Follow
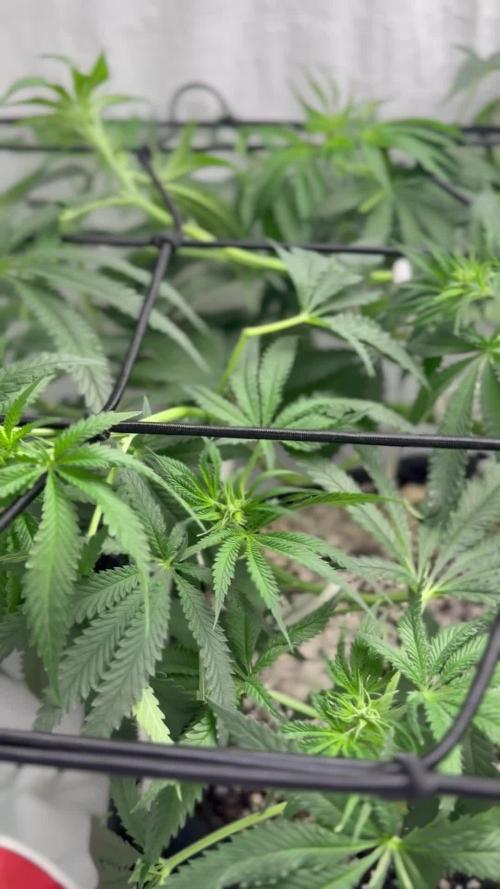
July 23rd: Day 10 into Flip
Temperature: [Day 75-80°F/Night 74 - 78°F]
Humidity: [45-55%]
Weekly Comments:
- light reshaping and defol. before stretch stops
- both plants are forming flowers, broke on decent top right off kinda pissed
Updates:



Likes
15
Share


@Waveform
Follow
Waiting for first signs of life …
While we are, I thought I’d give you a short explanation on the software’s graphics in case you did not follow my first diary.
The one to the upper left, as its headline says, is the temperature graph. Most important line is the red one, showing the leaf temperature measured with an infrared temperature sensor. As there are no leaves yet, it is pointed towards one of the pot’s wall at soil level. Air temperature from a sensor that usually hangs around somewhere around top level is violet, and the grey line is the outside temperature close to the tent, helping the software to determine if a main blower action will effectively lower temperature.
As I learned from the first grow a plant day that corresponds to the natural day can cause enormous gaps both to temperature and humidity, I inverted the plant day now, starting their night at 11 a.m. So after the first day temperature will only vary around 1.5 °C, which is of course due to the low light intensity too.
Humidity graph on the upper right is quite crowded. Main line is the blue one, tent air humidity, which on this first day was between excellent 65 – 70% most of the time. For the moment humidifier is electrically disabled. There is quite some excess humidity on the tent floor and no reason to push this any further. Outside air humidity is grey again and taken from the same outside sensor that reports outside temperature.
The soil humidity sensors are simple analogue capacitive sensors which have their flaws. I am interpolating their measurements to have a somewhat smoother reading, but as you can see from the turquoise humidifier reservoir reading (in legend named as plant soil hum 1), they can get confused when humidity is very high and start to report random numbers for some time.
The most important graph for all growing stages is the lower left one, where the pink line meaning plant VPD should be inside the green optimum range for somewhat perfect conditions. This cannot be attained all of the time – dehumidifying isn’t as easy as humidifying –, but software tries its best to do so. Outside VPD is grey again.
The last graph is more for amusement than anything else. The light intensity sensor is hard to position correctly, and everything you see about illumination and DLI (orange and green, plus grey for the accumulated 24 h DLI) should be taken with some spoonful of salt. Any resemblance to real world professional instrument readings can be considered purely coincidental.
The violet line is the CO2 reading from such a sensor, and you can see that its tiny peaks correspond to even tinier black peaks at the bottom of the graph, reading TVOC values which in this case, once they will be more than possible measurement irregularities, can be interpreted as smell.
-------
End of week 1:
All seeds germinated. I wasn’t at home most of the time, and it turned out using the humidity sensor to monitor the humidifier’s tank wasn’t good for the stability of the system. Arduino crashed, so there are no pictures yet and no graphs to show. I have the feeling light was a bit low as the seedlings grew a bit tall, but with lights now up to 20% I guess this problem is fixed.
More tomorrow when I have some more data to share.
Even more end of week 1 (I extended this week to 9 days as I cannot tell when the seedlings started to show):
Lights are at 40%, meaning 40 W in total. No reason to give them new water until next week. As some flies showed up from the BioBizz soil, I added 2 yellow cards. So far, everything in normal ranges. I’ll switch the control to grow phase soon which will raise the VPD slightly by 0.5 kPa.
It’s interesting to see the CO2 level started to climb by 50% during their last night and has not come down to baseline afterwards. I restarted the app to check if the sensor had lost its calibration, but it still sits at around 660 ppm now.

Likes
82
Share


@Harukisan
Follow
Hello fellow growers, I am pleased to start this new journey with you.
I am also particularly excited since I am going to grow a Mephisto Genetics strain for the very first time, the famous Double Grape.
I know you shouldn't believe the hype, as Public Enemy used to say, but it's hard to ignore the dithyrambic reviews when it comes to Mephisto.
I sowed the seed directly in the substrate and it was popping out 3 days later.
Right now the seedling is under my Mars Hydro TS1000, brightness set at 25%, lights are 80cm away.
During my last grows I set it up to the max at all stages of growth, this time I decided to proceed differently and increase gradually. Please let me know in the comments if you think I should just push it to the max right away.
I would like to thank HESI nutrients team for sending me a great Starter Pack! Shout out to Hesi_Official, can't wait to test your products!
Thanks for reading and stay tuned for weekly updates! 😎

Likes
15
Share


@Cauli
Follow
So, In the End of Week 11 we have harvested two of three Sensi Skunks.
In the End of week 12 we harvested the last one (Sensi Skunk 2, day 83).
In Total we had around 130g of trimmed wet buds from the three plants:
– Sensi Skunk 1 30g wet buds
– Sensi Skunk 2 40g wet buds
– Sensi Skunk 3 63g wet buds
Placed the trimmed buds in a dry net and dried them vor around 4-6 days before placing them in jars and ventilating them regularly.
for now it seems to be around 25g in dry buds. Had hoped for a little more, but it was really bad weather so we think it's okay. smell is really nice!
For next year, we have learned and will make things a little different.
– will start way earlier in the year for more sunshine and better weather
– pots were way to big, none of the plants needed so much space for their roots – next year will try 10l
– maybe we will start different nutrient company. any suggestions?
All around this was a very fun project! Loved how the plants looked and miss them already.
The smell of the dry buds is already really nice and we are looking forward to test it. will update then!

Processing
Likes
14
Share


@edaricogardens
Follow
Sooo, I'm not sure if I may have shocked and stressed this LSD-25 a bit too early because there's a ton of preflowers and she just had been lacking the growth I've seen when in comparison to my Strawberry Pie Auto. But with that being said, she does look healthy at least
Likes
16
Share


@DonKrika
Follow
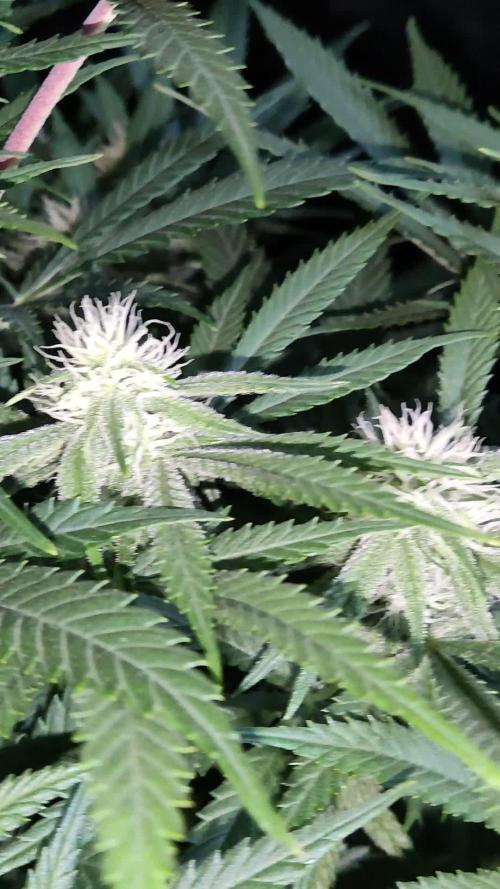
Change in colour on the plant to the right is getting worse, I only have one week left until the end of the grow, hopefully the plant will survive until the end.
From now until the end of the grow I will remove one hour of light every day, until the last 3 days of full darkness.
DAY 128
PH - 6.05
Solution Temp - 17
PPM-1900
Watering Volume per plant - 4L
DAY 131 - Molasses
PH - 5.95
Solution Temp - 16.1
PPM-475
Watering Volume per plant - 4L



Likes
51
Share


@Bread_n_Buds
Follow
Here we are again ready to start again, always under the sign of Zamnesia, we make our fantastic plants and we show you what we are capable of. We have 5 autoflowering strains and 5 photoperiodic ones and now we present them to you.
The second autoflowering that we present to you is the Black Orchid Autoflowering. This was advised and recommended to us directly by the Zamnesia elves and we are sure that they are keen to send us refinements, we have seen some super beautiful photos of this strain. Guys, black is black as a style of beauty for me it is unbeatable.
To explain my germination method which is a combination of experiences acquired in the field and readings of the right advisors, I have chosen to divide it into phases so that those who want can follow them and understand better step by step.
- Preparatory Phase ---- Check the average temperature in the room, humidity status to understand if it is the case to start or wait, I decided for the end of August because the temperatures start to drop towards the 22-25 degrees recommended for germination.
Then another thing more or less credible depending on the sensitivity is the control of the lunar phases. I believe in it a lot, it is a method that ancient farmers used to understand when it was best to plant depending on the attraction of the moon. To make my life easier I use a simple app that advises you on the right time to plant, harvest and put in the jar (depending on the lunar phases).
- Phase 1 --- Soaking in water. There are many authoritative friends who advise against this method due to the risk of drowning, but I have always been fine and I follow the rule if it opens in water the seed is almost certainly healthy and will come out of the ground 90% normally.
- Phase 2 --- Opening the seed in water. As soon as the seed opens and the root comes out a little, you have to be very very careful not to leave the seed in the water open for too long. This is why there is a risk of drowning. So as soon as the root comes out, it must be planted. Do not wait for it to stretch out a lot, you can wait a little longer in the absorbent paper, but not in water.
- Phase 3 --- In the meantime, while I soaked the seeds, I prepared my pots: I use small biodegradable pots (choose the ones with holes underneath for drainage). A few hours before working with the opened seeds, I moistened the soil with water adjusted to the right pH (5.8 - 6.2) and Plagron Power Roots. The small root is now open and we can make a little hole with a toothpick, widen it and insert the seed. Not too deep with the root facing downwards. From Serious Seeds we learned the dome technique: if you put a small dome of soil on the seed the water will settle on the sides avoiding overwatering problems.
- Phase 4 --- The plant emerges from the soil. So far I have not put the light, now I turn it on at minimum after half a day of soil to give direction to the seedlings. The first week the light will be gradually brought from 40% to 60% to go to 70% - 75% in the remaining weeks of veg. During the first week maximum, I keep the cycle of 24 hours to avoid stretching. Be careful not to exceed the first week at least with photoperiodic plants.
- Germination % --- In water 20/20 seeds have opened for good luck I'm waiting to talk when they come out of the ground but it seems that we are going towards an excellent percentage of germination..."Not too bad"...
- Soil and Food --- The soil used is entirely organic in every part and is the Plagron Promix that will be used with the 100% organic pack provided by Zamnesia complete with all the main fertilizers for your plant buy it at the link --
https://www.zamnesia.io/it/11457-plagron-easy-pack-natural.html
// Strain Description // It is said that the orchid symbolizes love, refinement and beauty. Well, we can confirm that the Black Orchid Automatic contains all these attributes and many more. This autoflowering variety has a lot to offer: a particular but very pleasant aromatic profile, and a relaxing and carefree high. Furthermore, this plant is very productive when grown in optimal conditions.
- Get a seed of this fantastic strain --- https://www.zamnesia.io/it/9493-zamnesia-seeds-black-orchid-automatic.html
- Soil and Fertilizers entirely organic --- https://plagron.com/en
- Growbox --- https://www.secretjardin.com/
- Music and sound --- I made my girls listen to 432hz frequencies and music from www.radionula.com
- Z --- You can find these seeds, much more from the world of cannabis, mushrooms and an incredible series of accessories and gadgets on the reference site not only mine but of many growers ----
https://www.zamnesia.io

Likes
11
Share

@Bread_n_Buds
Follow
Our Jet Fuels are plants that promise very well, we have always loved the strains of the Diesel family, a bit gassy and for this particular taste we have great expectations. You could say that it is the favorite taste in the BreadandBuds house I have to study the terpenes a bit better to tell you better but one thing at a time we will delve into everything.
Never stop at the first good results guys, always improving is fuel for the next day, to keep the passion alive and have results.
Growing Projects ----- I will follow this procedure, it has given birth to a plant before that will be worked with topping x16 buds and various LST and I have just germinated the second plant that will be born about 13 days after the first and will go straight to the conclusion with the main cola. I have to tell you in the past I was a topping maniac, then I felt nostalgic for the main cola. It is always a major sacrifice to give up the Main Cola. To avoid depression and to give a better vision to our super trusted breeder, home breeder and Zamnesia heart breeder we make a plant in topping and a straight one preserving the main cola. Those videos with the rotating Main COla were liked and we produce the best Maincola of the situation-
The first week went only with Power Roots 1 Ml/l and Pure Zym 1ml/l from now on we start with ALga Grow. The plants were transplanted shortly after germination because the biodegradable pots were very small. The soil is Plagron Pro Mix 100% organic renewed with 30% new soil and 20% Perlite added. (Pro mix don't have perlite but is airy we added anyway)
Plagron fertilizers are available on Zamnesia in convenient Pack formats for all growing styles. I used this with a simple search you can find the other products.
---- https://www.zamnesia.io/en/12119-plagron-top-grow-box-100-natural.html
Try a seed of this strain that drives us crazy...
---- https://www.zamnesia.io/it/11258-zamnesia-seeds-jet-fuel.html
Zamnesia Description // Jet Fuel (also known as G6, Jet Fuel OG, and G6 Kush) is a modern hybrid rich in THC and terpenes with a diesel aroma. Originally created in Colorado by crossing Diesel with Aspen OG, this 60% sativa-dominant hybrid is a must-have for any smoker who enjoys an uplifting and energizing high. Now, thanks to the hard work of our breeders, the original Jet Fuel is even easier to grow at home. Order your seeds, plant them in soil, and enjoy their rapid growth. After just 9–10 weeks of flowering, you can expect a generous harvest of premium sativa buds!
Growbox and Air System - Secret Jardin DS120w + fans + Exhaust fans and filters DF16 kit ---- https://www.secretjardin.com
All the best that mother nature can offer is on ----www.zamnesia.com
Call for collabo: I am available for collaborations with companies of Lights and various equipment for growing (No Seeds and Nuts company please) I would like to renovate my 120x120 space that has slightly obsolete lights, and I would like to try some controllers. If you have proposals available.
Likes
22
Share


@OldEnt
Follow
I'm getting impatient now. Gave her a light P burn with a extra feed of PK at the end of last week and have dropped Boost entirely. Fade came on faster than expected but I think that's the Boost making her hungry, leaving no doubt in my mind it's a PGR. Dammit.
Two more weeks??

Likes
4
Share


@RobinHoodGrows
Follow
First Time Grower Here - Jenny sprouted six days after I planted her. I used 3-gallon fabric buckets and FOX Farm ocean floor soil. Six days later her little sister sprouted. So this grow dairy will follow two young Dreamberry's on their way to get rolled up and smoked up.
At the end of week 1, both Jenny and Jasmin are doing great.
7/5/20 Jenny = 7 days
Jasmine = 1 day
Jasmine sprouted on the 4th of July... beautiful.
Sorry, no pics yet.
-RH


Processing
Likes
19
Share


@The_Projexx
Follow
Welcome to the start of week 6 !!!!! I'm so excited to be almost ready to start training these ladies good and proper ! They are picking up speed and growing nicely . Ivy will be growing out 4 main cola's instead of 2 which is super cool !!! Once the training has taken full effect I will be changing over into flower ( not for some times still ) and then we will see what these ladies bring to the table . Stay tuned ladies and gents things are starting to get exciting!
A big thank you to everyone who stops by the diary ( old and new ) I love the support I get from GD you guys are great!!
Happy Growing!!
-V.G
Day#33V Ladies are responding well to water increase . They seem to be gaining speed for growth as well . Day#1 Since watering 1/2 L at 320PPM ( Sensi Cal only )
Day#34V Pictures N/A. Started to train the ladies ! Going get my canopy nice and even now ! Day#2 Since watering 1/2 L at 320PPM
Day#35V Pictures N/A. Ladies are responding well to the training ! Day#3 Since watering 1/2 L at 320 PPM
Day#36V Pictures N/A. Watered ladies 1.5 Cups each at 250PPM ( 1ml b52 .5ml sensi )
Day#37V Pictures N/A. Ladies responding well to watering just growing along nicely ! Day#1 since watering 1.5 cups each at 250 PPM
Day#38V Pictures N/A. Going strong with the training . Day#2 since watering 1.5 cups at 250PPM
Day#39V Pictures N/A. Ladies are getting thirstier and thirstier 1! Day#3 Since watering 1.5 cups at 250 PPM
Recap : Ladies responded well to training this week , going to continue to train until im happy with canopy . Im sorry I havent posted many pictures due to a death in the family and the holidays coming up I've had barely any time to be on here ! I thank everyone for being patient with me . Other then that there's nothing much to say on to week 7 !!


Likes
14
Share


@Kakui
Follow
23 Noviembre: Se realizó el segundo apical, defoliacion, y Lollipop. Estamos a un par de días de iniciar el ciclo 12/12 de floración y pasar a riego Generativo.

Likes
38
Share


@PolishFarmer
Follow
Hi :) it’s 10th week in my happy grow :) girls looks lovely, Smell is awesome I think terminator does it’s job :)generally I’m so proud of my girls, of course it was not without mistakes but it is my second indoor experience so still learning from mistakes :) this way we will come to perfection :) new project from fastbuds is on the way! check what’s coming! :) happy Sunday for everyone, peace!
Day 66 update resulting decision of defoliation. I treated them well but in my opinion they can catch a big breath now :)