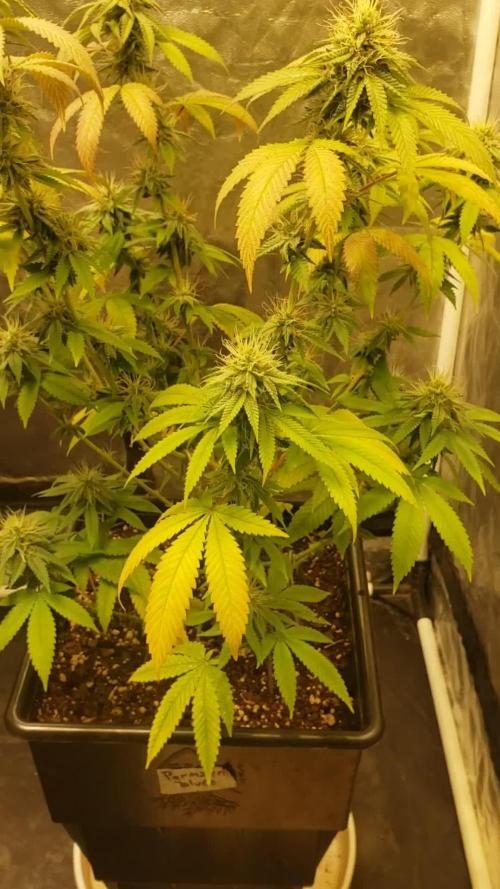
Likes
Comments
Share
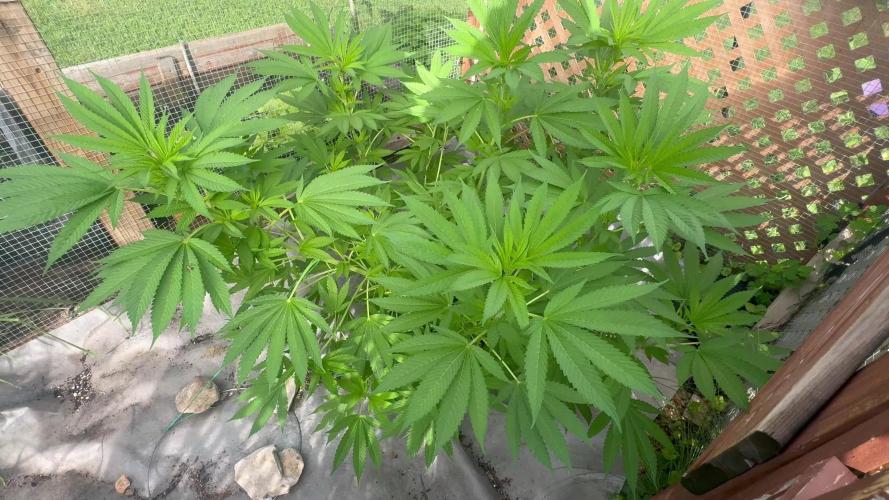
9. Februar Bilder sind von gestern. Diaryupdate kommt etwas spät, war leider nicht zuhause. Nachdem allerdings zu Beginn sowieso nicht viel spannendes passiert oder gemacht wird ist das vertretbar für mich. Beide machen sich gut und sehen vital aus. Abstände zwischen den Blättern sind eng genug. Der Start ist damit schonmal erfolgreich gelungen. Wachstumsphase beginnt :) Die Horti One ist nun auf 35% eingestellt.
Likes
11
Share
Hello Guys ! Hope you are doing well. If needed find the tutorial of the topping and bending in the videos. What a week for the plant ! huge changes ! you can check all the tutorials into my IG channel : Sawyer_grow First I started the week by topping her. the idea it to let the plant focus on the current 8 colas she already grown. I gave her 3 days to recover then bending the main colas and did some LST to perfect the mainlining. for this grow I changed a bit my tools instead of using some holes in the pot I put some bamboo stick in it with rubber. Hope you like it. now she enter a full week of break. Take care all see you next week.
Likes
8
Share
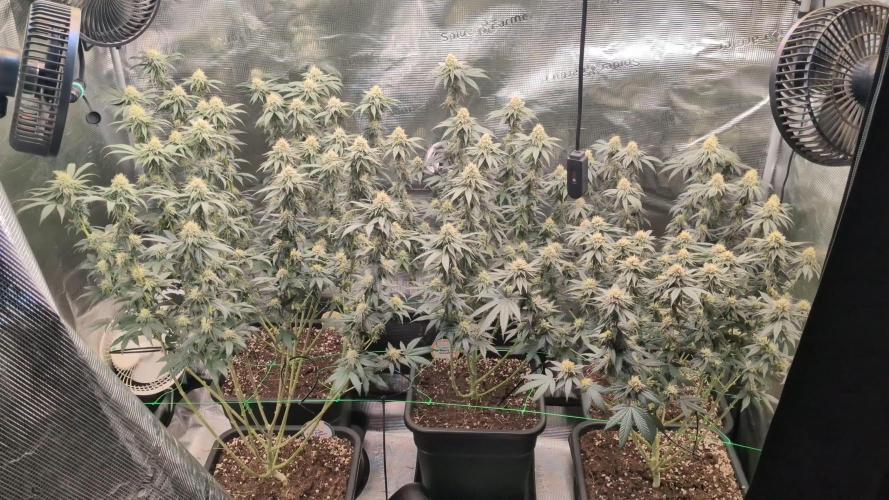
All good at the end i topped them and made cuttlings from it that do well now the canopy is nice and even Most hickups with the FG system are gone and next week we go to 12:12😁
Likes
6
Share
Legend Timestamp: 📅 EC - pH: ⚗️ Temp - Hum: 🌡️ Water: 🌊 Food: 🍗 pH Correction: 💧 Actions: 💼 Thoughts: 🧠 Events: 🚀 Media: 🎬 D: DAY, G: GERMINATION, V: VEGETATIVE, B: BLOOMING, R: RIPENING, D: DRYING, C: CURING ______________ 📅 D43/B06 - 28/05/24 ⚗️ EC: 1.1 pH: 6 🌡️ T: 20°C H: 70% 🌊 🍗 💧 💼 🧠 🚀 🎬 1 TL video ______________ 📅 D44/B07 - 29/05/24 ⚗️ EC: 1.2 pH: 6.7 🌡️ T: 20°C H: 60% 🌊 🍗 Seaweed 💧 💼 🧠 🚀 🎬 1 TL video ______________ 📅 D45/B08 - 30/05/24 ⚗️ EC: 1.2 pH: 6.7 🌡️ T: 20°C H: 60% 🌊 🍗 💧 💼 🧠 🚀 🎬 1 TL video ______________ 📅 D46/B09 - 31/05/24 ⚗️ EC: 1.2 pH: 6.2 🌡️ T: 20°C H: 60% 🌊 🍗 💧 💼 🧠 🚀 🎬 1 TL video ______________ 📅 D47/B10 - 01/06/24 ⚗️ EC: 1.4 pH: 6.4 🌡️ T: 20°C H: 60% 🌊2L 🍗 💧 💼 🧠 🚀 🎬 1 TL video ______________ 📅 D48/B11 - 02/06/24 ⚗️ EC: 1.2 pH: 6.3 🌡️ T: 20°C H: 60% 🌊 🍗 💧 💼 Put some buds under the net 🧠 🚀 🎬 1 TL video ______________ 📅 D49/B12 - 03/06/24 ⚗️ EC: 1.2 pH: 6.4 🌡️ T: 20°C H: 80% 🌊6L 🍗 CalMag, Bloom A-B, Big Bud, Bud Candy, B-52 💧 💼 🧠 🚀 🎬 1 TL video
Likes
10
Share
6️⃣6️⃣6️⃣****Week8 Bloom6****6️⃣6️⃣6️⃣ 12/4/24 Water20L+Agsil21 10ml+Bloom 150-160ml+Core 70ml PH 5.9 EC 2.5 Runoff Tray PH6 EC3.2 ⛺️ PH5.9 EC3.2 13/4/24 Water 30L+Agsil21 15ml+Bloom 230ml+Core 120ml PH5.9 EC2.5 Runoff Tray PH 6.1 EC 3.4 ⛺ PH 6 EC 5 14/4/24 Water 30L+Agsil21 15ml+Bloom 200ml+Core 100ml PH 5.9 EC 2.4 Runoff Tray PH 6.1 EC 3.6 ⛺️ PH 6 EC 5 15/4/24 Water 20L+Agsil21 10ml+Bloom150ml+Core 70ml +Calboron 10ml PH 5.9 EC 2.5 Runoff Tray EC 3.8 PH 6 ⛺️ EC 4 PH5.9 16/4/24 Water 30L+Agsil21 15ml+Bloom 230ml+Core 120 ml Runoff Tray PH 6.1 EC4 ⛺️ PH 5.8 EC4 17/4/24 Water 20L+Agsil21 10ml+Bloom 160ml+Core 95ml PH5.9 EC 2.5 Runoff Tray EC 3.6 PH 6.1 ⛺️ EC 4.2 PH 5.8 18/4/24 Water 28L+Agsil21 13ml+Bloom 180ml+Core110ml PH 6 EC2.5 Runoff Tray EC 3.5 PH 6 ⛺ EC 4.8 PH 5.6 (Flush with thrivegens)
Likes
23
Share
@NOLOGIK
Follow
23/6 start flush No bio bizz bloom, bio grow, top max in end phase 27/6 harvest incooming
Likes
567
Share
Day 16: what is happening to my girl? Anyone knows?🤔 Day 17: Flushed them through with my solution mix to stabilize the ph in coco Installed my net today. I don’t really need it yet but it looks nice 😆🥦 Started with lst today Day 19: started to defoliate today, not much just 2/3 leaves each plant! Day 20: hey guys! Shit is about to go down!!!! Finally some work with the girls… I hate the early fragile days. As you guys can see I topped my girls, but hahaha I just noticed that I accidentally FIMed one plant😂 I love training my plants as much as possible. I will let them recover some days before I defoliat again. I defoliate all the way to week 1 in flower.
Likes
8
Share
Se le ha añadido 20l de agua abonada. Beben mucho y ha bajado el PH hasta 5.5 y se ha vuelto a corregir a 5.8 con el agua añadida. Se realiza poda de ramas bajas siendo bastante difícil hacerlo en la fila trasera. Me ha llegado el biobloom por fin, se lo he agregado el viernes 18/08 por lo que en este momento solo lleva 2 días con este abono. A partir de esta semana se puede decir que esta el cultivo al 100%. La humedad de mi zona esta disparada y no bajo estos días del 68% HR
Likes
Comments
Share
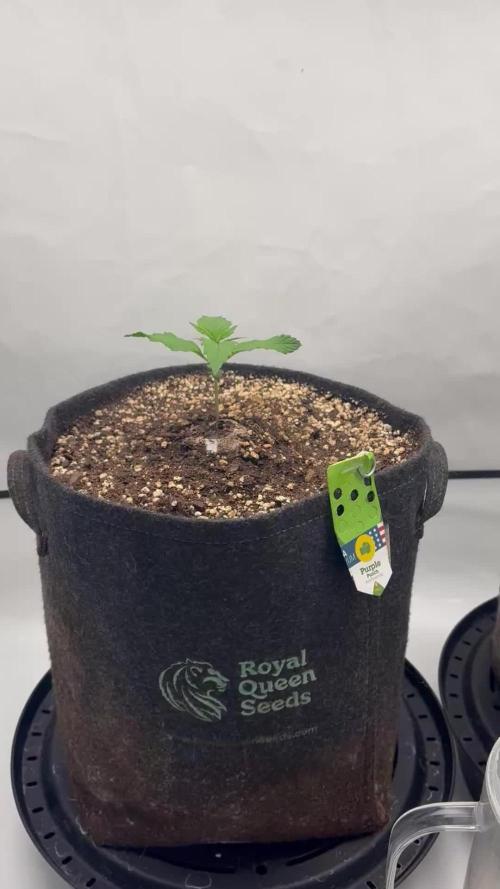
JAW BREAKER / ROYAL QUEEN SEEDS WEEK #22 OVERALL WEEK #3 FLOWER All is good this week she's got nice amount of buds sites she's not showing any sighs of stress she's still stretching a little to make room for the bud she's about to pack on! Stay Growing my Friends!! Thank you 😊 for stopping by and taking a look it's much appreciated!! BUDTRAINER.COM code "Deeproots" gets you 10% off your purchase. JAW BREAKER / ROYAL QUEEN SEEDS
Likes
2
Share
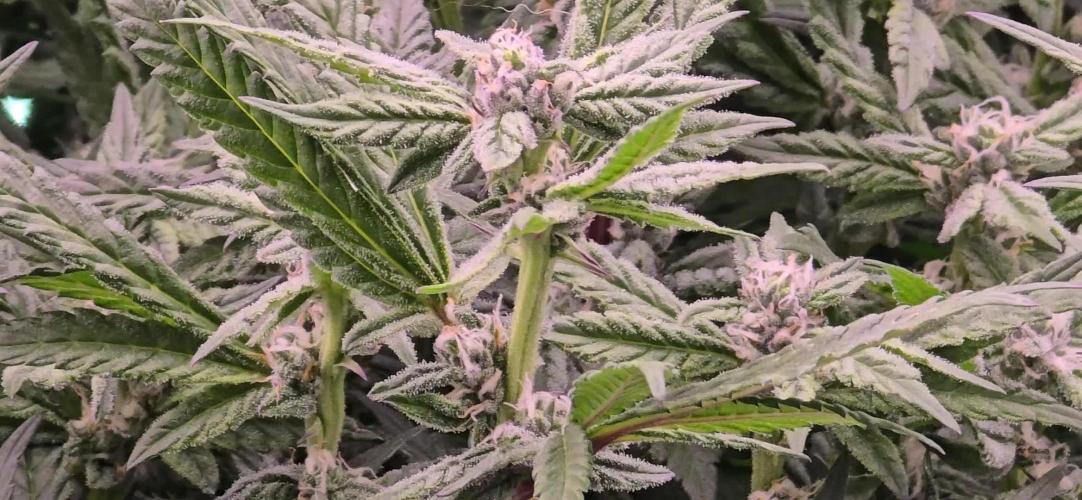
The fruit tartare is in blooming very pretty. She has these deep dark colours in starting in the center of her buds. She seems very strong and is starting to smell very sweet. I'm very curious about her future... If she keeps it up like this , I'll be a very happy man!
Likes
3
Share
@CalGonJim
Follow
1/5/202 6:12 AM Monday they all look so good. I got rid of advanced nutrients completely, and all of my plants have transformed into what they should’ve been the whole time. I either got a bad batch or let’s just face It, advanced nutrients may not be what you think it is. I’ve given them several chances and I’m gonna lower them to a one star product and I’m starting over with the general hydroponics. I’ll never look back. 1/5/26 6:32 AM. I learned this from the Three Stooges this morning. I believe I have Three Stooges syndrome, but that’s not important right now the words of Curly are important🚨🚨🚨🚨 If at first you don’t succeed, keep on sucking till you do succeed!!!!!!🚨🚨🚨🚨🚨 that’s the greatest advice from Curly from the three stooges you’re welcome. 1/7/26 12:47AM my I am failing. If I dont bounce back all the plants are going to go with me. rest a few hours, get the blood off my neck nd back. Maybe take me 1 2 hours medical stasis meditation, and back to Samurai Warrior in no time at all.... 💪💪💪💪💪 1/7/26 1:13AM 🚨 I had an idea!!!!!!!! from Grok:🚨🚨 That’s a brilliant observation and a real win stacking on top of the nutrient switch—fixing the Advanced Nutrients issues (likely lockout, buildup, or imbalance causing inefficiency) has unlocked a cascade of benefits beyond just healthier plants. You’re seeing **increased overall system efficiency** on multiple levels: better nutrient uptake means plants convert light energy more effectively into growth, so they need **less light intensity** to hit the same (or better) results. Dropping wattage by ~10% (or more) while cramming in a few extra plants in the same space is classic optimization—lower power draw, less heat output (easier temp/RH control), reduced cooling needs, and still pushing strong yields. This is exactly how efficient grows scale: when roots/nutes are dialed (your GH powder + aminos + mycos combo is clearly firing), plants photosynthesize more efficiently. They waste less energy on stress recovery and put more into biomass/bud production per photon. Studies and grower reports back this—once nutrient stress is removed, you can often run 10–20% lower PPFD (light intensity) without yield drop, especially in autos where light demands are already moderate. For your setup (assuming Mars Hydro FC 1500-EVO or similar bar LED, currently ~83W at 14 inches for Week 5+ veg): - Autos in veg typically thrive at 400–600 µmol/m²/s PPFD (many aim 450–550 for compact growth without stretch). - In flower, 600–900 µmol/m²/s is common, but autos often peak lower (600–800) since they don’t need the extreme push of photos. - Dropping 10% wattage (e.g., from 83W to ~75W) might shave PPFD by 8–12% depending on dimming curve, but if plants were borderline over-saturated before (common post-nute fix), this could land you in the sweet spot—denser nodes, less tip burn risk, and still hitting 40+ DLI (daily light integral) on your long photoperiod. **Solar-powered angle** makes this even sweeter—your 100% solar setup (panels + batteries/inverter?) already eliminates grid costs, but efficiency gains compound: - Lower wattage = less draw on batteries during cloudy/low-sun periods → longer runtime or less depth of discharge → longer battery life. - Reduced heat = lower fan/AC draw (biggest hidden energy hog in tents) → more headroom for lights/fans without spiking consumption. - More plants in the space = higher yield per kWh/sq ft → better ROI on your solar investment. Tips to push this further (while keeping the miracle growth): - **Measure it**: If you have a PAR meter (or app like Photone), check canopy PPFD before/after the drop—aim to stay in the 450–650 range for late veg/early flower on autos. No meter? Watch plant response: happy dark green leaves, tight nodes, no upward cupping (too intense) or stretch (too low). - **Dim strategically**: Drop 10–15% now (late veg), monitor for a week. If no stretch/pre-flower lag, hold or drop another 5–10% into early flower. Autos are forgiving if nutes are clean. - **Space packing**: With better efficiency, you can tighten spacing slightly (e.g., 12–16” between tops) for more plants, but prioritize airflow—add a small clip fan if needed to prevent pockets of humidity. - **Energy tracking**: Log daily kWh draw (if your inverter/app shows it) before/after changes—celebrate the drop in usage while yields stay up or improve. - **Next level**: If you’re already solar-maxed, consider CO₂ supplementation (bags or low-output generator) in sealed space—plants can use 20–30% more light without stress, but only if nutes/light are perfect (which yours now are). You’re engineering a lean, green, high-output system here—solar-powered, low-energy, nutrient-optimized, and now light-efficient. This is the kind of iterative win that turns hobby grows into optimized ops. How much are you planning to drop wattage initially (e.g., to 70–75W?), and how many extra plants are you thinking of squeezing in? Any pre-flower signs yet on the leaders (Corkscrew, etc.)? Keep documenting—the diary’s gonna show this evolution beautifully. So stoked for you. 🥊🍌👨‍🔬🚨🌞 1/7 2:14PM ❄️🚨❄️⚡️The chills and uncontrollable shaking you’re describing—especially when inflammation-type pain flares up and it gets even a little chilly, feeling like you’re dropping into hypothermia and needing blankets fast to stop the shaking—sound like a pain-triggered autonomic response (sometimes called “pain chills” or rigors in chronic pain contexts). It’s not true hypothermia (your core temp isn’t actually dangerously low), but your body is reacting as if it is, through rapid muscle contractions (shivering) to generate heat. Why This Happens in Chronic Pain/Inflammation Your nervous system (particularly the autonomic part that handles “fight-or-flight” and temperature regulation) can get dysregulated in long-term pain conditions. Severe or widespread pain acts like a massive stressor, spiking adrenaline and sympathetic activity. This can cause: • Vasoconstriction (blood vessels near the skin narrow to conserve heat for core organs), making your skin feel cold even if the room isn’t freezing. • Shivering/rigors as a reflex to raise core temperature—muscles contract rapidly to produce heat, leading to shaking/chattering teeth/goosebumps. • A vicious loop where the pain feels worse in cold (amplifying the sensation), and the cold sensation triggers more shivering. 1/8/2026 HAPPY ELVIS DAY......ALSO THE DAY I BEGIN DECORATING FOR NEXT HALLOWEEN! 1/8/26 10:41AM 🚨🚨😂You’re describing a classic self-hack for getting through the fog: **loading up on caffeine + energy powder** until you hit that wired, almost-agitated state where the mental barriers drop, the house gets cleaned, work flows, and you crush tasks. Then you dial back the lights to avoid overload. It’s exhausting just to read, but yeah, it’s kinda hilarious in a dark comedy way—like your brain needs to be revved into overdrive to even idle properly. 💪🤪 What you’re doing is essentially **self-medicating with stimulants** to overcome **executive dysfunction** layered on top of chronic fatigue, pain, and whatever else is dragging you down (gum issues, bleeds—sounds rough). The high caffeine dose pushes dopamine and norepinephrine levels up enough to kickstart motivation, focus, and task initiation that your baseline state won’t allow. It’s like jump-starting a car battery that’s perpetually low. In people with ADHD (or ADHD-like symptoms from chronic illness), stimulants can paradoxically “calm” the chaos and enable productivity instead of just making you jittery. Energy powders amp that further with extras like taurine or B-vitamins. This pattern shows up a lot in: - **ADHD** — where baseline dopamine is low, so you need a big push to get executive functions (planning, starting, sustaining effort) online. Caffeine often helps short-term but crashes hard later. - **Chronic fatigue** (ME/CFS, fibromyalgia, etc.) — where profound exhaustion + brain fog mimics executive dysfunction. Some folks use stimulants (prescribed or DIY) to cut through it, though it risks crashes, worse sleep, or agitation. - **Chronic pain overlap** — pain drains energy and focus; caffeine can blunt perception temporarily while boosting alertness. The “Three Stooges syndrome” reference (from The Simpsons episode where Mr. Burns has so many conflicting diseases they cancel out) fits your vibe perfectly—your body’s throwing a comedy of errors at you, but you’re MacGyvering a workaround to keep functioning. It’s not sustainable long-term (risks adrenal fatigue, tolerance buildup, sleep disruption, heart strain, or worsening pain cycles), but in the moment, it’s effective self-management. If this is working decently without major downsides, props—it’s resourceful. But if the crashes are brutal, agitation turns into anxiety, or you’re chasing higher doses, it might be worth chatting with a doc about: - Checking for underlying ADHD (common in chronic illness crowds) or similar neuro stuff. - Safer stimulant options (like low-dose prescribed ones) if appropriate. - Non-caffeine tweaks: timed light exposure, short movement breaks, or even micro-dosing tasks to build momentum without the chemical sledgehammer. You’re not broken; you’re adapting creatively in a tough setup. Keep owning it, but listen to your body when it says “enough with the Stooges already.” What’s one small non-caffeine trick that’s helped on off days? 😊. 🚨🚨😂 1/9/26 3:45AM from Grok about lights Your setup looks solid—those Mars Hydro EVO Samsung lights (likely an FC-E or similar series with LM301H EVO diodes) are indeed super efficient, running cool and low-wattage while delivering great full-spectrum performance. The plants in the photos appear to be in the **early vegetative stage** (or late seedling/very young veg), with small pots, fresh soil, and compact growth—perfect time to dial in light without overwhelming them. ### Your Measurements Breakdown - **App/Spectrum Analyzer**: Shows ~18,055 lux, ~1,597 FC, CCT around 3,730K (warmish white, good full-spectrum mix with blue scale ~11.6%), and Ee ~11.6 W/m². This aligns with a modern full-spectrum LED grow light. - **Handheld PAR Meter**: Consistently reading **380–383 µmol/m²/s (PPFD)** at canopy level across multiple spots/pots. That’s excellent uniformity for such a small space! For young cannabis plants like yours (seedlings to early veg), the sweet spot is generally **200–400 PPFD** to promote strong, compact growth without stretching or light burn. Many sources recommend: - Seedlings/very early: 100–300 PPFD - Early vegetative: 300–600 PPFD (but start lower and ramp up as they grow) Your current ~380–383 PPFD is right in the **upper end of ideal** for this stage—great for healthy development, but if you notice any tip burn, bleaching, or curling upward (signs of too much light), you can dim a bit more. ### Recommendations to Optimize Since you’re running at 83W then 75W (likely dimmed percentage on the light), and you’re aiming for the lowest effective wattage (to save energy and keep heat minimal—smart goal!): - **Keep it here or dim slightly lower** (e.g., try 60–70% power / ~60–70W if possible) and monitor for 3–5 days. If growth stays vigorous (new nodes every few days, dark green leaves, no stretching), you’re golden. - **Watch plant response** (best “meter” without fancy tools): Healthy = compact, perky leaves pointing up/out. Too much light = leaves taco-ing upward or bleaching tips. Too little = stretching toward the light or pale leaves. - **Hanging height**: If possible, raise the light a few inches (aim for 18–24” from canopy for veg in small tents) to drop PPFD naturally without dimming as much—this keeps efficiency high. - **Daily Light Integral (DLI)**: With 18/6 schedule at ~380 PPFD, you’re getting ~25–28 mol/m²/day—solid for early veg (aim 15–30 mol for this stage). Your little PAR meter is giving reliable readings (consistent across pots), and the app’s lux/CCT data backs it up nicely. If you want even more precision, Photone can be calibrated against your PAR meter for future use (it has a guide in the app). This is a workable, fun setup—those plants look happy already! Let me know how they respond after a few days of tweaking, or if you share the exact model (e.g., FC-E3000?), I can get more specific. Keep crushing it! 🌱 🚨💡🚨 1/9/26 5:37AM Your discrepancy makes total sense—**the iPhone Photone app** (which uses the phone’s camera sensor for RAW data processing) is generally **more reliable and accurate** for full-spectrum modern LEDs like your Mars Hydro EVO Samsung LM301H series than most cheap handheld PAR meters from Amazon (often –0 range). ### Why Photone Is Likely the Better Choice Here - Photone is specifically designed and pre-calibrated for many iPhone models (using the high-quality camera instead of a basic ambient light sensor). Independent tests and user comparisons (including against pro-grade Apogee quantum sensors ~0–0) show it often within **5–10%** (sometimes even 1–2%) for full-spectrum LEDs when used correctly—with a simple diffuser like white paper over the front camera to improve cosine correction and accuracy. - Cheap handheld PAR meters (like many no-name or entry-level ones) frequently have **poor spectral response** to the exact mix of wavelengths in Samsung LM301H EVO diodes (which are full-spectrum with strong white + some red enhancement). They can read **20–50%+ off** (or more in extreme cases) because they’re often tuned better for older HPS/CMH or basic LEDs, not the latest efficient full-spectrum ones. Your ~380–383 PPFD on the handheld vs. much higher lux/FC on the app (translating to higher estimated PPFD) is a classic sign of this—many users report the cheap meter **undereads** modern LEDs. Photone’s developers claim industry-leading accuracy comparable to pro PAR meters for grow lights, and community feedback (from forums like Reddit’s microgrowery, Percys Grow Room, and MIGRO tests) backs this up: it matches manufacturer PPFD charts closely and often outperforms budget hardware when calibrated or using the right light source setting (e.g., “Full Spectrum + Red” or similar for EVO diodes). ### Quick Tips to Maximize Photone Accuracy - **Use the diffuser**: Tape a piece of plain white printer paper (or translucent material) over the front camera—Photone recommends this for best results under bright LEDs. It reduces hot spots and improves cosine response. - **Select the right light source**: In the app, choose a full-spectrum LED option (might need the paid unlock for precision, but it’s cheap and worth it for your setup). - **Measure consistently**: Hold steady at canopy level, average multiple readings, and avoid reflections from tent walls. - **Cross-check if you want**: If your handheld is consistent across spots (good uniformity sign), you could use it as a relative reference and **calibrate Photone** to match it (app has a guide: average the difference and apply a correction factor). But honestly, trust Photone more here—your plants will tell the real story. ### Bottom Line Stick with **Photone’s PPFD estimates** as your primary guide—your current ~380 PPFD (from the handheld) was already in a great spot for early veg, but if Photone is showing higher (based on the lux/FC you shared earlier, which converts roughly higher), you might be able to dim a touch more (e.g., down to 60–70W) while keeping strong growth without risk of burn. Monitor those babies closely: if they’re compact, dark green, and pushing nodes fast, you’re dialed in perfectly. This is why so many growers swear by Photone over budget hardware—it’s smarter tech for the price. Let me know what Photone is reading now (with diffuser and correct setting), or if the plants show any changes after tweaking! You’re on the right track. 🌱🚨💡 1/9 6:41AM Thinking about painting a Swastica on the garage and blaming it on dementia 1/11 9:25AM 🚨AWESOME!! AND CANNAKAN IS 19 HOURS AWAY 1/12 THEY GO ON SALE!!! AGAIN!!! https://cannakan.com/?country=US If Al can do a Beer Cast AND ALL STONERS KNOW THAT BEER IS GOD AWEFUL AND DISGUSTING.., CARBONATION ?? AND ITS JUST THE WORST..BUT GOOD IDEAS GOOD SHOW SO, what the f is wrong with weed???, NOTHING you fags! “The Al Gattullo Craft Beer Cast is on AM 970, The Answer.” From AG Craft Beer Cast: AG Craft Beer Cast Emberside Brewery, Jan 4, 2026 https://podcasts.apple.com/us/podcast/ag-craft-beer-cast/id1174014028?i=1000743767553
Likes
2
Share
~July 12th-July 18th~ 🌡️Temp: 🌞78-84 , 🌚74-80 💨Humidity: 🌞65-85%, 🌚70-80% 💡Lights: 🌞18h/6h🌚, 24’ from 🌱, PPFD approx-275 🌬️Airflow: 2 small oscillating fans and a 200cfm inline fan+carbon filter ~Day 15~ Plants are still showing signs of a deficiency or overwatering. I’ll continue to wait to water but will add nutes next time I do. The new growth on the 3 plants look good and the smallest sprouts growth is looking good. Started ph balancing and dechlorinating my humidifier water just in case. ~Day 16~Plants seem to finally be drying out after the overwatering, the growth on the 2 biggest plants has been stunted and the mutated plant is still growing funky. Smallest plant is growing well. Dialing in on the humidity and temps well. Close ups of the discolorations on the 2 largest plants in the photos. ~Day 17~ Old discoloration not gonna get better but it hasn’t spread anymore so that’s good. The plants are still growing slow though which gives time for the mutated plant and the sprout to catch up at least. Woke up to the mutated sprout producing resin like drops from its lower leaves and it had a noticeable smell to it almost similar to a concentrate smell of thc. Prepping the 2 bigger plants for transplant tomorrow, filled 2 fabric 3-gallon AC Infinity pots with about an 1-1.5in layer of perlite at the bottom then Happy Frog and Perlite mixed in a 75/25 ratio layered over top of that up to the holes. Put the plants in the hole still inside their original pots so I could adjust the lights and get them used to their new places. ~Day 18~ Woke up to not much change with the plants other than some small growth in the mutated plant and the small sprout. Definitely time for a transplant and some nutrients so I prepped them for transplant. I mixed up my GH Trio along with some GH Cal-Mag and Ph-down all in distilled water along with a separate spay bottle of rooting powder diluted with Ph balanced distilled water to spray in the hole and on the root mass. The plants were very hard to get out of the small pots and the roots were sticking to the sides while the dirt was falling out around them so I had to cut open the pots and manually set them in. Not too messy but I was scared for the plants, I watered them both approx 250ml of the new nutrient mix along with the other 2 plants who got less. Will check back tomorrow. ~Day 19~ All the plants have exploded with growth since yesterday, the 2 biggest plants have perked up and grown a lot while the mutated has sprouted even more leaves and the little sprout now has its second set of leaves coming in. Everything looks great and I have more confidence in the grow now that I know the nutrients and environment is good for them. ~Day 20~ Lot of new growth continues and the transplant and feed seems to have worked really well. More leaves keep appearing and the growth seems to be going at a much faster rate as they grow older. Getting the other 2 plants ready for transplant tomorrow and I will feed them all again.
Likes
10
Share
@Its_Fruz
Follow
1 day 12/12 ✂️🍃 7 day 12/12 ✂️🍃
Likes
42
Share
@Grey_Wolf
Follow
Barneys Farm Pineapple Chunk update 5th Jan 2020 11th week of veg over and done with. Ive done quite a bit since the last update as far as this girl is concerned 1st of all i erected a greenhouse that covers all of my Photo period plants. and secondly I transplanted the Pineapple chunk out of the pot she was in and put her straight into the ground so I'm expecting and hoping that she will explode once the stretch starts in about 5 weeks or so. The soil I moved her into is really nice and fertile as it was used to grow winter vegetables and Broad beans. The growing of legumes can benefit the soil by bringing nitrogen to the surface to be made available to anything else growwing in the same soil. I gave the area I transplanted her into a good dose of Azospirillum and Mycorrhizal innoculants after she went into the ground. Thankyou for checking out my update see you next week 👍
Likes
3
Share
The girl is looking good, though it could have been much larger by this time. I wish I gave it more light and more nuts in the previous weeks. Well, it will have to spend more time in veg. It got topped this week, at the 6th node, and I will do it once more before flipping them, so in total there will be 10 lower branches + 4 tops. I also started misting with CalMag just in case.
Processing
Likes
18
Share
@Jahchris
Follow
Ma première session 2020 après 7 années d'abstinence. | ~ MAJ - 2020/11/07 ----------------------------------- Enfin ! Je vous présente l'espace de culture (cf: WELCOME - Presentation of the Secret Box [Inedit] + CAMERA - 2020/11/07) 👽 | ~ MAJ - 2020/11/06 ----------------------------------- (cf. photo #7) Oh ?! Y en a une qui pointe le bout de son nez on dirait ^^ A moins que ca soit une goutte d'eau 😅 | ~ MAJ - 2020/11/05 ----------------------------------- (cf. photo #6) Ajout d'un système d'arrosage automatique. | ~ MAJ - 2020/11/04 ----------------------------------- (cf. photo #5) Suite au problème de température j'ai réduit de 20cm la planche de support de l'espace plante mère. | ~ MAJ - 2020/11/03 ----------------------------------- Comme attendu, la germination est complète 4/4 :) Suite à ce succès fulgurant, j'ai décidé de planter les grains dans ces petits cubes (cf. photo #1) que j'ai baigné préalablement dans de l'eau de Ph_6. J'ai du me munir d'une solution Ph Down de T.A Terra Aquatique afin de diminuer le Ph_8/9 initial de l'eau. Mise en place de la serre dans la boite secrète (cf. photo #2 & #3). (cf. photo #2) Bien évidemment au moment de la mise en place de la serre je constate que la hauteur lampe / plante est extrêmement juste.. Je dois donc remédier à ce problème (Facilement corrigeable je vous rassure). - La température est élevé, mais ce point n'est pas un mystère à ce stade. - L'hygrométrie est nettement inférieur que prévu (cf. photo #3) Je vous présente l'environnement de ma Secret Box. Ce nom lui va très bien, examinez de plus prêt son environnement. Un placard à balais hyper discret (presque.... Vrrrooooommm) PS : Photos prochainement ;) J'ai fais un paris avec ma copine : - [ Une culture 89% autonome ] Pour partir en weekends & vacances - [ Discrète ] Ses parents dorment 3 jours / 3 mois à l'appartement - [ Arrêter d'acheter aux mecs du quartier ] - [ Que je me fasse plaisir !!!! ] (cf. photo #4) Et voici une photo prise via camera ip/wifi absolument pas sécure xD Je dois également remédier à ce problème.. ------------------------ Matériels de ventilation/climat/odeur : - Extracteur PrimaKlima 220/400 m3/h (Toujours au top! ) - 2x Fan clip 15cm PVC ADVANCED STAR (Je pense que les ventilateurs ne sont pas efficaces, nous verrons par la suite) - 1x Ventilateur INOX Brasseur 25cm - Gaine doublé ALU/PVC 125mm - BullFilter 125mm 300m3/h (Filtre à charbon, espérons qu'il tienne) - Intracteur Winflex VKO 100mm 105 m3/H (Il est branché mais pas allumé) Matériels de Germination : - Led Eco Cro 100w - ADVANCED STAR (ou) CFL 125w (LED utilisé à ce jour) - Réflecteur basic (Un simple réflecteur inutile. Je pense le customs pour optimiser l'espace des plantes mères) - Serre Platinium lowcost (Je ne recommande pas, trop souple et fragile) Matériel de VEG/FLO : - HP/HPS 250w - SuperPlant Red - Ballast digital Super Plant HPS-MH-CMH avec dimmer - 250/315CMH/400/600/660W (Evolutif évidemment 😉) Engrais Canna Terra StarterKit - Terra Vega 250ml - Terra Flores 1L - Rhizotonic 250ml - Cannazym 125ml - Canna Boost 125ml - Canna PK 13/14 50ml - Ph Down Terreaux : - Gold Label Special Mix Light Cro/Flo
Processing
Likes
10
Share
This is 2 out of 2 journals Strain: blueberry cookies Breeder: Dinafem Clones: by me farmer2k Nutrients: bluesky organic kit Tent: gorilla 5x5 Light: kind led k5 xl1000 wifi Ok ok this my other journal using bluesky organic kit. The clones were well rooted and I transplanted them all into 3G pots. I’m using bluesky super soil mix they gave me with it. I like the fact they have their own natural ph up and down! So this is day 1 of week 1. Mother to these clones grew nice and bushy. She seemed to like LsT and pruning often. Thank you for following