


Likes
Comments
Share

@DogDoctorOfficial
Follow
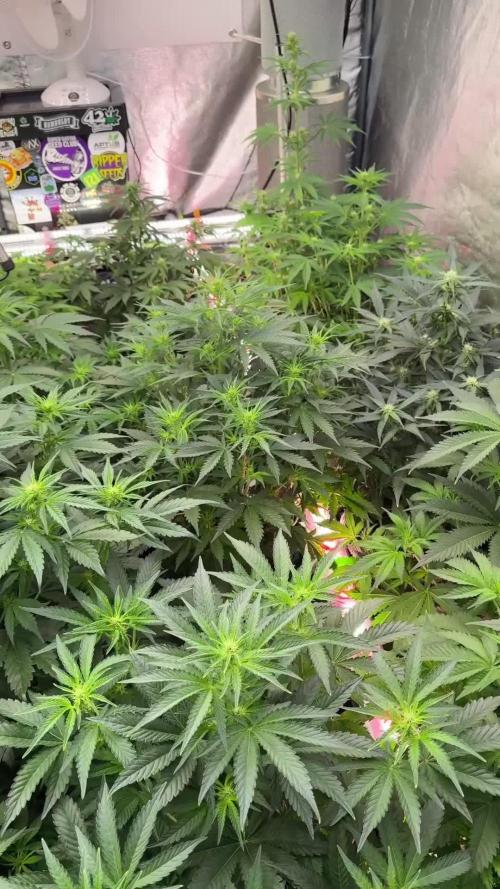
🌱 Sour Diesel — Week 8
(Flower Week 3) — Strategic Reset Week
⸻
🔁 Quick Recap — Where We Are
• Genetics: Sour Diesel
• Timeline: Week 8 from seed
• Flowering: Week 3
• Height: ~60–70 cm (compact structure)
• Room Temp: 28°C
• RH: 65%
• Feed EC: 2.9
• pH: 6.5 (kept above 6.0 intentionally)
• Lighting: LED
• Action this week: Strategic defoliation
This plant is not tall — she’s compact, dense, and structurally tight.
Which means airflow and internal light penetration become critical early.
And that’s exactly why this week mattered.
⸻
🍃 The Defoliation — Not Aesthetic. Architectural.
This was not cosmetic trimming.
It was:
• Removing large fan leaves blocking interior bud sites
• Cleaning inner congestion
• Opening airflow channels
• Resetting light distribution across the canopy
• Helping the entire room environment (not just this plant)
The room needed air — this plant was advanced enough to handle stress.
That’s key.
Week 3 of flower is the transition window:
• Stretch is slowing
• Bud sites are set
• Energy shifts toward stacking
At this stage, a strategic defoliation:
• Improves transpiration efficiency
• Reduces microclimate humidity pockets
• Prevents internal leaf-to-leaf condensation
• Encourages bud site activation below the top canopy
This was structural architecture. Not haircut vanity.
⸻
🌡️ 28°C in Flower — “Too Hot?”
Let’s Go Deep.
People panic when they hear 28°C in flower.
But here’s where most growers confuse:
🔥 HPS vs LED Heat Behavior
Under HPS:
• Radiant heat warms leaf surfaces directly
• Leaf temperature often equals or exceeds room temp
• 28°C air under HPS can mean 30–32°C leaf temp
• That pushes VPD dangerously high
Under LED:
• Less infrared radiation
• Leaf surface temp is typically 1–3°C LOWER than room temp
• So at 28°C room temp, leaf temp might be 25–26°C
And VPD calculations depend on leaf temperature, not air temperature.
⸻
🌿 What Is Leaf VPD?
VPD (Vapor Pressure Deficit) measures the difference between:
• Moisture inside the leaf
• Moisture in the surrounding air
But if you calculate VPD using only room temp, you’re missing the real transpiration dynamics.
With:
• 28°C air
• ~25–26°C leaf surface (LED)
• 65% RH
Leaf VPD sits in a very workable mid-flower zone.
Not extreme.
Not stress-inducing.
Not shutdown territory.
We’re driving metabolism, not cooking terpenes.
⸻
💧 Why 65% RH Isn’t Dangerous Here
Context matters:
• Good airflow
• Opened canopy
• Compact but cleaned structure
• Early-mid flower (Week 3, not Week 7)
At this stage:
• Pistils are forming
• Bud density is still moderate
• Transpiration is active
High humidity becomes dangerous when:
• Bud mass is dense
• Internal airflow is poor
• Late flower resin traps moisture
We’re not there yet.
And we just improved airflow with defoliation.
⸻
⚡ EC 2.9 — Aggressive but Intentional
That EC is strong.
But:
• Plant is compact, not oversized
• Sour Diesel can eat
• pH 6.5 keeps availability wide (Ca, Mg, P balance)
The key will be:
• Watching leaf tips
• Monitoring runoff behavior
• Watching for clawing or salt stress
Right now, if she’s praying and stacking, she’s handling it.
⸻
🔍 What To Expect Next Week (Flower Week 4)
After defoliation:
You may see:
• Slight pause (24–72 hours)
• Increased vertical bud push
• Better lower-site activation
• More defined pistil clustering
• Stronger apical dominance response
If recovery is clean:
• Buds begin early stacking phase
• Internodes tighten
• Resin production initiates at bract level
If stress appears:
• Slight leaf droop
• Tip burn acceleration
• Reduced upward leaf angle
But based on structure and timing — this looks calculated, not reactive.
⸻
🧠 Why This Week Matters Long-Term
This week determines:
• Airflow pattern for late flower
• Mold resistance later
• Bud density uniformity
• Final trim efficiency
• Light-to-bud conversion efficiency
This wasn’t about now.
This was about Week 7 and 8 survival.
⸻
🙏 Appreciation Section
To:
• The OGs here since seed
• The new followers discovering the journey
• The silent readers
• The critics
• The skeptics
• The lovers
• The haters
• The platform
• The sponsors
• The community
• Grow Diaries itself
Everyone has a place here.
Growth happens in public.
And that takes courage.
Respect to all of you.
📡 Please stay tuned they can try and take us down but we never quit https://www.youtube.com/@DOGDOGTHEDOCTOR NEW
🙏 Thank you for your patience and continued support.
FOR DISCOUNT CODES AND MORE JUST FOLLOW THE LINK https://website.beacons.ai/dogdoctorofficial
📲 Don’t forget to Subscribe and follow me on Instagram and YouTube @DogDoctorOfficial for exclusive content, real-time updates, and behind-the-scenes magic. We’ve got so much more coming, including transplanting and all the amazing techniques that go along with it. You won’t want to miss it.
GrowDiaries Journal: https://growdiaries.com/grower/dogdoctorofficial
Instagram: https://www.instagram.com/dogdoctorofficial/
YouTube: https://www.youtube.com/@dogdoctorofficial Deleted by Youtube
Vimeo : https://vimeo.com/dogdoctorofficial Under construction stay tuned ⸻
Explore the Gear that Powers My Grow
If you’re curious about the tech I’m using, check out these links:
🔆 Lighting & Environmental Control
• Future of Grow — Advanced LED lighting technology
https://www.futureofgrow.com/
DISCOUNT CODE: DOG20
• Lumiflora — Under-canopy LED lighting
https://lumiflorade.com/
• TrollMaster — Environmental controllers and automation gear (past collaboration)
⸻
Genetics
• Zamnesia Seeds — Genetics used in this project
https://www.zamnesia.com/
⸻
🌱 Soil, Substrates, Boosters & Root Support
• Plagron — Substrates, bio mixes, and supportive products
https://plagron.com/en/
⸻
🎒 Storage, Curing & Preservation
• Grove Bags — Curing and storage solutions
https://grovebags.com/
⸻
📸 Photography Equipment & Tools
(Not sponsors, but part of my creative toolkit)
• Sony A6700
• Sony full-frame macro lens + few more
• Stacking photography workflow - learning
• iPhone (for behind-the-scenes shots)
We’ve got much more coming as we move through the grow cycles. Trust me, you won’t want to miss the next steps, let’s push the boundaries of indoor horticulture together!
As always, this is shared for educational purposes, aiming to spread understanding and appreciation for this plant. Let’s celebrate it responsibly and continue to learn and grow together.
With true love comes happiness. Always believe in yourself, and always do things expecting nothing and with an open heart. Be a giver, and the universe will give back in ways you could never imagine.
💚 Growers love to all 💚
📸 P.S. – The Eye Behind the Lens
All photos in this diary (for now — except for the ones showing the camera, which I took with an iPhone) are taken with a Sony A6700 paired with a Sony full-frame macro lens and a few more.
Photography is part of the story — it’s how we share the fine textures, the glow, and the quiet details that words can’t always capture.
I’ve also started experimenting with photo stacking — a technique where multiple images, each taken at a slightly different focus point, are layered together to create one perfectly sharp image from front to back.
It’s not digital enhancement or AI; it’s pure photography — a way to reveal the plant’s beauty in microscopic depth, from trichome to petal.
You’ll even see a few shots of "ghost me" capturing the shots — camera, lens, setup — because every grow deserves not just to be cultivated, but documented like art.
FOR DISCOUNT CODES AND MORE JUST FOLLOW THE LINK https://website.beacons.ai/dogdoctorofficial
NEW DISCORD - Official Server Invite Link : https://discord.gg/ksjAkA5T74

Likes
8
Share


@TerpToad
Follow
Welcome to the Dutch Passion Growing Competition 2025!
I choose Banana Blaze Auto for competing in this contest. The seeds were given to me by Dutch Passion for free. Thanks!
These are my first indoor-grown autoflowers. I am looking forward to fast growth and big headbuds, lets see how the Banana Blaze likes the AutoPots!
You will see that the seeds werent put directly in the center of the pots. I am planning on applying LST during the grow and gave myself some space to work with before hand. Stay tuned :)
Update day 4: a small miracle happened - all seeds popped up on the same day! And by all I truly mean all, not only the three Banana Blaze Auto, but my two additional plants aswell! With all my autos perfectly synchronized, I can now start on a good note into these grows. Soon all plants exept the Banana Blaze sisters will move outdoors.

Likes
19
Share


@Mzsnoop2001
Follow
2da semana de flora y cambio positivo para las quebradas 😅 Blue Moby ni se enteró del supercroping accidental lo que si quedo con baja estatura que las demás. moby dick se recupero de la arrancada de la.punta principal 💪 viene un poco atrasada en flora en comparación a ww y bm pero viene remontando. Whithe widow viene súper bien y florando con cambios día a día 😍 está semana defolie las 3 por última vez y agregue una segunda malla de scrog para evitar el error anterior de quebrarla queriendola entrenar!
Como siempre acepto criticas y concejos gracias y buena semana!! 🤝


Likes
67
Share


@GanjaReaper
Follow
Day 83:
After being in the dark for like 4-7 days, they where ready to harvest. All plants getting cut by the machine, big buds are cut by hand.
I never weight wet buds because that doesnt make any sence. I will update soon on how much it is dry weight.
My friend helped me with the harvest since it takes many hours of work.
I have many buds that are as big or bigger as my hand.
Quallity so far looks promising even thought there are shitty buds as well, but thats normal and oke.
They have been cut freshly so I won't lose much weight when cutting. This will happen when cutting dry buds.
The remaining small leafs on the wet buds will dry in with the buds and will be barely visible.
More info soon.

Processing
Likes
10
Share

@CrackinBeans
Follow
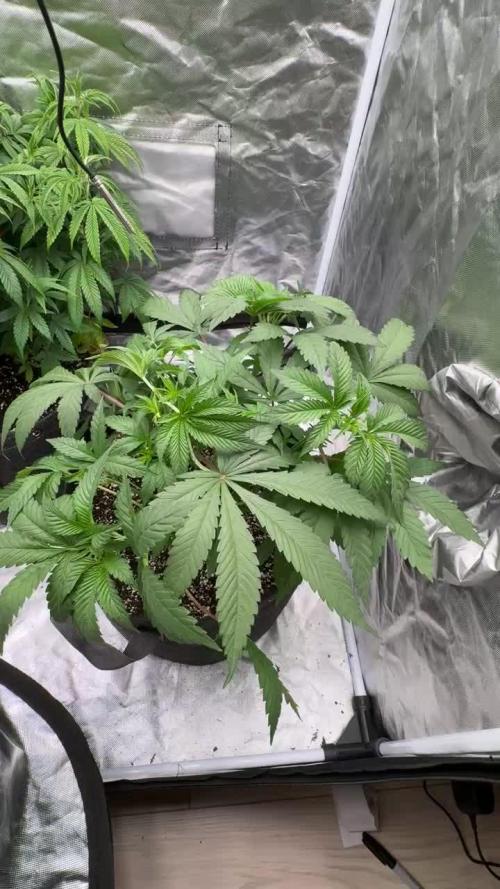
Plants are growing at a nice pace especially dealing with the extra high PH runoff


Likes
11
Share



Likes
39
Share


@Master_weeda
Follow
Bonjour à tous les padawans et maîtres jedis
Tout d'abord merci à greenhouse de me permettre de faire cette culture en m'offrant le feeding greenhouse et des graines
Je rappelle que cultive simultanément 9 pots de 10 et 11 litres dans une box prévu pour 4 et que je n'utilise que le strict minimum du matériel nécessaire à une culture correcte au prix le plus bas possible
MATÉRIEL CONFIGURATION
Box 80×80×160
Lampe led Lampwin 300 watts ×2
Ventilateur à pince 15 watts
Xiaomi Deerma humidificateurs 5L
Hygrometre thermomètre
Extracteur PROFAN 107 m3/h - 100
Prise programmable électronique ×2
1 pot carré noir 10 litres
Green house feeding enhancer
Green house feeding biobloom
Green house feeding biogrow
Substrat biobizz ligthmix
Fil de fer et pince coupante
Microscope
Petite balance de précision
CULTURE ÉTAPE PAR ÉTAPE
J'ai tout dabord fais germé ma graine avec le easy start de Royal queen seed et je suis agréablement surpris car franchement le taux de réussite est très élevé (17 graines sur 19) simple d'utilisation et très efficace.
Une fois la plantule sortie et d'une hauteur de 2 ou 3 centimètres je la prend délicatement et la place directement dans son pot définitif. Je préconise des pots allant entre 10 litres et 15 litres pour des autofloraisons cultivées en intérieur.
Le pot aura été préalablement préparé (video dans diarie) avec 30 grammes d'engrais greenhouse feeding biobloom et 30 grammes de greenhouse feeding biogrow, soit l'équivalent de 3 grammes par litre de substrat.
Je dépose donc la plantule dans son pot définitif je recouvre un peu de avec de la terre je tasse légèrement et j'arrose pour garder le substrat humide pas plus
Je place ma lampe led 300watts à environ 90 centimètres de la plantule avec un cycle de lumière de 24/24 pendant une semaine. Au début de la semaine 2 le cycle de lumière passera en 20/4 grace a un programmateur car c'est pour moi le cycle de lumière qui offre le meilleur rendement pour une autofloraison.
Jour1: léger arrosage
Jour2: léger arrosage
Jour3: la plantule commence à être plus vigoureuse mise en place de la ventilation pour augmenter sa masse racinaire et léger arrosage
Jour4: arrosage avec un litre et demi d'eau ph6.3 à laquelle j'ai ajouté 0.9 gramme de greenhouse feeding enhancer (soit 0.6 gramme par litre d'eau)
Jour5: aucune technique spéciale
Jour6: aucune technique spéciale
Semaine agréablement calme sans problème ni carence apparente
Que la force soit avec vous !

Likes
30
Share


@Sticky_fingaz
Follow
BIG BIG apologies to Heather from fast buds & to Growdiaries & anyone who follows.
The past few months have been a massive struggle, not just with temperatures & growing weed but on a personal level.
My wife has been very poorly & with covid and everything going on, it's put a massive strain on us all!!
I've tries to maintain an active presence on Instagram but that's about all I've physically had time for.
I've put this update together today, so far into the grow now it almost seems pointless.
I lost my original Mimosa due to high temps & high RH. Moving into the attic at that time of year was a mistake. It has cost me a small fortune to keep things alive. I've had to purchase an air con unit, more fans & just more of everything to be honest.
My purple punch is almost ready to harvest, any time within the next couple of days, followed shortly by Bruce Banner & Kosher cake.
I wont be winning any awards for this Diary & I feel bad as I was supposed to be show casing what 420 Fast buds has to offer & I've failed...miserably.
I hope you can make sense of all the pictures I've included....just a mass photo frenzy over the past few weeks.
Thanks to everyone & all your comments.
Wishing you all the best.
One Love ❤️
Likes
70
Share


@Insaniac_0
Follow
All feeds with nutes use either a whole ratio or combination of "Veg Mix" and "Bloom Mix"concentrates DILUTED in water until a total ppm of add in is reached using a (Total Dissolved Solids)TDS Meter measured in PPM (parts per million). The "Veg Mix" concentrate will eventually be added in smaller ratios and "Bloom Mix" concentrate what will eventually replace the "Veg Mix" concentrate entirely with the ppm and ratios listed when I feed. Veg mix recipe is on week 3. Bloom Mix recipe is on week 5.
Day 56
Took some glamor pics with black background - not really for vanity (although there's a little) but for contrast. I see more of the lockout issue better in the pics this way. - on that note, the ph seems to be working as it's been two days since defoliation and knitting needle ph correction, and the progression is way slower than it was on the last leaves at 3rd day of identifying.
So with that, room VPD of 1.07kpa seems stable enough with temps about 76F/65%RH/33%ILV
I released the binds today to let her grow without them until they crowd each other too much and I need to restrain - so in a couple of days at max.
Day 62
Transfer day. Although at first I didnt think I would be able to until Saturday, I got pots and plant saucers today, so I ended up going ahead and doing it.
Started by calibrating/testing both meters. Double checked the soil mix from yesterday as the last time I used wood ash the ph rose the day after... however this time it was fully mixed to I wanted to know if there would be a higher ph - it was the same as yesterady - 5 reading avg of about 6.35 - the slurry of 1:1 soil and 7.7 ph water was tested at 6.3 also.
Made about .75 gallon of 75/25 veg/bloom juice water at 500ppm feed water. Tried to ph read the soil in the pot and seen it go from 6.6 down to 6.35 (took video) in the dry soil, so I decided to use the 6.35 new soil reading and ph balanced the feed to that.
Used the needles since it was 7 days since the last feed and I am using such a small amount. Poured over needles in 8 places and pulled each out to let water down. the vacuum pulls the water down when I lift the needles.
Then I mixed 5tsp of Dynomyco to the 5 gallons of new soil and mixed really good. I placed a layer of perlite on the bottom of the 10 gallon pot and then layered in some soil.
Then with the help of my wife we pulled the plant out of the pot and placed it in the 10 gallon. I place back in the tent and added about a quart of plain de-chlorinated water evenly over the new and older soil to help bind them.
I reduced lights by 100ppfd to have about 505 and 500 at center colas and 430 lowest on outer ring with most at 450 and 470 highest. Soil to light is 35 inches and the plant is about 14 inches so about 21 inches from leaves to lights.
I left the ring off today and will rebind as needed tomorrow after she rests. Today the leaves look wilted and limp.
Also reduced humidity to 60% so 58 to 65% should be the range and the temps are 73F with the lights lower.
PPFD was higher with the new growth - unbound and tucked in for better cola/light position, it reads 570 to 580 on outer colas and 590 at both center branches
Day 57
Getting 1 more day out of free range growth before I tie her back against a ring. So in that time I decided to take a few vanity pics.
Overall the ph block seems to have slowed or stopped and she's back to growing again. Will be thinking about flip at the end of this week or so.
VPD same stats 76F/65%RH/33%ILV - ppfd right at max so I'll likely tie her off tomorrow. 605 600 in center and 580 to 590 at the outer ring.
Day 58
VPD stats mostly steady again today - 76F/65%RH/33%ILV - ppfd was checked after LST, measured 600 at each center cola and the outer ring measured between 550 and 590 most at 580
So as I said, I did LST today to bind her more out while the 4 center 4 colas fill the middle. I had to bind to the pot base instead of the ring as the colas are still a little short to reach for binds at the ring just yet. There's a lot of space to fill and a few (about half) of the out colas are sideways for now.
Had a break at the center cola when I tried to pull it back for bind. I knew to hold the branch at the node but forgot to do it here and heard a "snap" ... taped the crack and moved on - will monitor obviously
Day 59
Did more light LST to ensure the branches are growing where I want. PPFD was mostly the same as yesterday only now there are more colas around 560 than 580 on the outer ring with the center colas at 610 and 590 (front cola was tied down to spread more away from the ring and fill center better.
vpd same as past week or so 76F/65%RH/33%ILV
Last feed was on day 54 and the soil still seems damp so I will check again tomorrow for the next day. (Day 61)
The broken branch doesnt seem to have affected either side of the split as both sides seem to have grown a little with little to no wilt or drooping leaves. Im hoping it heals okay and doesnt delay flip to recover more; still monitoring.
Day 60
Did some light LST today by releasing the lower binds to the pot and attached as couple to the outer ring now. So far I only have to bind a few as most are already holding where i want them to.
Took the tape off the split and seen I didnt seel the gap closed when I taped it so now Im considering a drop of super glue to bind the branch back in hopes it grows onto the other side again. If not at least it would be more secure than it is now. And since it's a main split for 4 colas, I dont want too restrict it by binding at the split and potentially cutting off the nutrient pathways.
ppfd after LST was 610 and 600 after more LST and the outer ring is still ranging 550 to 580 with more at 560 now.
VPD same as I havent messing with any of the variables. 76F/65%RH/33%ILV
Soil is a bit dry and it's been 5 days since the last feed flush, so I have about 3 gallons of tap burning of chlorine now for a feed tomorrow morning.
Might still update again later if I find superglue...
found some superglue - tried to take pictures but I cant hold, squeeze the applicator, and film with just two hands. So the idea gets through, I did both sides.
On a side note I discovered a root popping out of the soil from the top. Covered it up but wasn't sure if I should be concerned.
Day 61
VPD same as it's been for most of the last week - 74F/65%RH/33%ILV
PPFD was recorded after I turn the plant a quarter turn for the smaller colas struggling to get over he ring's edge to have more light. Most colas at 580 with a couple at 600 and a couple more at 550 - center colas are hitting 615 and 620, but I have plancs to reduce in the next couple of days now
On that note, the root growing out of the top tells me that she's hungry and needs more root space, even if that means growing through the top of the soil. So I plan to transplant to a 10 gallon and flip after the recovery. After reviewing more of NugBucket's journal I realized this is why he moves them when growing 16 colas.
New pots should be here Friday so I should be able do it on Saturday.
So I prepped soil (using more Happy frog with mycorrhizal fungi already growing in it for a few weeks) with de-chlorinated tap water
Started by ph testing the soil and the water (4 readings on soil at 5.03 avg) - added about 1/2 cup total of wood ash to bring up the ph , mixed and tested again - added water at (about 7.7 ph) and tested again... last 5 readings in soil was 6.24,6.3,6.35,6.37,6.38 avg of 6.328 - covered and let rest until needed.
Since I plan to transplant in a few days I felt it would be best to 'lightly' feed tomorrow, again on transplant day, and again 2 to 3 days later.
Since my wife was taking pics at this time, I could only find this one to show the roots growing into the perlite then we planted it in the bigger pot.
--------
(Day 62 root base picture from above)
I have a hypothesis that says these are so short because I intentionally tried not to move the plant without the base stand to keep it from grinding these up and allowed them to grow in the last 2 weeks. This is that test picture/results.
I like the idea of better/more drainage, but thinking I am doing more harm each time I hear those gravel pieces crunch as it cuts those and forces the plant to look somewhere else for root space. Notice how the small root lines have no finer pieces or laterals grow out from these - I believe that is because they are so new in growth and that the perlite chewed up the smaller laterals even with little to no movement over the last two weeks
I would like to see a root ball experiment that exposed the roots throughout the grow but for now I can see these roots do grow into the base perlite and need to be handled carefully if you want them to grow more freely or with a standard pot size. As you can see Im not root bound but my plant thinks it is and is growing roots out the top.

Likes
3
Share


@SubliminalSociety
Follow
Hola!
Our senorita has stopped growing. Is it sad? definitely. Do the buds look good? oh yes.
The fern in the pot is growing better than my tequilita and that's ok. I'll monitor her buds to determine the right time to chop. Out of my 3 Ganja Farmer autos, she seems to be on schedule (despite the growth stop). Another month? Maybe. We'll see.

Likes
5
Share


@Kinghaze
Follow
Unfortunately, I don't have pictures of the buds when they were dried and cut. But I can tell you they looked very nice
Good high more body then mind.
Taste was okay not my favorite but for other people it will be fire !
I harvested:
Cupcake 1# 104 gram
Cupcake 2# 115 gram
Cupcake 3# 128 gram
I dried them for 10 days on 17c / 60%
Then cured them for 2 months in grove bags.



Likes
224
Share


@Ju_Bps
Follow
Hello growmies 👩🌾👨🌾🌲🌲,
👋 Flowers continue maturation,
End is close, i've started flush, Harvest for next week.
💧Give water each 2 or 3 days
1,5l Water + Nutri NPK Bloom Boost
1,5l Water + Flash Cleaner
PH @6
- Nutri NPK
Bloom Boost
1/4 tsp for 1 gal.
💡Mars Hydro - SP 3000
100% 41 cm.
🔥 Thanks community for follow, likes, comments, always a pleasure 👩🌾👨🌾💚🌲.
Mars Hydro - SP 3000 💡💡
https://www.mars-hydro.com/sp-3000-samsung-lm301b-greenhouse-led-grow-light
NUTRI NPK 💥🔥
https://www.nutrinpk.com/product/npk-mix-pak-for-4-to-5-plants-cannabis-fertilizer/
Pure Instinto - Strawberry Shortcake Auto🌲🌲
https://pureinstinto.com/product/strawberry-shortcake-autoflower/

Likes
7
Share


@Onlygrow99
Follow
Bien pues ya tenemos en marcha el 2º seguimiento del perfil...
Son 6 white truffles, 6 Apple&Bazzokies de GBSTRAINS y 5 GG4 de GBSEEDS que se empezaron a germinar el 15 de mayo por la tarde sobre las 19:00
Todas nutridas con BOOM nutrients jejeje
Todas las semanas iremos viendo los cambios y la evolución, los riegos y las flores que vendrán :)
El 16 de mayo del 23 sobre las 07:00 de la mañana pase las semillas del vaso con agua, a los tapers con servilleta. Ahí estuvieron 24 horas mas haciendo un total de 36 horas germinando para después,
pasarlas a las macetas de 1 litro.
22/05/23 actualizado, meto unas fotos mas de como van las semillas después de 7 días desde que se empezaron a germinar en el vaso de agua.
A día 22/05/23 llevamos 7 días desde que se empezaron a germinar.
ACTUALIZACION DE ESTADO:
30/05/23 Subo unas fotos después de 8 días.
Llevamos 15 días desde que se empezó a germinar las semillas en vaso de agua.
A partir de aquí, empiezo a contar semanas de crecimiento.
Trasplantaremos a maceta definitivas de 7L dentro de una semana o 2.

Likes
18
Share


@CANNASIM
Follow
Buds are forming nicely, the Hulkberry has a sugary scent, very pleasant looks like very green weed, vibrant.
Leafs are showing some cal mag deficiency, I’m using RO water, but supplementing with cal mag, and leafs still demonstrating that for a wile, could be the led to cloase, checked the runoff ec 1.4 and ph 6.5 looks normal, tested the soilless, is between 6.5 and 7.
This looks like a more fragile strain, wile by the side i have a heavy feeder, and a normal feeder, runing three distinct diets is out of question at this point...
The Purpple kush smells like candy and is really purpple and the unknown strain is like mint with a strong indica look.
I’m going to be away for 7days so I intalled a drip sistem and I’m hopping it does the trick...
Likes
22
Share


@handsammich
Follow
I enjoyed these autos quite a bit much more convenient for me, cbd wasn’t too resinous so the trim was much easier than my last experiences, having cbd bud nearby will be very useful.


Likes
3
Share


@medique
Follow
PK boost was added for this week as lower fans were starting to show serious PK deficiency. Defoliated about 25% of each plant, basically the lower fans/growth that was not getting light. Added some CFLs in a tent dark spot