


Likes
8
Share


@eldruida_lamota
Follow
Buenas noches familia, después del revuelo del Covid y todas estas miradas volvemos unos actualizamos la semana estas green ak de zambezaseeds están ya fenómeno, un ejemplar está repleto de truco más y el otro ahí anda flotando todavía.
Ph regulado y temperatura/humedad dentro de los parámetros.
Os dejo las fotos para que apreciéis bien y espero estar la semana que viene por aquí, saludos familia

Likes
14
Share


@aalpi
Follow
My microscope finally got delivered, so I can add some photos of that. The smell increased. The Buds got thicker this week and browning pistel appeared

Likes
52
Share


@DogDoctorOfficial
Follow
Another week has passed, and our beloved Cosmos F1 continues to amaze and astonish. It's as if the universe itself has bestowed upon her an extra dose of magic and wonder. I'm thrilled to share with you the latest chapter in our cosmic gardening adventure.
As I gaze upon our beloved Cosmos F1, I'm filled with awe at her transformation. She has truly become a sight to behold, adorned with an abundance of frosty trichomes that shimmer like stars in the night sky. Her fruits have also become denser, promising a bountiful harvest that we can almost taste. While we estimate there's still another week until harvest, we'll remain patient and let her guide us to the perfect moment.
In nurturing our cosmic beauty, I've continued to follow a simple yet effective regimen. I've provided her with pure water, ensuring she stays hydrated and refreshed. Additionally, I've incorporated Aptus Holland Enzym into her feeding routine, as I'm committed to preserving the vitality of the soil for future use. This approach not only benefits our current crop but also helps sustain the harmonious balance of life within our growing environment.
Let's take a moment to appreciate the significance of this soil preservation. By cultivating in a manner that allows us to reuse the soil, we contribute to the sustainable practices of our gardening community. It's a small but meaningful step towards reducing waste and honoring the interconnectedness of our natural world.
Last week, I mentioned my decision to defoliate our Cosmos F1. The room itself seemed to call for it, and our resilient plant welcomed the process with open arms, or rather, leaves. She embraced this adjustment with grace and resilience, showcasing her ability to adapt and thrive. I must say, defoliation has had a positive impact, allowing more light to penetrate her canopy and promoting healthy growth.
As I reflect upon this journey, I can't help but express my gratitude to @James and to Royal Queen Seeds for bringing Cosmos F1 into my life. She truly embodies the essence of an all-in-one package, captivating both my imagination and senses. The experience of growing my first CBD strain has been nothing short of extraordinary, and I eagerly anticipate the cosmic culmination of our efforts.
Together, we shall continue to revel in the wonders of the universe and allow its vastness to awaken our innate curiosity. Our Cosmos F1 is a testament to the marvels that can be achieved through patience, care, and a touch of cosmic inspiration.
May our cosmic garden thrive and inspire others to embark on their own celestial journeys. Until next time, keep dreaming big and let the cosmos guide your green thumbs!
As always thank you all for stopping by and for supporting me on this journey, i am super passion about growing and fell blessed to have you all with me on this new journey <3 <3 <3
Genetics - RQS COSMOS F1
Ligth - LUMATEK ZEUS 465 COMPACT PRO
Food - APTUS HOLLAND
All info and full product details can be find in can find @
https://www.royalqueenseeds.com
https://aptus-holland.com/
https://autopot.co.uk/
https://lumatek-lighting.com/
With true love comes happiness <3<3<3 Always believe in your self and always do things expecting nothing and with an open heart , be a giver and the universe will give back to you in ways you could not even imagine so <3<3<3
<3 <3 <3 Growers love to you all <3 <3 <3
Cosmos F1: The World's First F1 CBD Cannabis Variety
Cosmos F1 is the largest autoflowering cultivar in RQS catalogue of F1 hybrids. With her tall, typical Christmas tree structure and bright green foliage, Cosmos F1 is a testament to the beauty and vigour of Cannabis sativa. Plus, thanks to her pure genetics, which descend from Oregon CBD, she boasts the highest CBD concentration in our entire F1 seed selection.
Aromas, Flavors, and Effects of Cosmos F1: A Vibrant CBD Super Variety
True to the pure lineage from which she descends, Cosmos F1 boasts a delicious aroma that combines the freshness of crisp pine with the full-bodied, almost creamy aroma of modern Cookies varieties, and an unmistakable peppery bite. Thanks to her high concentration of CBD and low levels of THC, Cosmos F1 offers a balanced effect without intoxication. Cosmos F1’s terpene profile is dominated by myrcene, farnesene, limonene, pinene, and caryophyllene. Combined with high concentrations of CBD, Cosmos F1 produces a clear, meditative effect that relaxes the body while leaving the mind functioning and focused. Her effects help unite the mind and body, creating a state of cosmic order.


Likes
28
Share


@HydroHerb420
Follow
Still going well. Drained and refilled both tanks at the beginning of the week. Usually add PK week 5 flower but they didn’t quite look ready. Starting to smell nice in there now too.
Likes
18
Share


@Love_Cultivator
Follow
Soooo i'll edite this week in about a month or so when i finaly will have tried the endproduct 😁😁

Likes
19
Share


@Ferinky
Follow
Hola y gracias por pasarte a ver mi diario.
Ya he cultivado esta variedad anteriormente y siempre me ha gustado su sabor especiado.
La planta creció sin ningún problema pero con carencia de nitrógeno desde mitad de la fase de crecimiento.
Al ser un cultivo 100% orgánico y únicamente con riegos de agua del grifo sin añadir abonos líquidos era esperable, creo que con unos ajustes en la mezcla del sustrato hubiese obtenido mejores resultados aunque el hecho de añadir todos los nutrientes al sustrato me ha permitido facilitar la tarea del riego y no tener que realizar el lavado de raíces.
La planta se desarrolló en una maceta de 50L y ha producido 230g de cogollos secos, esponjosos y con una relación flores/hojas no muy buena.
El olor de las flores húmedas era intenso con toques especiados.
Respecto a plagas y enfermedades ha sido muy resistente, no he apreciado signos de araña roja, pulgón ni trips gracias al aporte de harina de Neem en el sustrato.
Tampoco he sufrido el temido y habitual ataque de las orugas (ni la oruga de las hojas ni la del cogollo) gracias a las pulverizaciones en las fechas clave con Bacillus Thuringiensis.
Tampoco se ha visto afectada por el Oídio que normalmente aparece al final de la floración en la zona donde vivo, ni botrytis
El clima también me ha acompañado este año, vivo en una zona cálida donde la temperatura suele ser óptima para el cultivo de exterior de cannabis, el mes de mayo llovió algún día de forma agradable, junio, julio y agosto fueron especialmente secos, solo llovió un par de noches a finales de agosto, y septiembre también ha sido muy respetuoso lloviendo solo 2 veces.
Por todo esto, siendo la primera vez que elaboro un supersoil, estoy seguro que para la temporada 2022 repetiré el sistema, haciendo algunos ajustes a la mezcla para evitar estas carencias que he comentado.
Quiero agradecer a Growdiaries.com la herramienta que nos brinda a los cultivadores (en mi caso cultivador clandestino) para poder realizar el seguimiento de nuestros cultivos y como, en mi caso particular, ha hecho que mi motivación y trabajo hayan sido una constante semana tras semana, por lo que ha influido directamente en el buen resultado final de la cosecha.
También agradecer a todo el que pasó por aquí durante el seguimiento ya que me dieron el apoyo necesario para mejorar en mi cultivo.
Un saludo.
Ferinky

Likes
23
Share


@adam_pawloski87
Follow
This week has been great ,today is day 78 and the girls are just doin their thang , 1 looks ready for flush already and the rest look about another longer then flush for them aswell,, can’t wait to see how these girls finish out over the next couple of weeks 😍!! Y’all keep them eyes peeled an stay tuned for next week! Peace love an positive vibes to y’all Cheers.💨💨💨

Likes
44
Share


@RakonGrow
Follow
Note : Jegliches Equipment aufgelistet welches ich nutze findet Ihr in der Germinations Woche !!!
Day 15 :
ich weiss noch nicht ob der mineralische dünger wirklich sofort etwas gebracht hat . schauen wir was die zeitraffer so vermitteln. ist es seit gestern schneller am wachsen ?
Day 16 :
PPFD 275 * 20h = DLI 19.8
Day 17:
+ 0.5L Flaschenwasser (EC 0.26)
+ + Canna Rizothonic
+ + Canna Terrar Vega
+ = Total EC 0.68 (PH 7.2)
+ Final PH 6.15
Day 18:
es wächst
Day 19:
es wächst immer noch
ventilation übern blätterdach angemacht. ich glaub daher kommt das ruckeln im video
Day 20:
+ 0.5L Flaschenwasser (EC 0.26)
+ + Canna Rizothonic
+ + Canna Terrar Vega
+ = Total EC 0.68 (PH 7.2)
+ Final PH 6.15
+ 0.5L Leitungswasser (PH 8.0)
Der Stamm hat sich in den letzten 3 Tagen verdreifacht vom Volumen. Jetzt hat er so Bleistift dicke erreicht.
Day 21:
die temps und relative luftfeuchte sind hier zwischen 58%-68% und 23.5°-25.5°C . reguliert sich aber immer zu den höheren werten . ist hier halt so :))
Likes
13
Share


@GYOweed
Follow
I may need to kill one of the little shits.
Looks like great growth 11 days from emerging. Top next week

Likes
45
Share


@tresplantes
Follow
Back from vcation after two weeks the Ladys Look beautyful and Full of Color
Today i will water them the last time on day 62 of flower and cut in the next 4-5 days
The zake should be a week faster than the other two but that isnt the case
The buds on all Ladys are dense and the smell is amazing cant wait to Test em out rauch


Likes
20
Share


@StunFlower
Follow
She's doing very well. Gave her a little clean up today - removed some undergrowth that won't make to the top. Keeping her diet pretty much the same other than an increase in Cal-Mag this week - the other plant in my tent was showing signs of deficiency so I thought they'd both get a little boost since I've been treading lightly. She did a bit of stretching this week - grew about 5" taller! Looking forward to see some fattening of the buds! 👊
-----------
Day 65: PPM 668; PH 5.8. I think her drink is bit on strong side with PPMs increasing a bit since the rez change. Topped her off today with 3/4 gallon of filtered water to dilute things a bit. Sitting at 574 PPM; PH 6.2. Buds are starting to stack nicely and fatten.
Day 66: PPM 553; PH 6.2. Let her be. Seems to be happier now that I've watered down her drink a little. Frost is starting to form around some of the buds and she's getting more fragrant.
Day 67: PPM 584; PH 5.2. Gave her 3/4 gallon filtered water with light dose of nutes. She's now running at 553 PPM; PH 6.0.
Day 68: PPM 563; PH 6.0. Let her be.
Day 69: PPM 532; PH 5.8. Gave her 3/4 gallon filtered water/feed. Now at PPM 542; PH 6.2.
Day 70: PPM 532; PH 5.1. Discovered my PH meter is toast and has been reading much higher than it should. Got a new meter and hopefully back on track. Thank goodness this plant is resilient. Gave her some PH up and sitting at 6.1.

Likes
15
Share

@masterofsmeagol
Follow
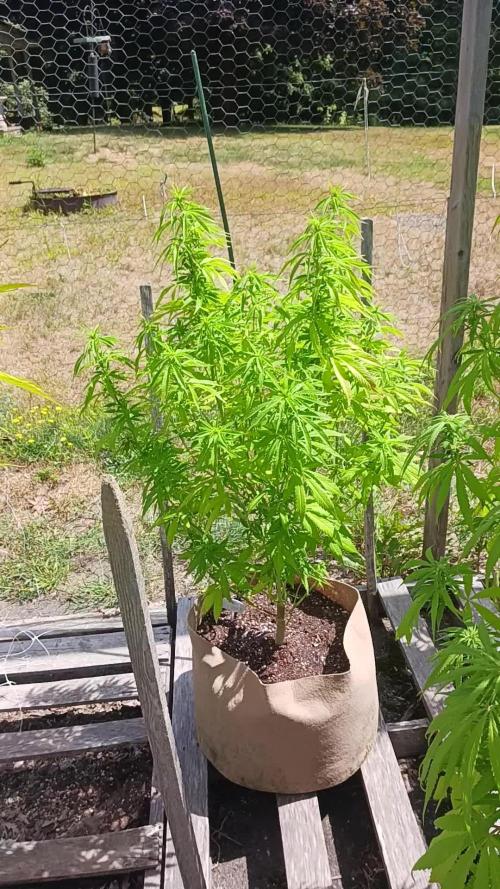
8/17 Watered everything but the 50. Found two leaves with sep markings on the pink kish in the 50. Definitely not using old soil again. I'm pretty sure THIS plant contracted it from the soil and not the way the others did with the lawn mower and birdseed hijinx. It's supposed to rain for the first time basically all summer. It's am 80% chance so I HELD OFF ON PLANT DOCTOR AND DID NOT APPLY as I'm supposed to have a clear day after. I'll apply the plant doctor in the morning. I'm hoping this rain will knock down a bunch of those thrips. They seem to be on a small branch on a plant or two. One or two leaves show damage and I'll pick them off. I figure I'll get them after I apply plant doctor. I'll use either citric acid or just my regular bt-k pillar treatment with Castille or liquid soap. That will kill them as well. I'm on really worried about it. I also might just buy a bunch of lady bugs and unleash them once things get further along.
EDIT: TOOK A QUICK VIDEO AND A COUPLE PICS. HOPEFULLY WE GET THIS RAIN. IF NOT IM GOING TO TREAT THE THRIPS THAT ARE ON TWO PLANTS NOW. I THINK IM GOING TO GO WITH BT-K FOR NY PILLARS AND HOPE THAT THE DISH SOAP IN THE MIX KILLS THE THRIPS. I HAVE LOTS OF DIFFERENT OPTIONS SO ILL FIGURE SOMETHING OUT. BUDS SEEM TO BE EXPLODING IN GROWTH. OH AND THANKS TO THE OUTDOOR GROWER THAT MESSAGED OFFERING TO HELP. I APPRECIATE THAT. THANKS.
8/18 We got the rain we were expecting. It was sheet rain for a few hourscand rained during the night. Everything was drenched and it was cold (50°F). I shook off the special kush that's way further in flower. I decided to use the leafblowrr despite the risk of spreading anything. I did it so that it wasn't ever blowing TOWARDS another plant but still. I was hoping it might blast off some thrips that might have survived that torrential rain. We've never had a dry summer like this. I'll moniter things. My water day is tomorrow so I assume that's when the girls will get their plant doctor dose. It's a great time of year for cannabis growers. We get to watch all the hard work we've put in literally pay off. It's very peaceful in the garden.
EDIT: Went over at about one to check things out and do some minor defoliation. I checked on the thrip situation and I dont know if I blasted them off with the leafblower or if the rain washed them away bit I doubt it. Ivecmade the decision to treat these little bastards. It's on one plant but it's started to spread to another branch on another plant. I probably just overlooked it but still. Seeing that it rained like he'll and I'm seeing like zero signs of septoria I'm going to treat everything. At least I think I am. I haven't decided what to use. I think I could just use bt and soap and I'd probably be alright. I'd feel better doing that as it's something I'm familiar with. Outdoor growing. It's always something.
8/19 In the 40's last night. Hopefully that will help with the thrips. I was hurried and since today tops at 72° I only watered the 10th planet big mk ultra and the chem dog with preventative plant doctor. I'm not seeing hardly any septoria and if I do itsca random leaf. I mixed up 3tsp of citric acid and some Dawn in a 2 quart hand sprayer and treated the 10th planet that I thought had heat stress and the Pink kush in the ten gal that has the damage. I also treated a branch on my good tenth planet. It was the only branch with markings so I think I've got it early enough. I'm just wondering the best way to tackle this. The pink kush I'm sure, could handle spinosad. That strain is much later flowering. I'll see how the citriccacid works and go from there. If the other girls need water they'll get it when I get home alongcwith plant doctor. I've got some work to do. I'll keep this updated. Opinions are always welcome.
UPDATE: THE PLANT IN THE TEN I SPRAYED LOOKS BETTER THAN WHEN I SPRAYED IT! I ALSO DIDNT WATER AS ITS UNDER 70° AND EVERYTHING I WATERED LOOKS WORSE THAN WHAT I DIDNT. WATERING NEEDS CHANGE QUICK WITH A 40° TEMP SWING. THESE THRIPS ARE GONNA HAVE A FEW MORE NOGHTS IN THE 40'S. THE CITRIC ACID SEENED TO KILL ON CONTACT. MY PROFESSIONAL BUDDY ADVISED TO ORDER GREEN LACEWINGS AS OPPOSED TO USING SPRAYS. HE SUGGESTED SPOT TREATMENT BUT AFTER MY RESEARCH ON THRIPS THAT WONT HE AS EFFECTIVE. I HAVENT DECIDED WHAT TO DO. I MAY ORDER THE LACEWINGS AND I MAY CONTINUE AND ROTATE TREATMENT. I DONT WANT TO OVERREACT (WHICHVI TEND TO DO) BUT I ALSO DONT WANT ALL MY LEAVES TO DIE. ILL KEEP THIS UPDATED. IM PLANNING TO GO OVER TONIGHT AND CHECK THINGS OUT. I MAY SPRAY A FEW MORE PLANTS AND WATER WHILE IM THERE. ITS TIME FOR THERE PLANT DOCTOR PREVENTATIVE.
8/20 I watered the two kush in the back WITH THE PREVENTATIVE DOSE OF PLANT DOCTOR as they were dry I assume due to the wind they get. The one in the 50 I found one sep leaf. Looking carefully arpund the garden I can tell that I have a thrip infestation. First time I've fought this and it seems most people don't really know what to do besides predators at the beginning of the season. I'm too far along for spinosad. At least thats what I've been told. My pro buddy said to try to spot treat it. It's not bad bit I'm afraid it might be worse than I think. The plants I treated with citric acid look MUCH better. I think I'll dial the dosage of citric acid down and start with that tonight and switch up treatments. I can get rid of them it's just going to take a ton of work. I think I've had them before and I attributed to something else. I so think that the very early pink kush plants could handle spinosad. I hope so. The plants I watered the other day look overwatered. The plants I didn't water look GREAT. The special kush in late flower looks happier than I've ever seen her. The difference being we went from 104° one day to 72 the next with 46° night Temps. This week is highs of 70's lows of high 40°'s. I've got a lot of work cut out for me. Didn't do a video as I didn't have time but I'll do one


Likes
9
Share


@Scilef
Follow
Daily report:
Day 1.
Watering: NO
Stats:
Humidity: 70%
Temp: 27.2
Notes: I want to see how often should I water Heracles. I fucked up with pH and maybe with watering frequency. I want to fix that. Also set the board to 100%.
Day 2.
Watering: NO
Notes: Defoliation went a bit too aggressive, but it looks fine and I hope that it will help weaker stems to grow faster. I will let Heracles to heal tonight and feed her only tomorrow's morning.
Day 3.
Watering: 5.7 pH 1550 ppm (1.25 l + CalMag) && 5.8 pH 1320 ppm (2.3 l + CalMag) + 5.7 pH 1120 ppm (1.6 l + CalMag) Total 5.15 l => 5.9 pH 1720 ppm (1.25 l)
Notes: This morning pot was completely lightweight and dry. Heracles looks amazing.
Day 4.
Watering: Night - 5.8 pH 1190 ppm 3.5 l (+CalMag) => 6.0 pH 1890 ppm 0.7 l
Notes: New leaves still has yellow marks between veins. I don't know what should I do with that - neither MgSO4 foliar nor CalMag in the mixture helped. Currently 1.5 days is the comfy period for feeding schedule.
Day 5.
Watering: NO
Notes: I found signs of overfeeding (and not only me found that), so next mixture will be less concentrated to let Heracles relax. Also, I bounded all tallest stems to the net to place all the grow spots at the same height.
Day 6.
Watering: Morning - 5.7 pH 761 ppm 4.5 l (0.75% of Base +CalMag + 1 l of plain water) => 6.1 pH 1750 ppm 1.1 l
Notes: I am still trying to create a flat screen of greens. Very excited of flowering stage, it's almost here. But wtf is going on with ppm in drainage?!
Day 7.
Watering: Night - 5.8 pH 1040 ppm 4.0 l (0.75% of Base +CalMag) => 6.0 pH 1930 ppm 0.8 l
Notes: I am run out of a free space in my growbox. Why does not blow starts?

Likes
5
Share


@Ensign420
Follow
Greetings fellow growers 🖖 and welcome to my first grow ever. This adventure actually started several months ago when I decided to stop buying flower from dispensaries and just grow my own bud. How hard can it be!?
This is actually my second seed of this strain. The first bean sadly died due to over watering (sorry girl, RIP). I was literally watering the cube to the point where water was dripping from the bottom, then heavily sprayed the humidity dome and tray with the vents completely closed. Everyday. Multiple times. I never let the dome or try dry out. So after about 8 days of not sprouting, there was a funky smell of rot. So that was that.
Later I learned that rockwool retains a lot of water and can easily drown seeds. So a wet/dry cycle is best for rockwool germination.
So even after hours of researching and digging through forums and tutorial videos, I was still under prepared for this journey. Did not consider how delicate the germination phase is. Oh well. Lesson learned. Reset and try again!
I hope everyone is safe and stoned during this corona crisis. Just like everyone else in the world, I want this pandemic to be over with. But in the meantime, let's grow some weed! 🖖
[START OF WEEK 01]
Day 01 - Monday - 08/03/20 - Total Days: 001
-----------------------------------
- [0830]: Light Schedule: 24Hrs/0
--- Soaked cube in 5.5 PH water for 10 min. Did not shake water out.
--- NO NUTES! Only PH'd down to control the PH levels.
--- Did not use the default hole (way too deep).
--- Flipped cube upside down and made a shallow hole for the seed (less than 0.25" deep).
--- Placed seed in and pinched hole close. No additional water added.
--- Sprayed the tray and dome with straight water (5.5 PH).
--- Vents are cracked opened a for ventilation (about 1/4 opened each).
--- Distance between the light and tray was 53"
--- AC was set to 80 °F
--- Exhaust fan was set to 86 °F
--- Room average temp was at 85 °F
--- Dome humidity was at 85-99% when sprayed.
--- Allowing to completely dry before respraying.
- [2200]: Dome and tray were completely dry! Sprayed only tray and dome with more water.
Day 02 - Tuesday - 08/04/20 - Total Days: 002
-----------------------------------
- [0845]: Sprayed dome and tray in the morning. Everything was dry.
--- Hoping for the best!
- [2130]: Everything was dry again, so sprayed dome and tray at night along with a light spray on the cube.
Day 03 - Wednesday - 08/05/20 - Total Days: 003
-----------------------------------
- [0830]: Everything was dry again. Resprayed dome and tray. Slightly sprayed cube.
- [2125]: Hooo damn!! She popped! Am little stub is visible! Resprayed dome and tray again.
--- Still going 24/0 for lights.
- [+0033]: Just checked up on her and I swear she grew a bit taller! Getting excited!
Day 04 - Thursday - 08/06/20 - Total Days: 004
-----------------------------------
- [0845]: Wow! Went from a little stub to fully sprouted overnight! Everything was pretty dry again so resprayed dome and tray.
- [2200]: Tap root is visible! Over 1" long too! Just resprayed dome and tray again.
-- Going to prep for hydroton transplant tomorrow!
Day 05 - Friday - 08/07/20 - Total Days: 005
-----------------------------------
- [0930]: She keeps growing!
-- Added a bit of CalMag to the spray bottle (8 drops to 650ml of distilled water). Resprayed dome and tray. Water was at a 5.4 PH with 141 PPM.
- [1045]: Prepped the bubble bucket with 4.5gal of water. Water is high enough to reach about 0.25" above the bottom of the net pot.
--- Added 3 drops of Superthrive
--- Added 3.5ml of CaliMagic
--- Added 2ml Hydroguard
--- Then PH'd down to 5.6
--- Solution Strengh: 120 PPM
--- Water chiller is set to 20 °C
- [1100]: Transplant time!
--- Filled the net basket 1/3 with hydroton. When placed in the bucket, air bubbles are not visible, but are slightly below the surface (slight digging will reveal the water/bubbles below).
--- Removed plastic on rockwool cube and placed in basket, then filled around and covered with hydroton. Making sure to block any light from passing through the net pot and into the nutrient solution.
--- Covered with a half-bottle dome sprayed with the CalMag water from earlier.
--- Hoping for the best!
- [1300]: Raised Bucket 5" higher. Now light distance is 48" to top of bucket.
- [1820]: Lowered tent exhaust temp to 76 °F
--- Lowered AC to 75 °F
--- Raised bucket even higher so light distance is 30" to top of bucket.
- [2300]: Looking good!
--- Sprayed dome and surrounding hydroton with more CalMag water.
--- Attached timer to light! So new 18 Hrs On/6 Hrs Off light schedule.
--- Lights On: [1600] (4pm)
--- Lights Off: [+1000] (10am the next day)
--- Decided to go with lights on during the evening/night and off during the later mornings/afternoon (the hottest part of the day) to see if temps can be controlled better.
--- Please survive girl!
Day 06 - Saturday - 08/08/20 - Total Days: 006
-----------------------------------
- [0800]: Everything was dry. Resprayed hydroton and dome.
- [2000]: Here first night cycle seemed to go well! Get'n taller!
--- Dry again. Removed the dome.
--- PH went up to 6.5 so PH'd down to 5.7
--- Ran the top feed drip ring for a bout a minute to wet the hydroton and rockwool with the nutient solution.
---Too scared to leave the top feed on 24hrs (I don't want over water her and cause dampening-off). Will let dry before re-watering.
- [2100]: After closer inspection, I think she's looking a bit yellow.
--- Decided to add a bit of grow nutes to the bubbler solution.
--- Added 2ml of Sensi Grow A
--- Added 2ml of Sensi Grow B
--- Solution strength after adding more nutes: 176 PPM
--- PH went up to 6
--- I hope that the extra chelating properties of the 'PH Perfect' solution is enough of a buffer for proper nutrient uptake.
Day 07 - Sunday - 08/09/20 - Total Days: 007
-----------------------------------
- [0800]: Water dropped a bit (mostly due to evaporation) so solution strength was at 190.
--- Checked PH again. Was still at 6, so PH'd down to 5.4
--- Ran the top feed for a minute to wet the hydroton a bit.
- [0915]: Since she's looking perky but still a bit yellow. So decided to up the nutrient concentration even more before lights out.
--- Added 2ml more of Sensi Grow A
--- Added 2ml more of Sensi Grow B
--- Solution strength after adding more nutes: 199 PPM
--- PH went up to 5.8
- [1700]: Checked nutrients.
--- PH: 5.9
--- Solution strength: 202 PPM
--- Added 4ml of Voodoo Juice
--- Added 4ml of B-52
--- PH after adding more nutes: 5.9
--- Solution strength after adding more nutes: 238 PPM
- [2130]: Decided to make a new foliar spray to address the continued yellowing.
--- Started with 500ml of distilled water.
--- Added 3 drops of CaliMagic
--- Added 3 drops of Sensi Grow A
--- Added 3 drops of Sensi Grow B
--- Added 3 drops of B-52
--- Added 1 drop of Superthrive
--- Solution strength: 164 PPM
--- PH was at 5.9 and did not adjust.
--- Gave her one spray.
--- Also sprayed the surrounding hydroton.
[END OF WEEK 01]

Likes
37
Share

@DogDoctorOfficial
Follow
Cosmic Noodles Auto — Final Strain Review
14 Weeks From Seed To Harvest — 12/12 From Seed
What a ride this one has been.
Our Cosmic Noodles Auto officially comes to an end after 14 weeks from seed to harvest, grown fully under a 12/12 light cycle from day one, side by side with photoperiods and other autoflower genetics inside the 8x8 tent — no special treatment, no isolated environment, no extended light schedules.
And honestly?
She absolutely crushed expectations.
This entire run was another reminder that autoflowers do not necessarily need 18/6 or 24/0 to produce beautiful flowers and respectable yields. With proper environment, stable feeding, patience, and healthy roots, they can still thrive and deliver excellent results even under a no-veg approach like this one.
We started this project with three plants. One of them unfortunately became part of an overwatering experiment that eventually led to losing the plant around early-to-mid flower. While painful, it became an important educational moment. We documented the process honestly so growers could learn from it — what overwatering looks like, how roots respond, and what to avoid. If anyone is interested, those reports are still available further back in the diary.
The remaining two plants, however, grew with very little resistance. Easygoing, vigorous, resilient, and surprisingly adaptable considering the mixed environment and unconventional schedule.
And in the end?
372.1 grams dry from the two harvested plants.
For autoflowers grown under 12/12 from seed, mixed together with photoperiods, we are genuinely very happy with these numbers.
But beyond numbers, what truly stood out was the quality.
⸻
Drying Process
After harvest, the plants were dried whole for approximately 10 days.
The environment stayed around:
* ~20°C
* ~60% RH
During the first couple of days, humidity was intentionally kept closer to ~45% to help remove the initial excess surface moisture from the flowers before stabilizing the drying curve more gently afterward.
The slow dry helped preserve aroma, resin texture, and overall flower integrity beautifully.
And the smell coming from the drying room… incredible.
⸻
Hand Trimming — Slow, Sticky & Worth It
Once drying was complete, every flower was separated and hand-trimmed carefully using the Zamnesia scissors together with the Trim Bin setup.
Hand trimming takes time. A lot of time.
But it also allows a level of precision and care that machine trimming simply cannot replicate. Every bud gets individual attention. Resin heads stay more protected. Structure remains more natural. And honestly, it becomes part of the ritual itself.
Our fingers were absolutely coated in resin by the end of it.
Sticky gloves. Sticky scissors. Sticky everything.
The Trim Bin itself collected a beautiful layer of golden dry sift during the process, and naturally, none of that went to waste. Everything was collected carefully and stored cold for future enjoyment.
Even the smallest parts of the harvest deserve respect.
⸻
Curing — The Part Many People Rush
After trimming, the flowers were placed into Grove Bags for curing.
For larger harvests especially, these bags are honestly an amazing tool. The TerpLoc technology helps maintain the internal humidity in the ideal curing range of approximately 58–62%, reducing the need for constant burping while helping protect the flowers from excessive moisture swings.
This matters because curing is not simply “storing weed.”
Curing is the process where the flowers slowly stabilize and mature internally:
* chlorophyll continues breaking down
* harshness reduces
* aromas become cleaner and deeper
* terpenes settle and express themselves better
* smoke quality improves significantly
This is why we usually prefer allowing at least one month of curing minimum, while many flowers continue improving for two or even three months depending on the cultivar and storage conditions.
Patience changes the experience dramatically.
And Cosmic Noodles definitely rewarded patience.
⸻
Aroma & Smoke
Even straight off the trim, the first smoke test was already extremely enjoyable.
The dominant profile came through as:
* citrus
* floral notes
* earthy depth
* creamy herbal background
As curing progressed, the profile did not change dramatically — it simply became more refined, cleaner, smoother, and more layered.
The smoke itself leans toward the relaxing side. Comfortable, calming, peaceful. Not a “race your brain” type of cultivar, but more something to slow down with and enjoy properly.
A dedicated smoke review will eventually come separately, but first impressions are honestly fantastic.
⸻
The Final Flowers
The cured flowers developed beautifully over time.
Dense but still natural. Resin-rich without looking artificially swollen. Strong aroma retention. Sticky interiors. Frosty surfaces. And some truly beautiful structure throughout the harvest.
We are also sharing photos of the cured flowers after roughly one and a half months of curing so people can see how the flowers evolved after resting properly.
Because sometimes the real magic happens after harvest.
⸻
Final Thoughts
Cosmic Noodles Auto turned out to be:
* easy to grow
* adaptable
* resilient
* productive
* aromatic
* enjoyable from start to finish
And most importantly:
fun.
No drama. No impossible feeding requirements. No extreme sensitivity. Just a solid cultivar capable of producing beautiful medicine even under unconventional conditions like 12/12 from seed.
For us, this one easily earns:
⭐ 10/10 ⭐
⸻
Thank You
Huge thanks to everybody involved in this journey:
* the breeders and genetics teams
* the companies providing gear and support
* the platforms that allow us to document these grows
* the communities following along
* the OG followers who have been here since the beginning
* the new people just discovering the diary now
* the supporters
* the skeptics
* the silent viewers
* even the haters stopping by for five seconds
Love is still sent your way.
And of course…
special thanks to Mr. Baggy for accompanying us through the cure once again. 🍃
Because in the end, this was never only about chasing numbers.
It was about learning, documenting, improving, sharing experiences, and appreciating the process from seed to final smoke.
From grower to growers — much love. 🌱
📡 DELETED @ 1K Please stay tuned.we never quit https://www.youtube.com/@TheDogDoctorOfficial NEW 🙏 Thank you for your patience and continued support.
FOR DISCOUNT CODES AND MORE JUST FOLLOW THE LINK https://website.beacons.ai/dogdoctorofficial
📲 Don’t forget to Subscribe and follow me on Instagram and YouTube @DogDoctorOfficial for exclusive content, real-time updates, and behind-the-scenes magic. We’ve got so much more coming, including transplanting and all the amazing techniques that go along with it. You won’t want to miss it.
GrowDiaries Journal: https://growdiaries.com/grower/dogdoctorofficial
Instagram: https://www.instagram.com/dogdoctorofficial/
YouTube: https://www.youtube.com/@dogdoctorofficial Deleted by Youtube - https://www.youtube.com/@TheDogDoctorOfficial NEW
Vimeo : https://vimeo.com/dogdoctorofficial Under construction stay tuned ⸻
Explore the Gear that Powers My Grow
If you’re curious about the tech I’m using, check out these links:
🔆 Lighting & Environmental Control
• Future of Grow — Advanced LED lighting technology
https://www.futureofgrow.com/
DISCOUNT CODE: DOG20
• Lumiflora — Under-canopy LED lighting
https://lumiflorade.com/
• TrollMaster — Environmental controllers and automation gear (past collaboration)
⸻
Genetics
• Zamnesia Seeds — Genetics used in this project
https://www.zamnesia.com/
⸻
🌱 Soil, Substrates, Boosters & Root Support
• Plagron — Substrates, bio mixes, and supportive products
https://plagron.com/en/
⸻
🎒 Storage, Curing & Preservation
• Grove Bags — Curing and storage solutions
https://grovebags.com/
⸻
📸 Photography Equipment & Tools
(Not sponsors, but part of my creative toolkit)
• Sony A6700
• Sony full-frame macro lens + few more
• Stacking photography workflow - learning
• iPhone (for behind-the-scenes shots)
We’ve got much more coming as we move through the grow cycles. Trust me, you won’t want to miss the next steps, let’s push the boundaries of indoor horticulture together!
As always, this is shared for educational purposes, aiming to spread understanding and appreciation for this plant. Let’s celebrate it responsibly and continue to learn and grow together.
With true love comes happiness. Always believe in yourself, and always do things expecting nothing and with an open heart. Be a giver, and the universe will give back in ways you could never imagine.
💚 Growers love to all 💚
📸 P.S. – The Eye Behind the Lens
All photos in this diary (for now — except for the ones showing the camera, which I took with an iPhone) are taken with a Sony A6700 paired with a Sony full-frame macro lens and a few more.
Photography is part of the story — it’s how we share the fine textures, the glow, and the quiet details that words can’t always capture.
I’ve also started experimenting with photo stacking — a technique where multiple images, each taken at a slightly different focus point, are layered together to create one perfectly sharp image from front to back.
It’s not digital enhancement or AI; it’s pure photography — a way to reveal the plant’s beauty in microscopic depth, from trichome to petal.
You’ll even see a few shots of "ghost me" capturing the shots — camera, lens, setup — because every grow deserves not just to be cultivated, but documented like art.
FOR DISCOUNT CODES AND MORE JUST FOLLOW THE LINK https://website.beacons.ai/dogdoctorofficial
NEW DISCORD - Official Server Invite Link : https://discord.gg/ksjAkA5T74


Likes
18
Share


@potcommunication
Follow
Florganics is a living soil starting fertiliser
the earth is this time plagron light mix
the lamp is at the start at 25 watts and 20cm above canopy
i will start to remove water from the system by placeing a spongecloth on the waterslide
i think the earth is a bit on the wet side
Also want to add nutrients at some point and fresh nematodes to make sure i dont get the damn flies again
i move the controller to the other side to make sure the sensor for temp and humidity is close to the plants
I had to change the soil mid week as it was too hot. It was made from last year's FLO Florganics and too bad...
It switched to biotabs NL
And put ZK 1 and ZK 2 in the fridgegrow system. I removed ZK 3...
WHATEVER
FLO Florganics is actually a great product and as soon as it is available again we will use it again...
There was trouble with the factory and Flo learnt a lot. Now the fertilizer gets tested in and independent lab....
END of week all looks great the plants are growing the one that had too many nutirents for a while is now ... bigger of course
Likes
1
Share

@rommyu
Follow
Lots of issues at the moment, issues with not knowing if I have a deficiency or if the plant is progressing along. Yellowing leaves - should I let them falls off? should i remove them to prevent their getting infected and infecting others?.
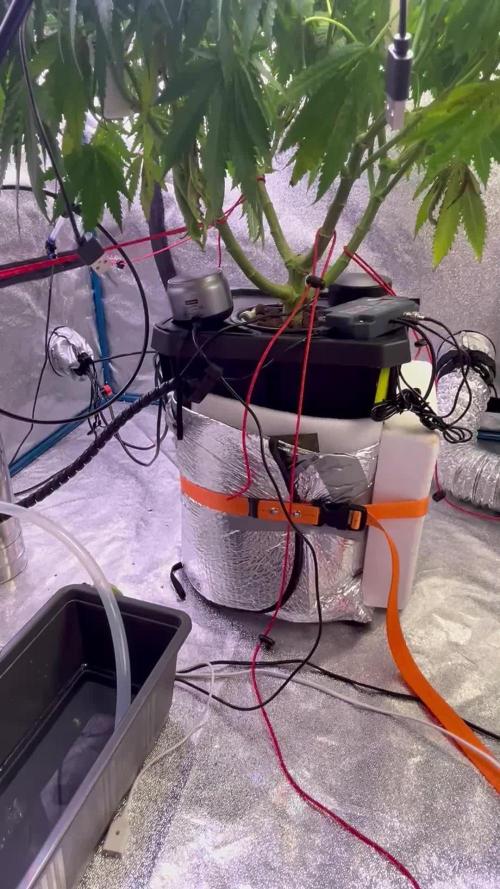
Outside temp is around 30-32 degrees making my ice pack on the pot side solution insufficient to keeping the temperature stable. Lots of tucking and the canopy is reaching 1m2 and the roots are so massive they fill the bucket completely (15L).
They smell fresh and It feels alive, the smell the energy coming off the microbes, beneficial bacteria and mycorrhizza, like smelling a flowing river teeming with life.
I didnt train the stems properly (i wanted more horizontality).. Which is causing the issues I have now. But in the old tent (which was 2x2 feet 60cmx60cm) they would touched the wall and created other issues, I hadnt decided yet where i wanted to put it next (120x240cm or 60x120cm).
Im learning alot about electrical conductivity (ec) and also about how my plant responds to concentration of fertilizers and helpers as suggested by the manufacturers recipe.
I have branches in the front that are not growing to the ideal height, im just tucking and tucking the others hoping they catch up.
also the light ppfd is up to 1000. and the distance is about 250cm.
Im hoping to get at least 350grams of dry bud, and if im lucky maybe even 500!.
I plan to do the same exact grow again, with the same breed (not a clone unfortunately). Hopefully I can increase the yield as well as any factors i deem needing improvement (less electricity, optimal percentage of fertilizer, less fluctuation in vpd).
in short: lots to learn! but not enough buffer!
