




Likes
47
Share


@Lady_NugWitch
Follow
Topped these girls and repotted into final resting places. Lol. Happy growing!!

Processing
Likes
11
Share


@ValdivianGrower
Follow
Día 39, sigo con el problema de fertilización, aún no trabajo en ello. Puse un sistema de generación de CO2 para apoyar la floración.


Likes
15
Share


@PiusWaxis
Follow
Here we are almost at the end of this incredible journey, the tenth week of flowering is over, the growth and progress of my plant shows no signs of slowing down. Every day brings new surprises and advancements that continue to amaze me.
The commitment to providing high-level care with Plagron's premium nutrients has proven instrumental in maintaining the plant's exceptional health and vigor.
The results speak for themselves, as the plant continues to flower and show robust development. 💪🌿✨
The buds have expanded further in size and density, yielding under their weight, and displaying an eye-catching layer of resin that highlights the vitality and overall well-being of the plant.
It's truly a sight to witness and a testament to the benefits of using high-quality nutrients throughout the growing process.
The TrollMaster "TENT-X" environmental control system remains an indispensable component of my grow setup, ensuring that the grow room maintains the optimal balance between temperature and humidity levels necessary for plants to thrive.
The system's precision control capabilities remain critical in creating an environment conducive to optimal plant growth. 😎💪
The 240W MEDIC GROW MINI-SUN 2 LED light continues to provide stellar lighting conditions, providing plants with a tailored spectrum that meets their specific growing needs. By carefully monitoring temperature, humidity and VPD data via control system graphs, I can make precise adjustments to optimize growing conditions and maximize plant health and productivity. 😍
I'm excited to share a video that captures this week's temperature, humidity, and VPD trends, offering a look at how these advanced technologies work together seamlessly to create the perfect growing environment for plants. It is truly amazing to see how these tools work in harmony to support the growth path of plants.
As each week unfolds, I am filled with anticipation for the new discoveries and obstacles that await us in the grow room.
With the unwavering support of Plagron nutrients, the continued reliability of the TrollMaster control system, and the exceptional lighting provided by MEDIC GROW LED, I am confident that the next week, as well as the last, will usher in further progress and triumphs in this cultivation journey.
Thank you for joining me on this exciting adventure of growing and exploring the wonders of growing plants! 💪👽🚀

Likes
1
Share


@Lazuli
Follow
I use a new EC meter wich shows higher numbers, so now my water shows 1500ppm with 1.2 grams/L drypart and 1ml/L calmag, the thing is if the runoff is about the same as what goes in yr all good.
Likes
15
Share


@SweetheartOG
Follow
The girls are fully in flower this week which of course is a GREAT sight to see when opening the tent. The smell in the tent is so sweet and fruity it's already making your mouth water!! So this week I feed the girls with a little of the living soil veg so they are still getting a helping hand. They were also given the living soil bloom and some barley which I will admit is the first time using it but so far me plus the girls are very much enjoying!! I have done the necessary light de-foliating on all 4 girls over the past 2 weeks and more LST. Happy toking guys and girls!! Will keep you all posted with more videos through the week so please keep checking back 🙂
Likes
9
Share


@SamDo
Follow
Week twenty-two is officially done on the Pineapple Upside Down Cake.
This week is a turning point, marking the end of vegetative growth and the start of the flowering transition.
I decided to switch the light cycle to twelve-twelve.
Initially, the plan was to wait for a stronger recovery, but the reality is simple: it wasn’t happening.
The plant was given roughly three full weeks to acclimate after stress, and the response stayed limited.
Rather than staying stuck in an endless waiting phase, I chose to move forward.
This means accepting that flowering may not be extremely vigorous or high-energy.
That’s fine. This run is also about observation, learning, and adapting.
Flowering was initiated gently, at around three hundred PPFD, to avoid adding more stress.
At the same time, I switched the nutrient program to Athena bloom and adjusted the recipe accordingly.
The plant has now been under flowering conditions for about twenty-four to forty-eight hours.
Over the coming week, I expect to see the first signs of stretch.
It’s a bit frustrating, because structurally the plant was doing really well.
The LST work created a clean, balanced canopy, and the potential was clearly there.
Now the focus is simple.
No rushing.
No over-correction.
Just letting the plant transition naturally into flower and observing how she reacts.
Next week will officially mark the first true week of flowering.
From there, we’ll reassess posture, stretch, and overall vitality.
For now, the plant is left alone to settle into its new rhythm.
That’s it for week twenty-two.
See you next week.

Likes
12
Share


@Victusaa
Follow
All 3 plants get transplanted into their new pots (12+12+7.5), applied topping technique to all of them.
On the transplantation day, they were looking unhappy with their leaves drooping but day by day they're getting better.
I've positioned the pots to get approximately 750-820 μmol per plant.
Likes
38
Share


@Cariboo_OG
Follow
Utopia Haze is a rare heavily sativa dominant hybrid (90% sativa/10% indica) strain created through back crossing Brazilian Sativa strains. This tasty little bud took home 1st Place for Best Sativa in the 2008 High Times’ Cannabis Cup and for good reason – with its potent 18-22% average THC level and long lasting cerebral effects, Utopia Haze is one powerhouse smoke. The Utopia Haze high comes on soon after you finish your first toke, hitting you with a strong cerebral lift that infuses you with a sense of hazy relaxation.
Type: Feminised/Photoperiod
Cultivation: Indoor/Outdoor
Flowering Time (days): 70-75
Indoor Yield (g): Up to 650
Feminised Outdoor Harvest Month: October
Feminised Outdoor Harvest Month Week: 3rd-4th week
Aroma: Citrus, Woody, Pungent, Mint
Effect: Cerebral Lift, Hazy Relaxation, Sleepy
Welcome Everyone to the Final Entry of my Utopia Haze Grow !
There is so much to discuss ! I have been extremely busy as of late trying to get this Harvest together, but i am happy to have it here for you now !
I Seriously under estimated the amount of time, help from others, and my own necessary skills to pull this off.. and i still kind of screwed it up lol !
But its worth noting i have never actually done this before and trying to document it during....was extremely hard.
It is next to impossible to work an iPhone with rubber gloves on !
First I want to discuss everything step by step so before you jump straight into the comments on how the end product is so small in "quantity"
Rest assured i am happy with its"quality"...and thats all that matters to me because Life is a journey not a destination! and i have learned so much from this grow that I couldn't be any happy even if i messed some things up :)
But at the very least I hope you read through this entry in its entirety with an open mind and focus more on the process, rather than just the outcome!
I ran out of Ice & i was only able to wash three times..(normally I've heard you should go sometimes 5-6 washes)
Preparation is Key & things will be much better next round :)
Photos 1-22
These are pretty self explanatory but for those of you just tuning in now.. this is what happens to a very happy plant when you don't have the necessary tools to monitor key components of growing cannabis.. Ph, as well as EC levels play a very key role in the outcome of your grow lol that being said I was just able to save this plant by purchasing both tools but that doesn't mean the plant didn't suffer because of the prior events.. This was a Huge reason behind me choosing to turn this harvest into what i would consider
"Solventless Hash Rosin" from "Ice water extracted Bubble hash".
Pictures 23
The idea here is the process of using "fresh Frozen Cannabis" this has been discussed many a time online on such sites as instagram and here on grow diaries as well.. I personally have Never tried the process so i decided to try it out and make a judgement for myself..
Video 24
The Cannabis has now been in the freezer for 72 hours making it very well frozen.. as you can tell i struggled getting it all into the 25u Screen Wash Bag. One thing of note i would do differently is i will de-stem my next batch as i also believe this played a part in the amount of plant matter that escaped through the sieves.
Photo/Video's 25-28
The idea here is "ice water Seiving" & especially with the bags that I am using here that are only have screen material on the bottom portion of the bag it is very important to have spaces in-between the screens to allow the water to pass directly through the screens into the bottom bucket with the least amount of resistance.. because the hash is so extremely temperature dependant if it gets warm on the side of the bag.. it will stick there and not make it to the bottom to become use able product..
29
You do not need to use as much Ice as i used here lol... the idea is to keep everything very cold..i certainly achieved that but at the sacrifice of using so much that i ended up grinding product and producing "contaminants" but in the end they are just plant matter that i would be smoking when i rolled up my joint either way so.. I'm not super disappointed..
But it should be noted that what you want to achieve here is a Layering effect where you have the wash bag between two small layers of ice while the "water current" washes the Trichomes away allowing them to be separated by the screens setup below :)
Before Starting the machine you should allow some time (i.e.;10-12minutes pre soak to allow the product to become saturated) before the first cycle.
By video 32 I have just ran out of ice lol..
Video 33-34
Here I have a tip for you.. to separate the screens that you sieve through.. cut 5 gallon buckets to stretch them across nice and tight.. it'll make scooping your Bubble that much easier ! i learned this from the many "Frenchy" videos I have watched :)
Picture 35
Here in lays the problem for most people.. drying your hash without loosing vast amounts of "Terpenes" whilst also stay ever vigilant against mold !
Thanks to all those videos I've watched on youtube.. id like to think this was one of my most successful parts of this process..
Things to Note; Terpenes start to seriously evaporate at temperatures 68F or 20C
you need to stay as cold as possible whilst bringing the Relative Humidity in the space down into the 40-30% to stay away from that nasty mold !
I used my cold storage room in the basement.. with a dehumidifier running to keep the space at 45% RH & staying at a constant 15c.
All while spreading the hash as thin as possible across parchment paper, on top of the white screens with a fan moving air across both sides of the paper.
Pictures 36-38
These are some macros i took in the middle of my drying session I fell in love with the colour.
Yes i know the black spots are plant material but they will get caught when i bag the hash & squish the oil out.
Thing to Note; at this stage it is important to ensure you 'micro plane" the hash down as fine as you can whilst staying weary of the temperature... any "chunks" will hold pockets of moisture.. that lead to potential problems..ie; mold ...
Picture/Video 39-41
Successfully planed bubble hash ready to be bagged and Squished !
Picture 42
Ive decided to follow Pedro.. from Pedros Grow Room and double bag to be on the safe side so i don't have any blow outs.
So thats One 25u bag inside one 160u bag ! :)
Pictures 43
This is almost 3 grams of the bubble hash from above, already melting in the bag.. this is where i ran into trouble again lol things started getting to warm in the house and i was only able to get one of the three squish's i did on video :( things started getting sticky.
Picture 44
This is basically just a photo of the equipment I'm using; 3x5 LowTemp Cage in the frame I built myself, with a 20Ton bottle jack.
Something to note here is this is an older Lowtemp model with only a single heating zone which is which i have it closed here heating Both sides of the press :)
As well as the importance of having adequate pressure on your plates.. my rig is very overkill for the size of hash bags..lol
Video 45
Here is the lovely press video.. its didn't quite work the way i wanted either lol my directional folding wasn't quite tight enough for a big "drip" :)
&the Press was set to 65°c
Photo's 46-50 are pretty self explanatory :) I had a blow out.. but still managed to pull an 80% return from the hash once squished...& yes it tasted amazing :)
Was it worth it in the end... that could be debated.. for some..i understand..its not your thing, but for those of us that are interested in making our own concentrates.. free from Solvents...
I wouldn't make it any other way :)
If even ONE of you reading this diary finds it helpful to reference for ANYTHING.....even if its "what not to do" ill consider it a success !
Thanks again for tagging along on this garden adventure.. its been one heck of a journey !
Much Love from B.C. Canada,
Until Next time,
Cariboo
Likes
3
Share


@Skinnytalls420
Follow
So this was one of the easiest autos I have grown she’s short and fat has an amazing smell and coverd in trichomes I can’t wait to try it!!!

Likes
6
Share


@Izzydawizzy
Follow
Supper cropped because plant got taller than expected. Was too close to light. Tallest branches around 3 feet tall. I defoliated 2 weeks into flower. I also took clones today. Sweet gassy smell. Have light on 75% intensity since it is so close. Depending how plants respond I may just keep the intensity there.

Likes
4
Share


@Barcelona_Farmers710
Follow
Simplemente una de las mejores Super Silver Haze o muy parecido que probado! Una pasada de sabores cítricos y terroso a la vez...hay que decir que sabor a Lemon predomina! Una gozada Farmers.

Likes
5
Share

@CannaArchive
Follow
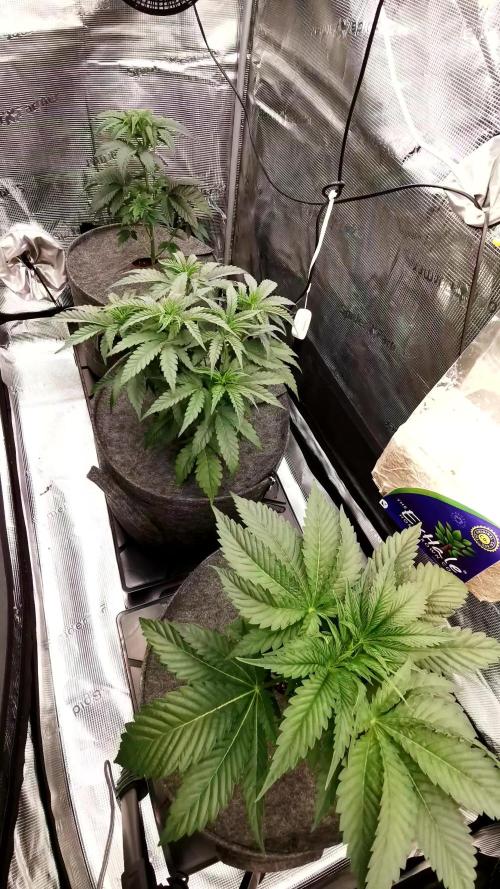
This week both plants entered a strong vertical expansion phase 🌿
Internodal spacing increased noticeably, showing a clear push in height rather than lateral stacking.
• Height approx. 30 cm
• 4+ developed nodes expanding rapidly
• No training applied (intentional canopy synchronization with Jelly Donutz)
Pheno #2 is clearly separating itself 👀
The stem thickness is impressive, (roughly the size of a thumb or a Clipper lighter) nearly twice as thick as the other plant.
Leaf size is the largest seen so far in this run, with very broad fan leaves and strong biomass production 💪
Lower damaged leaves from the transplant phase were removed. Canopy now fully green and healthy 💚
Light intensity increased to ~600 PPFD under 18/6 ☀️ IR schedule remains active.
Internodal spacing suggests vertical drive, likely influenced by genetics + IR interaction.
Leaf posture shows light praying but not aggressive, indicating comfort without excessive light stress.
Watering every 2–3 days based on pot weight 💧
Pheno #2 shows slightly higher demand, drying the pot roughly half a day earlier than its sister, a strong indicator of increased root and transpiration activity.
Feeding this week:
• 1x Orgatrex
• 1x Greenhouse Bio Enhancer
• Otherwise RO + CalMag (switching to BioBizz CalMag without nitrogen moving forward)
Environment stable, structure strong, momentum clearly increasing 🚀
Overall: strong vegetative drive, clear pheno divergence, and rising growth energy going into the pre-flip window
Likes
5
Share

@MetallicaDave
Follow
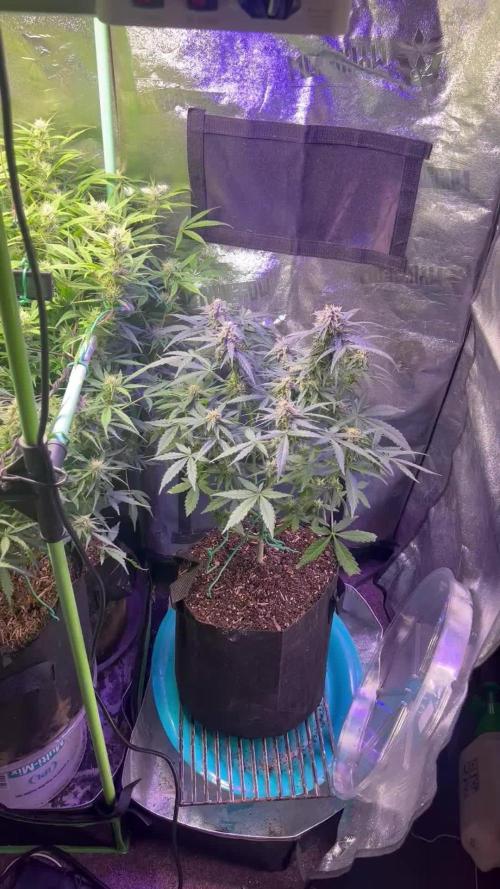
Starting week 9 on 3 plants in the tent week 8 for 1 week 7 for 3 more. Today my 3 youngest got repotted in great recycled soil new amendments mi teals and Carfully cut a way the 1 gallon fabrics added Mychro all along the roots and bottom pots, I put them tin 3 gallon Potts and a 5 gallon pot all fabric I extended my grow by completely opening the tent sides and added a 75 and 50 watts of light
The lights are 16 inches above the stretched canopy.i had a slight PH downshift so I purchased PH up and I’m back to 6.4 soil. Oh I was doing 800 and 400 ppm into all pots all are in flower. I always water to 10% runoff and I use a Turkey baster and DEWALT ShopVac to suck up the extra water, 333 is the pppm at the run off. I’ll try and do better pictures I’m wanting to CHOP on day 85 (21 days to go ). The Net is great took some leaves off watching it all come together PH is making my leaves soft very green and healthy looking. I moved branches for better light exposure clippped lower buds and skinny branches ( Larf). Smoke em if you got em 🤘🏻
Likes
76
Share


Likes
6
Share


@1Prinz
Follow
New week started with a pseudo LST for the Frosted Guave twins: while adding soil Ivebent them away from each other so the can get more light, because the leaves of the big one started to cover the small one.
08.06 watering with 300 ml each.
Likes
13
Share

@Chubbs
Follow
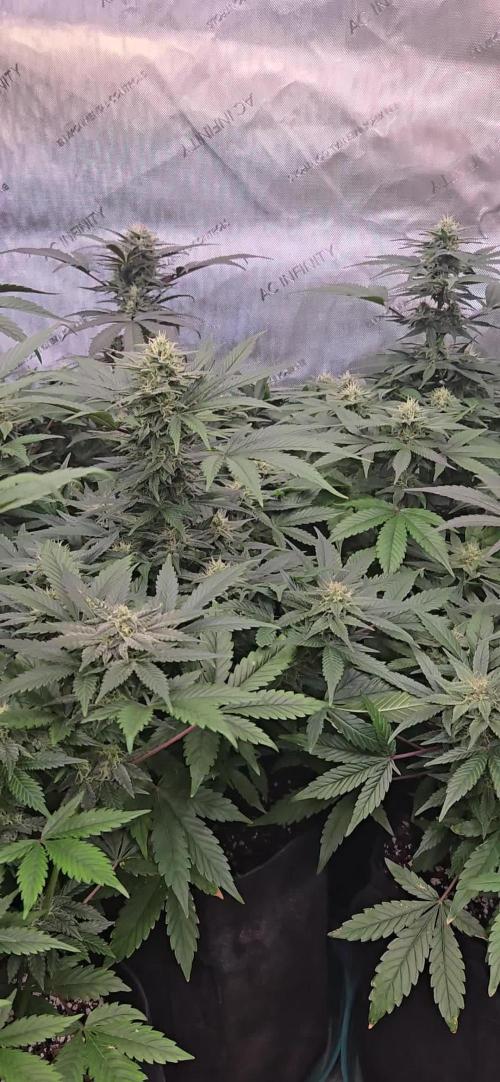
What up Fam, weekly updates on these lovely ladies. This week it's been warm and such a bad time for my AC to go out but overall temps been in the mid it's inside the tent and the plants seem to not mind at all. They're still getting fed 16oz daily. I'd say from the looks, maybe 2-3 more weeks until harvest. Happy Growing.
Likes
22
Share


@CanarianGrow92
Follow
Another week for the persian pie 😁 so far so good, only 2 and half weeks left, we gave some candy and for the rest only water! Hopefully things continue to go good! She showed a lot of thc so I'm sure it's going to be a strong smoke

Likes
15
Share


@UberSmokez
Follow
After 24 hours in the large fabric pots alot of improvement from a few errors in the germination stage they were streching for light so i had to rush the seedlings to the tent and get it all set up u will see the difference from when i put in pots to now