Likes
37
Share
@Roberts
Follow
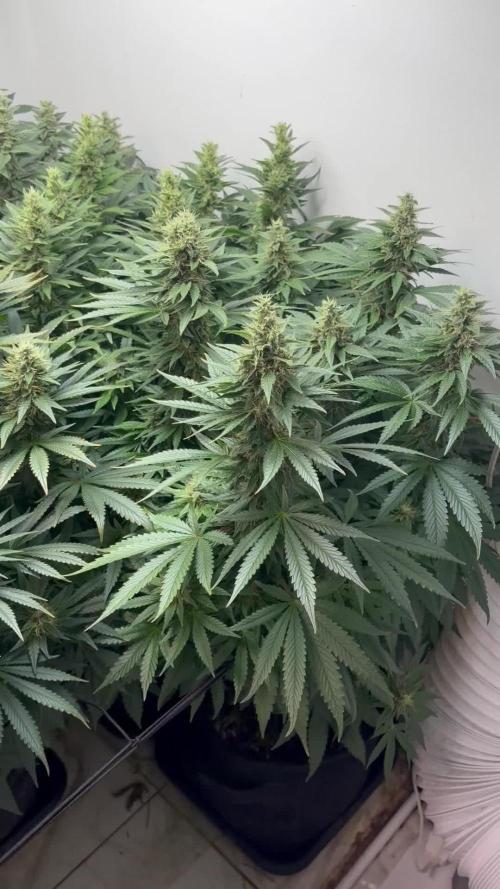
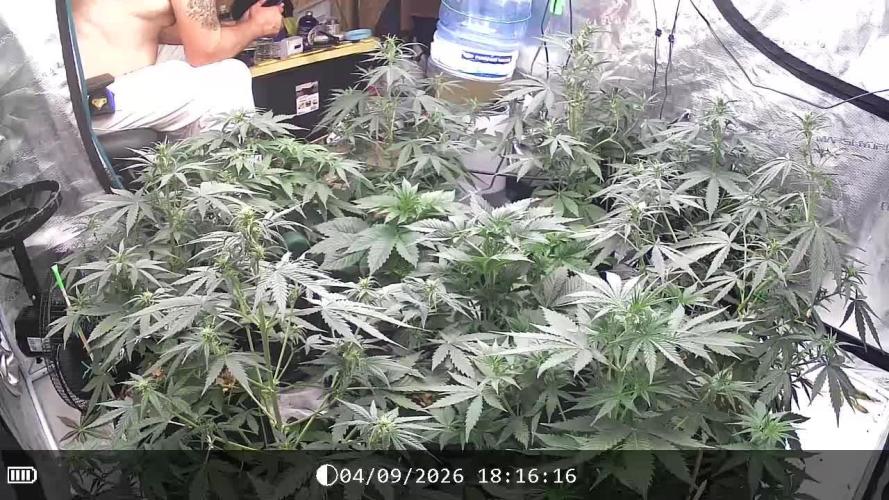
Mandarin XL auto is making progress. She got a solution change yesterday, and is just getting acclimated to it. She also got some lst and defoliation today. I will likely neem oil spray her again to ensure I got any pest that have been about. I have not seen any on any plants. It's better safe before sorry going into flowering. Thank you Medic Grow, Gen1:11, and Ganja Farmer. 🤜🏻🤛🏻🌱🌱🌱 Thank you grow diaries community for the 👇likes👇, follows, comments, and subscriptions on my YouTube channel👇. ❄️🌱🍻 Happy Growing 🌱🌱🌱 https://youtube.com/channel/UCAhN7yRzWLpcaRHhMIQ7X4g
Likes
36
Share
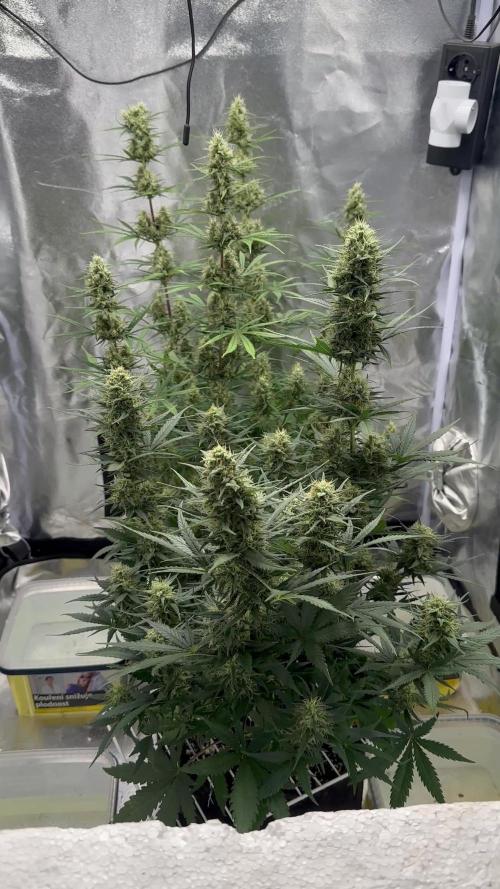
Started the flush yesterday, the Zkittlez is pretty much ready to harvest at only 42 days of flower, now just waiting the critical to finish. Both smell amazingly good The intensity from the led's made the critical yellow in some tops, and got worse since i flush them yesterday so I raised up the lights just a bit.
Processing
Likes
23
Share
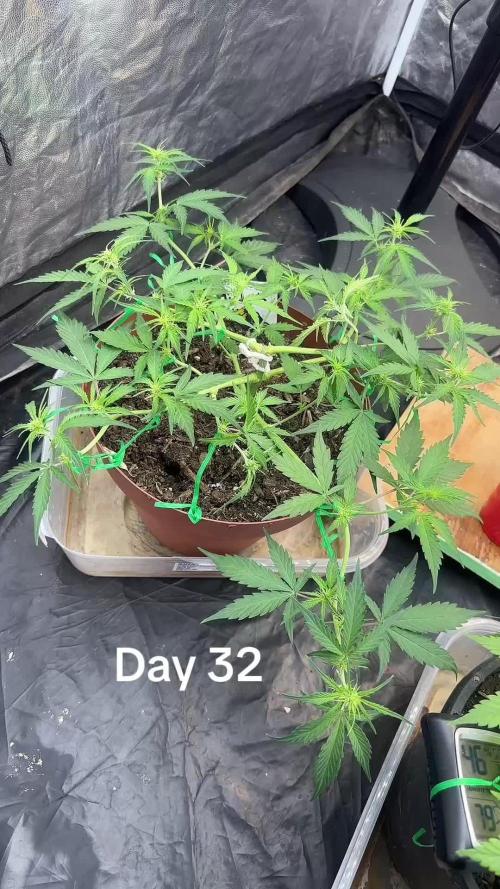
Off to the start of week 6 !! These ladies are vegging just fine and they are gaining alot of side branching !! I'm very excited to be start giving the LST training but for now its time to let them recover from the topping ! I've increase the water per feeding to 1/2 L they don't seem to mind I've also invested into a watering can to make my life easier as well as softer water delivery for the root system :) preventing damages . I find Lagertha to be abit shorter but shes growing! Other then that stay tuned ladies and gents the shows just starting ! Thanks to everyone who stops into the diary to check out the progress on the ladies ! The support from GD is great and I thank you for it ! Happy Growing! -V.G Day#33V Ladies are responding well to the water increase they are also almost done healing up , the side branching has really picked up ! Day#1 Since watering 1/2L at 320PPM ( Sensi Cal Only ) Day#34V Picutres N/A. Ladies are recovering nicely from the topping that took place . Won't be long till they are in full swing . Really bushing out ! Day#2 Since watering 1/2L at 320 PPM Day#35V Picutres N/A. Ladies are really starting to bush up nicely ! Gonna have to train them really good cause they like to stay tight ! Day#3 Since Watering 1/2L at 320PPM Day#36V Pictures N/A. Watered ladies 1.5 cups at 120 PPM ( B52 Only ) . Can't wait to start training these fine ladies !! Can't rush good stuff though ! Day#37V Pictures N/A. Responding well to watering , almost ready to start training them ladies !!!!! Day#1 Since watering 1.5 cups at 120PPM Day#38V Pictures N/A. Ladies are starting to grow grow grow ! Day#2 Since watering 1.5 cups at 120PPM Day#39V Pictures N/A. Going to train ladies tomorrow !!! Day#3 Since watering 1.5 cups at 120PPM Recap : Things went well this week for the ladies . Sorry I dint post much in the way of pictures I had a death in the family and we are also preparing for the holidays so I been crazy busy ! The ladies are growing slowly but surely we will be looking to train them as of next week work on getting that canopy nice and even before sending these ladies into flower !
Likes
20
Share
@Oldwied
Follow
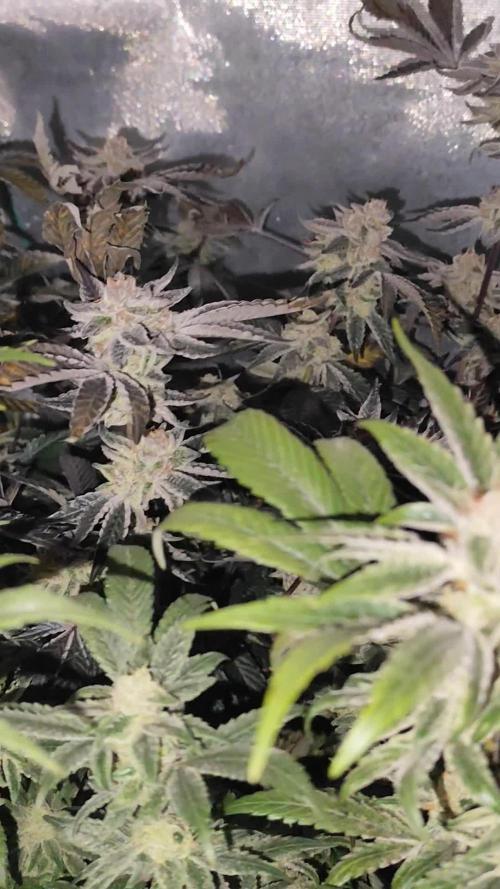
I added 10mL LAB (lacto acid bacteria, diy with rice water and milk) per liter of irrigation water, twice a week. I installed a fan under the canopy to prevent mold. At the stage when the buds become denser. The calcium and magnesium deficiency seems to be under control. The affected leaves look terrible, but the leaves without the deficiency have turned dark green again. Light Power: 100% Day 87 Flower #35 Photoshooting
Likes
38
Share
01/04/2022- Hello and welcome all been away on some family matter. So today was the last day this girl got watered and will also be the last day she got light as well, she will be cut down Friday morning. The smell has gotten a lot more stronger since flush was started last week Wednesday. Will update before I chop her down.
Likes
39
Share
smelly yelly holly sticky bolly trully fully potenty
Likes
26
Share
First week of the boom season, a lot pistils are showing up, smells good and strongest. The next week I will add a little more nutrients of advanced nutrients. Big bud, bud candy, and the last week I will add a Overdrive.
Likes
Comments
Share
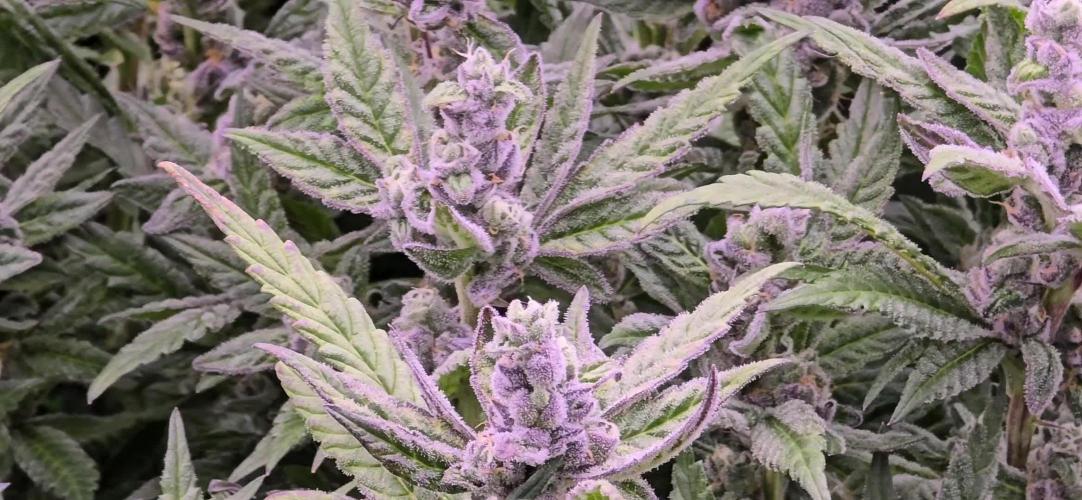
The seed was germinated in the @Kannabia sproutly Smart germinator 3weeks ago and then potted up a week later and now on the @Plagron coco a&b sugar royal and power roots
Likes
77
Share
@TOTEM
Follow
Oh my. Last week I was talking about N deficiency, but in reality she was perfect! The real big problem was my pH pen, that was broken, and when I thought I was giving a pH 6.5 solution to my plants, in reality the pH was a lot lower than that (maybe pH 4). That's why her leaves all started getting yellow! Runoff PPMs right now, after the feed, are 3100 lol. I decided not to flush her, but I'll give just water until that value decreases a little. Her flowers are bigger, and smell more and more, day after day, of fruit. I LOVE HER. But what a pity for those burned tips! I also have some updates on the clones. One of them created 1 single root, haha, but YAY, I'm so happy about it. That clone was fast! The other two are still there, but my fingers are crossed. There's a video of the clone after all the photos.
Likes
68
Share
@Roberts
Follow
Auto Northern Dragon Fuel is finishing up her bulking. Everything is looking good. She has a strong diesel smell with sour notes. Just letting her finish up. Thank you Medic Grow, and Super Sativa Seed Club. 🤜🏻🤛🏻🌱❄️🌱 Thank you grow diaries community for the 👇likes👇, follows, comments, and subscriptions on my YouTube channel👇. ❄️🌱🍻 Happy Growing 🌱🌱🌱 https://youtube.com/channel/UCAhN7yRzWLpcaRHhMIQ7X4g
Likes
2
Share
@Hou_Stone
Follow
Mai 17 I did some lollipoping on mai 14 Last week before go in flowering !
Likes
Comments
Share

Day 15 Update : Decided to grab a tape measure to check canopy heights on a whim and discovered that my light was hanging 35 inches from “Cellie” Cereal and Milk . Wowzers 👀! So I raised the plant to be 26 inches from the light that I also dimmed down to about 40% . It works out that I can try to get the most out of the end of flower stretch for the older gal who shall no more than be mentioned for reference to accentuate the great glorious glamorous “Cellie”. The humidity plummeted after I did a major defoliation of the older gals so I adjusted the airflow rate of the lower in-line fan and the upper inline exhaust fan with the carbon filter . I lowered them both to the lowest setting & the humidity returned to “normal” Let me explain my reasonings/thinking behind my adjustments which are experimental at BEST. It’s worth also mentioning without having to preset a single thing on my 70pint Dehumidifier located inside this tent it is legitimately only plugged into my PRESET humidistat controller which is set to 50%-46% RH WITH an alarm on highs of 55% and lows of 43% . In real life what this translates to is when this humidity controller triggers the dehumidifier ON @50%RH immediately the fan of the Dehumidifier begins running. However this does not help the rising humidity that is occurring (it will reach 55%-60.2%RH ). Given a fixed amount of time , the condenser(atleast what it sounds like . .again, it could be anything) turns on . It is when this “condenser” “sounding” component begins working that the humidity IMMEDIATELY plummets down to my low point of 46% So to make a long story short the humidity gets vacuumed to 46%RH & the dehumidifier turns off, bc of the PURPOSEFUL EXPERIMENTAL TWEAKING making all air exchange fans low leveled the humidity slowly but steadily rises to 50%RH then the dehumidifier is triggered on but only the fans initially and the humidity eventually reaches 55%RH-60.2%RH & then the humidity gets all its hair snatched out by the dehumidifier and drops back down to 46%RH. 😮‍💨😮‍💨😮‍💨😮‍💨 with all that said of anybody was even interested per my tents leaf canopy height temperature average good to great OR LITE GREEN TO DARK GREEN VPD for my temperature begins @ 60 & ends @ 52 which is kind of a perfect storm for OUR GIRL “CELLIE” oooooooorrrrrrrrrrr sssssssoooooo I think/hope . She still hasn’t needed watering since being transplanted, she should now ready and willing to stretch those toes and we need the opportunities to top water that soil a few times to make those dry amendments available to her . More pics of later the week coming as we go . . Hopefully . Diligence is a practice Day #17: giving her some water today, no specific amount just until she feels the right amount of “heavy”. She was given 3 different batches of water once ph’d to 6.3 once ph’d to 6.7 one ph’d to 6.5. She’s grown an inch in 2 days. Also swapped out the smart hygrometer system to a different brand . So far it has all the capability I was looking for but I need to run 2 more experiments to know for certain it lives up to my needs and its price tag 😁 Day 18 Update: she grew an inch taller nice 👍 The smart hygrometer system has reported/experience Bluetooth failures twice already(although I don’t know exactly what that means considering I purchased this for it’s Wifi capabilities ) I didn’t think to check it whilst I was away so I cannot yet say If it meets my final expectation/need I bought a soil ph meter & it indicates “my mix” is at 3.1 ph 👀 hmm 🤔 I’m wondering if this is a must fix or can I get by .eventually she will be transplanted and at that time I can use my new digital soil ph probe to construct her new blend moving forward but I am curious is I mixed another batch at 3 something ph would it matter ? In the beginning I wasn’t ph’ing any of my watering just because I assumed my soil mixture was highly acidic because of the 70ish pecernr peat moss base . I also assumed that it would be acid fixing for the water I put in it and therefore wouldn’t need to ph it and I did just fine just giving plain old tap water when thirsty until I experience VPD issues & in an effort to pinpoint what my exact issue was and how to fix it I of course eliminated all the variables and dialed in on my ph of my feed water and now my soil so it leaves me wondering does the soil need to be relatively 6.1 ph or is the 3.1 I’m flying at alright also . I checked the other 3 currently in here getting through flower & two of them are in the 3’s for ph & one of them is 6.2(the largest of them all) how ever she was the largest of them all always and oddly enough I mixed one big batch for them and transplanted them at the same time so I get two of them having the same ph as “Cellie” but the other that is in ph heaven is an oddball Should I top her here or supercrop later hmm I need to decide my vision for this thing Day 19 Update: ponytailed her youngest internode for about 16hrs she aggressively popped out of it twice ! It didn’t even work for 24hrs when I try it again it’ll be before the internode is so strong . Also rigged up a 16in oscillating wall-fan that currently being held with 2 zip ties , 2 rubber bands , & a smidget of duct tape and MAJORITY OF FAITH keeping it in place . The biggest plus to my added circulation is that I got the 16in fan for ! A win is a win . Pics uploads will be held for the next 3 days until the end of week 3 upload . Drop a thumbs up Day 20 Update : THE FAN FELL! But no one was damaged or injured . I re-rigged it . This time with duct tape , 3 popsicle sticks , 2 heavy duty zip ties & 1 regular strength zip tie . SHES SOLID NOW 😂 I did some solid rigging this time & have videoed my handy work . Also I forgot to turn my A/C back on before leaving the house so temps and humidity skyrocketed and swung for 9 hours until I got home . The temp in the tent was 84.4 and the humidity went from 42.4 to 57.5 to 42 every three mins. Day 21 Update : SHES A PRETTY GIRL. RQS says Cereal Milk is a slightly sativa dominant hybrid but the pheno of this particular seed seems to lean more towards indica I’m not mad at it ! I’m getting more stoked to see what she can do. She still hasn’t received any additional water since day #18.
Likes
28
Share
This little girl started her journey on April 4th with germination into a water glass and finished up on June 27/20 – Day 78 from germination. She was a fun grow and was very resilient through the whole run. She spent most of her grow time in a 20/4 light schedule. She formed nice frost levels and stayed to a very nice and manageable height of roughly 20” tall without topping or bending her main stem. She was not as fussy about nutrient levels and took them well. She does like her medium on the dryer side though. Small little auto bush of OG Kush crossed with Indica genes😃 She would make a nice a plant to run while you are vegging out some photos for 6 or 8 weeks as she is not very big in size but will swell up and yield decent weight👍 She was grown in a 3 gallon fabric pot with coco coir and maybe 15% perlite. She was fed salt based nutrients……..so sorry but they are flushed out and that is what I am more comfortable with. Focus on the early growth with microbes, fungi and kelp!! She was fed the normal pattern with pH being held around the 5.4 to 5.8 range in feeding. Then as flower approached, I gave the pots a more consistent look at the runoff numbers and she was running 7.8pH coming out of her!!!!! WTF. She stayed in her pot that she was planted in and fought this issue all through the rest of her grow. The pH issues started surfacing around week 3….as we headed into flower of course. Scratching my head for weeks, I ultimately didn’t change anything other than really low pH feeding going in…….below 4 idea. For weeks she had 3.9 water going in and still getting 7.8 running off. I initially felt it was related to cheap fabric bags so I cut slits in the very bottom of the bags that stayed and tried transplanting other girls into plastic pots, which it can be fabric pot issues but I am not as convinced anymore for this run that there was an issue there, wasn’t sure about giving her Magnesium on top of Magnesium and therefore did I mess her up good on the inside early on in week 2 idea, out of options I changed back to RO water and that seems to have solved my issues……I was using tap water that was not filtered this run🤬 The pH was high so that was adjusted but with the ppm being at 185 to 200 range I chose not to buy a filter and just dechlorinated the water only. I was tired of lugging 5 gallon water bottles in and out of the basement😃 That is a difference from all other grows…..silly for not catching this by week 4! So…….back to lugging bottles in and out of the basement😂😂😂 She really started to take shape around weeks 7 and 8 and formed a beautiful little cannabis plant and grew to 20” tall and roughly 18” wide. Main focus with her was to just perform LST on side branches and let the top go…….I wanted to just let her go and see what would happen to her main cola for size and height……plus I don’t do that…….I always bend over the tops on my grows so this was a little different for myself. She grew very nice leaves and a lot of them. This pheno had a lot of leaves to her and that is fine……its not really my first choice in characteristics of a plant though..…..so much more work at trim time……Green Poison XL Auto, SWS71, was a dream to trim👍 as a comparison!! She didn’t fox tail very much she firmed up her buds towards the end. The resin production was a little slower coming out in her but by week 7/8 she was getting pretty impressive😋😋😋 White and sticky!! She smelt of woods with citrus notes…..works for me👌 There were no issues at all retaliated to pests or bugs……I threw in a couple sticky traps but there weren’t any to catch. She handled the high humidity in this run great and there were no signs of any powdery mildew👍👍👍 She is a very stable strain from Sweet Seeds! Day 63 was last feeding, flushed for almost two weeks. Rezin and Liquid Weight still given for one of the weeks but the last week was plane water. In hind-site I think I should have hit her with some Flawless Finish to help get that last bit out of her. She did feed on most of her nutrients but some of the lower leaves were still more green that I would have liked. She was cut down on day 77…..11 weeks is about what I suspect looking at her in week 7…….this was roughly 8 weeks flower time……makes sense😃 She grew for 75 days and then I decided what the heck…….she needs a hole in her stem to stress her out😃 I didn’t try breaking a branch but rather drilled a hold into the base of her stem……something new to try out. I think I will try more holes next time….max 3 I think……then I want to run a couple with cracking their stems and see if there is a difference👍 I feel more in control of a drill and its accuracy vs bending branches and they snap where they want to…….anyway it was worth a try!!!! Worst case, it made it easy to hang her as a whole plant to dry😃 This girl battled pH issues all her life and as a result the buds were not where I would have liked them. There were not fluffy…..but here were not as hard as I would like for rolling joints, so the whole girl went to concentrates She dried for 7 day as a whole plant, 2 days more in smaller branches, then 1 day curing in jars before dry ice sift. She yielded 74g of dry cured buds, 2.65 ounces. Not bad…..I don’t think her buds would have gotten a lot bigger but they certainly would have had more weight if they firmed up…..grower issue, not genetics. So…..lets make some rosin from this girl🤩 The yields on this and making her hash a perfect colour are not what this process is about…..let’s get that out of the way right away……this is about another way to enjoy and consume my cannabis for my own relaxation and medicinal needs. Taking pictures of rosin is always a challenge…..it is always dark in the pictures unless you are using a nice DSLR to let more light in. Rather than making bubble hash with water, I just used the bags to make a dry ice kief from the buds. Unfortunately I couldn’t get a block of dry ice and had to use these cubes…….don’t like these as much because there are too many surfaces beating your green plant material and your kief goes green before long when shaking. Could have done it with out ice all together…..nicer hash but lots left on the plant afterwards that way so yield is low. Used two bags in this extraction, the 220 as the bag for edibles and the 120 as the bag for pressing rosin to smoke…..dry ice hash rosin!! The yield on this from the 74g of bud was 22.4g kief. 220 bag was 12.6g and the 120 bag was 9.8g. Not great I guess but I didn’t want to keep going for 4 and 5 minutes with the bags…..these were roughly 2 minutes with the 220 being 3 minutes on the high side. You can certainly see that the 120 product is more golden in colour than the 220 but since I didn’t crazy, the 220 is still a very nice colour. Last step on this journey was then to take the kief and make our rosin. I pressed product using 37um bags with the temp set at 160 degrees. All were done the same for the most part……roughly 4 gram presses, the same temperature, and the time. The first presses were 90 to 120 seconds. If a second press was done on the pouch, then it was at the same temp but for only 40 to 50 seconds. The yield on this was just shy of 7 grams…….6.77g…..roughly 30% yield from Kief???,…..roughly 9.2% from flower???…….would have likely done better right from flower😂 😂 😂 it was fun, regardless of the yield😃 Tasty rosin!!!! Can’t beat rosin for getting the true tastes of the plants. These numbers are absolutely due to my abilities with extraction.......sure don’t judge the genetics based on my returns......she is a frosty plant and will give great returns!!!👍👍 Several pictures show that, I hope!! So that will wrap up this diary for Sweet Seeds Killer Kush Auto, SWS56. Certainly give this girl some consideration if you like OG Kush and also have space concerns in your grow. She is beautiful frosty little girl with a punch. Certainly get the usual woody and citrus notes from her rosin and she has a lasting high. She helps to get get you going and willing to finally start cleaning that corner of the room you have been avoiding…….watch out though…..distractions😃……next thing you know 40 minutes go by and you are staring at a box of DVD’s wondering what happened to CD’s…….cassette tapes (the art of the “mix tape”), 8 tracks, vinyl……ALBUM COVER ART Baby!!!!!! Then its either back for another rip, or get your crap done because the next rip leads into even less work getting done😃😃 Great job as usual @Sweet_Seeds !!! Looking forward to the next one……Cream 47 photoperiod……actually, already done germination and a new diary coming👍👍…..compare a 3 gal pot to a 5 gal pot, or a fabric vs air pot, and see what my yield differences are?? Thanks for the read and greatly appreciate the comments Growmies!!!!! Love spending time on a forum for growers to help fellow growers. Much grower love and thanks again for your time, opinions, and suggestions🙏🙏🙏 Cheers!!
Likes
13
Share
Week 10 day 64 The temperatures are still not so high as they were before but it is still 25 degrees celsius outside. ( 77 Fh). So temperatures inside are better manageable. I started again with the feed with the auto Zkittelz. Video Music: Activation URL: https://icons8.com/music/
Likes
52
Share
I'm absolutely thrilled to share my with you as I see my Cosmos F1 from Royal Queen Seeds enter the first week of flowering. Let me tell you, this CBD strain has exceeded my expectations in every way! First off, can we talk about how big she's gotten? I'm amazed at the growth spurt during the vegetative stage. I've been bending the leaves gently to promote an even canopy and ensure that every bud site gets enough light. She's looking so healthy and vibrant, and it just fills my heart with joy. As for nutrient boosters, I've started incorporating some key products from Aptus Holland into my feeding regimen. I've added extra phosphorus (P) to support flower development, as well as a topbooster to enhance essential oil production. These supplements are designed to optimize plant health and yield, and I've already noticed a difference in the overall vigor of my Cosmos F1 since I started using them. Now, let's talk about the importance of the pre-flowering stage. This is a critical period in the cannabis life cycle, as it sets the stage for the upcoming flowering phase. During pre-flowering, the plant undergoes hormonal changes that trigger the transition from vegetative growth to flower production. It's crucial to provide the right conditions and nutrients during this stage to ensure a successful flowering phase. One of the main reasons why I started using nutrient boosters during the pre-flowering stage is to help my Cosmos F1 build up the necessary resources for flower production. The extra phosphorus promotes strong bud development and enhances the plant's ability to produce flowers, while the topbooster stimulates that plus essential oil production, which contributes to the overall potency and aroma of the buds. Moreover, using nutrient boosters during the pre-flowering stage can help prevent nutrient deficiencies and ensure that the plant has all the nutrients it needs for optimal growth. This is especially important during the transition to flowering, as the plant's nutrient requirements change, and deficiencies can negatively impact flower development and yield. In conclusion, the pre-flowering stage is a crucial time for cannabis plants, and using nutrient boosters like extra phosphorus and topbooster from Aptus Holland can greatly support your plant's health and development during this critical period. I'm absolutely loving the results I'm seeing in my Cosmos F1, and I can't wait to see her bloom into a beautiful CBD-rich harvest. As always thank you all for stopping by and for supporting me on this journey, i am super passion about growing and fell blessed to have you all with me on this new journey <3 <3 <3 Genetics - RQS COSMOS F1 Ligth - LUMATEK ZEUS 465 COMPACT PRO 
Food - APTUS HOLLAND 
 
All info and full product details can be find in can find @ https://www.royalqueenseeds.com 

https://aptus-holland.com/
 
https://autopot.co.uk/ 

https://lumatek-lighting.com/ With true love comes happiness <3<3<3 Always believe in your self and always do things expecting nothing and with an open heart , be a giver and the universe will give back to you in ways you could not even imagine so <3<3<3 <3 <3 <3 Growers love to you all <3 <3 <3 Cosmos F1: The World's First F1 CBD Cannabis Variety Cosmos F1 is the largest autoflowering cultivar in RQS catalogue of F1 hybrids. With her tall, typical Christmas tree structure and bright green foliage, Cosmos F1 is a testament to the beauty and vigour of Cannabis sativa. Plus, thanks to her pure genetics, which descend from Oregon CBD, she boasts the highest CBD concentration in our entire F1 seed selection. Aromas, Flavors, and Effects of Cosmos F1: A Vibrant CBD Super Variety True to the pure lineage from which she descends, Cosmos F1 boasts a delicious aroma that combines the freshness of crisp pine with the full-bodied, almost creamy aroma of modern Cookies varieties, and an unmistakable peppery bite. Thanks to her high concentration of CBD and low levels of THC, Cosmos F1 offers a balanced effect without intoxication. Cosmos F1’s terpene profile is dominated by myrcene, farnesene, limonene, pinene, and caryophyllene. Combined with high concentrations of CBD, Cosmos F1 produces a clear, meditative effect that relaxes the body while leaving the mind functioning and focused. Her effects help unite the mind and body, creating a state of cosmic order.
Likes
35
Share
Another week, she is growing great and its time to clean the bottom part of the plant. I remove leaves and branches to focus the energy to the top and not waste it on the lower branches.