


Likes
Comments
Share

@420DeepGrow
Follow
📆 Semana 5
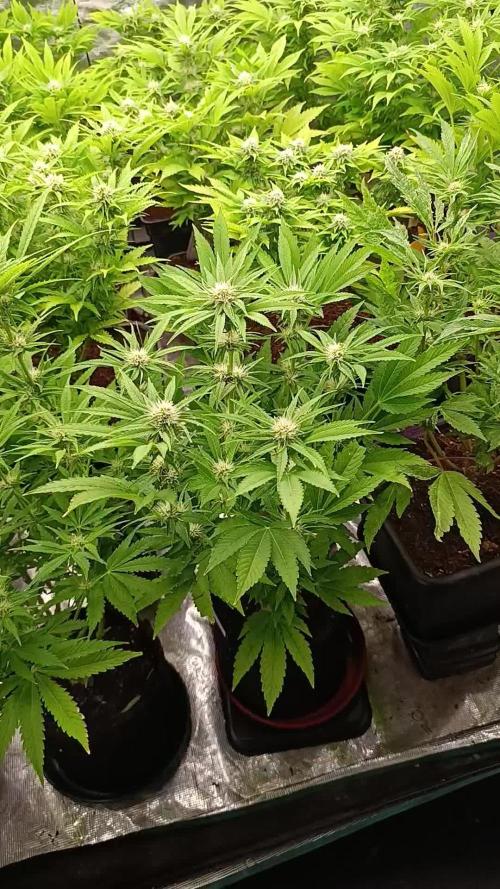
Se estabiliza la EC y se termina de estabilidar el pH, comienza el engorde real. Los cogollos ya están definidos y apilan cálices con más densidad, mientras los pistilos siguen activos y blancos.
La energía se centra totalmente en ganar volumen y resina. La estructura se mantiene firme y uniforme, con buena absorción y sin estrés.
Seguimos creciendo fuerte 💪!

Likes
4
Share

@dbudauto
Follow
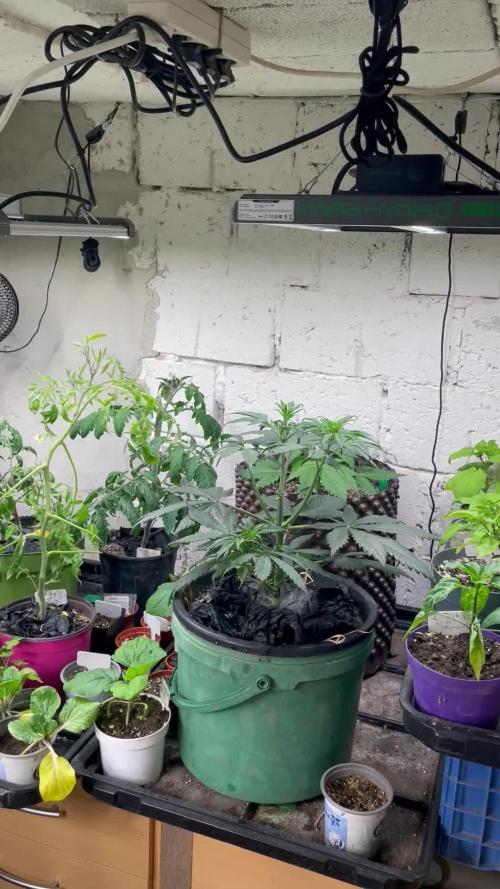
Das Timing entgleitet mir ein wenig
Die Guava zischt davon und meine Jack Skywalker D-Bud 2# mit dem Pollen lässt sich viel Zeit
Zur Sicherheit habe ich noch white Diesel Haze von Sensi um das Projekt irgendwie zu retten
Auch ja ich hatte noch Pollen eingefroren (D-Bud Auto #1 ) da habe ich mal nen Ast von der Guava bestäubt


Likes
83
Share


@JamMAKEcan
Follow
6wk into flowering..3wk more according to statistics.. But i will be checking the hairs an Crystal...the smell is strong smells like fruity peebles the alien candy from beever seeds and the white widow smells like fruity pine both are UNBELIEVABLY STICKY now they were outside for 2wk into flowering ..fat. Azz budz


Likes
38
Share


@Aedaone
Follow
I dropped these in a glass of water and let sit until they sank, then transfered to paper towel. I placed the paper towel in a ziplock bad but did not zip it. That was the afternoon of the 9th of June. I'm planting today the 11th June directly into 30 gallon pots. The taps are slightly longer than the seed, but we've got overcast rainy/misty weather forecast all day. That should give them moisture to keep them alive until roots establish. I've added the nutes to this week. These nutrients are all dry fertilizer that are premixed into the soil and numbers are ml of fertilizer per gallon of soil/perlite.
Likes
2
Share

@For2itous
Follow
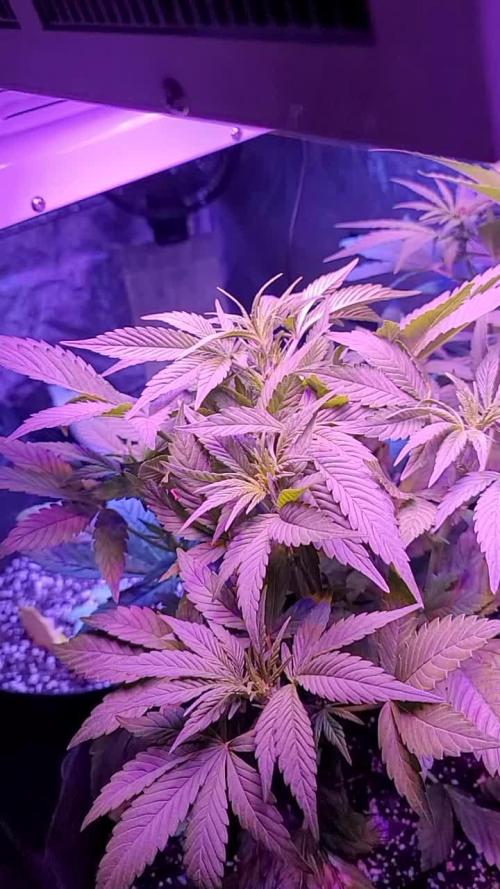
1 girl is definitely growing quicker so assume gonna be ~a week or so difference which is fine with me. The bigger plant is already rapidly budding and they're already a bit purple 💜 Happy holidays
Likes
6
Share


@Spearfish
Follow
Water change day 51.
Too close to lights day 52. Used dimmer, prolly gunna buy a taller tent or modify this one.
Day 54. Dimming helped, glad i caught it early.


Likes
19
Share


@Mr_Juice
Follow
despite the struggle with high temperatures, it grows incredibly fast and energetically…..
the plants in the back contain guanocalong, the plants in the front are fed with plagron🤘🏻
nutrient doses are always divided for 2 plants
light intensity increased to 80%
skywalker og runtz xl-topping+lst(I will publish the results in a week)

Likes
59
Share


@Secretflower
Follow
😘.Hello My Friends.. 😘
📰 ... March 4, 2021... 📰
🌿 Day N°31 🌿
We are in the middle of the 5th week of growth for my three Feminized Amnesiac from Spliff Seeds..🚬
The plants are beautiful, after two weeks under my lamp @TSW2000 from Marshydro, they look so cute.🍀
📰 March 2nd
I transplanted my plants into 3.4 liter pots with All-Mix soil from Biobizz.
I topped two Amnesiac and the third one is with LST. I could have done it sooner, but last week I was on vacation in the mountains.. 🏔️
I have a bit of experience with Topping, but the LST I never test. I hope I did everything well as it should and that the plant will react well.. 😷
💉 Nutrients 💉
I incorporated 16 grams of Easy-Boost granules from Royal Queen Seeds into 3.4 litres of Biobizz All-Mix soil.
🔦 Light 🔦
I increased the power of my #MarshydroTsw2000 from 25% to 40%.
🐛 PEST 🐜
The treatment by the leaves of TEC FORT last week (1ml/l) worked very well, on 14 plants I saw only one thrips. On the blue stripes there is nothing..💀
That's all for now my friends.
Take care of yourself and your loved ones.. 😷
I wish you only happiness with your plants.. 🌻
... 🕊️ PEACE & LOVE 🕊️ ...
Likes
20
Share


@THCanbisGrower
Follow
This is first week. i cover those plant with plastic glass.
because from my expierence. from the old day. there are many enermy of your plant such mouse or many insect can get in your grow tent.
so it's bad thing for me when the rat in my house come and ate all of my little plant when it age 1 weeks.
so it should not happen again. before your plant strong. this state of plant is weakest of your plant. this time must very be careful.
Likes
17
Share


@HowtoBubatz
Follow
It’s the third week of flowering, and the plants are starting to show some exciting progress! 🌿
The buds have begun to build mass, and the first signs of trichome development are visible, giving them a light nice, frosty look. ✨
I did notice a few nutrient deficiencies on the leaves, likely due to underfeeding, as I’m using a medium with 50% coco.
To fix this, I adjusted the nutrient levels, and the plants seem to be responding well. 🌱
The plant that wasn’t trained with LST is about a week ahead in development compared to the LST version, showing more advanced bud growth.
Also, the smell is becoming more pronounced, with the first hints of that classic, sweet aroma filling the tent. 🍬🌿
I’m excited to see how things continue to unfold in the coming weeks! 😁✨
Likes
120
Share


@TheBudWhisperer
Follow
Week 27 - 4 weeks into the new flower cycle and bud development is a lot more advanced, much earlier post-transition too. It’d be great if these finished out early as we’ve got some extra cuts on the white widow that may need a home in a few weeks. Couldn’t resist - it’s such a vigorous plant that we’re gonna keep it for the next pollen chuck if the schedule aligns.
Chopped out a massive amount of larf from the undercarriage and we were ruthless here due to super high humidity and ideal conditions for botrytis. Still hoping on some useable seed and/or bud but this whole thing has been touch and go since the partial reveg. Alls good for now. Thanks for take’n a look.
As for the outdoor… meh. Like everyone around here we’ve fallen victim to far too much sustained rain recently and the WPM on the strawberry has really set in. The harvest window has cracked open slightly with about 2 weeks to peak. Still waiting on chop day though so it’s 50/50 if there’ll be anything usable on this plant. In a last ditch effort to get er to the end we’re gonna strip most of her fan leaves now. That’ll alleviate the WPM somewhat (in combo with a daily peroxide spray). We’ll likely chop early too. The bud wash should greatly assist with and offset any lingering small amounts but she’s gotta get there first and this strain is not known for mold resistance. Time will tell. The Lost Coast OG - an absolute champ. Lush and green, came through the rains just fine and should be a great smoke when it’s all said and done. Not long for either now - should be better part of 2 weeks for the strawberry and then whenever the og says fini👍.
Background/Repetitive Nonsense
These plants will be the two mothers this growing season that will be utilized for stage 2 of the pollen chucking project. We’ll be taking clones and stressing the genetics for some fem. pollen using colloidal silver.
Instead of trying to reinvent the wheel with landrace genetics, we’re effectively skipping initial hybrid crossing and stabilization, going straight to the polyhybrid mix. I call it the shotgun approach to selective, unvetted and amateur breeding on a micro scale😉.
These 2 parent strains will form the basis for 8-10 different F1 polyhybrid combinations and a further S1 back cross of each of the mothers. Not only should we be able to preserve the genetics for both mothers in feminized form but we’ll also be running an entire family of new hybrids after seeding out clones from each on the initial lineup of this summers photoperiods.
Method is pretty simple here; once we’ve got our pollen off the two mothers we’ll be clipp’n clones on 4 select strains that have proven results from various respected breeders. We’ll be using those for pollination purposes in what is expected to be a 10 plant recirculating Dutch bucket hydro system.
***Update***
The feminization process didn’t take at all with the strawberry or the Skywalker so it’ll be reg. Seed crosses with only Skywalker and some other 707 Headband that we have in the vault.
*********
Strain details:
Parent strains for self pollination
- Skywalker Kush by Reserva Privada
Classic kush effects and earthy aroma. The strong kush element of this cultivar will compliment any cross.
- Spliffs Strawberry by Spliff Seeds
Incredible mix of flavourful terpenes and hard hitting high THC. She’s got some Herer as well as some Diesel in ‘er so an obvious choice for any cross as well.
***UPDATE***
The strawberry had to come out of this breeding run to wait for a better mother that hasn’t been attacked by aphids. It’s been a tough battle this season and we’ve had to make a couple of heartbreaking sacrifices already.
Parent Strains for cross pollination
***UPDATE***
We added another 2 strains to the mix just in case we need to spot swap for some more variety.
- Ghost Train by AMS Seeds
A cross of Alien OG x Ghost Train Haze. Never tried the strain but I’ve heard only good things. This one might be worth mixing with the Strawberry so we’ll see how it goes.
***UPDATE***
Sadly - the ghost train turned out to be an auto so cloning her out as part of the breeding project is a no-go. Really disappointed about this but at least we still have a ready backup strain on the lost coast og to take her place.
- Boogie Nights by AMS Seeds
A cross of Kalijah, aka afghani/skunk/diesel/blue heaven X Juanita, aka NYC Diesel/Reina Madre). No idea here so naturally I’m interested😉.
**************
- Lost Coast OG by Emerald Triangle
Pakistani Kush x Lemon Thai x Chemdawg #4. Essentially a classic, west coast combo of landrace kush genetics that Cali is famous for, mixed with hard hitting Chemdawg #4.
***UPDATE***
The Lost Coast is a winner of a plant. Still outdoors and in veg. Looks like it’s recovered from the aphid attack. Might consider trying to take another cut of this and just rooting it in a pot for pollination. At this point, what the hell and if we could salvage anything it would be a positive.
*****update: got lazy and taking a cut never happened… so dumb - this plant is amazingly resilient and thicka than a snicka!******
- Spliffs Blueberry by Spliff Seeds
(Chocolate Thai x Afghani #1 x Highland Oaxaca) x Northern Lighhts Special. Only 1 bean of this left and the whole purpose is to blend the best of Spliffs Berry strains as a tribute. Awesome breeder and they’ve been very kind to us over the years.
- Northern Light by Royal Queen Seeds
NL means nuff said. A combo of 11 unknown strains believed to originate from the west coast of North America. This cultivar is a great take on these classic genetics and a perfect compliment to just about any cross. A biased fave of ours.👍
- White Widow by Seedsman
Brazilian Sativa x South Indian Indica. This classic strain has been unluckily elusive for us the last couple years. We know the quality of seedsmans version of this cultivar having grown it in the past. Sadly, a very strong performer that never made it to harvest due to an uncontrollable aphid infestation.
And we’re only at step 1.... still gonna need an assist with pheno hunting all of the crosses so if anyone’s interested in running the testers (when we finally get to that point) just let me know👍😎.
*****Update - plagues by issue after issue and having this project go an extra 6 weeks at least has been frustrating as fuck. Still on the way to chop as I write and really unlikely we’ll be pulling seed off this run. Big time bummer but it is what it is. Lessons learned, move on👍.****
Gonna be a Dope ass summer project and can’t wait to see it in full swing🤟. Thanks for stopp’n in y’all👊


Likes
39
Share


@AestheticGenetics
Follow
4/15/25 Things are progressing nicely. Some plants dont seem to be doing too much but 3 of them or so that are really standing out.
Im curious if some of these are going to be longer flowering time than anticipated with the very obvious sativa dominant plants.

Likes
73
Share


@Reyden
Follow
Domani dovrò andare a comprare il necessario per fare qualche clone mentre darò una tagliatina ai rami non necessari 🌱👽
Questa settimana ho integrato calcio e magnesio insieme a un infuso di banane che inizierò a dare prossima settimana
Oggi ho cambiato a 14 ore di luce e dalla prossima passerò a 12…devo assolutamente tenere qualche clone di questa PPOG perché è una bomba 😛
Vedremo come si evolve più avanti non vedo l’ora 👉🏻👐🏻🤭🌴


Likes
107
Share


@Tropicannibis_Todd
Follow
💩Holy Crap Growmies We Are Back💩
Well after another short break we are back at it 😁
So what do you say we have some fun 👈 We got some FASTBUDS TESTERS FBT2309 😛
Seed soaked for 24 then placed in a tub with paper towels , once it cracked and rooted , placed into its main pot 👌
Lights being readjusted and chart updated .........👍rain water to be used entire growth👈
👉I used NutriNPK for nutrients for my grows and welcome anyone to give them a try .👈
👉 www.nutrinpk.com 👈
NutriNPK Cal MAG 14-0-14
NutriNPK Grow 28-14-14
NutriNPK Bloom 8-20-30
NutriNPK Bloom Booster 0-52-34
I GOT MULTIPLE DIARIES ON THE GO 😱 please check them out 😎
👉THANKS FOR TAKING THE TIME TO GO OVER MY DIARIES 👈
Likes
9
Share


@Rastaluna
Follow
Planties are getting bushier :3
This week we focused on LST, providing as much light so smaller tops could reach the size of bigger ones.
We raised the light cause NL started showing signs it didnt like being close to the light, but also saw some other issues, tips of canna leafs started to yellow, about a week and a half ago we fed them some nutrience, home made organic and also a mix. So now im not really sure from what caused the yellowing tips. Nutriante deficiancy? Nutrient burn? Light?
Taking now a closer look, to see upcoming signs that would make this situation clearer.
Apart from yellowing leafs, the smell(rrrlll goood) becomes more noticable, its nice coming to the tent, feels like youre high from growing nature :=)
We topped speedy chille and took of yellowing leafs, she really liked it and is now growing 4 tops
Processing
Likes
9
Share


@Hattrick
Follow
recovering from heart surgery, wanted to switch last weekend but was still in hospital. switched 0n 04/12 to flower.
doing what i can when I can and with some luck all will work out
