


Likes
Comments
Share

@Chucky324
Follow
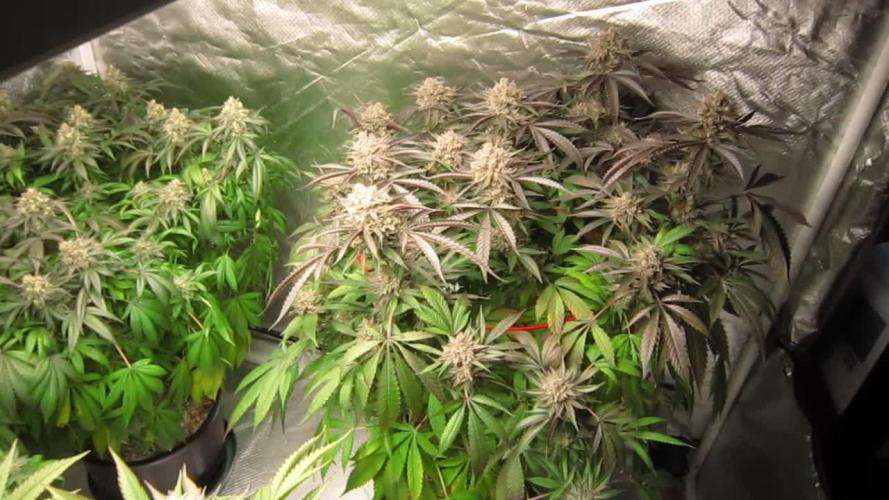
Hello. This is the end of week 9 and the beginning of week 10 of flowering.
OK... One more week of light and then a couple of days of dark and then harvest.
Everything is going good here. Had 2 good watering last week. the plants are using up the nutrient that's left in the soil.
So I'm expecting some yellowing of leaves next week.
I got in touch with UKHTA Seeds last week and they said they would love it if I would give my 50% off code to someone on grow diaries.
So I've got a 50% of your first order code from UKHTA Seeds, Needs to be used by May1st 2026 though.
They would love it if diaries were made for the seeds.
Could you privet message me if your interested. If there's more than a couple of people interested I'll ask "why would YOU like these seeds" sorta quick contest to find a winner. Let me know.
OK. Have Fun.
Chuck.

Processing
Likes
17
Share


@greennug
Follow
shortest plant is 50cm tallest being 95cm. They are all doing wonderfully, most of autos are budding nicely and all of the photoperiods are ready to flower. looking very promising. i am changing my light schedule to 14-10 to kick these girls into flower.. this will give the plants an extra 17% (or so) a day under the lights.rather than 12-12. i cant be fussy as i only have one grow space but if my research is correct these should grow beautifully! the autos are well ahead so shouldnt affect my harvest weight too much. like i say i cant be fussy! thanks for looking


Likes
20
Share


@DeepRootsGrowTrees
Follow
KRITIC AUTO by KANNABIA
Week #12 Overall
Week #9 Flower
This week she's doing great 👍 looking outstanding frosty dense buds she smells great she's almost done a few more weeks. Stay Growing!!
Kannabia.com
KRITIC AUTO

Likes
23
Share


@deFharo
Follow
Bienvenidos cultivadores de marihuana clandestinos, y también a los que tienen la fortuna de no serlo! 👨🌾💦💡🌞🌲
3M ♫ Ʈիє Ңαppỿ ƓrꭥωԵի, último diario de cultivo, que ya es feliz porque no tiene historia; sólo un tributo al proyecto y al tiempo del cultivador de marihuana, que no cree en milagros, que no le importa que le crean tonto, que se cree feliz y por lo tanto es el único feliz... sin explicaciones, con buenos humos y con la certeza de que cultivaré marihuana hasta que me muera!
Feliz, muy feliz, por despedirme con una cepa que un día fue la Reina de Color de mi Jardín de la Alegría, y que en el último momento, una plaga virulenta de araña roja, sumado a mi reacción de novato aterrorizado, acabaron por arruinar el cultivo completamente, una deuda reconocida que me dispongo a pagar. 😍👍
Ahora, el éxito está asegurado, por la genética indiscutible, la experiencia adquirida en el camino, el tiempo de verano, mayor maceta, mejores Bio Fertilizantes... y la felicidad añadida!😊😊
Recordamos lo que dice el productor:
Purple Shot es una variedad de aromas muy complejos que nos recuerdan a licor de uva y a cítricos. Es el resultado del cruce entre Purple punch, Do-si-dos y nuestra Exotic colors (75% Indica /25% Sativa). Variedad de floración rápida, terminando en 8 semanas (mi anterior cultivo de esta cepa alargó el periodo de floración hasta las 12 semanas), de porte robusto y flores muy densas y repletas de resina... completamente de acuerdo! 😋
La semilla germinó y asomó alegre por el sustrato al segundo día, ahora vive dichosa tomando el radiante sol de verano durante el día, y por la noche, afortunada junto a todas sus compañeras, las grandes y las pequeñas, disfruta de la luz intensa de la carpa de cultivo y del calor de su familia.🌲🌲🌻🌼🌱🌾
Hasta la próxima semana feliz...
SALUDOS A TODOS!!🖐️👨🌾💧💦🌞💡
=================================
🙄👇👌👍👉👉🖐️👨🌾👍👈👈👈🤜👌🙏👇🤩🖐️🏻


Processing
Likes
6
Share


Likes
Comments
Share

@LaBurlaVerde
Follow
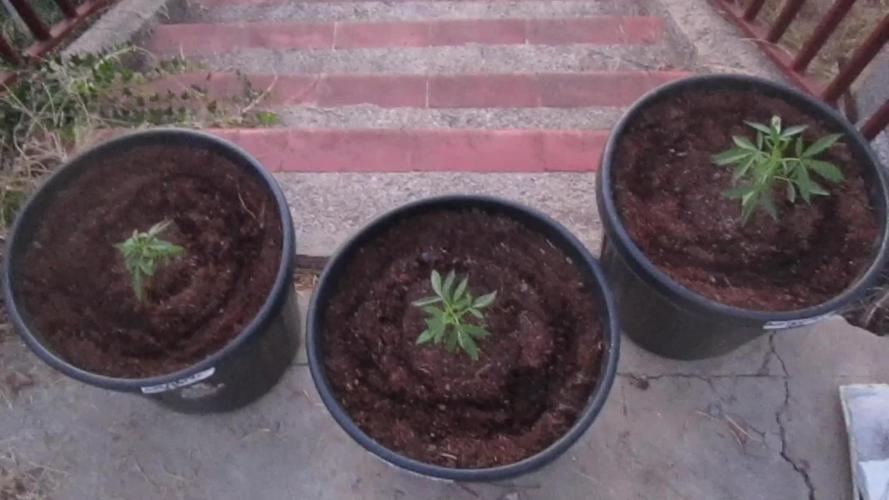
Actualización de la Semana 3, la semana pasada estuvieron bajo el Led de maravilla alargando las horas e incluso un dia entero que estuvo nublado disfrutaron de la luz extra 20 horas al dia, esta semana el Martes el led dejo de funcionar ya me a pasado otras veces, se funde un led y no va la luz.. este seguimiento no quiere que me lleve ningun premio 😂😂 Esta semana han sido regadas una vez con 1,5 litros de agua, al estar en 20 litros solo riego 1 vez por semana.. De momento aun no les e dado fertilizante extra tienen suficiente alimento la semana que viene empezare a darles un chute de Top Auto de Top Crop.

Likes
6
Share


@Plantinator
Follow
She is taking shape nicely, but in the meantime I noticed some CalMag and N deficiencies too. On the next feed I will go with 2/3 strenght and the following one will be 3/4 if needed.
At the moment I’m switching from tap water to rainwater, the problem is that Biobizz PH down doesn’t hold the ph for more than an hour. Hence the deficiencies.
I ordered a PH- from Growth Technology, it solved the issue.
The watering regime is as follows:
•Clean water in the tray for 3 days, top up if needed
•Turn off the air pump, drain the water
•Wait 12 hours
•Pour the feed in the tray (4 liters - 1/2 strenghth)
•Leave the feed in the tray for 24 hours, air pump off
•Drain the leftover of feed
•Clean water in the tray, turn the air pump back on
Likes
12
Share


@Growing_Skills
Follow
Chinazes) The nuts have all sprouted, Easy to grow, 70 days have passed from the beginning of the first week to harvest, Incredible, sweet, delicious smell, once you smell this aroma, you can enjoy this smell for hours)) I recommend it to everyone!!)) I will put this variety in the top.


Likes
6
Share


@Ninjabuds
Follow
My permanent marker plants are looking really interesting! The short and stocky one with the purple leaves is super vibrant. I love that pop of color against the green of the other plants. It's a little different from the taller plant, which has this really cool stacked-up look to it. I'm curious to see if those stacked-up leaves will change color too.
The past few weeks have been so beautiful, watching the plants grow and change. It's amazing how something so small and fragile can turn into something so strong and vibrant. Now that they're getting ready to bloom, it feels a little bittersweet. I'm so excited to see the finished product, but I'll definitely miss having them around while they're growing.

Processing
Likes
4
Share


@DoItBigGrows
Follow
Made some major upgrades to the environment. Moved the girls into a Vivosun 4x4 Tent and certainly not looking back. Loving it so much. Also grabbed a Spiderfarmer LED SF1000 or the rest of veg and by the time flower hits we shall have 2 Spiderfarmers ;) also did an extra topping on both! Not gonna undermine this grow one bit.


Processing
Likes
25
Share


@Kikiwindsurf
Follow
I cutted off the main cola of GG accidentally, so we have GG LST, GG LST + topping and LH growing naturally.
Rain days/no sunny days they stay indoors as u can see. (20hours indoors 400HPS and 12 hours outdoors direct sunlight)
Gonna decrease nutrients because of the apparence of the leaves, "plastic leaves effect" let me know what u will do in comments ! DAY 39 AND 40 GORILLAS AND DAY 30 LH
18/04/2020 day 35 of LH and day 44 and 45 of the gorillas. They starting the full bloom and swating crystals. Smell increased considerably. I water more nowadays because she drinks a lot ! enjoy todays vid in the terrace :D
Likes
6
Share


@StoneyCoconut
Follow
5/4/21. Day 64.
WR is beefing up. Drinking about 12 ounces a day, water only. I'm still seeing some clear trichomes. Not much amber. I'm thinking she'll be done in less than a week. Still hoping she lightens up a bit. I want her to burn up whatever nutes are left before the cut. We shall see, patience is a virtue!
GC is a beast! Still uptaking a half gallon of water daily. I cut back just a bit yesterday and she let me know by pouting (droopy) this morning. I top fed her about 1.5 quarts and bottom fed a half quart or so. Then gave her a few ounces of Reharge water. I use a hand pump sprayer and water a bit at a time to prevent roll off. Thiink of light rain on dry soil. She looks happy and lush now. She'll get full bloom nutes tomorrow plus some top dressing, her roots are growing up and out of the surface of the soil 😳. Details on the the top dress will be noted in my next update.
These two girls were planted on the same day.
5/6 Day 66.
GC came out to play today😳 Stll shots just dont do her justice. She's still drinking heavily. Half gallon of 5 part bloom + Cal-mag yesterday morning, this morning dry. I'm gonna botom feed her at night, just a pint or so. I feel bad when she pouts 😟 She's 22 inches at the peak and 22 inches round. Next time I woud choose 5 gallon bags, 2 per this size tent. I LSTed a bit with pipe cleaners to even up spacing. The I gave her another pruning. So much leaf! @Hawkbo on his GC grow for for showing me the way! She also got a top dressing of 1/2 quart of Happy Frog with worn casings, dolomite lime and bone meal. She just eating all these nutes up! The tops are building girth now. Very firm! No oder yet.
WR is ready! I'm drooling, no really. She'll get a nice video too 😉 Might do a selective harvest. They dont always finish evenly. To be continued.
5/9 Day 69.
WR went dark. I'll chop her on day 70, 10 weeks. Trichs are mainly milky. Big and bold! Looking into a scope that connects to the tablet so I can get some shots of these these divine pearls 👊😌 Sorry to report I cant upload the the video I made, corrupted file or some nonsence 😒
GC is chugging along building buds! She's a jungle of bud and leaf. I continue to work the canopy relieving her umbrella leaf and of the scub from underneath. Who wants all that fluff anyway? Still drinking almost a half gallon a day. I'm gonna keep the bloom nutes on the hot side unless she says stop.
Processing
Likes
2
Share


@Justrite
Follow
End of week one of germination .
Currently setting up veg tent and still tinkering with set up .
Germinated in pre soaked rock wool cubes with rooting stims and a 1ml of m g b and then cover with a bit of light mix and just using cal mag water watered over the top when required , when they start to take off I’ll use a mix with rooting Stims Again to get theM working with the autopot system
Pizza , luv & Techno ;)
Processing
Likes
21
Share


@Walligator
Follow
I felt things were going well, and didn't want to jinx it.... however my time has come for the next level of challenges.
This week things were looking great, but then I saw some leaves having discolored spots. I looked under the microscope and saw it was the leaf, didn't think much more of it. Next day, more spots, so I investigated. looking again with the microscope, I found the devil!
Spider mites!
So, I sprayed greencleaner on them at light shutoff...
and the following day plant does not look too good.
Looks dry and light burned.
So I moved the lights up, they were not a problem before and the plant had stopped stretching this week.
hopefully I this will go away, but I need to spray tomorrow to keep with the schedule, hope it does not dry out y plants as much this time!
However looking at the bugs again, they are dead!
I also lollypopped the girls, however since I am a noob, I could have trimmed more, but it makes me nervous of taking off too much, so maybe a few days I will take some more off, or just watch the dead leaves closer, and will clear daily...

Likes
12
Share

@Growmigos
Follow
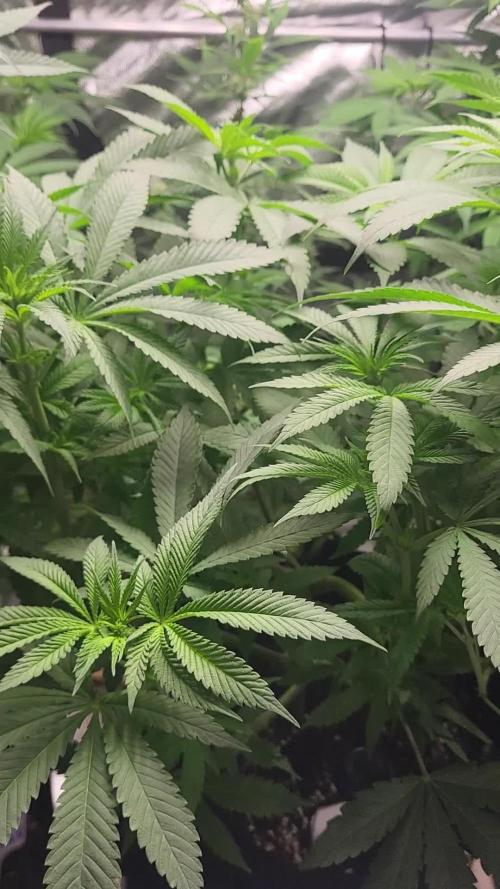
Sie ist im Strech förmlich am explodieren, sie streckt sich in alle Richtungen, sie nimmt die volle Düngermenge gut auf und die 100 Prozent Licht steckt sie mit 38cm Gut weg, die Genetik überzeugt bis jetzt total und ich freue mich auf die Blüte , ich habe mir einen Entfeuchter gekauft und mein Drainmaster kommt auch bald dann wird auch vernünftig gemessen. Vpd nachts 1,0 und bei licht an 1,2 bis 1,3 ,dank mars hydro 12 l entfeuchter


Likes
184
Share


@Hologram
Follow
You can see, RuntzF1 has really enjoyed a HOTweek filled with sunshine, finally!
..When the sunrays hit her, she made it snow!!👏👏👏
and she was suddenly in a hurry to finish up.. 👍i think im gonna harvest her end of this week before the temp. gets cold again ..
🙌
happy growing for all ✊
PS
1-7-24: i have been trying to update this diary bc i have a harvest!! but the harvest button does not work..
same with my cheese diary.. i harvested her this weekend but diary is gone..
i emailed GD .. so maybe tomorrow...
7-7-24: the harvest button still does not work.. :( sorry every time i try to update this, it will show as a new update, its not.. this is already 2 weex old, mayb more..)

Likes
23
Share


@nonick123
Follow
Día 27 (20/05) Riego con 250 ml de Té de Compost
Día 28 (21/05) Vuelven a tener sed! Las riego con 250 ml sólo H20 pH 6.2
Día 29 (22/05) Riego con 750 ml H2O+ Regulator 0,15 ml/l + CaMg-Boost 0,25 ml/l + Startbooster 0,25 ml/l + TopBooster 0,2 ml/l- pH 6.2
NYC Diesel Auto vuelve a recibir aplicación foliar de sales de Epson (4 g/L) porque presenta de nuevo ligera clorosis
Día 30 (23/05) N/A
Día 31 (24/05) N/A
Día 32 (25/05) Las plantas no paran de crecer! 😍
Día 33 (26/05) Riego con 750 ml H2O + Regulator 0,15 ml/l + CaMg-Boost 0,25 ml/l + TopBooster 0,2 ml/l- pH 6.2
💦Nutrients by Aptus Holland - www.aptus-holland.com
🌱Substrate PRO-MIX HP BACILLUS + MYCORRHIZAE - www.pthorticulture.com/en/products/pro-mix-hp-biostimulant-plus-mycorrhizae