


Likes
Comments
Share

@UDUDUDUDU
Follow
we got one good ☀️ day this week. I lifted da plant up, removed da second bulb & still angry that it's been 12 weeks 🤯


Likes
14
Share


@Black_Widow
Follow
Привет садоводы
Цветок потихоньку растет
на днях я сделал еще одну одну обрезку ,разделив ее рост с 2 веток на четыре и пересадил в горшок побольше
сегодня я сделал еще одну последнюю обрезку, разделив 4 ветки на 8

Likes
285
Share


@Tropicannibis_Todd
Follow
👉Alrighty Then👈
So we are at DAY 42 of Flowering with the Sugar Larry 👈 And she's doing fantastic 👍shes finally done with her stretching 👌 and building Budz 👈
😀 decided to showcase pheno #2 , definitely has different traits then #1 very interesting 😀 thoe both are killing it 👈
Hedgehogs in full bloom 👈 I did a major strip , defolation is complete 👌
Except for some slight watering , ive been doing some defolation as well as some LST manipulation to pull branches to the side 👌
👉I had to Top her during the middle of 4th week 👍 Happy Growing
👉Soil Provided by ProMix.ca
👉Nutrients Provided by Agrogardens
👉Lighting Provided by MarsHydro.ca
Thanks my friends for the great support over the years 🙏 Happy Growing

Likes
8
Share


@Kappa420
Follow
Every plant grows differently... i think one is getting ready (No1)? I am not sure maybe couple weeks more?

Likes
4
Share

@DogDoctorOfficial
Follow
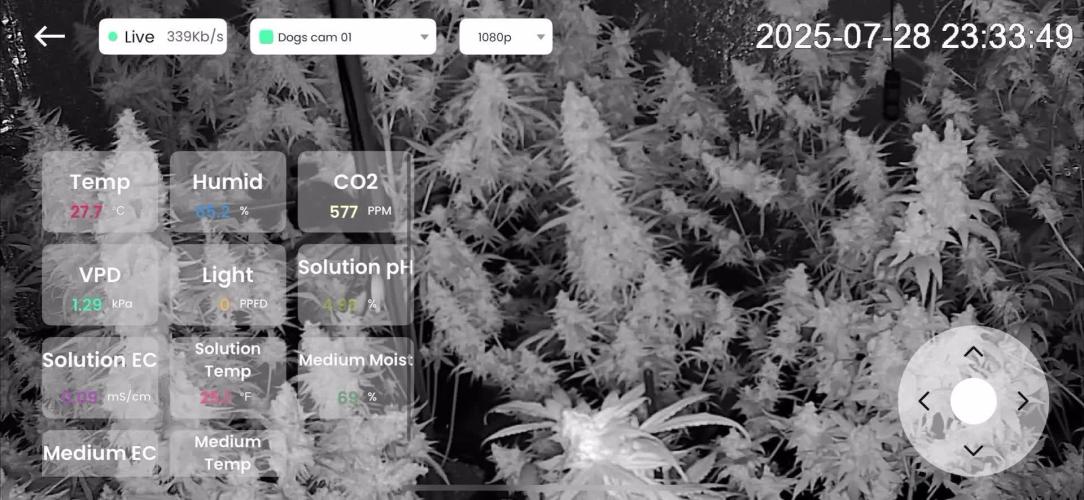
Week 6 Flower – A Hard Lesson: Bud Rot
Quick Recap – From Seed to Here
This Lava Cake run started beautifully:
• Germination was smooth and fast using the Cannakan with Aptus Regulator and Start Booster.
• Veg went strong, with both phenos thriving under the Black Series LED and later joined by ThinkGrow and Lumatek support.
• Transplants into 11L fabric pots gave them space to expand, roots looked stunning.
• Early flower (weeks 1–4) brought explosive growth, thick white hairs, and dense colas forming under carefully tuned nutrition — Aptus base inputs with Plagron complements.
But the same density that made these flowers shine also made them vulnerable. High humidity swings and airflow inconsistencies created the perfect conditions for bud rot (Botrytis cinerea) to sneak in.
What Happened This Week
Despite our best efforts, phenotype two (Lava Cake #2) showed visible signs of bud rot. To protect the garden, she was harvested early. Infected material was thrown straight into the trash (not compost — spores spread too easily), and the healthy parts are now drying in a separate, controlled space.
Phenotype one (Lava Cake #1) remains in the tent. She has minor spots, but overall is swelling and pushing forward. She’ll be closely monitored daily to make sure the infection doesn’t spread.
👉 Full educational article from Zamnesia:
🔗 Bud Rot Cannabis Grower Guide – Zamnesia https://www.zamnesia.com/grow-weed/563-bud-rot-cannabis-grower-guide
What Bud Rot Is
• Caused by Botrytis cinerea, a fungus that thrives in warm, humid, poorly ventilated conditions.
• Begins inside dense buds, hidden from sight, and by the time it appears on the surface, the inner cola is usually already compromised.
• Spreads quickly if unchecked, especially in crowded flowering rooms.
Why It Happened
• Humidity spikes during flower.
• Airflow not perfectly balanced, leaving “dead spots” in the canopy.
• Dense colas trapping moisture.
• Temperature swings stressing the balance further.
Prevention Tips (for us and for everyone reading)
• Lower humidity in mid/late flower (40–50%, then 35–40% near harvest).
• Strong airflow: oscillating fans above and below canopy + efficient extraction/intake. need improving in here for my next run
• Regular defoliation to open the canopy.
• Daily inspections of the biggest buds.
• Harvest at the right time — pushing too long in risky environments can invite problems.
What to Expect / Not to Expect Going Forward
• Lava Cake #2: She’s drying now. Expect about 2 weeks of slow, careful drying under controlled temps and humidity. With bud rot, extra caution is needed — we won’t rush, but we’ll also make sure nothing risky makes it through. Expect reduced yield because of the early cut and loss of infected colas, but quality and safety will come first.
• Lava Cake #1: She will continue swelling in the tent. Expect daily monitoring, improved airflow, and cautious optimism. If she stays strong, she could still finish beautifully.
• The Room: We’ll dial in airflow and humidity management even tighter, keeping CO₂ and temps in check, and prepare the AC unit to avoid these swings in the future.
Closing Thoughts
Bud rot is a tough enemy, but also one of the most important teachers in growing. It reminds us that environment control is just as vital as genetics or nutrients.
Yes, we lost part of this run, but we also gained experience that will make every future run stronger. And sharing this openly might help others spot it sooner, act faster, and maybe even save their crop.
At the end of the day, that’s what these diaries are for: to celebrate the wins, learn from the losses, and keep growing together. 🌱💚
📲 Don’t forget to Subscribe and follow me on Instagram and YouTube @DogDoctorOfficial for exclusive content, real-time updates, and behind-the-scenes magic. We’ve got so much more coming, including transplanting and all the amazing techniques that go along with it. You won’t want to miss it.
• GrowDiaries Journal: https://growdiaries.com/grower/dogdoctorofficial
• Instagram: https://www.instagram.com/dogdoctorofficial/
• YouTube: https://www.youtube.com/@dogdoctorofficial
⸻
Explore the Gear that Powers My Grow
If you’re curious about the tech I’m using, check out these links:
• Genetics, gear, nutrients, and more – Zamnesia: https://www.zamnesia.com/
• Environmental control & automation – TrolMaster: https://www.trolmaster.eu/
• Advanced LED lighting – Future of Grow: https://www.futureofgrow.com/
• Root and growth nutrition – Aptus Holland: https://aptus-holland.com/
• Nutrient systems & boosters – Plagron: https://plagron.com/en/
• Soil & substrate excellence – PRO-MIX BX: https://www.pthorticulture.com/en-us/products/pro-mix-bx-mycorrhizae
• Curing and storage – Grove Bags: https://grovebags.com/
⸻
We’ve got much more coming as we move through the grow cycles. Trust me, you won’t want to miss the next steps, let’s push the boundaries of indoor horticulture together!
As always, this is shared for educational purposes, aiming to spread understanding and appreciation for this plant. Let’s celebrate it responsibly and continue to learn and grow together.
With true love comes happiness. Always believe in yourself, and always do things expecting nothing and with an open heart. Be a giver, and the universe will give back in ways you could never imagine.
💚 Growers love to all 💚
P.S. – Drying After Bud Rot Harvest
For Lava Cake #2, we harvested the entire plant and are drying her whole. Because bud rot was present, we’re being extra careful:
• Drying in a separate, controlled space, away from the main room.
• Temperature kept around 18–20°C, with humidity 50–55% — steady and stable.
• Gentle airflow moving through the room, never directly on the buds.
• Daily inspections to ensure no hidden spots continue developing.
The goal is a slow 10–14 day dry, preserving as much aroma and quality as possible, while making absolutely sure nothing unhealthy makes it through. With bud rot, safety comes first — anything questionable goes straight to the trash.
👉 Why whole-plant drying?
By leaving the plant intact, moisture moves more gradually from stems and inner tissues to the buds. This slows down the drying process, prevents overdrying, and helps preserve delicate terpenes and flavonoids that give Lava Cake her unique flavor. Especially after a bud rot scare, a steady, controlled dry is essential for both safety and quality.

Likes
9
Share


@valiotoro
Follow
Let’s start with the smell absolutely wonderful it’s floral & sweet it reminds me a jasmine green tea🤤
The buds are SUPER sticky✂️
See you in one month for the smoke review
Take care 😎
Oh & happy new year

Likes
9
Share


@Cogollo_eu
Follow
**Encontrarás la traducción a español al final de la descripción**
From/Desde: 01/09/19 || To/Hasta: 08/09/19
From day/Desde día: 00 || To day/Hasta día: 07
Ocean Grown Cookies Diary / Diario de las Ocean Grown Cookies:
https://growdiaries.com/diaries/38831-oceangrown-cookies-blues-sisters
-----WEEK SUMMARY-----
If you like this week, please hit a like, it costs you nothing! 👊. Thanks in advance 😉!
Hi buddies, i'm very happy to welcome you to my new Dinafem's Cookies grow. In this grow I'm going to run 4 Dinafem seeds, 2x BlueBerry Cookies (this diary) and 2x OceanGrown Cookies. The seeds were provided by Dinafem itself, a thing that i want to thank a lot to Dinafem Team, specially to you Mark! 👊 ;). I will try to do my best 🙏.
The first week was as expected, buried the seed on Sunday night in a small pot (i'm not sure if it's 0.3 l, but +/-), it be came to seedling on Wednesday afternoon and grown till Sunday as it should be... (AK Déjà vu).
Equipment used
-----------------
Platinum Grow Lights P300 (93W grow, 180w Flora, full spectrum)
DR90 growing tent (90x90 cm)
10 l AeroPot
Mid-size Oscillating vent 20w
Soil from Bio-Bizz (Light-mix) i will use a small layer of Hard-mix in the bottom of the AirPot and mix the rest with Superguano & Top Vulcan (Both from Top Crop) on transplant.
-----WATERING CALENDAR-----
Using all week nutrients @ PH 5.8 & EC 0.7
01/09/19: 130 ml
04/09/19: 60 ml
08/09/19: 120 ml
*****ESPAÑOL*****
-----SUMARIO SEMANAL-----
Por favor, si te gusta esta semana dale un like, no te cuesta nada 👊. ¡Gracias por adelantado 😉!
Hola compañeros, estoy feliz de presentaros mi nuevo diario de Cookies Dinafem. En este cultivo voy a plantar 4 semillas, 2 BlueBerry Cookies (este diario) y 2 OceanGrown Cookies. Estas semillas me las ha mandado el propio Dinafem, cosa que quiero agradecer al equipo de Dinafem, especialmente a Mark! 👊. Intentaré hacerlo lo mejor posible.
La primera semana fué como se esperaba, planté las semillas el Domingo por la noche en un tiesto pequeño (no se si es exactamente de 0,3 l pero +ó-), se hizo plántula el Miércoles por la tarde y creció hasta el Domingo como debía... (DejaVú de la AK)
Equipo usado
-----------------
Platinum Grow Lights P300 (93W crecimiento, 180w floración, espectro completo)
Tienda de cultivo DR90 (90x90 cm)
10 l AeroPot
Ventilador oscilante mediano de 20w
Sustrato BioBizz (Light-mix) usaré una pequeña capa de top-mix en el fondo del AirPot y mezclare el resto con Superguano & Top Vulcan (ambas de top crop) cuando transplante.
-----CALENDARIO DE RIEGO-----
Usando todos los nutrientes de la semana @ PH 5,8 & EC 0,7
01/09/19: 130 ml
04/09/19: 60 ml
08/09/19: 120 ml


Likes
6
Share

@GnomesAndStones
Follow
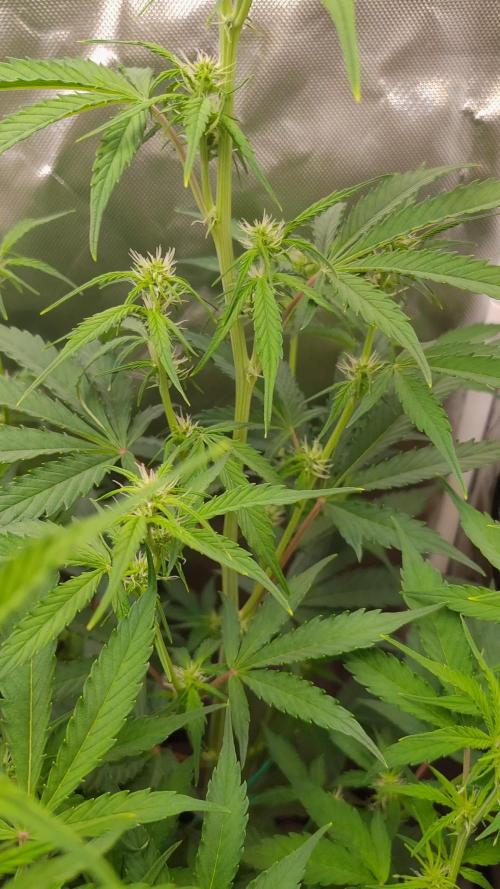
🌱 Growing too nice! She kept on stretching like crazy, growing 3 cm every day. The small tent couldn't handle her anymore, so she got promoted to the 60x60x180 cm Tent. Buds are really visible now and only the tops are stretching even more to indicate the final colas.
Day 43
💧 watered with 3,5L, pH 6 and 3ml/l CalMag, 1 ml/l grow, 0,7 ml/l micro and 0,4 ml/l bloom coming in at 1200 ppm.
Day 45
💧 Thirsty again, so she got 4L with 2,5 ml/l CalMag, 0,7 ml/l grow, 1,5 ml/l micro and 1,2 ml/l of bloom resulting in 1200 ppm. I wanted to try lowering CalMag slowly because i wasn't sure if she still needed that much.
Day 49
❗I realized, that i was still feeding her growing nutrients because i forgot to switch to preflower ratios... Not a huge deal but still unfortunate.
💧 Watered with 3,5L, 0,6 ml/l grow, 0,9 ml/l micro, 0,8 ml/l bloom and 3 ml/l CalMag -- 1150 ppm
Likes
2
Share

@Hou_Stone
Follow
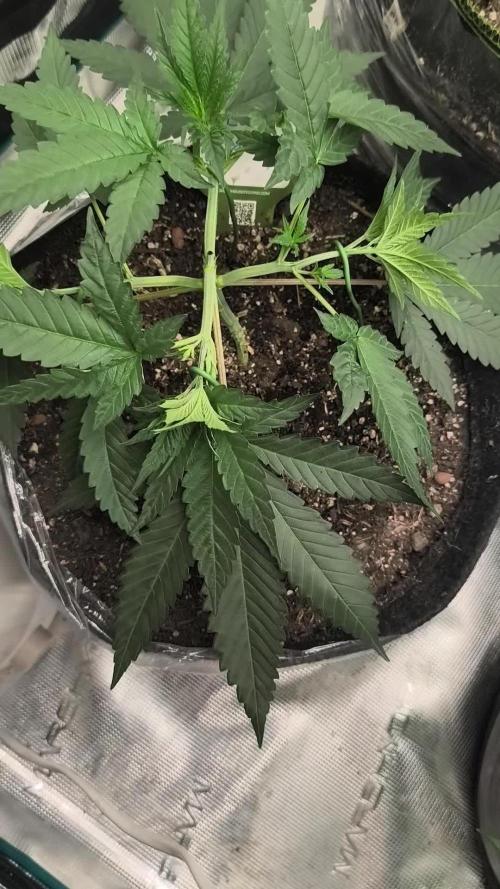
Week 4, after last week's pruning, the plant has recovered well. I'm using wires to do some LST and create space between the branches.

Likes
11
Share


@Mo_Powers
Follow
another week has passed and it is growing and thriving excellently. there has been a lot of sunshine and occasionally the necessary rain from above. no pistols to be seen yet

Likes
8
Share


@DonPerion1983
Follow
So forgot to add last week I took out the scrog net as I personally think the plants were to far into flowering now to be trying to tie them down! This week I’ve been trying to check trichomes!! Also I’ve added canna pk13/14 nutrients! As I think there getting closer to harvest time! I’m planning on using this 13:14 for two weeks feeding?? Then flush for 7-10 days with just normal soft tap water ph’d down to 5.8!!??
Also ordered a microscope just waiting on arrival! So I need to keep checking these trichomes until turning a little milky?? But overall still happy with my first grow so far! Notice leaves are turning yellow do I trim them? Or let them die naturally? Any help still needed cheers

Likes
5
Share

@sunshinegroww
Follow
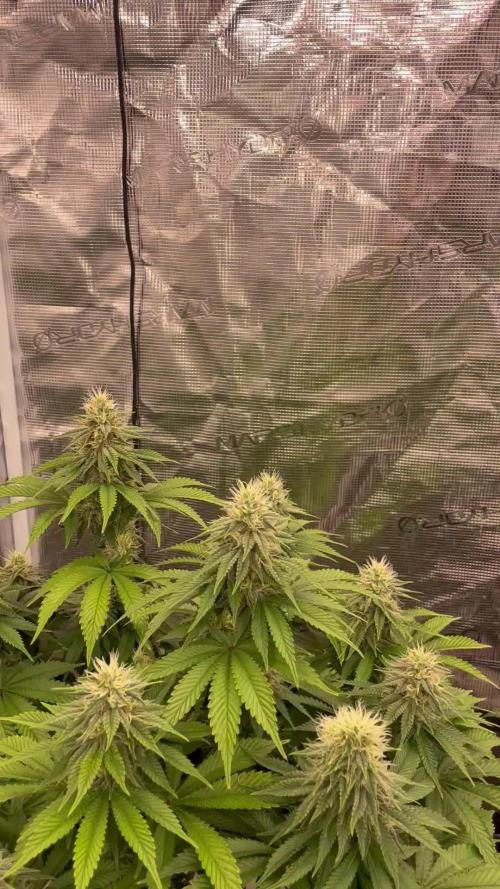
Hello week 6 looking 🔥 2 yellow leafes i think underwater as pretty hot now ☀️☀️☀️?❤️
Likes
16
Share

Likes
86
Share


@DogDoctorOfficial
Follow
Apolo F1 Mission Diary - Week 3: The Ballet of Bend, Blossom, and Root Rhapsody
Greetings, fellow cultivators and guardians of the green frontier! Week 3 of our Apolo F1's botanical saga has unfurled with a kaleidoscope of growth and a symphony of roots that dance beneath the surface. Join me as we explore the verdant ballet of bending, the flourishing foliage, and the hidden root rhapsody.
This week has been a crescendo of controlled chaos, with the delicate art of bending taking center stage. Each branch gracefully sways and contorts, responding to the gentle nudges like a botanical ballerina in an intricate dance. Our Apolo F1 is not just growing; she's performing a choreography of resilience and elegance.
And here's the thrilling revelation - roots! Yes, beneath the soil surface, a clandestine world is unfurling. Root tendrils are popping up like eager spectators in the front row, reaching out to absorb the nutrients and anchor our green virtuoso. It's a root rhapsody, a silent applause to the nutrient-rich symphony we've orchestrated.
As I continue to guide the botanical ballet, the TDS in the watering regimen maintains a harmonious 390 ppm, providing our plant with a nutrient-rich libretto. The pH, the conductor of this aqueous symphony, remains a steady 6.0, ensuring optimal nutrient absorption and a thriving performance.
Temperature-wise, our Apolo F1 revels in the cozy embrace of a 26-degree Celsius environment. It's like providing the ideal backstage conditions for our botanical star, ensuring she performs at her peak.
Now, let's talk about the behind-the-scenes technique – the bottom feeding spectacle. Water is tossed into the plate, and our green companion sips from this botanical wellspring. It's a refined and controlled drinking session, a sophisticated soirée for our growing virtuoso.
And as always, a tip of the hat to Aptus Holland, the maestros of our nutrient symphony. Their meticulous regimen ensures our Apolo F1 gets the VIP treatment from the roots to the tips of her flourishing foliage.
As we marvel at the ongoing dance of growth and the flourishing of our green virtuoso, I extend my gratitude to the digital coliseum, Grow Diaries, for being the stage where our horticultural epic unfolds. And to Royal Queen Seeds, whose Apolo F1 has become the star of this green opera.
In the next enthralling chapter of our Apolo F1 Mission Diary, we'll witness the continued ballet of growth and the root rhapsody beneath the surface. Until then, may your gardens flourish and your green endeavors be ever bountiful!
As always thank you all for stopping by and for supporting me on this journey, i am super passion about growing and fell blessed to have you all with me on this new journey
Likes
6
Share


@Silverback_Guerilla
Follow
I'm wanting to replace all my miscellaneous lights with another quantum bar rig before my Fall grow this year.
Anybody want to buy some gently used lighting gear this summer???😁😎
👉 2 x 100w Cree CXB3590 (3500k) with pin heatsinks - 3 grows usage
👉 1 x 100w Citizen Clu048 COB (3500k) with pin heatsink - 3 grows usage
👉 1 x 120w DIY quantum board (3000k) 256 x LM301b's - no heatsink - used for 2 grows
👉 1 x 60w Bridgelux COB (3500k) - Par38 style - used for 1 day (a back-up bulb)
👉 1 x Morsen 2000w (367w actual) blurple with a bank of 1/6 of the 200 LEDs not working - used 3 grows
👉 1 x Morsen 2000w (367w actual) blurple with only my current grow in use (the replacement)
👉 1 x HeroLight 1500w (285w actual) 5 x COB full spectrum (pinkish-white) - 2 veg stage uses
👉 4 x 36w Par38 type deep red (660nm) bulbs - 3 grows usage
👉 2 x 25w 225 LED panels (660nm) - 3 grows usage
👉 2 x 25w 225 LED panels (440nm) 4 veg stage uses
👉 2 x 25w 225 LED panels (440nm)
👉 1 x 50w 225 LED panel (6500k+440nm)
👉 1 x 20w Par38 style Cree COB (3000k) - (more like a 40w) - used for a week
👉 1 x 15w Sansi blurple Par38 type bulb - used 1 day only
👉 1 x 40w Sansi 4000k daylight Par38 type bulb - used during germination only
👉 4 x 12w MiracleLED red spectrum (4000k daylight + 700nm red) regular light bulb - used during flowering in 2 grows
Just hit me up in chat if you are interested in anything-
============================================
SUNDAY 3/31:
I foliar fed her a few times and rotated her. Almost have the lighting timers adjusted well enough to keep the PAR high while keeping temperatures low enough for successful flowering.
MONDAY:
spun her around and foliar fed a few times
TUESDAY:
I fed her about 3/4 gallon and started her on Open Sesame and Tiger Bloom. Foliar fed a few times and tweaked the timers again..
WEDNESDAY:
I foliar fed a few times and rotated her, then took some photos. She's looking sexy!😍
THURSDAY:
I foliar fed her a few times and rotated her.
FRIDAY:
I watered her with about a half-gallon including boomerang, bud candy, calimagic, terpinator, kelp me kelp you, and armor si. She's the most Sativa-looking plant in either of my tents, but still currently winning the race to the finish.


Likes
10
Share


@majic_happen
Follow
day 44
- The growth process continues unabated. I am waiting for the desired size. 8 days after flowering it didn't grow as much as I thought it would, so we went back to the growing season. 👽
day 49
- I decided not to cut the leaves anymore after much defoliation. It easily tolerates strong stress easy to grow.
