


Likes
Comments
Share

@Borberad
Follow
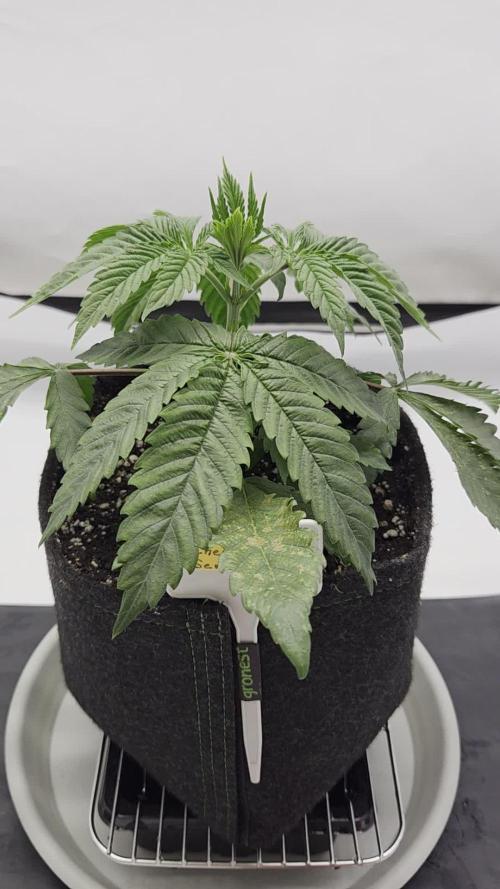
Wir sind sehr zufrieden mit dem kleinen Küsschen 💋 sie wächst fleißig vor sich hin und macht keine Probleme. Das Toppen musste bis Tag 32 warten. Ein guter Kuss hat es halt nicht eilig. Oberhalb der 4.ten Nodie wurde dann geschnitten. So haben wir noch die Möglichkeit uns die 6 stärksten Triebe auszusuchen und können dann die 2 schwächsten entfernen.

Processing
Likes
225
Share


@The_Projexx
Follow
What can I say the ladies are looking good forming up nicely Im really glad i trained them because they are going to get big ahah Other then that we are on schedule and things are kicking up it up a notch in the garden .
Thanks to everyone who comes down and checks out the diarys means alot to me . I wish y ou all the best through the hollidays !
-Happy Growing!


Likes
5
Share


@DawgHaus
Follow
Day 1: A large root can be seen at the bottom of each cell pot. Filled 3x 3 gallon pots with coco perlite 60/40 mix and transplanted each seedlings into its forever home. Not messing with micro-bacteria and all this time round as the nutes have everything that’s needed, fresh coco and a good feed will be more than enough for these girls. Watered them each with 100ml of water mixed with with a small amount of Velokelp and stuck a bag over each to lock in the humidity. Once the transplanting was over I setup a little DIY drip irrigation system with a 10L reservoir. Feeding schedule will be at 1/4 strength of advise dose as recommend by FastBuds and Remo Nutrients. Set up the timer for the lights and drip irrigation system to kick in tomorrow. The lights will change to 18/6 and drip irrigation will kick in just after lights on.
Day 2: Lights turned off for the first time after 24 hour light for the past few days. After 6 hours of darkness the seedling are looking healthy as fuck. The first true leaves are now developed and they’re all bright bright green. Drip irrigation timer did its thing for the first time today and I’m well happy with the result from my little DIY kit, hopefully all runs smoothly with it for the rest of the grow.
Day 3: The cotyledons have started praying upwards towards the light. The bags over the top of the plants have a good amount of condensation on the inside so I’ve cut a couple small holes in the top of each bag to let a little air in. Turned drip system off for a couple days to avoid over watering.
Day 4: Tiny second set of leaves can be seen in the centre of each plant. Made the air holes on bags bigger to get the ready for them to be removed. Drip system still turned off.
Day 5: Drip irrigation system is working as it should and environments holding up so all is good. Plants are looking good and seem fairly well rooted. Removed the bags from the top of each pot and turned on the humidifier and set it to 60%. Only thing left to do on this setup up is get some trays under the pots so they’re not sitting in puddles during the feeds.
Day 6: All of the plants first true leaves are praying up to the light and the second sets are starting to properly develop. Really happy with all the seedlings so far. When it comes to autos these seem like the business. Fans turned on today and drip irrigation set back on its timer. Found some old metal grilled shelves that have worked out perfect for trays for the irrigation.
Day 7: Second set of leaves are beginning to rise up, another week I reckon and I’ll look into hanging the MH bulb so these girls can explode. Very happy with these seeds so far. Gave them their first foliar spray with a 5ml of Velokelp and 5ml of Magnifical mixed into 1L of water. Turned the oscillating fan up a notch too as I’ve got it set up a fair distance away and I didn’t feel the breeze was catching them enough. Mixed up a new stronger feed this evening so it’s read for the droppers coming in tomorrow.

Likes
54
Share


@MistaOC
Follow
06.05. Day 100
60 Days of flowering
Harvestday
May 6th — what a day. Back from vacation in the afternoon and wrapped up the Grow Cup in the evening. It was a long, exhausting day, but one I’ll never forget. Those five legendary ladies made it truly unforgettable!

Likes
13
Share


@AutoCrazy
Follow
This plant is the easiest plant I’ve grown! Takes well to everything organic!! She takes to training like an absolute champ!
I can’t wait to see this Dinagirl in the end!!
🍿
😎

Likes
24
Share


@ThatoneAKguy
Follow
It’s Aliiiiiiive! Finally built my second matching hybrid NFT hydro system after getting the autos out of the main tent. 6” Rockwool cubes on draining racks in 8 gallon totes with an 8 gallon res. Waiting on some parts from amazon to add the second pump and feeding tubes. Hoping to veg them for 3-4 weeks before I flip the schedule. Haven’t decided if I want to scrog them yet or not.
Likes
22
Share


@Njaak
Follow
pH was important as expected and a bit of light burn later on in the grow but ultimately it was pretty smooth sailing. I used a very common nutrient (GHE) and not overly strong.
Buds were thick, dense, and moderately pine smelling. The plant did not grow excessively tall thanks to LST, and the LST did not seem to have any ill effects at all. Foliage was thick, and I let it go for a very long time before doing any sort of defoliation. Even then it was modest and just to get light to the lower colas.
Still in trimming mode and will continue to update :)
Also, other plants in the house got spider mites. Not this one. Could have been that it was in hydro and others weren't but hard to say.

Likes
2
Share


@GanjOS_OG
Follow
First week of Veg is done after the propagator tent. Clones looking good so far - getting healthy again. Startet LST.


Likes
25
Share


@MotherNaturesSon
Follow
Waning off CaN to full Jack’s Part A for flowering nutes. Also have floralicious plus and UV bulbs on the way for the late flower. Bit of defoliation, no major problems to speak of overall. Probably will update with a video mid week. Cheers

Processing
Likes
2
Share


@Vet4weed
Follow
Week 4 (Jan 25 - Jan 31)
Time to transplant! Note: Posted this a couple days early (actual transplant took place on Groundhog Day, 2 Feb) 1st time going Organic, plants starting to sag, so decided it's about time to move to a bigger container so I can have a better feel for watering and feeding. Added about 2-3 teaspoons of Wildroot Organic Concentrate Mycorrhizal Fungi to the roots and soil during transplant in hopes it'll give you them a little boost and establish a good root ball.

Likes
16
Share


@GreenMunchkin
Follow
Alright grow cycle, mistakes, improvements, etc...
She did stay in veg for too long, her growth was slow and not the best and so she took quite long, next time i'll be there from the beginning so I can take care of her throughout.
But her growth is really fun. It is a tall growing sativa with fairly tight noding when trained accordingly, producing long filled colas. The buds grow fairly dense and fluffly but do air out a little when dried. Trichome production was pretty impressive as well as terpene production.
She had thrips since her early days but did not seem to mind them at all. I did spray them initially but once flower started I stopped. I believe predatory mites might have been feeding on the pupae in the soil, if that is what this specific species of thrips did, the reason I say that is I could never see adults only larvae. Whatever the case maybe they were there but the population never really increased.
Something I did not mention during the grow is that those plants were played music during the days, music that is apparently developed for plants.
The 10L pot was WAY too small for a true sustainable living organic and to provide enough space for the plant, that was a mistake, I'd say a 20L would be the bare minimum and still. The bigger the better.
The hempy transfer did not hurt the plant and I believe even helped to some extent, BUT, I am still running test on the subject and so can't confirm anything, here are my observations
Roots did not colonize the perlite, a little on top and the sides but that was it, I was expecting to see a big root mass in there.
I believe hempy are great for salt fert as it hold a soup of nutes where the plant can feed from since the coco only holds very little
Whereas in nature most nutrient are in the top soil where the highest amount of decomposition happens, this is where the highest microbial activity happens and so where the plant will find food. Living organic is trying to reproduce nature and so there is no need for the plant's roots to gather at the bottom of the pot. Although it could have potentially provided the plant access to a larger amount of water and possibly more oxygenation of the pot. Those are all theories, please speak up if you have other proofs.
In conclusion , unless i get proven otherwise by someone or my latest running experiment , I will not be using hempies again as I believe it brings more complication and issues than a simple fabric pot.
The lights, The 600w at the start was good, then I decided to add a 400w...😂 That was completely overkill and not necessary. Waste of electricity. And they started suffering from too much light it seems at some point, I raised the light by a good 30 cm and they were fine.
600 is more than enough.
I am happy about how the soil performed but it has room for improvements.
As for the watering technique I have been watering large ammount every few days, next time I will be giving constant small amount of water each day and a soak every week or so, I believe the soil might perform better under those conditions.
She was also an easy plant to harvest whit her long colas which had very little foliage, I do trim in excess as I like my buds extra clean but the buds are not excessively bushy.
The trims were use to make some bubble hash, around 100g of wet trims yielded around 1.5-2g of bubble hash.
I did add a negative effect but only because it wouldn't give me a smile otherwise, but to be honnest it barely dries your mouth.
The soil is going to be recycled and reused in a next grow.
I can't think of anything else at the moment but if you have any question don't hesitate.
Likes
18
Share


@VI_Cannabis
Follow
June 14th not a ton happened, I believe I watered them (It seems I am having to water every second day now as they start to get bigger)
June 15th - still just growing away. I went out and got some different ducting so I could pull air from outside better with the ac infinity inline fan. I also received some insulated ducting from Amazon that is a hell of a lot better then the standard stuff I am using. I also grabbed a new 9 inch fan (still deciding the best place to place it, for now it is beside the door). I grabbed a larger oscillating fan aswell to keep air moving around.
June 16th - decided I would do some lst and then I gave them some water. I have been feeding nutrients every second day. I have also on every 3rd watering been doing just ph’d water. The humidity seems to drop quite a bit within 10-20 seconds of the door being open hence the lower reading. I am sitting roughly at 45-55 depending on time of day. As for temperatures I’m still struggling to keep it down during the warm days and it seems the highest I am getting is around 29 since switching the lights off from 11am - 5pm
June 17th - the girls seemed to have perked back up after yesterday’s lst. Not much new today just some growth!
June 18th - Unfortunately I forgot to take pictures today. But not to much difference. I did feed the girls with some nutrient water today.
June 19th - I again forgot to take pictures. They are just growing away and doing there thing. I did check for growth from the topped portion on the bigger plant, no growth from one of the 2 tops. So I indeed cut it to low… I won’t be doing that again haha.
June 20th - finally grabbed something to deal with the heat since it is getting hotter everyday. I picked up a 10,000 btu air conditioner. I have it set at 23 degrees. I also moved the plants around and re-arranged some stuff. I took the inline fan that was taking air out and instead the ac output is going to there. I ended up having to make the vent into a 6inch vent on the trailer. Temps stay around 23 now. Humidity is still 45-55 depending on time of day.
Likes
44
Share


@Aedaone
Follow
The temperatures, humidity, height, and watering volume(if measured) in grow conditions are all averaged for the week. The pH is soil pH. Any watering done by me is well water which is 7.6 pH and 50° F. Coop Poop, Feather Meal, and Soluble Kelp are ml/gallon of soil top dressed. Everything else listed in nutrients is ml/gallon of water fed to plants without checking the solution Ph.
Day 1 we had a high temperature of 73°. It was sunny, cool, and a dry 35% humidity. The girls are super happy. I watered about 5 gallons today.
Day 2 we had a high temperature of 74°F. I watered about 5 gallons of well water. The nights are super cool and the pm is coming back. I'll have more Growers Ally fungicide arriving tomorrow. I'll hit these with the double treatment to clean them up.
Day 4 we had a high temperature of 84°F with sunny skies. The humidity is tipping back up but still below 80%. I didn't get photos for day 3. The girls are doing great. I treated with biofungicide today. They're feeding off the nutes in the pot. They run a little low on nitrogen overnight. When I water in the morning the feather meal on the top soil breaks down and they darken up.
Day 5 we had a high temperature of 87°F with partly cloudy skies. I watered about 5 gallons.
Day 6 we had a high temperature of 80°F. Skies were cloudy and we have a hurricane now tropical depression about to hit. I watered about 5 gallons. No rain yet.
Day 7 we had a high temperature of 72°F. Skies were overcast and there was a drizzling mist all day. Humidity was 110% for at least 24 hours. The girls seemed to be fine. There's more rain in the forecast and I'm hoping we miss it.
Likes
9
Share


@Headies
Follow
This is the beginning of each week. So I flushed them and switched nutrients. They were mag deficient, nitro toxic. Not PH actually. I'm adding co2 next week after I seal the room. I think I need to back the PAR down to 800 but they are still alive and it's over half way done.
How any more weeks? I thought this was a 65 day auto. Hydro in a 5 gallon pot could add up to three weeks I heard with Autos. could these go 12 weeks total?
Likes
19
Share

@PavementPunk
Follow
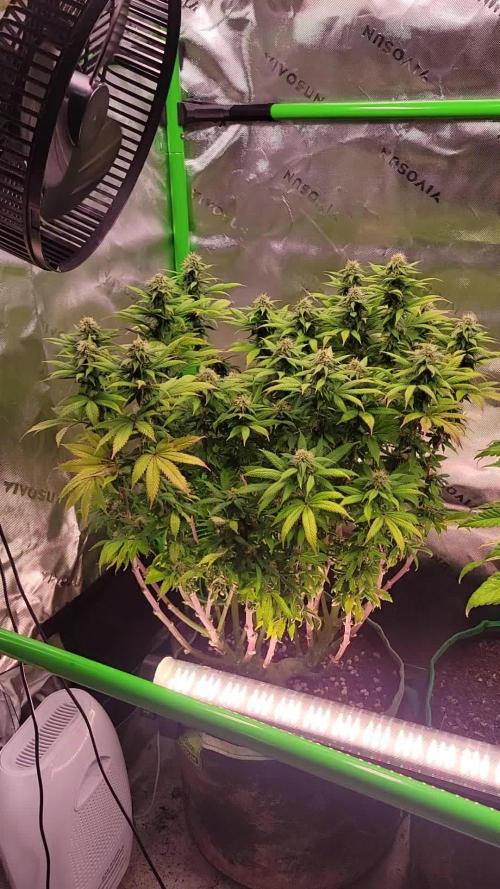
7/8/26 this poor baby was another caterpillar victim. Besides the stunting damage she shook it off ok. Not the biggest and probably not gonna produce a ton but shes doing her thing and looking pretty healthy. Happy growing friends ✌️
Likes
2
Share


@Luv2Grow
Follow
Day 71 - Starting week 11 and this is her final week. She will be getting chopped on Friday. She’s still has quite a bit of white pistils but just about 100% of the trichs are milky with about 30% amber so that’s telling me she’s ready. I’ve never tried the 72 hours of darkness before harvesting but because I need some room in the tent, I went ahead and took her out and placed her into a dark cabinet until Friday. She’ll have decent airflow in there so she should be ok until Friday.
Day 72 - Nothing new to update as of now. She’s just hitting her first 24 hours of complete darkness. I’ll give her a quick peak tomorrow and see how she looks and then will give her 24 more hours and chop her on Friday.
Day 73 - Just a few updated pictures before chopping tomorrow. It’s been almost 48 hours of darkness and I’m not seeing much of a difference in her but she is definitely smelling REALLY strong.
Likes
3
Share


@CalGonJim
Follow
5/5 1AM MONDAY
5/6 4am BPP is looking good....water logged some roots so I will be opening the top today to dry the dirt.
230pm used a rag with a little bleach cleaned the bottom of the tray and sides dried and put everything back. BPP looks happy!!!
5/8 5sm.... BPP id good all others looking nice. letting dirt dry now, turned on the white lights and turn them off by hand around 3 or 4 but leave blue and red on 24/7. Im not consistent with the white lights, if they show stress I go back to just blue and red.
5/9 1am retard robin....if I register this plant as an immigrant retard will I get 3000 a month from the state???!!!???!!!
5/10 Retard Robin....you have failed me for the 3rd or 2nd to the LAST TIME!!! I dont know if she's going to become a viable plant now???? I will plant the last GOAT seed in the same cup, I dont think she's worth saving but a new seed will make for an exciting grow!!!!
I put a new seed in!!!.. Just noticed I did NOT open the air vents ...so a little water logged....I did a Rapid Start ..5mL water with a little run off. Opened the vents and put a little USB fan up.
5/11 222am they liked the Rapid Start .4ml L rinse.
Likes
31
Share


@The_Doctor_Green
Follow
Esta semana he regado solo con flora booster 2 ml x litro de agua.
La planta de la tierra, la sigo estirando hacia los costados.
Las de las macetas se ven sanas y bien, de a poco se van
Likes
9
Share

@Organic473
Follow
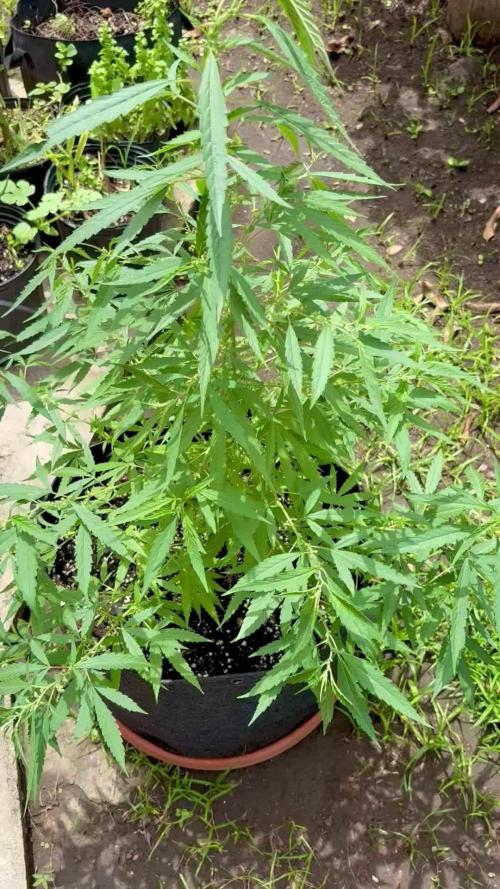
This guy and all his bloom. I will harvest now and save the pollen the… blueberry skunk has been pollinated so many times already via pre flowers… when I do start flowing his her I am interested to see how those seeds will turn out.
This skunk male is a champion!