


Likes
Comments
Share

@NAG420
Follow
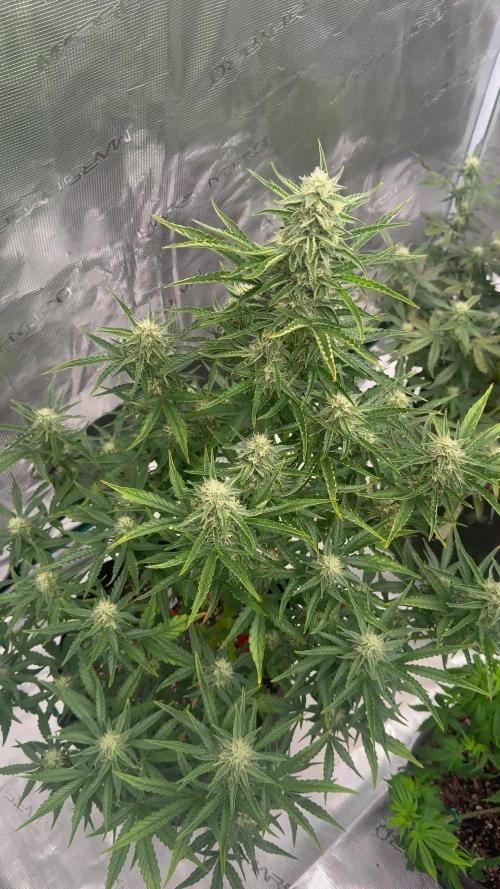
Well all caught 🆙 now this is the end of week 8 post and wow the frost is not coming in had some more heat issues decided to go up on the lamp percent from 80-85 but the heat load was to high and if I leave the outside air to cool down at night would drop too low in the tent. Started to regulate it a lot better now tho I have taco leafs but still fattening up every week! Breeder recommend 70 days almost there will be keeping close eye on the tricos when it’s time to chop.


Likes
11
Share


@Hix57
Follow
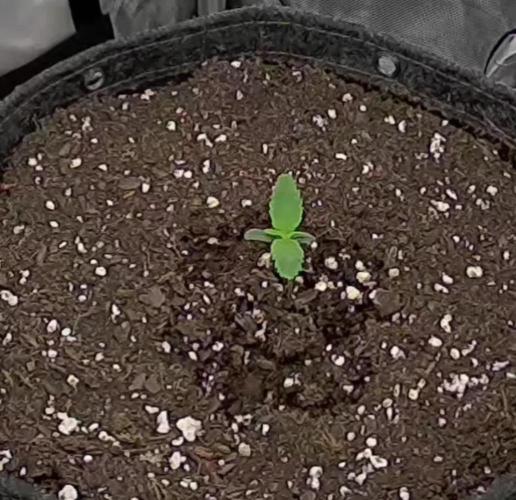
La semaine 5 s'est déroulée plutôt bien, même si on a eu un petit excès d'azote.
J'ai décidé de stopper complètement l'apport d'azote et de passer à une alimentation exclusivement dédiée à la floraison pour le moment.
Mes plantes ont fini leur phase d'étirement et se concentrent désormais sur la formation des fleurs.
En douceur, je commence à retirer une à deux feuilles par jour.
Un grand merci à louloutre pour son précieux coup de main !
🌱

Likes
4
Share

@SWITCH420
Follow
Hi folks,
I'm coming here to start the process of ending this grow journal. I harvested about three months ago and the weed is definitely cured. Photos are about to come — I'm doing a real studio photo shoot for those buds, they deserve it!
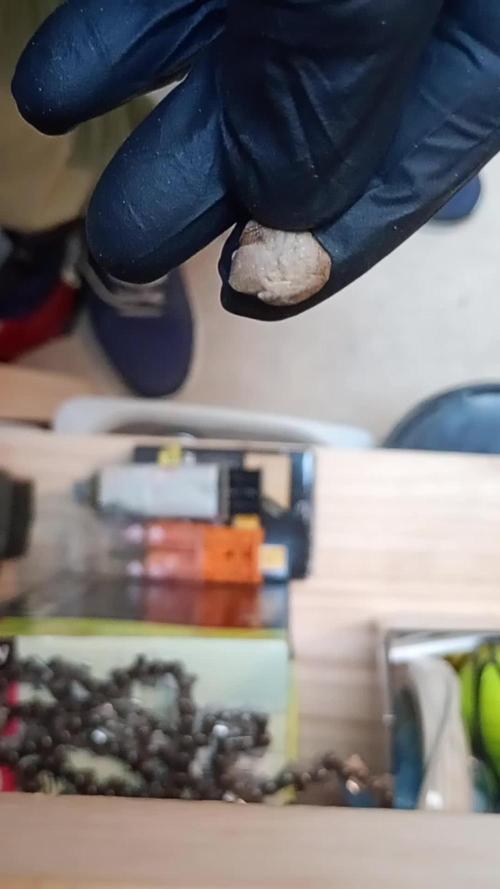
While waiting for the shots, I made some pretty damn dank hash temple balls using the iced water extraction method (solvent-free) with my little washing machine. It's a mix of the 8 strains I grew here — never ideal to mix different kinds of resin... but man, this is some serious dedicated work, so I'm making myself happy with that 14g shiny temple ball in the end 😉
Here are a few details about my process for you guys (and don't forget — you can do it with fresh material! Fresh frozen is always tastier. Also, the drying process is much more efficient and faster with a freeze dryer, but... you need the budget for that. I don't, so I go with the air drying method — check it out below):
1. Get your dry trim, then cure it properly for at least a month (I did 3 months). Smell it — mmh, sweet, dried to perfection. ✅
2. Freeze it, delicately wrapped in a freezer bag.
3. Let a large amount of tap water sit for at least 24h to remove chemicals like chlorine, then use it to make plenty of ice cubes — don't be shy, especially if you're not working in a cool environment.
4. Prep your washing machine: add trim between two layers of ice, fill up with clean water (as much as you can, large vortex is better than a smaller one), then make it seat for 30 min (45 min for thicker buds) the time that the dried green material gets wet again.
5. Prep your filtering tools: catch bag, different mesh bags, spoon, etc.
6. Wash as many times as you can before green contaminants appear, as these lower the quality of your hash — don't hesitate to go up to 8 to 12 washes if the resin still looks clean! Important: each wash has its own specific duration, and they get progressively longer as you advance through the process. Frenchy Cannoli (a true hash legend) provides a detailed timetable for this — from as little as 30 seconds to 1 minute for the first wash, all the way up to around 25 minutes by wash 8. Make sure to follow that schedule rather than using the same duration for every run or running it too long the first wash !! It could breaks to quickly your precious material before you collect all the trich's and the quality would be lower in the end.
7. Collect the wet resin in the mesh bags with a frozen metal spoon, make patties with the resin, and let them sit over some towels in order to drain as much water as possible (place a tissue made for hash collecting over the towel).
8. When the patties are a little dry to the touch, wrap them as they are in the tissue and place them in the freezer for 48h or more.
9. With an iron strainer, microplane your patties over the biggest flat surface you can get! It's important that your micro pieces of hash dry widely and don't get too compacted. Any failure in the air drying process will nucleate rot, ruining your hash in the end and making it a poor product — eventually something to throw away. Sad when you think about all the phases of the process to get to this point!
10. So, in order to air dry properly, you must — it's not optional — lower the RH of your dry room to 35% or slightly below, never above and let it dry as long as needed until the material feels like dry sand. For myself, I found 10 to 15 days is ideal. The room must be very lightly ventilated (not directly on your resin!) and in complete darkness — the goal is to preserve all those delicious terpenes! Ideally, temps around 60°F or 16°C
11. Now that it's dry, collect your resin with a large thin spatula! Make a little mound between two layers of PaperHash, boil some water, and fill up a wine bottle with it!
⚠️ From this point on, to avoid exposing your carefully dried resin to a more humid environment — which could ruin all your hard work — everything must happen in the same drying room. Keep working at 35% RH until your temple ball is tightly and airtight wrapped in PaperHash. (And don't forget to drink water — it's dry in there! 💧)
12. Start to slowly press your resin. Magical moment. Finally....
13. Press 3 times for 10 to 15 minutes in order to really decarb your hash — because that's what it's all about! Between each press, try as best you can to shape a patty... until the final press, when you'll be able to form that magical shiny temple ball (it only shines with gloves on, guys 😄)
14. You are now allowed to try it — for quality control purposes only, of course!
15. Because you want to age your hash for the sweetest 5-star smoking experience: wrap your temple ball in a large piece of PaperHash — if you can get that brand it's ideal, or another kind (check https://thepressclub.co) as long as it's organic!
16. Place the wrapped temple ball in a glass jar and store it in a dark, cool place.
17. Wait a minimum of 3 months before opening it.
18. Open, smell, touch — you'll be amazed. Roll it up with some weed or tobacco or both (I do both) / Or get a Hooka... you are smoking some true primo aged hash made by yourself! Taste the difference and realize all the path from choosing the seeds online until this first amazing puff ... 🙏
I want to credit my inspiration for making this kind of hash to the great Frenchy Cannoli, who has shared all his knowledge through amazingly rich tutorial content that you can find online with a bit of searching. 😉 Peace Frenchy 🕊️☮️




Likes
36
Share


@MrJoint
Follow
🌻 It already starts to smell very well.
✌️🎃Thank you for checking my cultivation.

Likes
4
Share


@eldruida_lamota
Follow
Que pasa familia, vamos con la tercera semana de floración de estas Tropicana poison F1 de Sweetseeds.
Vamos al lío , las 3 plantas seleccionadas fueron trasplantadas a su maceta definitiva, ya superaron el shock por el trasplante, estas semanas las paremos todas a floración.
El ph se controla en 6.2 , la temperatura la tenemos entre 20/22 grados y la humedad ronda el 50%.
El ciclo de floración 12h de luz, el foco está al 100% de potencia.
Las jodidas estiraron demasiado, veremos como acaban, no me gustan tan altas.
Hasta aquí todo, Buenos humos 💨💨💨

Likes
2
Share


@OS_Farmz
Follow
Flowering goes good, also found the possible reason of slowy grow of one of the plants.

Likes
1
Share


@critwat
Follow
Day 19 - Girls are growing very bushy! Turned light intensity down to 75 and raised them a bit to promote more vertical growth. Also fimmed the main colas on this day.
Day 21 - Transplanted the OG Glue from its red solo cup into a 5 gal container and added mycorrhizae to mitigate any shock. Seems to be doing well.
Day 25 - girls are all healthy and showing no signs of issues! Growing like.... Weeds


Likes
58
Share


@MadeInGermany
Follow
Flowering day 16
since time change to 12/12 h
Hey everyone 😀
The ladies are developing beautifully 😊.
Since, as already mentioned, I work with the same genetics from last time (at that time with 3 plants, topping and scrog) this time work with all 8 and immediately after rooting on 12/12 I am very curious how much they will still grow 😂.
The back and middle ones are pretty little trees like I imagined.
The front small plants will probably not do much in size either, which is not a problem since I tried it as an experiment :-).
Then there are mini trees 😂👍.
Otherwise everything is going great 😊.
This week the entire water was changed, and this time instead of the Canna Aqua Vega filled with Canna Aqua Flores because the first flowers appear ☺️.
I'm curious what happens this week, especially with the front 😂 and wish you a lot of fun with the update.
Sorry for the flickering in the video. it's because of the lamp and unfortunately I can't get the system out every time :-(.
Stay healthy and let it grow 🍀👌
You can buy this Strain at :
www.Zamnesia.com
☝️🏼☝️🏼☝️🏼☝️🏼☝️🏼☝️🏼
Strain
Gelato clone from mother (Zamnesia )
☝️
Genetics: Wedding Cake x Gelato x Gelato 33
👍
Vega lamp: 2 x Todogrow LED CXB3590 COB 55 W
1 x Sanlight S2W 62 W
💡
Flower lamp : 2 x Todogrow LED CXB3590 COB 55 W
1 x Sanlight S2W 62 W
💡 ☝️
Grow Aero System : Growtool 0.8
☝️
Fertilizer:
Canna Aqua Vega A + B , Canna Aqua Flores A + B , Rizotonic, Cannazym, CANNA Boost, Pk 13/14, Canna Cal / Mag, Canna Ph - Grow, Canna Ph-Bloom
☝️🌱
Water:
Osmosis water mixed with normal water (24 hours stale that the chlorine evaporates) to 0.2 EG. Add Cal / Mag to 0.4 Ec Ph with ph- to 5.2 - 5.8
💦 💧

Likes
38
Share


@Cariboo_OG
Follow
Utopia Haze is a rare heavily sativa dominant hybrid (90% sativa/10% indica) strain created through back crossing Brazilian Sativa strains. This tasty little bud took home 1st Place for Best Sativa in the 2008 High Times’ Cannabis Cup and for good reason – with its potent 18-22% average THC level and long lasting cerebral effects, Utopia Haze is one powerhouse smoke. The Utopia Haze high comes on soon after you finish your first toke, hitting you with a strong cerebral lift that infuses you with a sense of hazy relaxation.
Type: Feminised/Photoperiod
Cultivation: Indoor/Outdoor
Flowering Time (days): 70-75
Indoor Yield (g): Up to 650
Feminised Outdoor Harvest Month: October
Feminised Outdoor Harvest Month Week: 3rd-4th week
Aroma: Citrus, Woody, Pungent, Mint
Effect: Cerebral Lift, Hazy Relaxation, Sleepy
Welcome Everyone to the Final Entry of my Utopia Haze Grow !
There is so much to discuss ! I have been extremely busy as of late trying to get this Harvest together, but i am happy to have it here for you now !
I Seriously under estimated the amount of time, help from others, and my own necessary skills to pull this off.. and i still kind of screwed it up lol !
But its worth noting i have never actually done this before and trying to document it during....was extremely hard.
It is next to impossible to work an iPhone with rubber gloves on !
First I want to discuss everything step by step so before you jump straight into the comments on how the end product is so small in "quantity"
Rest assured i am happy with its"quality"...and thats all that matters to me because Life is a journey not a destination! and i have learned so much from this grow that I couldn't be any happy even if i messed some things up :)
But at the very least I hope you read through this entry in its entirety with an open mind and focus more on the process, rather than just the outcome!
I ran out of Ice & i was only able to wash three times..(normally I've heard you should go sometimes 5-6 washes)
Preparation is Key & things will be much better next round :)
Photos 1-22
These are pretty self explanatory but for those of you just tuning in now.. this is what happens to a very happy plant when you don't have the necessary tools to monitor key components of growing cannabis.. Ph, as well as EC levels play a very key role in the outcome of your grow lol that being said I was just able to save this plant by purchasing both tools but that doesn't mean the plant didn't suffer because of the prior events.. This was a Huge reason behind me choosing to turn this harvest into what i would consider
"Solventless Hash Rosin" from "Ice water extracted Bubble hash".
Pictures 23
The idea here is the process of using "fresh Frozen Cannabis" this has been discussed many a time online on such sites as instagram and here on grow diaries as well.. I personally have Never tried the process so i decided to try it out and make a judgement for myself..
Video 24
The Cannabis has now been in the freezer for 72 hours making it very well frozen.. as you can tell i struggled getting it all into the 25u Screen Wash Bag. One thing of note i would do differently is i will de-stem my next batch as i also believe this played a part in the amount of plant matter that escaped through the sieves.
Photo/Video's 25-28
The idea here is "ice water Seiving" & especially with the bags that I am using here that are only have screen material on the bottom portion of the bag it is very important to have spaces in-between the screens to allow the water to pass directly through the screens into the bottom bucket with the least amount of resistance.. because the hash is so extremely temperature dependant if it gets warm on the side of the bag.. it will stick there and not make it to the bottom to become use able product..
29
You do not need to use as much Ice as i used here lol... the idea is to keep everything very cold..i certainly achieved that but at the sacrifice of using so much that i ended up grinding product and producing "contaminants" but in the end they are just plant matter that i would be smoking when i rolled up my joint either way so.. I'm not super disappointed..
But it should be noted that what you want to achieve here is a Layering effect where you have the wash bag between two small layers of ice while the "water current" washes the Trichomes away allowing them to be separated by the screens setup below :)
Before Starting the machine you should allow some time (i.e.;10-12minutes pre soak to allow the product to become saturated) before the first cycle.
By video 32 I have just ran out of ice lol..
Video 33-34
Here I have a tip for you.. to separate the screens that you sieve through.. cut 5 gallon buckets to stretch them across nice and tight.. it'll make scooping your Bubble that much easier ! i learned this from the many "Frenchy" videos I have watched :)
Picture 35
Here in lays the problem for most people.. drying your hash without loosing vast amounts of "Terpenes" whilst also stay ever vigilant against mold !
Thanks to all those videos I've watched on youtube.. id like to think this was one of my most successful parts of this process..
Things to Note; Terpenes start to seriously evaporate at temperatures 68F or 20C
you need to stay as cold as possible whilst bringing the Relative Humidity in the space down into the 40-30% to stay away from that nasty mold !
I used my cold storage room in the basement.. with a dehumidifier running to keep the space at 45% RH & staying at a constant 15c.
All while spreading the hash as thin as possible across parchment paper, on top of the white screens with a fan moving air across both sides of the paper.
Pictures 36-38
These are some macros i took in the middle of my drying session I fell in love with the colour.
Yes i know the black spots are plant material but they will get caught when i bag the hash & squish the oil out.
Thing to Note; at this stage it is important to ensure you 'micro plane" the hash down as fine as you can whilst staying weary of the temperature... any "chunks" will hold pockets of moisture.. that lead to potential problems..ie; mold ...
Picture/Video 39-41
Successfully planed bubble hash ready to be bagged and Squished !
Picture 42
Ive decided to follow Pedro.. from Pedros Grow Room and double bag to be on the safe side so i don't have any blow outs.
So thats One 25u bag inside one 160u bag ! :)
Pictures 43
This is almost 3 grams of the bubble hash from above, already melting in the bag.. this is where i ran into trouble again lol things started getting to warm in the house and i was only able to get one of the three squish's i did on video :( things started getting sticky.
Picture 44
This is basically just a photo of the equipment I'm using; 3x5 LowTemp Cage in the frame I built myself, with a 20Ton bottle jack.
Something to note here is this is an older Lowtemp model with only a single heating zone which is which i have it closed here heating Both sides of the press :)
As well as the importance of having adequate pressure on your plates.. my rig is very overkill for the size of hash bags..lol
Video 45
Here is the lovely press video.. its didn't quite work the way i wanted either lol my directional folding wasn't quite tight enough for a big "drip" :)
&the Press was set to 65°c
Photo's 46-50 are pretty self explanatory :) I had a blow out.. but still managed to pull an 80% return from the hash once squished...& yes it tasted amazing :)
Was it worth it in the end... that could be debated.. for some..i understand..its not your thing, but for those of us that are interested in making our own concentrates.. free from Solvents...
I wouldn't make it any other way :)
If even ONE of you reading this diary finds it helpful to reference for ANYTHING.....even if its "what not to do" ill consider it a success !
Thanks again for tagging along on this garden adventure.. its been one heck of a journey !
Much Love from B.C. Canada,
Until Next time,
Cariboo
Likes
6
Share

@CadillacGreen_420
Follow
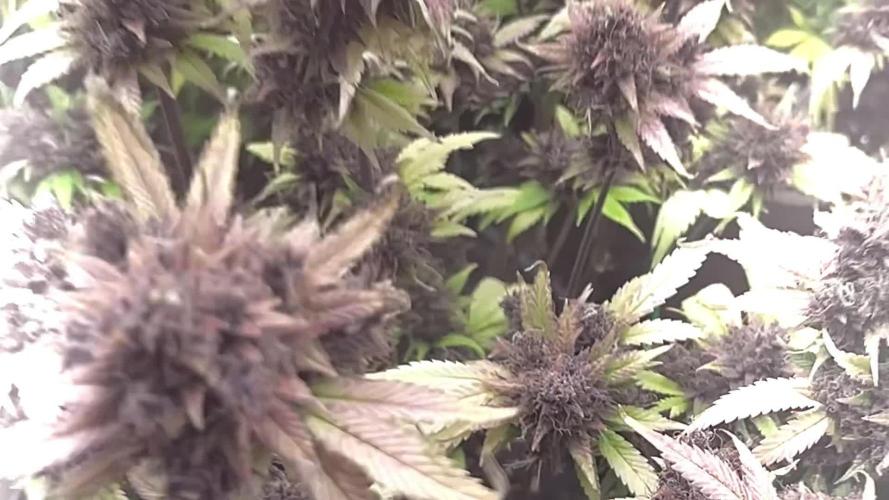
Week 13 – Ripening is now progressing slowly, as I had expected, due to my choice to provide a light stimulus that isn’t too intense but rather gentler. From flowering until now I’ve maintained 30 DLI and a steady 470 PAR.
In this run, the goal has been to keep the resin thick and sticky. Humidity has been kept between 57–62% max. My lamp is an Omega Pro 300W, which I’m currently running 37% (111 W).
This strategy seems to be working well: resin production has been abundant, and on this point—and not only this one—I’ve completely fallen in love with Gorilla Cookies.
The aroma is exquisite, and the resin… the flowers are covered in ointment-like resin.
The macro shots of the trichomes still don’t show any amber heads, so I believe harvest is probably about 10–15 days away. 🍮🤤
I think I’ll grow only Gorilla in the next run! 🦍👀
P.SThe leaf discoloration happened very quickly! The previous photos are from yesterday when it was still green — today it looks like this. Really interesting
Likes
8
Share


@artems
Follow
Despite a slight salt buildup, Scrooge is thriving. After measuring the drainage, it showed 1200ppm, so I'll be flushing it out. Increased the feed to around 1000ppm to ensure it gets the nutrients it needs. Let's keep those vibes positive! 🌿🌟
Likes
19
Share


@Freedonia
Follow
Day 58. Apparently the plant has a bit of excess Nitrogen, so I changed the fertilizer in the reservoir, removing CalMag I have lowered the levels and N, because CalMag has 4-0-0. Lowering the ppm to 650 (before 750). Thank you for the advice @SeedLover 😁
I also start to try the new microscope that has arrived today. :D
Let's see how it progresses!
Likes
7
Share


@GermanGrow182
Follow
Die zweite Reihe Photos hat richtig aufgeholt und ist fast so hoch wie die 2wochen älteren , aber noch nicht so verzweigt. Habe ja die beiden Haupttriebe nach außen gebogen, dadurch sprießen jetzt die Seitentriebe stark.die Special Queen Auto sind alle fleißig am blühen.es sind komische phenos geworden. Zwei sind sehr klein geblieben und werden nur wenig abwerfen. Da ich einen 4.run außerhalb der Doku habe, wo auch noch 6autos wachsen, ist es mir egal 🙂. Es läuft. Deas wichtigste sind die Photos und die machen,was sie sollen.. bis nächste Woche ✌️


Processing
Likes
15
Share


@CannabisAprendiz
Follow
Hola con esta semana ya quedamos al dia con el seguimiento ya que estaba atrasado en el tiempo. Se nota una producción de resina notable en esta genética que nos ha gustado mucho por su olor y estructura de las plantas .
hemos creado un video por cada una de las 14 plantas del seguimiento, hay varias muy llamativas que están "pre-seleccionadas" para mantener a futuro, el olor que se llega a sentir es muy florar y dulce, si tienen alguna pregunta no duden en preguntar saludos.
Hello with this week we are already up to date with the follow-up since I was late in time. There is a remarkable resin production in this genetics that we liked a lot for its smell and structure of plants.
We have created a video for each of the 14 floors of the follow-up, there are several very striking that are "pre-selected" to keep in the future, the smell you get to feel is very flowery and sweet, if you have any questions do not hesitate to Ask greetings.
Likes
64
Share

@MadeInGermany
Follow
Hi people :-)
Today the update of the Blue Gelato # 41 🌱.
She looks very healthy and vital 👌.
It has grown very nicely this week.
I only uploaded 2 of the same videos for testing, once in 4 K and once in HD. Since the last videos of the quality were unfortunately not so good when you watched them on the PC.
I hope this bug is now fixed, otherwise it is because of my apps etc.
Tomorrow there will be a few more pictures, because unfortunately I only came to the videos today.
That's a hell of a lot of work that comes with growing, and still work in everyday life 😅.
What you don't do for your passion 😍👍
I wish you all a nice start into the new week, let it grow and stay healthy 🤗🙏🏻🌱🍀
Likes
39
Share


@J_diaz420
Follow
Esta semana todo tranquilo, en un par de días más haré poda de bajos y defoliación .
También se colocaran tutores de vara a cada planta
Likes
49
Share


@Guerilla_Jack
Follow
Hello growers!! I bend the main branches down.Side branches are spreading nicely.. Everything looks fine for now.Nice green day too you all😁


Likes
2
Share


@KeemBboomin
Follow
Everything is not as accurate as I would like to say, but I wanted you guys to see what I can do
Likes
12
Share


@most_dope
Follow
the week has been smooth the leaves are fading / dying and i fed 1ml in a liter of water twice in the last 10 days but thinking about starting a flush now its been about 62 days and fastbuds site says 9 weeks. the hairs are mostly white still besides on a few buds its 25% and like 80% orange on 1 bud. trichomes are starting to look amber on sugar leaves about 10-15% amber trichs i need a better loupe to see close up tho. the buds just keep fattening up slowly but surely. im trying to be patient and let them get juicy even if its taking longer than the website advertised, (probably due to me dropping her in veg and overwatering in seedling stages) either way, super happy with the results so far and im thinking about getting another light. im going to try growing 2 plants under the 1 light until then but i think i could fit 3 or maybe 4 if i had a 2nd light. hopefully getting a 2nd tent soon too.