


Likes
57
Share


@Schnabeldino
Follow
end of week 8
...this looks really good.
The Buds are so heavy and sticky, amazing smell...
Gorilla 1 - 442 gr - 104 g dry
Gorilla 2 - 502 gr - 110 g dry
Gorilla 3 - 490 gr - 120 g dry

Likes
19
Share


@Dunk_Junk
Follow
Day 18 - FIM cut made.
Day 20 - Repotted to her 38 litre airpot. I planted her quite deep to help with stability so she has 'shrunk' 0.5cm this week 😂


Processing
Likes
20
Share

@Dunk_Junk
Follow
She grew 4cm this week in height. She's doing her thing. Next few weeks should show some good growth.

Likes
4
Share

@SugarandTerps
Follow
Vegi W6
12.2.2026 Gießwasser 2L, Ph-Wert 5,8, EC 3,0
14.2.2026 Gießwasser 2L, Ph-Wert 5,8, EC 3,0
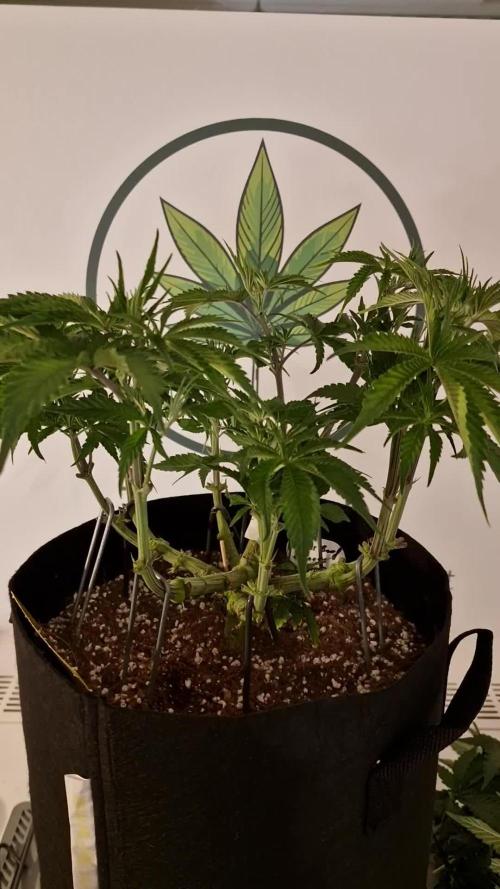
17.2.2026 Entblätterung und unter Triebe entfernt. Vorbereitung für die Umstellung in die Blüte. Der Bruch im Haupttrieb ist gut verwachsen. Neues Reservoir angemischt.
18.2.2026 Gießwasser 2L, Ph-Wert 5,8, EC 3,0

Likes
7
Share


@Stickygreens420
Follow
1/16/2023 - Day 14: not much new to report. All 6 plants are continuing to look healthy. The Grand Prix seem to be a bit smaller than the Frozen White Runtz and Ice Bath. They all look good though.
1/18/2023 - Day 16: clipped a leaf off each Grand Prix to send it in for a genetic test to determine the sex. I used Farmer Freeman. Nothing else to report at this time.
1/20/2023 - Day 18: watered all 6 plants and foliar fed with the same water. Ph was 6.6, and mixed with ThermX-70, FishShit, Rootwise Micro Complete, Pure Protein Dry organic fish fertilizer, BuildASoil Big 6, Rootwise Enzyme Elixer, Fermented Comfrey Extract, and Yah-Whey Thrive. I know I went crazy, but might as well use it if I have it.
1/21/2023 - Day 19: Plants are looking happy. They obviously loved the feeding yesterday


Likes
32
Share


@Compassionate_Gardener
Follow
Shortly after they were switched to flowering (after week 3) the plants continue to stretch and then start to develop their first flowers. Now in week 7 all plants have very nice flower clusters all over the plant and side branches. They have grown to 45 cm (=Shiva Skunk on left side) and 40 cm (Serious Kush on right side of aisle) in height respectively and all plants have a nice dark green color, which shows they are healthy and also that the Advanced Nutrients schedule works like a treat. The Q6W-Gen.2 LED-Lamps are now dimmed to 100% (=three green LEDs on the dimmer) and work on FULL POWER, which ensures full fledged flower production. Both varieties have now started to exude their typical aroma. The Shiva Skunk starts to smell musky and sweet, while the Serious Kush smells 'gassy' and 'fuely' like its OG-Kush heritage. The flower clusters on the Serious Kush appear to grow denser than the clusters on the Shiva Skunk.


Likes
46
Share


@Smokwiri
Follow
Welcome to week 2 of my Bubblegum XL diary, genetics by Royal Queen seeds.
Looks beautifull, no starting problems. Grows fast since day 1.
Small full spectrum burple cob light is doing its job very good, and as you can see the plant is growing as we like it to.
GHE changed its name to Terra Aquatica, so its terra aquatica nutrients
-- update day 3 wk2
Repotted into 15l rqs smartpot
-- update day 4 wk2
Topped/fimmed plant, lets see how it comes out in the future
Added small after-transplant video
Likes
6
Share


@Growformyself
Follow
Für mein erst grow bin ich super happy und über das Ergebnis sehr zufrieden. Auch der Samen von DutchPassion ist sehr zu empfehlen, vielen Dank!

Likes
26
Share


@Ukfarmer420
Follow
So day 21 of flower today, major defoliation done yesterday and feed only water and molasses phed to 6.5.
The plants look good again but very bare with out the leafs, lots of light can peneetrate the lower buds now tho.
Hopefully see some nice growth this week 😀.
Day 23 of flower.
Been battling humidity these past few days, with the de humidifier on i can get it to 48% so not to bad now, a good purchase lol.
Plants are stinking really skunky when you open the room up, but to touch and smell its like pure citric 🍋 lemon.
There Starting to put out lots of trichomes now, hopefully I have a good pheno.

Likes
9
Share


@DeepRootsGrowTrees
Follow
TRIPLE G by ROYAL QUEEN SEEDS
Week #7 overall June 12th-18th
Week#6 Veg
This week she was topped she doing well after being supercroppedstem starting to get thicker and she's looking good. No issues this week.
Stay Growing!!
Royal Queen Seeds TRIPPLE G
Likes
6
Share


@NiBaMeCa420
Follow
Hi guys,
Hope you are all doing well in these difficult times the upside is you can spend more time on this amazing hobby of ours.
Another week has passed and i have a few updates we are still growing on a 24 light schedule and im thinking about switching to 18-6 for the following week-week and a half of veg fase,
The growth is good but they are not very thirsty which concerns me a little but we will see what will happen.
3 of the plants have a little defect which shows it self in weird looking leaves and stunned growth don't know what is up with that but we will also see what the future brings, experience tells me that although the plant may look a little retarted that does not mean that these will not grow to be amazing plants with a big harvest
very curious to see how they are going to develop further down the road.
I stopped giving the Hy-pro Terra i love the company and their products but there is something with the Terra line that does not make me happy although it's very easy to use just one component as a base and a few optional additives it doens't give me the results i expect so i made the switch to Hy-pro Hydro Part A+B and within a day or 3 the plants have a fuller green color and the development of the plant overall is very noticeable and the stem is getting steurdier and thicker.
As for the lights they are still hanging on the same height as i started and i gave it a little more power the plants are stretching towards the light just like i wanted and when i made the switch to 12-12 i will gradually move the light lower untill it's about 30-35 cm above tha canopy and i may or may not take out met scrog netting i haven't decided yet.
That is all for this week
Hope you all are doing good stay healty and keep it green
Cheers,
Nibameca

Likes
34
Share


@Southwest_budders21
Follow
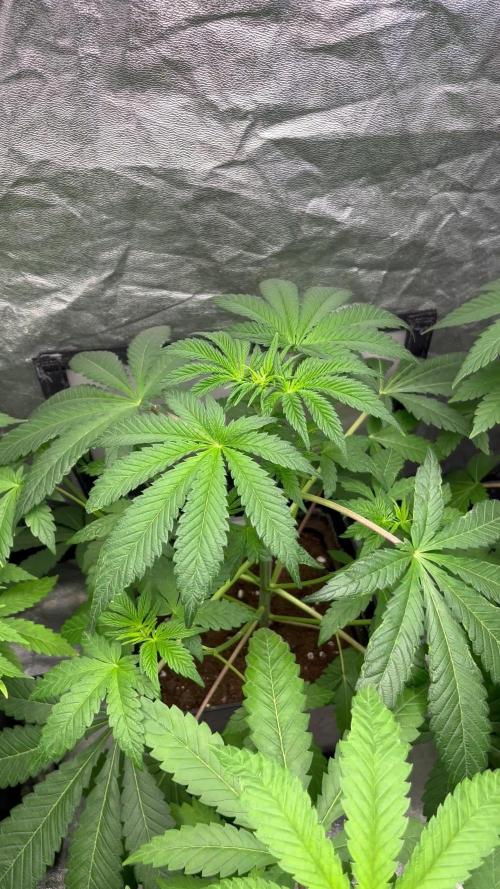
Not much to say apart from they are getting bigger and all three seem to be girls now 11 days until I flip!
Edit: I'm happy with the training and keeping them low, so the aim is to flip this week
Processing
Likes
1
Share


@Funkyskunky1
Follow
They are looking real good. I think I may have gotten some nutrients on one plants leaves and it caused some yellowing and leaf curl, I’m hoping it straightens out.
Likes
Comments
Share

@eldruida_lamota
Follow
Que pasa familia, vamos con la primera semana de floración de estas Barcelona Puff feminizadas de Seedstockers.
Vamos al lío ,se trasplantaron en macetas de 7 litros definitivamente.
El ph se controla en 6.0 , la temperatura la tenemos entre 24/20 grados y la humedad ronda el 50%.
El ciclo de floración puse 12h de luz, el foco está al 50% de potencia.
De momento van creciendo a buen ritmo y tienen un buen color, estaban muy bien enraizadas al realizarle el trasplante se notaba la abundancia radicular.
Agradecer a Agrobeta por el envío del kit gold series para la temporada 🙏.
- os dejo por aquí un CÓDIGO: Eldruida
Descuento para la tienda de MARS HYDRO.
https://www.mars-hydro.com
Hasta aquí todo, Buenos humos 💨💨💨


Processing
Likes
3
Share


Likes
46
Share


@Ned_Schneebly
Follow
Would definitely grow this strain again with some lst work and a large pot from the start I would hope to double the yeild atleast.
I'm a fan of the chunky buds atm and this plant has some nice chunky buds!
The smell is very earthy and a little bit of sweet. Smooth taste and a pretty heavy high! Buds are super sticky.
I have heard alot about fastbuds and I will continue to purchase there seeds!
If it wasn't for mars hydro and there affordable products I wouldn't be here!