
Likes
Comments
Share

@Jabbamo
Follow
_______________________________________________________
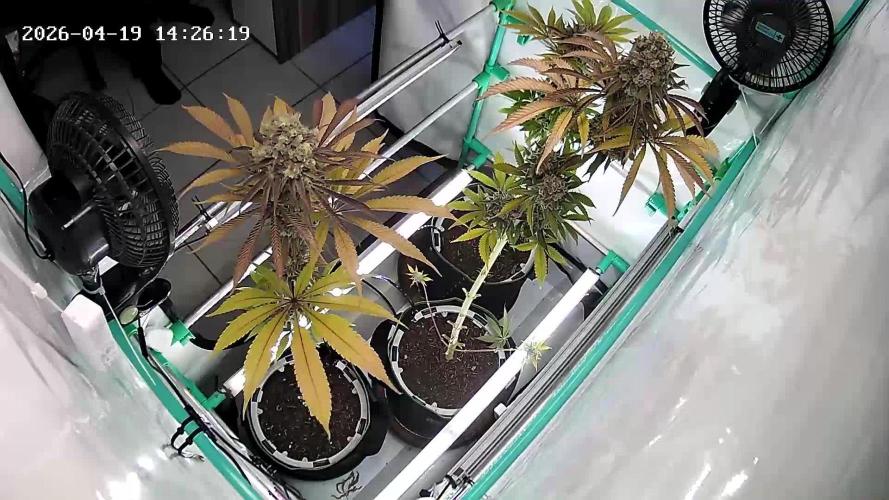
So. 19.4.
"Ernte"
- Umluft AUS
- Abluft Leistung Stufe 3
- Raumheizung AUS
- Raum auf 18°C runterkühlen
- Luftbefeuchter AN (RLF 50% Automatik)
- Idealwerte 16-20 °C / RLF 55-62 %
_______________________________________________________
Mo. 20.4.
"RLF - Pendeln"
- Luftbefeuchter AN (RLF 50% Automatik)
- RLF auf 60% anheben
- Luftbefeuchter AUS
- RLF auf 55% absenken
usw. ...
_______________________________________________________
Di. 21.4.
"RLF - Pendeln"
_______________________________________________________
Mi. 22.4.
"RLF - Pendeln"
_______________________________________________________
Do. 23.4.
"RLF - Pendeln"
_______________________________________________________
Fr. 24.4.
"RLF - Pendeln"
_______________________________________________________
Sa. 25.4.
"RLF - Pendeln"
_______________________________________________________
So. 26.4.
"RLF - Pendeln"
"Probemessung #1"
- RLF +10% / 60min.
- Restfeuchtigkeit zu hoch !
- Idealwerte RLF +0,5 bis +1,5 % / 60min.
"RLF-last down"
- RLF auf 55% absenken
- nicht tiefer ! ("Curing Stop" Gefahr)
_______________________________________________________
Mo.27.4.
"Probemessung #2"
- RLF +1% / 60min.
- Restfeuchtigkeit OK
"Curen im Glas"
- Glasvolumen 1L
- Boveda 62% / Größe 8
- Glas zu 70-80% befüllen
- minimum 30g pro Glas
_______________________________________________________
Di. 28.4.
"Lüften"
- Glas öffnen
- 1min. warten
- Glas schließen
- Glas leicht schütteln
_______________________________________________________

Likes
8
Share


@DevelGrow
Follow
Growers Love to Zamnesia✌️🍀💚🍀
Hallo Freunde 👋 Grand Daddy ist 14 Tage alt und macht sich sehr gut in Händen von Shiva 🌱💚 es sind die ersten Triebe da und ab nächster Woche wird leicht LST angewendet und entsprechend entlaubt! Sonst finde ich sieht's ganz schön aus! Bis nächste Woche keep Green and grow High,✌️🍀💚🍀

Likes
1
Share


@KotBegemot
Follow
Another week of sunny weather.
The training went well considering the outdoors.
At the end of the week the stamens showed.

Likes
4
Share


@eldruida_lamota
Follow
Que pasa familia, vamos con la cuarta semana de floracion de estas Rainbow Melon feminizadas de fastbuds.
Vamos al lío, de las 3 plantas, me quede con 2 por espacio, siempre pongo alguna semilla de más por si no abriese alguna por no perder ese hueco del indoor.
También se trasplantaron a su maceta definitiva, en este caso de 7 litros.
Tenían algo de shock por el trasplante pero ya fue solucionado.
El ph se controla en 6.2 , la temperatura la tenemos entre 20/22 grados y la humedad ronda el 50%.
Las flores empiezas a formarse y progresan a buen ritmo.
Hasta aquí todo, Buenos humos 💨💨💨

Likes
36
Share


@Hempface86
Follow
Day 35 is here and we are at the start of week 5 and as you can see this girl is in flower! She is crowning nicely and look super healthy.. I implemented silica and recharge into the feeding regimen and today was the first day I gave the girls recharge so I'm hoping tomorrow I see that they are happy about it.. big shout out to Zamnesia Seeds for the opportunity to make this diary.. their website has absolutely everything and is one of the coolest websites I've come across and I'm not just saying that.. they have everything from seeds to almost everything you can find at a head shop and all your mushroom 🍄 growing needs as well.. awesome website awesome genetics awesome people can't get better than that.. thanks to everyone for stopping by and hitting a like and saying hi it's much appreciated. Good luck to everybody and happy growing ✌️ code zammigrow2024 for 20% off!!!
https://www.zamnesia.com/us/authentication?SubmitCreate=1&ref=j1up85x0


Likes
42
Share


@Grow420pice
Follow
Es blüht...
09.06.2021
Strawberry Pie ist in die Blütephase eingetreten.
Blackberry auch, knapp dahinter. Hat schwarze, violette Pistolen. Cool!
Forbidden Runtz kommt jetzt langsam in die Blüte. Wächst sehr schön und gut. Temperaturen sind im Moment optimal. Nächste Woche soll es so bleiben... Bin gespannt wie lange es noch dauert.
10.06.2021
Ich werd sie einfach wachsen lassen und nicht trainieren. Ich habe nur die unteren, schwächsten Triebe abgeschnitten und werde sie hin und wieder mal ein wenig entlauben.
Runtz scheint sich sehr gut zu entwickeln.
Strawberry Pie blüht schon. Fühlt sich auch wohl.
Blackberry hat sich erholt und sieht wieder sehr gut aus. Hat ein Sprung gemacht. Blüht auch.
11.06.2021
Super Wetter ist angesagt für die nächsten Wochen!!!
Blackberry hat Strawberry Pie eingeholt und überholt, ist jetzt 2. Knapp hinter Forbidden Runtz.
13.06.2021 Heiße Tage... 🌞🤩💚
Heute morgen gutes Futter bekommen, eine kräftige Lösung. Trocknen sehr schnell aus. Zwischendurch bewässere ich.
14.06.2021
Runtz ist jetzt auch komplett in die Blüte übergegangen.
Weiter geht's...
🌱🙏😎
Likes
32
Share


@D33jW
Follow
🐾🐻🐾 Bros Beast - Breed Bros 🐾🐻🐾
DAY 98 / FLOWER 60 / WEEK 13
Gens: Hulkmania x Muffin Berry
You can buy this great genetics on Web side:
https://breedbros.com
Only water to the end. I will keep it for a few days more.
Thanks for the likes and comments, see you in harvest next week!

Likes
53
Share


@DogDoctorOfficial
Follow
Salutations, fellow cultivators! Week 2 unfolds with the grace of a symphony, and the tale of my Blackberry Auto continues to captivate. The journey is both an art and a science, and every green leaf is a brushstroke on the canvas of cultivation.
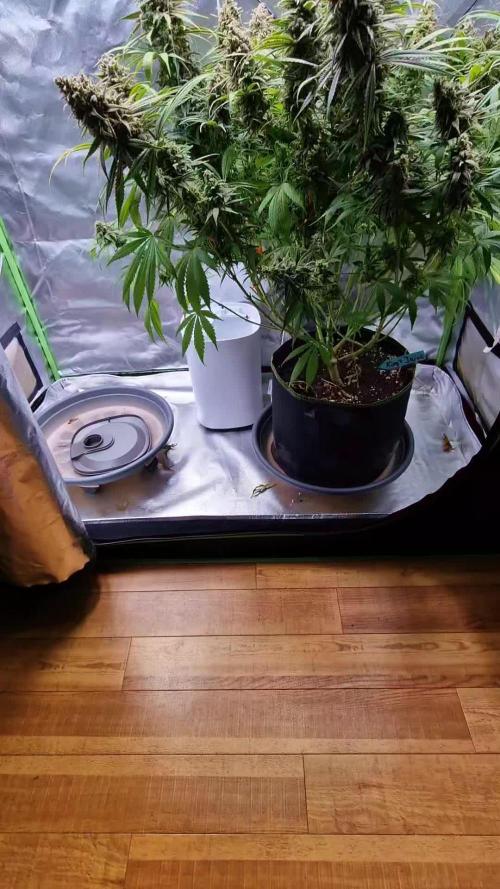
Our heroine has found her throne – a final 16L AutoPot. What makes AutoPots the crown jewel of cultivation, you ask? These self-watering wonders provide a dynamic, gravity-fed watering system, ensuring the plant receives precisely what it needs when it needs it. It's the epitome of hands-off perfection, allowing the plant to dictate its own hydration destiny.
Transplant day is a ritual, a moment where roots meet Mycor Mix magic. This mix, a blend of mycorrhizae species, becomes the plant's ally, expanding the root system and fostering nutrient uptake. It's like giving my Blackberry Auto a superhero sidekick, enhancing her abilities and resilience.
The transplantation dance continues with the application of Aptus Holland Mycor Mix on the roots and surroundings. This isn't just a transplant; it's a ritual of care. Mycor Mix establishes a symbiotic relationship, unlocking nutrients and fortifying the soil with beneficial microorganisms. It's a small act with profound effects, ensuring my plant's journey is supported at its very foundation.
As the pot receives its royal guest, the soil is adorned with 75g of Aptus All-in-One pellets (NPK). This powerhouse blend provides a balanced nutrient feast, a banquet for optimal growth. The soil is further enriched with Aptus Micro Mix, a harmonious supplement that fine-tunes the nutrient symphony, ensuring every note is in perfect balance.
Post-transplant, the ritual concludes with a nourishing bath – my Veg Aptus Recipe. This elixir, carefully concocted, ensures a smooth transition for Blackberry Auto. It's not just water; it's a potion that whispers the promise of health, strength, and vitality.
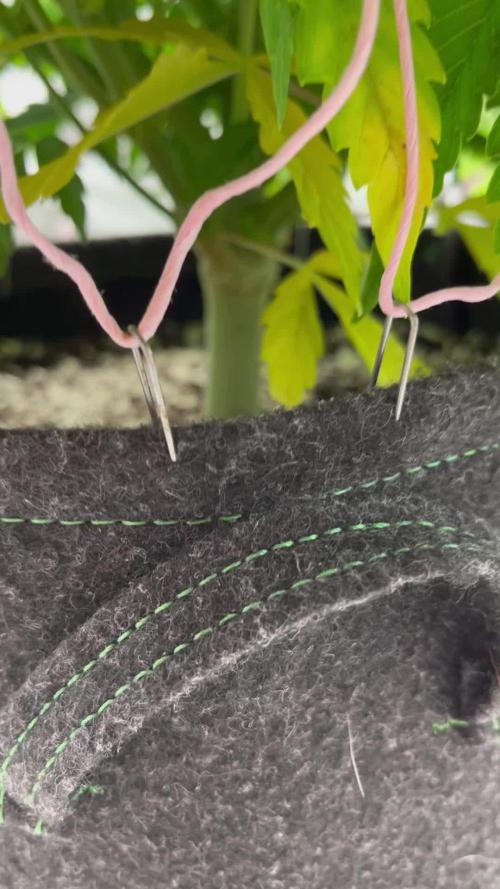
The week embraces low-stress training, a dance where leaves are gently bent to shape the plant's architecture. Blackberry Auto, the prima ballerina, responds with joy. This technique not only encourages lateral growth but also maximizes light exposure, orchestrating a symphony of photosynthesis.
As I witness this botanical ballet, I'm reminded that cultivation is a dialogue between caretaker and plant. Together, we embark on a journey where each element, from AutoPot elegance to Mycor Mix finesse, plays a vital role. Stay tuned for the continued saga of Blackberry Auto – a story told leaf by leaf, in every graceful twist and turn.
Genetics Blackberry Auto @Fast_Buds
Food - @aptusholland @aptus_world
As always thank you all for stopping by, for the love and for it all , this journey of mine wold just not be the same without you guys, the love and support is very much appreciated and i fell honored and blessed with you all in my life
Likes
77
Share


@BipolarHellas
Follow
Hello world,
🇬🇷
the previous week had a lot of growth for the ladies...meanwhile Michelle has been switched to 12/12...the switch was made 9 days ago and she is showing her first pistils...this diary however will follow Angie and Lucy who are growing outdoors and will be in vegetative stage for a lot more weeks...So, let's begin this new week...
=====================================
WEEK 8:"DON'T FEAR THE NIGHT"
☠️Day 50...I stand and stare at Michelle trying to see those tiny first pistils...It is still windy so I have to move them around all day...I have a safe spot but its not sunny...Angie and Lucy are OK,still getting taller...this week I will be using Enhancer again as well...I have a small fear every time I use it because of the ph issue...what I have to admit is that Green House Feeding until now has been perfect...I have been giving only water and some top dressing of it and I don't have any deficiencies till now...the plants are vigorous with a very healthy green colour...
☠️Day 51💧today I watered with 3 L each...they drink like beasts...I top dressed Michelle with Bio Bloom from GHF...eat my girl,eat...I have already put Bio Bloom when transplanted but a little more will not harm her...
☠️Day 53...💧I thought giving them 3 L of water would keep the coco wet for long,but they drink like beasts...had to water again today...
☠️Day 54...Michelle is having a tough time for 12 hours in the closet...I can feel the heat and the CO2 when opening it in the morning...however she looks fine and flowering...
☠️Day 55...💧watered again...the outdoor girs will not be on time for the contest and that makes me nervous...I hope they extend the deadline for all of us who grow outdoors...and those who got the seeds late...please GHSC...give us some time😄
🌸🌸Today Michelle is completing the second week since the light flip...she is growing pistils everywhere and I love watching her...
Day 56...Michelle has reached 77 cm in height and Lucy is 70...they will become beasts...
Another week has passed,thanx for watching,happy growing and be safe...☠️

Likes
27
Share


@adam_pawloski87
Follow
Let’s go Day 36 !!! This week went real great, girls built up a lot of structure, and stayed super healthy ! Today they got fed just water phd at 6.5 ! They been really loving that balance! I also removed a lot of under trim since we are going into preflower , so had to shave up those legs lol ! It’s really great for them , the love that airflow , but don’t take off too much or you could shock your plants so be careful ! Can’t wait to see what these girls do this week ! Hope you all enjoy an are ready for another amazing productive week ! Peace , Love , an positive vibes to y’all Cheers LetsGrowwww!!! 😶🌫️💨💨💨💨
Processing
Likes
15
Share


@Deli_Weed
Follow
Todo va muy bien, esta creciendo demasiado! El tronco se ve muy fuerte 💪🏻🌱

Likes
4
Share

Likes
5
Share

@Lvnsource
Follow
Bloom is approaching for this one, this week I’m going to focus on getting her well fed before flipping to 12/12 , before I’ll very likely grab a clone or two


Likes
80
Share


@JamMAKEcan
Follow
Well 8 week into flowering. STATISTIC says 8-10. But everything stat wise went out the window😳😳 now im strictly looking at crystals and hair with yellowing of leaves.. Im still waiting on my loupe to see crystals.. Smell is weak if any..

Likes
46
Share


@pifflestikkz
Follow
Week 5 day 36F
FLUSHING
Using advanced nutrients flawless finish and 2gal PhD water to flush. Every 2/3days when soil is dry.
Starting now with 2 days darkness.
Still in awe with this pheno, the colours, density, smell are all beautiful on this plant 👌💚
😂👉In the video check toward the end when I zoom in on crown bud, I'm high as sh right now and it looks like a smiley face 😁🤣 saying 2more days mofo and we ready 💪💪💚
Thanks for following I'll be back with the chop in 2-3 days 😱😂💚

Likes
9
Share


@420medic
Follow
Absolutely love this cultivar, make sure you have adequate ventilation as these buds are very resinous and dense. It was a very nice plant to grow even though it was small in structure made up for the weight in the buds
Likes
4
Share

@Samsationalseeds
Follow
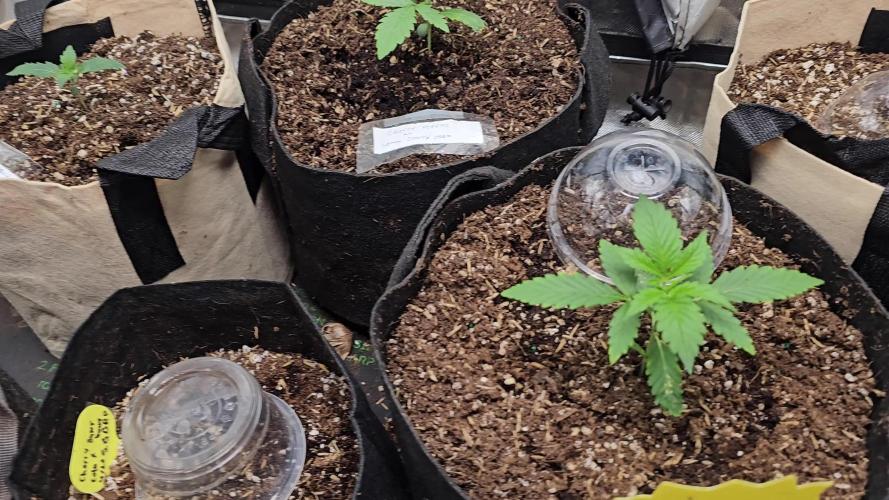
I think this is somewhere between week two and week three on the oldest photos.In this rotation, the other ones are probably a week to ten days or less. I cut out the plastic cups and realized as simple as better.Once they germinate and the glass cup, just put them in the bag and ready
Likes
16
Share


@Tipton
Follow
Lots of smells have become their own... The fried banana has this crazy skunk smell with a real earth dirt smell once the skunk fades... The orange cake NO kidding, smells like a fresh peeled orange and some kind of batter smell... It's nuts...
The big Z has the immediate Skittles blast with a earthy afternote... And the paint is just like the last one and smells real chemical like! When u say the name it makes u smell the paint... Is that just me???? Hahaha anyways... Thats what I got .. everything is going amazing and for day 37 I think they've filled out real nice... Now hopefully they fatten up in the next 20-30 days!!!!

Likes
15
Share


@The42
Follow
Today is day 42 from seeds in soil. Just watering and defoliation this week. Stopped lst today as the tent is pretty much touching all walls. Plants looking good and growing fast. Only real issue is 1 in full flower, 3 close and one seems to still be in straight veg. Hopefully they all flip soon or going to cause me drying issues come time to harvest. Won't feed again again for a couple of weeks, just water and fish sh!t every other watering. So far so good.

Likes
11
Share


@Madman2020
Follow
Yeesh, what a ball drop
Circuit Breaker kept tripping.
Using 3 450w, co2, exhaust fan, 3 fans.
I unplugged the Co2 after 3 days of troubleshooting.
Vpd got totally screwed, plants didnt get watered and messed up the steer.
Irrigation system clogged(probably from stagnating)
Reservoir has buildup of organic material.
Think it was caused from Kelp, and microbes being added to the tank
A bubbler didn’t help, covering it didn’t help. I did not try “hydrogaurd”
I will stop adding organic nutes.
I am now watering by dubbing a bucket into the tank and gand waterin
Also, no more than 1000w of lighting in a room.
I prefer to use a full quality setup with less plants. No Co2 is ridiculous. Each test ive done has shown that co2 gets me heavier yields.
