
Likes
Comments
Share


@GERGrowDesigns
Follow
Welcome to Flower Week 8 of Kannabia Pink Gelato
I'm excited to share my grow journey with you from my
Kannabia Seeds Project . It's going to be an incredible ride, full of learning, growing, and connecting with fellow growers from all around the world!
Check out Kannabia Seeds with my link [https://www.kannabia.com/de?ref=61966] and grab the germination device or the strains I used . Trust me – it’s worth it for sure !
Get another 20% Discount at all products using the code [GGD] at the checkout.
For this Project , I’ve chosen the Feminized Photo Strain Pink Gelato:
Here’s what I’m working with:
• 🌱 Tent: 225x150x150
• 🧑🌾 Breeder Company: Kannabia Seeds
• 💧 Humidity Range: 45
• ⏳ Flowering Time: 56-63 Days
• Strain Info: 23%THC
• 🌡️ Temperature: 26
• 🍵 Pot Size: 20
• Nutrient Brand: Hy-Pro
• ⚡ Lights : 600W x 2
A huge thank you to Kannabia Seeds for allowing me to try my Best with this amazing collection from Photo Strains they managed to Sponsore . Big thanks for supporting the grower community worldwide! Your genetics and passion speak for themselves!
Let’s grow together – and don’t forget to stop by again to see the latest updates!
Happy growing!
Stay lifted and stay curious!
Peace & Buds!

Likes
106
Share


@SlowerLowerGrower
Follow
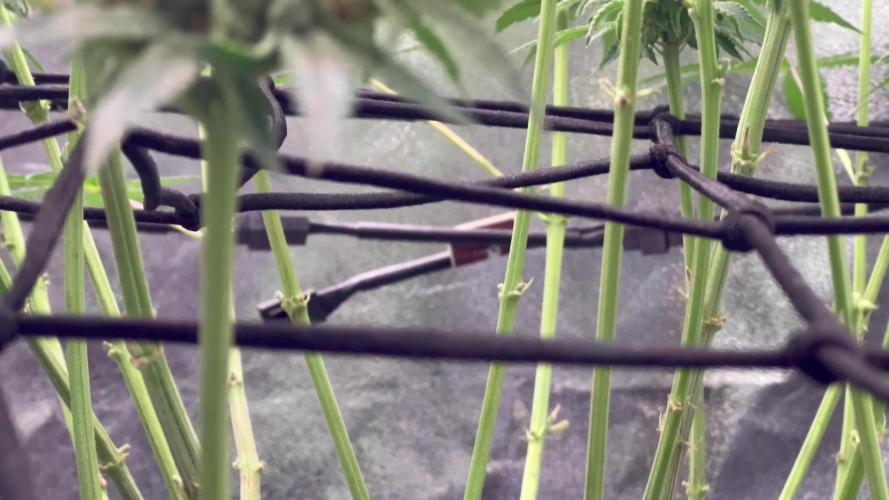
Killer week. The BA x SD is just a monster. Topped at the 5th on day 15 and continues to branch out so fast. Now the WWK had a serious problem growing into the Kind Soil and got burnt up but she still has a decent growth rate. She was topped at the 3rd and cleared of the first node. All new growth is looking green and healthy so that's past us hopefully. I added some eye hooks to my autopot for the future training on the BA x SD.

Likes
19
Share


@adam_pawloski87
Follow
This week went real well! All 5 of the Twenty20 Ogreberry Autos and the 1 Fastbuds Bruce Banner have successfully germinated and sprouted up from the soil!! This upcoming week we will start giving these girls a heavy feeding of nutrients PH d at 6.5 an see how they react , most likely will love it!! Temperature an humidity has been on point, through out the day we reach 70-75 degrees an a nice humidity of 65%which is always nice ! Hope you all enjoy an keep them eyes peeled for next week !! Peace, love, an positive vibes to all you Growmies out there! If any questions please feel free to ask , more then happy to help! Cheers everybody to another great grow!!!


Likes
16
Share

@ohcibi
Follow
Still growing strong actively. In particular Ryu developed lots of newly freshly white pistils but also the lower bud sites started to grow significantly.
Fingers crossed that this will grow smoothly towards the end. The emergency harvested branches were ok but way to soon of course. At the same time they haven’t been very big either so I guess the impact on final harvest won’t be as big/maybe even beneficial as for air flow, nutrient supply etc for the rest of the branches. Also those I harvested have been excluded by my counting so far as I haven’t seen them since they were too low. There’s another one such candidate who might have to be emergency harvested as well but he’ll have a full more week and also he is heavily coated in sugar already.
Let me know in the comments how well you can see the sugar coating, especially the lower bud sites sometimes have an excessive coating. Would be interesting to know whether this has anything to do with lower bud sites doing something that it makes them sugar up more. Or maybe it’s the light that is different in these darker areas
The image quality in the video for some reason is much better often than in the photos. I don’t get why the iPhone isn’t just doing what it does in video mode in photo mode as well.


Likes
3
Share


@Simpatetique
Follow
La planta crece muy sana. Decido hacer poda apical en meristemos laterales, en 4 nudos. Al ser pequeños no sé si será apical o FIM. También un poco de LST en inferiores para que busquen mejor el sol. Estoy haciendo pruebas a ver como reacciona. Si veo que sigue en altura doblare un poco la a punta. Me planteo malla scrog. El riego continua siendo lluvia, una pasada los días de sol con pequeños momentos de lluvia.

Processing
Likes
20
Share


@eldruida_lamota
Follow
Que pasa familia, actualizamos la semana de la farm cheese, la trasplantamos a su maceta definitiva, utilizamos sustrato Plagron.
Ph controlado en 6,5 humedad algo baja pero pronto pasaremos a floración, temperatura ideal, el led hace si función y aparte no da calor.
Los nutrientes los seguimos echando en dosis muy bajas para que no sobre fertilize.
Hasta la semana que viene fumetillas.

Likes
8
Share

@DogDoctorOfficial
Follow
🌸 Week 6 Flower – Gelonade Diaries
The Gelonade girls continue their elegant dance into flower, both Pheno #1 and Pheno #2 shining in their own unique way. Their structures remain remarkably similar, tall, strong, and full of energy, while each holds onto her own personality, expressed in leaf form and flower shape.
This week we noticed a few small spots on the leaves. Nothing dramatic, nothing to sound alarms about, but enough to remind us that plants, like people, sometimes whisper when they need something. It could be calcium, it could be another minor imbalance, but the key is observation. We’ll keep a close eye, watching for patterns, listening to what the girls want to tell us, and adjusting gently if needed.
🌱 Quick Recap (For Those Just Joining)
From the start, this run has been about detail and care.
• Germination was clean and quick, the girls leaping from seed into life.
• Veg was marked by strong branching, healthy leaves, and the unforgettable funky unicorn foliage of Pheno #2.
• Transplanting into super soil and fabric pots gave them the room to spread their roots and breathe.
• The shift into flower was smooth, guided by careful lighting, steady feeding, and a balance of Aptus and Plagron nutrients.
• Weeks 4 and 5 saw sativa-like stretch, white hairs bursting across every cola, and canopy lights filling every corner with photons.
Now here we are in Week 6: the garden maturing, the flowers stacking, the personality of the genetics truly revealing itself.
💧 Feeding & Balance
The recipe continues to revolve around Aptus Regulator, CalMag Boost, Top Booster, and Plagron’s Power Buds, Sugar Royal, and Green Sensation, with Aptus All-In-One Liquid helping tie the orchestra together. We’re keeping EC balanced, always mindful that the soil already provides a strong foundation.
💡 What’s Happening & What’s Next
This week is all about observation. Flowers are swelling, resin begins to sparkle in early traces, and aromas start to hint at what’s to come.
What to expect: denser buds, richer pistil coloration, and a canopy that will soon demand defoliation for airflow.
What not to expect: miracles overnight. This is the stage of patience, where the magic brews quietly within each calyx.
💚 Closing Thought
The Gelonades remind us that growth is rarely flawless. A spot on a leaf is not a failure, but a message. Perfection isn’t the goal, balance is. And balance is exactly what these girls are showing us week after week.
May the flowers swell with grace,
may the leaves whisper their truths,
and may the grower’s patience
be rewarded in full bloom.
PS: Understanding Foxtailing
One of the girls, our Pheno #2, is starting to show signs of foxtailing. For those new to the term, foxtailing refers to when buds grow in elongated, irregular patterns instead of stacking neatly into the dense, conical shape we often expect. The result is a flower that looks “spiky” or “funky,” almost as though the plant is growing multiple little towers from a single cola.
Why does this happen? There are two main sides to the story:
• Genetic Foxtailing: Some strains naturally express this trait, especially sativa-leaning hybrids. In this case, foxtailing is simply part of the plant’s personality, often leading to extra surface area for resin glands, which can even mean more trichomes and aromas.
• Environmental Foxtailing: Stress factors can also trigger it — high heat, intense light (too much PPFD), or shifts in feeding can encourage buds to keep stacking in odd ways rather than finishing their round formation.
In our case, the temperatures have sometimes pushed higher than ideal, and the lights are running strong, so those factors might play a role. But genetics also carry a heavy influence, and Gelonade — being sativa-leaning, can naturally lean toward these elongated flower expressions.
Is foxtailing a problem? Not at all. While it can look unusual compared to the “textbook” cola shape, it doesn’t reduce quality. In fact, it can increase flower mass and surface resin coverage, giving us more material and potentially more complex aesthetics. Some growers even treasure it as a unique expression of their plant’s individuality.
So while Pheno #2 may look a little funky, we see it as a gift, more fruit, more character, more story to tell. This is the garden’s way of reminding us that beauty doesn’t always fit a mold, and that variation is part of the magic of growing.
📲 Don’t forget to Subscribe and follow me on Instagram and YouTube @DogDoctorOfficial for exclusive content, real-time updates, and behind-the-scenes magic. We’ve got so much more coming, including transplanting and all the amazing techniques that go along with it. You won’t want to miss it.
•GrowDiaries Journal: https://growdiaries.com/grower/dogdoctorofficial
•Instagram: https://www.instagram.com/dogdoctorofficial/
•YouTube: https://www.youtube.com/@dogdoctorofficial
⸻
Explore the Gear that Powers My Grow
If you’re curious about the tech I’m using, check out these links:
• Genetics, gear, nutrients, and more – Zamnesia: https://www.zamnesia.com/
• Environmental control & automation – TrolMaster: https://www.trolmaster.eu/
• Advanced LED lighting – Future of Grow: https://www.futureofgrow.com/
• Root and growth nutrition – Aptus Holland: https://aptus-holland.com/
• Nutrient systems & boosters – Plagron: https://plagron.com/en/
• Soil & substrate excellence – PRO-MIX BX: https://www.pthorticulture.com/en-us/products/pro-mix-bx-mycorrhizae
• Curing and storage – Grove Bags: https://grovebags.com/
⸻
We’ve got much more coming as we move through the grow cycles. Trust me, you won’t want to miss the next steps, let’s push the boundaries of indoor horticulture together!
As always, this is shared for educational purposes, aiming to spread understanding and appreciation for this plant. Let’s celebrate it responsibly and continue to learn and grow together.
With true love comes happiness. Always believe in yourself, and always do things expecting nothing and with an open heart. Be a giver, and the universe will give back in ways you could never imagine.
💚 Growers love to all 💚

Likes
19
Share


@paparazzi
Follow
Good strain for beginners. I could keep her on flowering for two or three more weeks , but weight is not so important.

Likes
13
Share


@DrewbieDoobieNoobie
Follow
Last big feeding before I start to flush. It looks like the blue dream is not gonna make it. I will pull it out and make room form my vegetable garden seedlings. I might as well use the light that's all ready on, I have some tomato and pepper plants sprouting as we speak. Back to the Buddha I have a concern about the Think different that it might get bud rot from being so dense and only one cola. the FAST BUDS 420 Genetics are impressive. I think on the next run I will get a better yield as I will have a record of their veg and flower times accordingly. I can really dial in the feeding schedule. The Carmelicious is really doing well they are all starting to smell sweet and fruity. My target harvest day is 1/20/20 a little over 2 weeks from now I will give them there last CAL MAG / SILICA PH 6.0 watering today 1/5/20 as the pots have dried out from the last Big Feeding. They will eat up what ever is left in the coco this week and the flush with the Clean Fruits From GREEN BUZZ Nutrients will be all that is left for the last weeks. I will be Dope Scoping the Trichomes in 2 weeks 90% cloudy 10% amber, this will be my harvest window indicator. I hope to see the fan leaf fade starting next week that way I will no that the food is gone from the coco and that plant will start using its reserves. Until next time, a toast. To wives and girlfriends may the two never meet😉


Likes
17
Share


@Northerngrowers
Follow
A pesar de los contratiempos en las primeras fases de crecimiento las plantas han conseguido exprimir todo su potencial y hemos obtenido unas flores de primera calidad repletas de tricomas y un alto porcentaje en thc.
Flores con tonos morados y negros hacen que su aspecto sea mas impresionante todavía.
Un sabor muy sutil, diferente pero muy agradable digno de paladares expertos. Efecto relajante, placentero, sensación de felicidad, apto para cualquier hora del día.
Una gran genética.
Totalmente recomendable.


Likes
20
Share


@victor_lion
Follow
This is a strain that is very easy to grow and resistant, after the fourth week it sticks a lug, and does not need a lot of vitamins, it grew with only 13 and 12 hours of light and went through cloudy days and a lot of humidity

Likes
15
Share


Likes
39
Share


@Hazecat_420
Follow
Se realizó una defoliación en la parte más baja y en las 2 hojas más grandes de la parte superior para que pudiera entrar de mejor manera la luz a los brotes más pequeños. Se aplicó Voodo Juice para las raíces y Top Bloom para la floración, ya todas tomaron de buena manera el cambio del fotoperiodo. Seguimos 👽 ...
Likes
14
Share


@Chucky324
Follow
Hello. This is the end of week 8 and the beginning of week 9 of flowering.
One more week of flowering for these plants and then harvest after 9 weeks of flowering..
Things are good here. I got 1 big flush in. Should be able to get 2 more flushes in this week. And I like a couple of days of dark before harvest.
I'll show some pictures of, before the harvest, next week.
I see some of the buds are heavy enough to start heading for the floor. I though I tied them up tight. 😏
Ok. Be Great.
Chuck.


Likes
13
Share


Buds putting on weight

Likes
Comments
Share

@TopNugCultivator
Follow
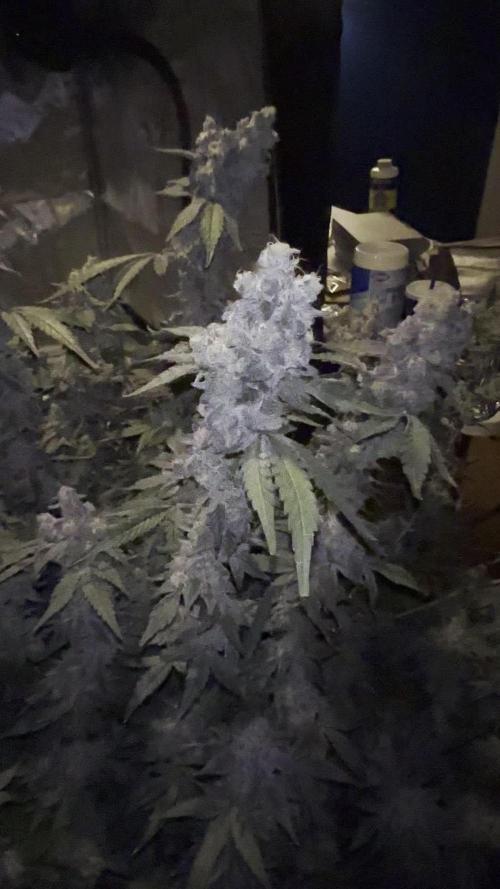
The chop has arrived! This was a really long but fun grow! I do see why people don't like growing sativas it does take forever and is a difficult process! I will do another one for sure though! I will update one more time with the full harvest and weight once drying has finished. 11/21/2025 is when I started the dry in my tent! Currently 62F and 60% humidity
Likes
5
Share


@Hashsmokinslasher
Follow
Think I'm done giving her nutrients, might run some slf-400 through her not sure if it's necessary though. Trichs are still developing not sure how long till harvest but should be within the next couple weeks.


