Likes
Comments
Share
@Drehpaper
Follow
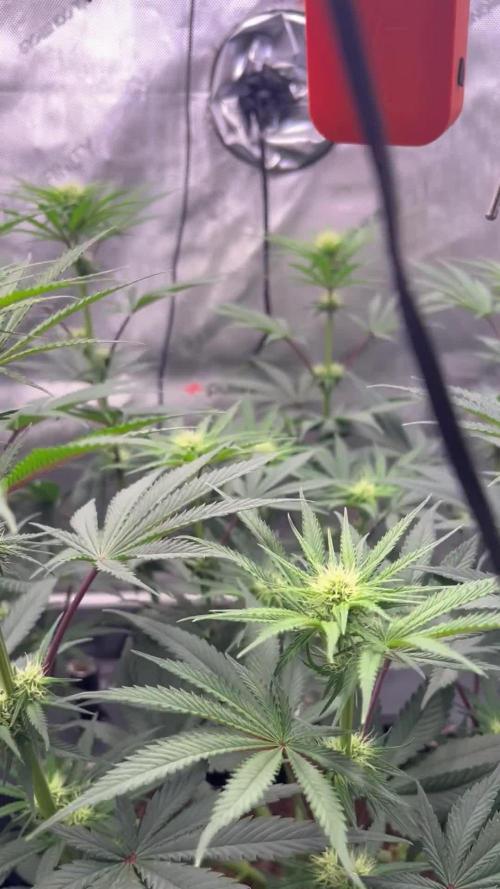
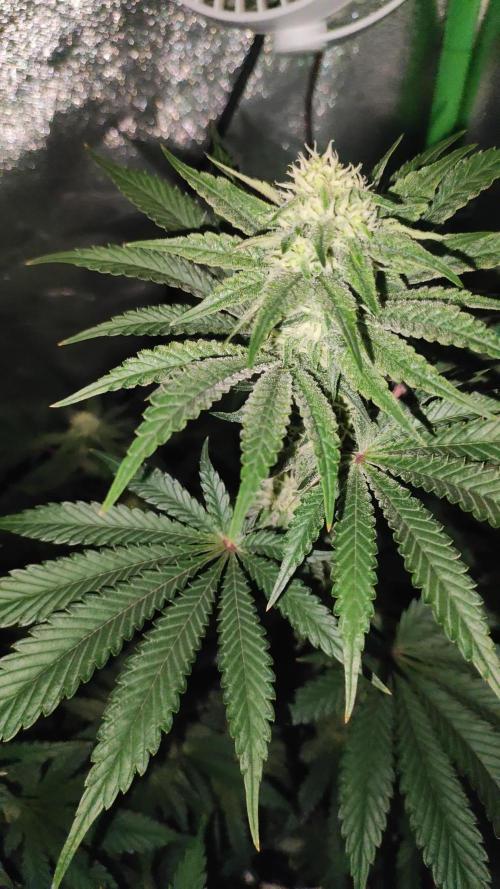
Woche 7 Tag 43-49 / Blüte Tag 15-21 Luftfeuchtigkeit 50 Tag 27 Nacht 22 PPFD 800 DLI 34,56 Höhe 55 VPD 1,4 Lampe Abstand 40cm Lampe auf 60% Acht Tage nach Umstellung, erste Blüte Anzeichen zu sehen. Komme leider nicht unter die 50% Luftfeuchtigkeit, wird wohl bis Ende so durchgezogen. An Blüte Tag 16 wurde sie radikal entlaubt und um einige Triebe erleichtert. Evtl bisl zu Radikal 🙈. An Tag 21 wurde sie mit 0,5 Liter Komposttee gegossen. Eigenkreation ausm Komposthaufen von Oma 👵. Temperatur leider auch immer um die 27 grad die ich nicht gesenkt bekomme. Werden hoffentlich nicht zu viele Terpene flöten gehen.

Likes
13
Share
@Enki_Weed
Follow
Hey Grow-Community, es ist wieder Zeit für das DWC-Update! Wir sind in der kritischsten Phase angelangt – der 6. Blütewoche. Jetzt geht es darum, maximale Masse und Dichte in die Blüten zu bekommen. Und was soll ich sagen? Meine Early Skunk Diven liefern eine Bilderbuch-Performance ab! Der Zustand der Superstars: • Pflanzenkörper: Sie sind kerngesund, saturn-grün und zeigen absolut keine Mangelerscheinungen. Die Buds verdichten sich massiv und die Trichomproduktion läuft auf Hochtouren. Der Blütenduft wird immer intensiver. • Wurzelzone: Das Highlight jeder Hydro-Woche! Das System wurde komplett gereinigt (VC-Anlage ist blitzsauber) und die Wurzeln sind kernweiß – ein Traum im DWC und das beste Zeichen für optimale Sauerstoffversorgung und ein perfektes Wurzel-Spa. Das Hesi-Menü für 38 Liter (FL-Woche 6): Pünktlich zum Peak der Blüte gab es heute den frischen Tankinhalt. Da der Bedarf an Kalium und Phosphor nun am höchsten ist, wurde die PK-Dosierung exakt nach Hesi-Schema für die 6. Woche angepasst. Mit dieser perfekt abgestimmten Nährlösung und den kerngesunden Wurzeln sind wir bereit, die Endphase der Blüte einzuläuten. Bleibt gespannt, denn bald startet die entscheidende Spülphase!
Likes
3
Share
@RezaM
Follow
This week, I gave my plants more fertilizer to test if they show any signs of burning. Now, I'm stressed out! I think I should give myself some seaweed to relieve the stress 😂 The girls show signs of calcium deficiency. I sprayed a small amount of calcium and magnesium on them to help them recover faster. I’m not sure why the new leaves are very pale. Could they be lacking iron? I think the high soil moisture might be causing issues with iron absorption, but I’m not completely sure. I’ll wait and see what happens this week. Considering that I use regular water, I expected them not to have a calcium deficiency.
Likes
38
Share
Utopia Haze is a rare heavily sativa dominant hybrid (90% sativa/10% indica) strain created through back crossing Brazilian Sativa strains. This tasty little bud took home 1st Place for Best Sativa in the 2008 High Times’ Cannabis Cup and for good reason – with its potent 18-22% average THC level and long lasting cerebral effects, Utopia Haze is one powerhouse smoke. The Utopia Haze high comes on soon after you finish your first toke, hitting you with a strong cerebral lift that infuses you with a sense of hazy relaxation. Type: Feminised/Photoperiod Cultivation: Indoor/Outdoor Flowering Time (days): 70-75 Indoor Yield (g): Up to 650 Feminised Outdoor Harvest Month: October Feminised Outdoor Harvest Month Week: 3rd-4th week Aroma: Citrus, Woody, Pungent, Mint Effect: Cerebral Lift, Hazy Relaxation, Sleepy Welcome Everyone to the Final Entry of my Utopia Haze Grow ! There is so much to discuss ! I have been extremely busy as of late trying to get this Harvest together, but i am happy to have it here for you now ! I Seriously under estimated the amount of time, help from others, and my own necessary skills to pull this off.. and i still kind of screwed it up lol ! But its worth noting i have never actually done this before and trying to document it during....was extremely hard. It is next to impossible to work an iPhone with rubber gloves on ! First I want to discuss everything step by step so before you jump straight into the comments on how the end product is so small in "quantity" Rest assured i am happy with its"quality"...and thats all that matters to me because Life is a journey not a destination! and i have learned so much from this grow that I couldn't be any happy even if i messed some things up :) But at the very least I hope you read through this entry in its entirety with an open mind and focus more on the process, rather than just the outcome! I ran out of Ice & i was only able to wash three times..(normally I've heard you should go sometimes 5-6 washes) Preparation is Key & things will be much better next round :) Photos 1-22 These are pretty self explanatory but for those of you just tuning in now.. this is what happens to a very happy plant when you don't have the necessary tools to monitor key components of growing cannabis.. Ph, as well as EC levels play a very key role in the outcome of your grow lol that being said I was just able to save this plant by purchasing both tools but that doesn't mean the plant didn't suffer because of the prior events.. This was a Huge reason behind me choosing to turn this harvest into what i would consider "Solventless Hash Rosin" from "Ice water extracted Bubble hash". Pictures 23 The idea here is the process of using "fresh Frozen Cannabis" this has been discussed many a time online on such sites as instagram and here on grow diaries as well.. I personally have Never tried the process so i decided to try it out and make a judgement for myself.. Video 24 The Cannabis has now been in the freezer for 72 hours making it very well frozen.. as you can tell i struggled getting it all into the 25u Screen Wash Bag. One thing of note i would do differently is i will de-stem my next batch as i also believe this played a part in the amount of plant matter that escaped through the sieves. Photo/Video's 25-28 The idea here is "ice water Seiving" & especially with the bags that I am using here that are only have screen material on the bottom portion of the bag it is very important to have spaces in-between the screens to allow the water to pass directly through the screens into the bottom bucket with the least amount of resistance.. because the hash is so extremely temperature dependant if it gets warm on the side of the bag.. it will stick there and not make it to the bottom to become use able product.. 29 You do not need to use as much Ice as i used here lol... the idea is to keep everything very cold..i certainly achieved that but at the sacrifice of using so much that i ended up grinding product and producing "contaminants" but in the end they are just plant matter that i would be smoking when i rolled up my joint either way so.. I'm not super disappointed.. But it should be noted that what you want to achieve here is a Layering effect where you have the wash bag between two small layers of ice while the "water current" washes the Trichomes away allowing them to be separated by the screens setup below :) Before Starting the machine you should allow some time (i.e.;10-12minutes pre soak to allow the product to become saturated) before the first cycle. By video 32 I have just ran out of ice lol.. Video 33-34 Here I have a tip for you.. to separate the screens that you sieve through.. cut 5 gallon buckets to stretch them across nice and tight.. it'll make scooping your Bubble that much easier ! i learned this from the many "Frenchy" videos I have watched :) Picture 35 Here in lays the problem for most people.. drying your hash without loosing vast amounts of "Terpenes" whilst also stay ever vigilant against mold ! Thanks to all those videos I've watched on youtube.. id like to think this was one of my most successful parts of this process.. Things to Note; Terpenes start to seriously evaporate at temperatures 68F or 20C you need to stay as cold as possible whilst bringing the Relative Humidity in the space down into the 40-30% to stay away from that nasty mold ! I used my cold storage room in the basement.. with a dehumidifier running to keep the space at 45% RH & staying at a constant 15c. All while spreading the hash as thin as possible across parchment paper, on top of the white screens with a fan moving air across both sides of the paper. Pictures 36-38 These are some macros i took in the middle of my drying session I fell in love with the colour. Yes i know the black spots are plant material but they will get caught when i bag the hash & squish the oil out. Thing to Note; at this stage it is important to ensure you 'micro plane" the hash down as fine as you can whilst staying weary of the temperature... any "chunks" will hold pockets of moisture.. that lead to potential problems..ie; mold ... Picture/Video 39-41 Successfully planed bubble hash ready to be bagged and Squished ! Picture 42 Ive decided to follow Pedro.. from Pedros Grow Room and double bag to be on the safe side so i don't have any blow outs. So thats One 25u bag inside one 160u bag ! :) Pictures 43 This is almost 3 grams of the bubble hash from above, already melting in the bag.. this is where i ran into trouble again lol things started getting to warm in the house and i was only able to get one of the three squish's i did on video :( things started getting sticky. Picture 44 This is basically just a photo of the equipment I'm using; 3x5 LowTemp Cage in the frame I built myself, with a 20Ton bottle jack. Something to note here is this is an older Lowtemp model with only a single heating zone which is which i have it closed here heating Both sides of the press :) As well as the importance of having adequate pressure on your plates.. my rig is very overkill for the size of hash bags..lol Video 45 Here is the lovely press video.. its didn't quite work the way i wanted either lol my directional folding wasn't quite tight enough for a big "drip" :) &the Press was set to 65°c Photo's 46-50 are pretty self explanatory :) I had a blow out.. but still managed to pull an 80% return from the hash once squished...& yes it tasted amazing :) Was it worth it in the end... that could be debated.. for some..i understand..its not your thing, but for those of us that are interested in making our own concentrates.. free from Solvents... I wouldn't make it any other way :) If even ONE of you reading this diary finds it helpful to reference for ANYTHING.....even if its "what not to do" ill consider it a success ! Thanks again for tagging along on this garden adventure.. its been one heck of a journey ! Much Love from B.C. Canada, Until Next time, Cariboo
Likes
5
Share
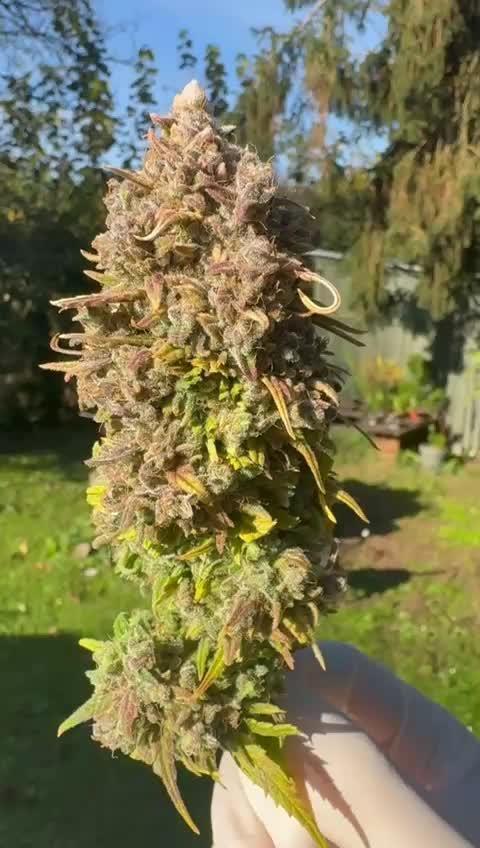
16.08.23-41 дня от каски , никаких манипуляций кроме ежедневных фертегаций раствором удобрений не производится 16.08.23-день 47 - почки растут и радуют ) Этот малыш чудо ! Изначально начал расти с двумя головами (топпинг я не делал )🤡
Likes
7
Share
All seems to be going well. I'm watering twice a week with 80ml per plant. Using mainly plain water with a little Fish Mix. If growth is strong this week, I'll look potting into 5 gallon pots next week. I've begun some small training with my fingers to keep the stalks malleable and see what shape I want. Once they're in their final pots I'll start training with clips.
Likes
30
Share
Growing some healthy looking leaves. This is suppose to be a good well-rounded medical strain. I hope it's true, I could definitely use some.
Likes
20
Share
Dia 35 de vida en total y 10 dias después del transplante desprenden bastante olor y van cogiendose a la tierra se puede notar en la robustez tambien en la grandaria de las hojas, estamos a la espera del tirón fuerte que no tardarán!!
Likes
7
Share
@darb35
Follow
First week of veg and all 3 are growing at the same pace. Will try to monitor and bend if one of then grows freakishly tall for some reason.
Processing
Likes
93
Share
@Ferenc
Follow
Let's see how it goes. I raised up the water so it is now 150ml 2x per plant so 300 per plant per day. The same with fertilization and the same days remain. I keep 14 hours darkness and 10 hours light schedule for Purple Punch obviously I take out from the tent and put separately. I can't wait to harvest the Gelato Cookie D'ohpe so I can use the tent for the Purple Punch. I give 18 hours light on so 12 hours on 4 hours off and 6 hours on 2 hours off. Basically, it was the only solution because I put the Purple Punch in at 23:00 o clock and take out at 9 am. So the light on from 23:00 to 11 am and then 15:00-21:00 and off from 21:00 to 23:00. It was the only good way based on my timeline working hours and school. I also see the first signs of flowering after 7 days of light schedule change of the Purple Punch. Hope it goes well. They have a totally different smell, both strong, but the Gelato Cookie D'ohpe is like sweet and aromatic, and also like a muck heap 🤐😅👻The Purple Punch has strong smell but not sweet more like citrus. Saturday: I always had some yellow fan leaves but now it is getting more on the Gelato Cookie D'ohpe. Hopefully, it causes the flowering stage because the plant wants to use the energy for buds making and takes out of the leaves, so it is a natural process. I read that it means the plant is on the halfway of the flower. Hope the best. Tuesday: Purple Punch does well flowering, and the Gelato Cookie D'ohpe I think one more week so I will start flushing from tomorrow. I have checked the trichomes, they are cloudy, milky and the pistils started getting brown also so soon it will be done. The fan leaves also getting yellow as it can be seen so I think the next is the final week, if not then no more than 2 weeks and it is done. I can't really wait... End of this week Gelato Cookie D'ohpe is 70cm and the Purple Punch is 40 cm.
Likes
41
Share
Day 15-05/11/21 it’s the Start of week 2 of veg everything is looking good hopefully my Mars hydros are here in next few days!!! Day 16-06/11/21 today plants are looking really good I gave them there first bit of biobizz grow!! Day 17-07/11/21 nothing new today no need for watering probably water tomorrow!!! Day 18-08/11/21 didn’t give them anymore water today but defenitly will be watering tomorrow!!!! Day 19-09/11/21 i gave them all i nice 750ml of water today with biobizz grow all looking good!!! I started a new YouTube so if everyone who reads this could subscribe I would really appreciate it!!! Day 20-10/11/21 nothing new today all looking good!!!! Day 21-11/11/21 nothing new today I tried some training on about 3 of them that u see in the video they don’t seem to need water today but most definitely will tomorrow!!!
Likes
12
Share
Another week down. As some of you will see, from the three purple kush autos one defiantly has the characteristics of a “purple kush plant” it is very small with odd shaped buds and almost purpley/black. The other two are monsters with no purple traits. I did loose a plant at the start that was also stunted, which likely would have produced another “purple budded” plant. Anyway it has been hotter than hell here, and they pretty much survived a hurricane and tornado, so I think these girls will finish out the summer just nice. I gave them a feed of some cal mag and some fox farms tiger bloom. Other than that they be chillin. Enjoy the weather! Cheers.
Likes
4
Share
Since my last grow i have a problem with powdery mildew... So on veg. i just spray Sulfur and worked fine... (the smell is terrible....) now i am in flower and found the mildew again... i try a new mixture: dry common horsetail 1 onion 1 garlic cook that for around 1 hour. Then i flux it 1:5 with water. The smell is not so bad and just for 2 days. The leaf and flower not change color or smell. Hopefully it works! i will spray that now every week. Update: Flower Day 20 I start with the Top dressing on all Plants. They start to frost. The powdery mildew spreads :'( i dont know what else i can do?! i spray again!
Likes
12
Share
@CANNASIM
Follow
We are at week 3 now. A lot of development, i have not used liquid nutes this week, it is raining a lot so no water needed, thus no liquid nutrients. I have top feed of dry nutrients mix, basically a mixture of a super soil recipe that usually is used within to make a hot soil: I mix all tue ingredients together and use it gradually about 40g as a powder, in the top of the soil. - Azomite 500g - Natural fosfate 500g - Biochar 1kg - Bokashi 1kg -Kelp meal 500g -Mamona meal 1kg -chicken meal 1kg -Potassium silicate 500g -Gypsum farm 500g -Diatomaceous earth 500g Mix all keep it in a soil bag, this pure mix and use it once every month. The companion plants have emerged and will protect the soil humidity mainly.
Likes
8
Share
Vamos familia que ya actualizamos la cosecha de estas zkittelz de Mafia seeds. Vaya flores que se han marcado repletas de tricomas, parecen escarcha y las flores se marcan aromas bien dulces. Es una variedad bastante fácil de cultivar pero al tener un periodo de floración algo más largo, hay que estar pendiente de alimentarlas bien, gracias Agrobeta en mi sala es posible. Temperaturas máximas en 24 y mínimas en 20 y una humedad estable en torno al 36%. Las mantuve 10 semanas, ya las vi bien maduras y ya tenía tricomas ambar así que les di matarile. Agrobeta: https://www.agrobeta.com/agrobetatiendaonline/36-abonos-canamo Mars hydro: Code discount: EL420 https://www.mars-hydro.com/ Espero que disfruteis este diario, buenos humos 💨💨💨.
Processing
Likes
17
Share
@kcartel
Follow
For the first time I cut the leaves, for more extensive illumination of the upper part, due to the close location of the light of the plant, the trunk trunk grows and does not stretch upwards, I want to cover the entire area of ??the pot with one layer then start the flowering stage at 6-7 weeks I didn’t cut the leaves, but simply pressed them to the ground, since this is my first experience, I think that everything is going well, the plant eats a lot of nutrient fertilizers and looks good as you can see, the temperature in the box exceeds 27 degrees and it seems to her that temper tsya. in many of the moments, I would like to express a special thanks to such a cool grower like ctm_dzagi! Looking at his works of past cycles, I learned a lot and continue to learn, his technique and approach is great! Well, we are waiting for the fifth week)) Let's go!
Processing
Likes
5
Share
@Ensign420
Follow
Week 02 Introduction This week has been a bit of a struggle. Had my first experience dealing with slime and brown algae. But I think adding enzymes and increasing the beneficial bacteria helped to fix the issue. Also experienced nutrient burn for the first time. My nutrient solution strength got as high as 671 PPMs. So backed it down to about 430 PPMs during the end-of-week reservoir change. Also cut Hydroguard (expired?), CaliMagic, and Superthrive from this grow. Now she's still stunted, but is starting to recover. Hopefully... [START OF WEEK 02] Day 01 - Monday - 08/10/20 - Total Days: 008 ----------------------------------- - [0830]: Still looks a bit yellow. But getting larger! --- Solution strength was at 248 PPMs. --- Just topped off with a bit of distilled water --- PH went up to 6.1 so PH'd down to 5.8 --- Ran the top feed for a bit to wet the hydroton. - [2130]: She's looking even more yellow now. --- Even the new leaves are really yellow. --- Decided to add more base nutes. --- Added 4ml of Sensi A --- Added 4ml of Sensi B --- Now at about --- Solution Strength went up to 304 PPM. --- PH was at 6, --- Also raised the water level a bit more. --- I really hope it's a nutrient deficiency and not an over-watering issue. --- Please live! Day 02 - Tuesday - 08/11/20 - Total Days: 009 ----------------------------------- - [0830]: Looking less droopy. But still yellow. --- Decided to do a reservoir change. --- 4.5gal of distilled water --- 8ml of Sensi Grow A --- 8ml of Sensi Grow B --- 8ml of Voodoo Juice --- 4ml of B-52 --- 4ml of CaliMagic --- 4ml of Hydroguard --- 4 drops of Superthrive --- PH'd down to 5.8 --- Solution strength: 302 PPM --- Since I didn't want to risk over-watering the rockwool, I did not to do a top feed, may do one tonight after the sleep cycle (lights are still set to go off at 10am and back on at 4pm). --- As I was doing a reservoir change, I noticed that the tubes and bucket were a bit slimy. Didn't really stink or anything. Is this normal? Maybe due to the Hydroguard and Voodoo Juice? --- I hope she gets better soon! - [2215]: Getting larger! But still yellow. --- Also can see a root growing through the net pot! Tiny little thing but it's there! Will have to start dropping water once more appear. --- After looking over a few DWC diaries using AN nutes, seems like my solution strength is still too low. Most around this stage average around 500 PPMs with about 4ml per gallon. --- Top fed for a minute to wet the top of the hydroton. --- Solution strength went down to 263 PPM. --- Added 8ml more of Sensi A --- Added 8ml more of Sensi B --- Now base nutes are at 16ml for 4.5 gal of water. --- PPMs went up to 411. --- Still lower than 500 PPMs, but that's okay. --- PH was at 6. Not sure if I should adjust PH using AN nutes. So going to not ajdust unless PH goes above 6.1. Day 03 - Wednesday - 08/12/20 - Total Days: 010 ----------------------------------- - [0830]: Looks like more root growth! --- She still looks yellow. But leaves are perky. --- PH was at 6.2 so lowered down to 5.8. --- Solution strength was at 394 PPMs --- Since roots are still growing, I decide to lower the water level a bit. Now water level is a bit below the net pot. - [2200]: Root is getting longer! --- Slime is returning. Not sure why. --- Solution strength: 357 PPMs --- PH: 6.1 --- Decided to add an enzyme along with more beneficial bacteria to hopefully cure the slime. --- Added 16ml of Sensizym --- Added 5ml of Hydroguard --- Added 8ml of Voodoo Juice --- New solution strength: 430 PPMs --- New PH: 6.1 --- Top fed for a minute. --- This slimy residue is really freaking me out! I hope the added enzymes will help eliminate the slime. --- Going to do a full reservoir sterilization/nutrient change over the weekend. Please survive until then girl! Day 04 - Thursday - 08/13/20 - Total Days: 011 ----------------------------------- - [0930]: I think the enzymes worked! There is little to no slime now! --- Although I think the root was also dissolved in the process. It's now just a little stub sticking just below the net pot. The enzyme is also suppose to dissolved dead roots too but guess that root was too weak? Not sure what happened there. But I think the slime is cured! --- Solution strength went down to 395 PPMs. Decided to add more base nutrients. --- Added 8ml of Sensi A --- Added 8ml of Sensi B --- Added 4ml of B-52 --- Solution strength went up to 598 PPMs. --- PH was at 6.1 --- As long as the PH is between 5.5 and 6.3, I'm not going to use PH Up or Down. But still will monitor PH levels. - [1715]: Checked up on her after her nap and shes looking alive but stunted. But no slime! --- Decided to add some sugars to help maintain the enzymes and beneficial bacteria. --- Solution strength was at 587 PPMs. --- PH was at 6.2 --- Added 8ml of Bud Candy --- Solution strength went up to 671 PPMs. --- PH also went up to 6.3 --- Lowered water level a bit to hopefully promote more root growth. --- Top fed for a minute. --- She is getting bigger, but still looks yellow. Day 05 - Friday - 08/14/20 - Total Days: 012 ----------------------------------- - [0915]: Leaves look a little burnt on the tips. Still no slime. --- Going to back off on the PPMs to hopefully fix the nutrient toxicity. --- Solution strength was at 632 PPMs --- PH was at 6.3 --- Added/Removed water until PPMs were at 536. --- PH was still at 6.3 --- Raised water up a bit, then top fed for a minute. - [2200]: Looking better. Still yellow though. --- Solution strength: 514 PPMs --- PH: 6.5 --- Added PH down. --- New solution strength: 518 PPMs --- New PH: 5.2 --- PH was kind of high. So decided to PH down. Had to use quite a bit to bring it down. But eventually got it to drop down to 5.3. A little low, but so far, the PH has always gone up so wanted to start it really low. --- Ran the top feed for a minute to re-saturate the top of the hydroton. Day 06 - Saturday - 08/15/20 - Total Days: 013 ----------------------------------- - [0830]: She looks stunted. leaves are still yellow. --- Solution strength: 514 PPMs --- PH: 5.6 --- Top fed for a minute. --- Not sure what to do at this point. Going to do another reservoir change soon. Hoping she lives until then. - [2145]: Looking pretty much the same. --- A bit of slime has returned. Since I've been diluting the nutrient solution, the enzyme ratio has dropped. So I guess this is expected. --- Also noticed that slime build up was on the air-stones. Never really checked the stones so not sure how long that has been there. Looks brown too, which can't be good. --- Going to do an H202 sterilization of the system (minus the net pot) tomorrow so did not add anything. --- Lowered the water level to below the net pot. --- Then top fed for a minute. Day 07 - Sunday - 08/16/20 - Total Days: 014 ----------------------------------- - [0900]: STERILIZATION DAY! --- Decided to skip today's night cycle for a deep clean. --- I'm hoping that skipping a night cycle won't be too stressful. --- Temporarily moved her to a new bucket. --- Used about a half of gallon of straight distilled water to flush out the net pot. --- Drained the system and wiped up all the brown sludge. Also removed the air stones and cleaned up all the goo. --- Filled the system with 2 gallons of distilled water and at least 30ml of food grade hydrogen peroxide (35% strength). --- Yea its a lot, but since I'm not going to sterilize the system overnight, I went with a really high doseage. Basically I kept adding until I started to see little bubbles start to form. --- Then I ran the water pump. - [0915]: Boiled the air stones in tap water for about 10 min. Then reconnected them to the airlines. --- I let the air stones and hose soak in the sterilization solution for about 5 minutes so the peroxide can absorb into the stones. Then ran the air stone to help mix and agitate the solution. --- Occasionally, I'd repeat the process of turning the air pump off for a few minutes to let the stones soak. - [1000]: Covered the top two row of holes of the net pot with some aluminum tape. Hopefully this solves the light leaking in through the hydroton. - [1200]: Used an old toothbrush and scrubbed the pump clean. Then drained the system. --- Refilled with more distilled water and peroxide. Again added a lot. --- Ran system again to sterilize even more. - [1530]: Drained the system and refilled with distilled water to rinse. --- Ran the system for a few minutes, then drained and rinsed again. --- Did this a few more times over about an hour. - [1630]: Added 4 gallons of fresh distilled water. --- Added 15ml Sensi Grow A --- Added 15ml Sensi Grow B --- Added 12ml of B-52 --- Added 16ml of Voodoo Juice --- Added 16ml Sensizym --- Solution strength was at 430 PPMs --- PH was at 5.6 --- I was going to add Hydroguard, but I think the bottle is expired. Since 2017 or 2018!? I think Hydroguard is good for up to 2 years from the date on the bottle or 6 months after opening. So not going to use from now on. I wonder if this could have contributed to the slime build up. --- Also removed the CaliMagic and Superthrive too. Going to only use AN products to eliminate the chance of incompatible nutrients. --- Placed her back in the bucket and top fed for a minute. --- Here's hoping for the best. Going to let it ride until morning! Please feel better! [END OF WEEK 02]
Likes
17
Share
@Its_Fruz
Follow
Defoliation every 4 days ✂️🍃🍃🍃
Likes
16
Share
Que pasa familia, vamos con la octava semana de floración de estas Purple Lemonade FF de Fastbuds. Vamos al lío, las plantas se trasplantaron en macetas de 7 Litros, con tierra top crop y plagron mezclada con un poco de coco. El ph se controla en 6.5, la temperatura la tenemos entre 24/21 grados y la humedad ronda el 50%. El ciclo de crecimiento puse 12h de luz, el foco está al 50% de potencia. Tengo trips que combatiremos con control biológico ya a estas alturas del cultivo. A ver si me recupero estas próximas semanas y puedo estar al 100%. - os dejo por aquí un CÓDIGO: Eldruida Descuento para la tienda de MARS HYDRO. https://www.mars-hydro.com Hasta aquí todo, Buenos humos 💨💨💨