


Likes
Comments
Share

@gse314
Follow
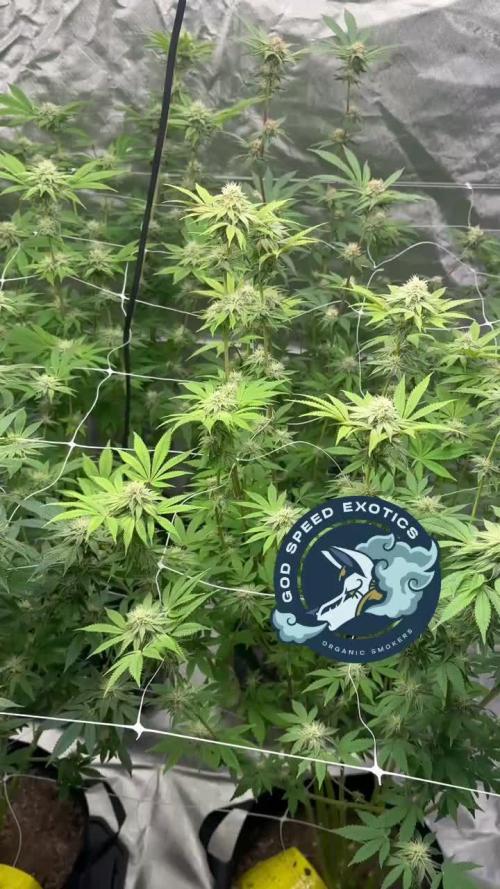
1st day of week 6, Did my last defoliation for this grow, see yall next week

Likes
11
Share


@squirtle42
Follow
German:
Seit dem letzten Update ist nicht viel passiert.
Der ein oder andere Trieb ist noch ein wenig in der Höhe gewachsen.
English:
Not much has happened since the last update.
Some shoots have grown a little in height.

Likes
53
Share


@Chucky324
Follow
Hello. This is the end of week 8 and the beginning of week 9 of flowering.
I'm a flusher. I gave their last food yesterday and will use nothing but water till the end. I've marked the branches that I've pollenated and will give food again after harvest if the seeds aren't finished. Easy as that.
I found some bud rot on plant #3 and had to cut it out quick. Too bad it was one that I had pollenated. It was only the top bud so I hope the other buds on that branch will still be good for seeds.
Everything else is going well in here. I didn't know what I would get when I made the cross 2 years ago but I'm very pleased with the way the plant have preformed so far. There's some big, heavy, dense buds in here. Can't wait to smoke them.
It's 30*c here today and will be for the next 4 days. It's 35*c in the greenhouse right now, I just stuck my head in while I'm waiting for the video to upload. That will kill any fungus spores that bother my plants.
Good Luck. Chuck.
Likes
3
Share


@Mr_nugs_lover_David
Follow
Beautiful strain so far, hope she was gonna grow a little bigger but she's did get very big,she's starting to produce a very nice smell. Let's see what happens guys.

Likes
1
Share


@Lazuli
Follow
The bulk is here and what an amazing plant she has become
I start the overdrive next week and this plant will be harvested at week 14
Likes
82
Share


@Harukisan
Follow
Hello fellow growers, I am pleased to start this new journey with you.
I am also particularly excited since I am going to grow a Mephisto Genetics strain for the very first time, the famous Double Grape.
I know you shouldn't believe the hype, as Public Enemy used to say, but it's hard to ignore the dithyrambic reviews when it comes to Mephisto.
I sowed the seed directly in the substrate and it was popping out 3 days later.
Right now the seedling is under my Mars Hydro TS1000, brightness set at 25%, lights are 80cm away.
During my last grows I set it up to the max at all stages of growth, this time I decided to proceed differently and increase gradually. Please let me know in the comments if you think I should just push it to the max right away.
I would like to thank HESI nutrients team for sending me a great Starter Pack! Shout out to Hesi_Official, can't wait to test your products!
Thanks for reading and stay tuned for weekly updates! 😎

Likes
53
Share


@DogDoctorOfficial
Follow
Greetings, fellow cultivators! Week 5 unfurls like a verdant tapestry, and my Blackberry Auto continues to astonish with her relentless growth and burgeoning beauty. Join me in this chapter of botanical marvels, where every leaf and bud tells a tale of meticulous care and burgeoning potential.
Unstoppable Growth and Insatiable Thirst: Blackberry Auto's growth knows no bounds as she reaches for the heavens, drinking voraciously from the AutoPot Aquavalve. The rhythm of her growth is like a symphony, each day bringing new heights and newfound vigor. It's a testament to her vitality and the nurturing environment she thrives in.
Enormous Leafs and Branch Bending Mastery: The foliage has evolved into a canopy of gigantic leaves, each a masterpiece of photosynthetic prowess. As I continue to bend branches, opening her arms to the light, the canopy becomes a labyrinth of greenery, optimizing light penetration and promoting lateral growth. It's a dance with nature, where every bend is a stroke of horticultural artistry.
Budding Beauty Unveiled: As the first week of flowering (or pre-flowering, depending on interpretation) dawns, Blackberry Auto reveals the promise of her floral bounty. The buds, adorned with an intricate structure, are a sight to behold – a precursor to the botanical masterpiece that awaits. It's a moment of anticipation, where each bud holds the potential for a harvest of unparalleled quality.
Rapid Evolution and Community Gratitude: With each passing day, Blackberry Auto evolves into a botanical marvel, a testament to the magic of cultivation. A heartfelt thank you to @fastbuds_official for bestowing upon us this exquisite strain, a true gem in the world of cannabis genetics. To Aptus Holland, my main sponsor, your support fuels this green journey and enables the flourishing of Blackberry Auto's potential. Kudos to Grow Diaries for providing the platform to document and share this journey, and a shoutout to the community for the camaraderie and shared passion that enriches our collective cultivation experience.
As the saga continues, I invite you to witness the unfolding chapters of Blackberry Auto's odyssey. Together, we cultivate not just plants, but a shared love for the botanical realm. Stay tuned for the forthcoming adventures in this GreenThumb Symphony!
Genetics Blackberry Auto @Fast_Buds
Food - @aptusholland @aptus_world
As always thank you all for stopping by, for the love and for it all , this journey of mine wold just not be the same without you guys, the love and support is very much appreciated and i fell honored and blessed with you all in my life


Likes
2
Share


@LoganatorDude
Follow
I absolutely love to watch them grow! Especially that moment they hit their first growth spurt.
I started with RO water that is remineralized for drinking purposes. The ppm is only 18! My tap is 156! So considering they don’t need much water, I’ve been stealing some of our drinking water. The RO water starts at pH of 7. After I add the nutrients, ppm of 249 @ pH of 5.8 while soil is still sweet @ pH of 7
I think my days are off as a new week begins on the last day of the previous week. I am going to leave that for consistency.
04/21 - Noticing some possible nutrient issues with the Fruity Pebbles for several days now. Going to see what she needs. Up front I’m thinking maybe just a super small amount of Amino Acids with a little Epsom Salt. Maybe she is struggling to access the nitrates from the neem cake. IF it’s a issues with nitrogen. We will see. Maybe she would benefit from some extra calcium?… Any ideas are greatly appreciated.
Day 22 and I am noticing how these girls have been burning up a lot of potassium lately, dealing with the wind and sun 💨 ☀️, getting pushed around all day.
I plant to top dress with some Kelp Meal pretty soon.
Day 24 -> 4/22/22- a quote from the weather on today’s red flag warning and dust storm warning.
“ HAZARD...Less than a quarter mile visibility with damaging wind in excess of 60 mph. SOURCE...Satellite imagery. IMPACT...Dangerous life-threatening travel.”
I’m keeping the girls inside today.
Day 26, I was planning to check the runoff on some of these girls, especially the fruity pebbles, however I messed that up as I also top dressed WAY too much of the seaweed bliss. So I flushed with plain RO water at pH of 7 until there was only slight coloration in the runoff. I didn’t check the runoff as a lot has changed with all that flushing. So next watering/feeding I will make sure I check the runoff on multiple plants.
So the seaweed bliss with its 17 on potassium, seems to be the most likely culprit for why there is a bronze-ish color on the inside of the new growth. Hopefully a foliar feed of Epsom salts can correct the problem. Inside tent, lights on LOW. Noticing similar pattern in all of them to a degree, most noticeable in the fruity pebbles.


Likes
11
Share


@Beedog
Follow
Day 70 Really struggled with high temperatures this week everyday was 33 plus and nights wasn’t much cooler just glad it’s over now got a week left until I have to harvest hopefully they be ready to go by then most of em anyways


Likes
9
Share


@isoonly
Follow
been changing watering a little and started useing jungle juice and B-52 got rid of most of yellow leaves only some left on American pie for my first grow think its looking okey working on a DWC system trial and error now looks like its working just need to seal the water leaks but they are not to bad just need som bigger rubber rings for inside barrel and to get last mats needet as store ran put off the stuff i need


Likes
4
Share


@Maximilian1234
Follow
Blütewoche 6
Was soll ich sagen die Blüten werden immer fetter und fester. Ich bin eigentlich nur noch alle zwei Tage am gießen. Mehr ist nicht zu tun. Gut das die Gemüseanzucht wieder los geht sonst wäre es fast langweilig 😉
Die Pflanzen sehen nach wie vor sehr gesund aus, lediglich im unteren Bereich merkt man langsam das Nährstoffe verlagert werden. Trauermücken sind kaum noch zu sehen. Da haben die fressfeinde sich wohl gelohnt.
Die Skywalker ist eine sehr einfach anzubauende Sorte.
Bei mir haben sich meiner Meinung nach 4 unterschiedliche Phenos gezeigt.
Lasst mir dazu aber gerne eure Meinung da!
Liebe Grüße 🖖
Likes
4
Share


@m0use
Follow
***Sponsored Grow*** = Medic || https://medicgrow.com || Grow = ***Sponsored Grow***
Made the call to chop this plant as it was only going to make nanners if I left it to long. Overall a giant disappointment, the Fast Flower FF was an Autoflower AF, Its put me off fast flowers and really whats one week when you grow indoors for an early harvest. Not something that's in my list of things I need. The smell of the plant is nice, basic weed scents, nice and sticky and full of crystals. Will see what happens in cure once it finishes drying. It made a weird nub of plant at the base of its stalk. have not seen that before, IDK what it was/means. Will provide more details in smoke report week.
***Sponsored Grow***
Official Website: https://medicgrow.com/
Facebook:
https://www.facebook.com/medicgrowled
Twitter:
https://twitter.com/medicgrow
Instagram:
https://www.instagram.com/medicgrow420/
YouTube:
https://www.youtube.com/channel/UCNmiY4F9z94u-8eGj7R1CSQ
Growdiaries:
https://growdiaries.com/grower/medicgrowled
https://growdiaries.com/grow-lights/medic-grow

Likes
20
Share


@The_Bearded_Grower
Follow
welcome to 📅 day 8 of veg 3/22/2021 🌱she is growing just as I would expect from the Aglex light.
She is starting her 3rd set of leaves and she looks healthy and happy.
Update 📅 Day 11 of veg 3/25/2021 she grew quite a lot over night and so I micro toped ✂️ her I will upload pics in the morning

Likes
2
Share


@Gardens_of_Of
Follow
The lady went into the drying tent this morning. I exceeded the suggested 6-7 weeks (flowering) by 4-5 days because I wanted to wait until she reaches 20-25 % amber this time.
Despite all the issues caused by my mistakes, she managed to grow healthy looking frosty buds.
This pheno was definitely not the biggest producer thoguh but the smell is absolutely top notch.

Likes
43
Share


@420DeepGrow
Follow
Gracias al equipo de Kannabia Seed y XpertNutrients, sin ellos esta magia no seria posible.
🍁💐 Runtz (Auto):
Si esta cepa se ha ganado su popularidad a pulso, esta versión autofloreciente es digna heredera de sus atributos. No es de extrañar que nuestros criadores hayan acertado con su programa de reproducción, al combinar dos de las cepas más fascinantes de la actualidad: Zkittlez y Gelato.
planta resistente y robusta, de cuerpo esbelto y fuerte ramificación lateral, que se puede cultivar prácticamente en cualquier entorno; pero prefiere los veranos largos y cálidos, tal y como quiere la madre naturaleza, donde bañada por el sol se eleva hasta los 120 cm. para producir unos rendimientos muy gratificantes de 100-150 gramos por planta.
En interior, y tras solo 70 días desde la semilla, también recompensará con cosechas abundantes de hasta 500 gr./m²
Inmediatamente después de encontrarte con ella, lo primero que notarás es su aroma descaradamente afrutado, con un toque tropical cortado con reminiscencias terrosas y amaderadas, que se entremezclan de forma agradable para ofrecer un combo que hace salivar las papilas gustativas.
Ofrece un sabor confitado, refrescante y similar a sumergirse en una piscina de frutas cítricas y flores de fragancia intensa. Al inhalar, obtienes la bondad de la dulzura; al exhalar, el humo se convierte en suave y cremoso, dejando suficiente profundidad en cada bocanada para satisfacer a aquellos que buscan los matices más complejos.
⛽ XpertNutrients: es una empresa especializada en la producción y comercialización de fertilizantes líquidos 🍶y sustratos🐛, que garantizan los mejores resultados y cosechas de la más alta calidad. A través de una cuidadosa selección de materias primas y un proceso de producción avanzado, sus productos son sinónimo de resultados confiables.
🛒 Consigue aqui tus fertilizantes:
https://xpertnutrients.com/es/sobre-nosotros/#:~:text=Xpert%20Nutrients%20es%20una%20empresa,de%20la%20m%C3%A1s%20alta%20calidad.
📆 Semana 7:
Ha sido una semana algo complicada, tormentas, frio y lluvia han ralentizado el crecimiento, espero que pronto lleguen dias soleados, continuo con 1/3 nutrientes recomendados en cada riego.

Likes
6
Share

@Salokin
Follow
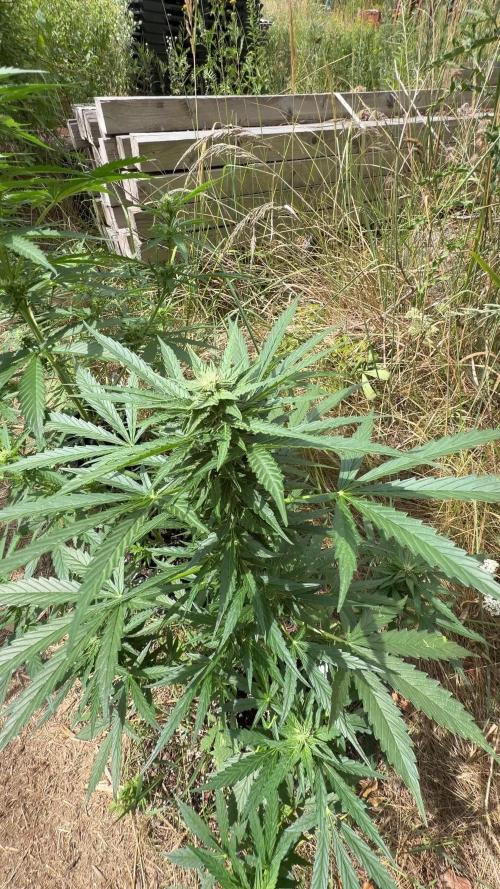
**Week 8 | Forbidden Runtz Auto | Flowering**
She's in full flower now and looking the part. Height at 70cm, structure holding up well under the developing buds — good density forming on the main cola and the side branches are following suit. Trichome production already visible up close. This one is moving in the right direction.
Light hours down to 16h naturally as the season progresses. Watering bumped to 2L per plant per 24h to keep up with demand. pH 6.2, EC 1.2 mS/cm, humidity at 60%. Day temps back down to 25°C, nights at 18°C — better conditions for flower development than the peak heat weeks.
Nutrient stack switched to bloom: CANNA Aqua Flores A+B at 3ml/l each, CalMag Agent 0.9ml/l, Aptus Regulator 0.1ml/l. Plagron Green Sensation introduced at 0.5ml/l to support the transition and push terpene and resin development from here on out.
Updates every Sunday. Stay tuned.
Likes
36
Share


@Terp_Djiny
Follow
Today I shortened all four plants by fimming. Let's see what will become of them.
Day 32: I think they took it well. The new shoots are growing.
Day 33: Today I actually had to repot. The roots came out from the bottom of the pots. Plant three is struggling as you can see. I hope it comes through well.
Day 35: I think the plagron light mix is too heavily fertilized. The plants give me the impression of being over-fertilized. The purple color of the stems is a hint. Then I will rinse them tomorrow.