
Likes
Comments
Share
Likes
7
Share
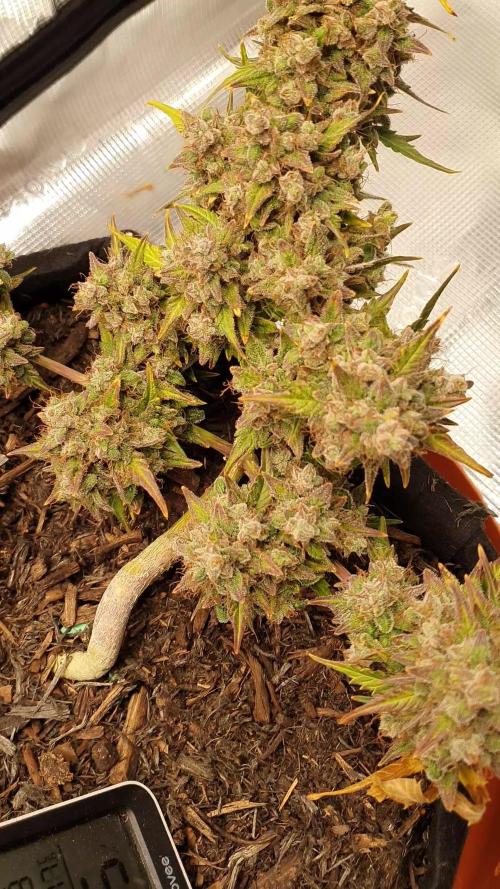
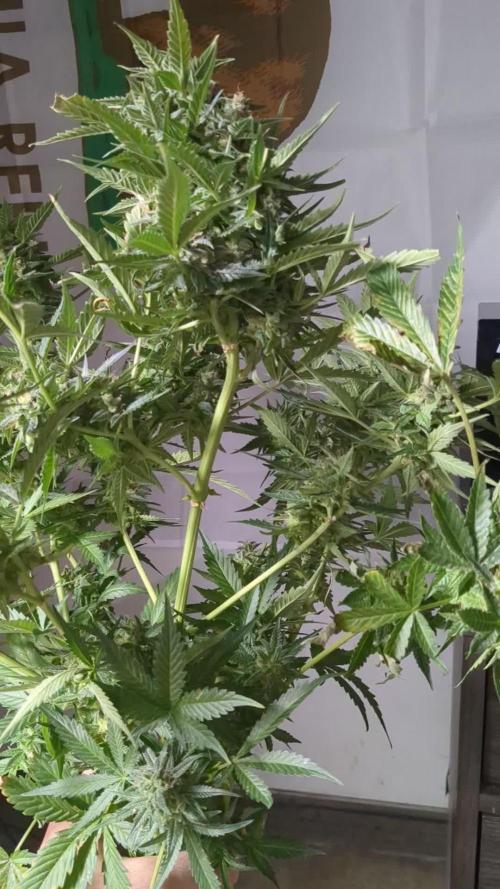
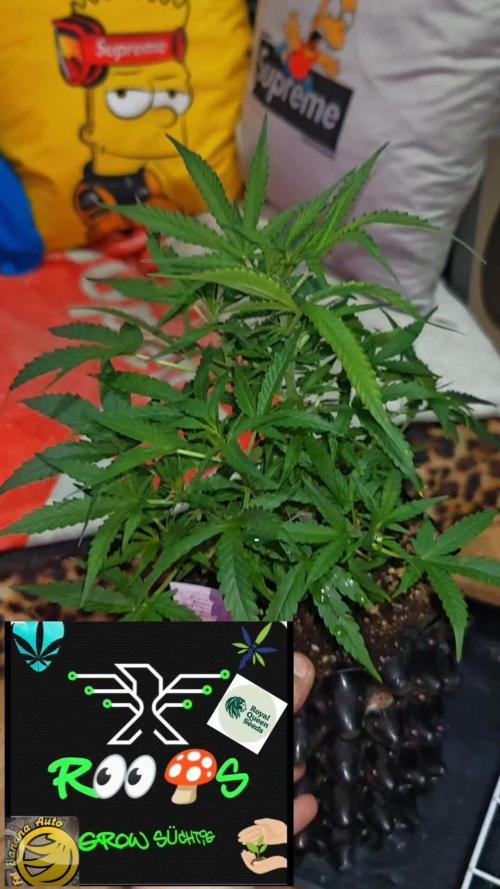
Die kleine Prinzessin macht Ihrem Namen alle Ehre. Kommt raus, und bleibt nach einer Woche 2 cm klein. Mal was neues. Man könnte vermuten, das es evtl. an der mittlerweile alten Genetik liegt. Moderne Strains sind bei gleichen Bedingungen ein zigfaches größer. Wir werden sehen wie es weiter geht. 🙀
Likes
37
Share
@Roberts
Follow
Mandarin XL auto looks like she is done stretching. She is starting to for trichromes and start bulking. I did a solution change in her several days ago. Everything Is looking good. 🤞🏻for some nice buds to form. Nothing more to report. Thank you Gen1:11, Medic Grow, and Ganja Farmer. 🤜🏻🤛🏻🌱🌱🌱 Thank you grow diaries community for the 👇likes👇, follows, comments, and subscriptions on my YouTube channel👇. ❄️🌱🍻 Happy Growing 🌱🌱🌱 https://youtube.com/channel/UCAhN7yRzWLpcaRHhMIQ7X4g
Likes
12
Share
Week 8, and my custom fit SCROG has been installed! ❤️ At Day 50 I separated my 7 gallon girls and my 5 gallon girl. Once done, I began the very easy process of adding my “floating” SCROG. I use ratchet straps, just like the ones that come with lights to secure the four corners of the screen to the top of my tent. This allows me to adjust the screen height as necessary when 1) first installing and 2) once the full stretch of flower has occurred, I can tweak it a bit to balance the canopy as best as possible. It’s not 100%, I still get some over achievers, but I find it useful as another option. I like to do a major defoliation before I set the ladies in. Typically till this time, I have done almost no defoliation, just LST and some HST techniques. I adjusted the ladies placement to allow growth out all sides of the screen, set the screen height and began tucking and bending. The defoliation and bending allows light to penetrate all those side shoots that would have amounted to nothing, and they become top shoots as they grow up and form an even canopy. I don’t like to weave, it can damage the new shoots and cause growth problems, but the goal is to get as even a coverage as you can while allowing for plant growth in all directions. Once complete, I will give the girls about a week to recover and grow those new shoots. I like to have about 80% coverage of the screen, before I change my light cycles to flower 12/12… and if they are healthy and strong. I’ll decide this weekend if it is time ❤️👊🇨🇦😎 Happy Gardening!
Processing
Likes
6
Share
@dyrachok
Follow
Продовжую вести репост і тримати свою крихітку на ріпені. Деякі незрозумілі проблеми з листям, але якщо вірити мудрецям з цього сайту - це через високу температуру, яка останні дні була аномально високою. Опустив горщік нижче, долив води у мій "зволожувач" повітря, сподіваюсь це хоч трошки допоможе. Квіти здаються не дуже плотними, і скоріш за все це тільки моя провина( Але рано про це говорити, вирок буде після повноцінної дегустації стиглих квіточок😋 Тріхоми майже усі мутні, трошки є янтарних. Даю ріпен завтра 04.09 останній раз, далі тільки вода, і харвест. Планую провести харвест на 10 тижні.
Likes
4
Share
Did LST and topped Pheno 1 & 2, 3 is too funky to mess with. I think PH was just my issue and possible too high intensity light as I lowered to 60%, but also brought my PH to 6.5 so I'm guessing that helped too.
Likes
3
Share
@CreoWeed
Follow
Pheeew... another intense training week is gone, and as I was thinking the past week the baby is a girl and started flowering already at around day 25, which I pretty early but considering all the stress of the 3 transplant and the massive LST it's acceptable. After reporting her in the final 20 Lt pot, no stress was encountered although and she start stretching pretty fast as plants do on preflowering. I introduced blooming nuts as soon as I saw pistols and everything now I'd going pretty smoothly. I'll give her the last 10 days of heavy LST and then I'll leave her doing her things. For now it's all, stay tuned, stay high!
Likes
4
Share
@SamDo
Follow
Vegetative Week 3 This third week of vegetative growth was expected to be a turning point, but it turned out to be another difficult one. The plant did gain a bit of height, roughly a couple of centimeters, which shows that growth hasn’t completely stalled. However, foliage development remains poor, and overall vigor is clearly lacking. The plant is growing, but it doesn’t look healthy or strong. No additional watering was done this week, as the medium did not justify it. Humidity management appears to be a key issue. Under the dome, humidity was still around 95%, which is excessive. The dome has now been fully opened to allow better gas exchange. Removing the small support revealed another concern: the stem lacks strength, as the plant fell over once unsupported. This points to weak structural development and possibly limited transpiration and nutrient uptake. Condensation droplets were observed on the leaves, confirming that the plant is likely oversaturated with moisture. Excess humidity may be preventing proper respiration, which could explain the lack of nutrient absorption and overall stagnation. At this stage, no drastic action is taken. The focus is on observation, environmental adjustments, and understanding the root cause of the stress. This plant should normally be much larger by week three, so close monitoring will continue into next week. See you next week!
Likes
51
Share
Esa familia, ya hemos vuelto fumetillas, ya estoy de nuevo activo para explicaros mis métodos para cultivar vuestra yerba. Bueno contamos esta vez con una cookies gelato de royalqueenseeds, la verdad por oídas y lo que leí, que son una cepa bastante fuerte tiene bastante thc, veremos estas semanas cómo avanzan. Si germinación 100%, 5/5 ejemplares germinados y preparados para brotar. . Hasta ahora el ph lo dejamos en 5.8 la temperatura ronda los 22/24 grados y la humedad está en torno al 80%. . Ahora en la alimentación, gama agrobeta. 0,5 ml x L Piramid , vía radicular. 0,5 ml x L Growth black line , vía radicular. 0,1 gr x L Cancerbero , vía radicular. 0,1 ml x L Tucán , vía radicular. 0.1 ml x L Flash Root , vía radicular. 0,4 ml x L Great Green , vía foliar. . Empezamos con muy buen pie, espero que no surjan muchos problemas en futuras semanas, buenos humos 💨💨💨.
Likes
11
Share
Sour Diesel — Week 12 (Week 7 Flower) “The Ascension of a Fighter” 12/12 from seed. No safety net, no adjustment phase — just straight into the cycle. And from day one… she struggled. But she stayed. ⸻ 🌱 How did we get here — 12/12 from seed This run was built around a system — not individual plants. From germination, all plants entered the same 12/12 rhythm. No veg buffer, no separate adaptation window. And that means one thing: ➡️ The environment doesn’t adapt to the plant. ➡️ The plant adapts to the environment. Most did it smoothly. She didn’t. Different feeding sensitivity, different response to VPD, different pace. She never fully synced with the room… But she never gave up either. ⸻ 🌿 The “Unhappy” Plant That Didn’t Quit Let’s be honest — she was behind from the start. * Slower development * Less vigor early on * More sensitive to feeding and conditions In a single-plant run? She might have been considered a failure. But here’s the reality: She adapted. She corrected. She found her rhythm — late, but real. And now? She’s showing why genetics matter. ⸻ ❄️ Trichomes & Frost — Unexpected Power For a plant that struggled… The resin production is honestly impressive. * Buds coated well beyond expectation * Trichome coverage consistent across sites * That classic Sour Diesel sparkle starting to show character Not the heaviest producer in the room — but absolutely punching above her weight. ⸻ 🌸 Density & Structure This is where she surprises even more. * Smaller plant overall * But buds coming in tight and compact * Good stacking despite limited size She didn’t stretch much — but what she built, she built with intention. Dense. Focused. Efficient. ⸻ 🌡️ Environment — Why we didn’t adjust for her Important point here. This room is dialed for system stability, not individual correction. * Temps, RH, feeding — all set for the majority * Adjusting everything for one plant would destabilize the whole run So in this case: ➡️ She had to adapt to the room ➡️ Not the other way around And that’s exactly what makes her story interesting. Because she did. ⸻ 💧 Nutrition Same base feeding as the room: * Terra Bloom * Pure Zym * Sugar Royal * Power Buds * Green Sensation * CalMag Pro pH ~6.5 | EC ~2.0 She showed sensitivity early on, but stabilized over time. No chasing deficiencies. No overcorrections. Just steady input and patience. ⸻ 🧠 Observations This plant is a lesson. Not every plant thrives instantly. Not every phenotype fits the system. But resilience… that’s where the real value shows. She may not be the biggest. She may not be the easiest. But she’s earned her place in this run. ⸻ 🔮 What to expect next week * Continued resin development * Slight increase in bud density * Possible early signs of ripening (some pistil darkening) * No explosive growth — but steady finishing She’s not going to suddenly become the biggest. But she will finish properly. ⸻ ⚠️ What NOT to expect * No late stretch * No dramatic size increase * No sudden change in structure This is about refinement now, not expansion. ⸻ 🙏 Final Words To everyone following this journey: * The ones who support from day one * The new people discovering the process * The skeptics — always part of the balance * The silent watchers * The platform hosting this space * The sponsors and partners * The genetics behind this resilience And especially… This plant. Not perfect. Not easy. But real. From grower to growers 🤝🌱 📡 DELETED @ 1K Please stay tuned.we never quit https://www.youtube.com/@TheDogDoctorOfficial NEW 🙏 Thank you for your patience and continued support. FOR DISCOUNT CODES AND MORE JUST FOLLOW THE LINK https://website.beacons.ai/dogdoctorofficial 📲 Don’t forget to Subscribe and follow me on Instagram and YouTube @DogDoctorOfficial for exclusive content, real-time updates, and behind-the-scenes magic. We’ve got so much more coming, including transplanting and all the amazing techniques that go along with it. You won’t want to miss it. GrowDiaries Journal: https://growdiaries.com/grower/dogdoctorofficial Instagram: https://www.instagram.com/dogdoctorofficial/ YouTube: https://www.youtube.com/@dogdoctorofficial Deleted by Youtube - https://www.youtube.com/@TheDogDoctorOfficial NEW Vimeo : https://vimeo.com/dogdoctorofficial Under construction stay tuned ⸻ Explore the Gear that Powers My Grow If you’re curious about the tech I’m using, check out these links: 🔆 Lighting & Environmental Control • Future of Grow — Advanced LED lighting technology https://www.futureofgrow.com/ DISCOUNT CODE: DOG20 • Lumiflora — Under-canopy LED lighting https://lumiflorade.com/ • TrollMaster — Environmental controllers and automation gear (past collaboration) ⸻ Genetics • Zamnesia Seeds — Genetics used in this project https://www.zamnesia.com/ ⸻ 🌱 Soil, Substrates, Boosters & Root Support • Plagron — Substrates, bio mixes, and supportive products https://plagron.com/en/ ⸻ 🎒 Storage, Curing & Preservation • Grove Bags — Curing and storage solutions https://grovebags.com/ ⸻ 📸 Photography Equipment & Tools (Not sponsors, but part of my creative toolkit) • Sony A6700 • Sony full-frame macro lens + few more • Stacking photography workflow - learning • iPhone (for behind-the-scenes shots) We’ve got much more coming as we move through the grow cycles. Trust me, you won’t want to miss the next steps, let’s push the boundaries of indoor horticulture together! As always, this is shared for educational purposes, aiming to spread understanding and appreciation for this plant. Let’s celebrate it responsibly and continue to learn and grow together. With true love comes happiness. Always believe in yourself, and always do things expecting nothing and with an open heart. Be a giver, and the universe will give back in ways you could never imagine. 💚 Growers love to all 💚 📸 P.S. – The Eye Behind the Lens All photos in this diary (for now — except for the ones showing the camera, which I took with an iPhone) are taken with a Sony A6700 paired with a Sony full-frame macro lens and a few more. Photography is part of the story — it’s how we share the fine textures, the glow, and the quiet details that words can’t always capture. I’ve also started experimenting with photo stacking — a technique where multiple images, each taken at a slightly different focus point, are layered together to create one perfectly sharp image from front to back. It’s not digital enhancement or AI; it’s pure photography — a way to reveal the plant’s beauty in microscopic depth, from trichome to petal. You’ll even see a few shots of "ghost me" capturing the shots — camera, lens, setup — because every grow deserves not just to be cultivated, but documented like art. FOR DISCOUNT CODES AND MORE JUST FOLLOW THE LINK https://website.beacons.ai/dogdoctorofficial NEW DISCORD - Official Server Invite Link : https://discord.gg/ksjAkA5T74
Likes
51
Share
@Mr_Juice
Follow
I am extremely satisfied with the biotabs fertilizer, something incredible. and no PH water adjustment 🖕🏼 one shows a slight lack of magnesium. I will not deal with it at this stage, but next time I will put the lights higher.🤘🏻 -and the buds are incredible for 4w blooms BIOTABS: …….. is still the best organic fertilizer I've tried. incredibly good and simple and I only applied it 2x🤘🏻 in 1w and 4w🌹
Likes
31
Share
Week three of this (up till now) 100% pure organic grow is behind us... She is looking great, really speeded UP in the last few days...💪 She has had only water up till this point.. I'm thinking that will change in the upcoming week but i have not decided yet... Hope it all goes good... fingers crossed👍
Likes
150
Share
@visco
Follow
So here we are, day 72 september 8th. RIP first grow, I shoulda had a dehumidifier guys.... The 3 other plants are transpiring wayyyy too much and I didn't realize how much of a humidity problem it would cause. Low and behold, it ruined my girl. I believe only the main cola is affected. Can I chop her top off and continue on till the rest of her buds ripen? What can I do ?? Please help I fucked up, this really sucks ass.... EDIT EDIT: ITS NOT ROT YAY! IT'S SPIDER MITES I BELIEVE! I saw a little red bug and i was like OH SHIT. Turns out they can leave little webs in your buds. Any recommendations on how to treat this ? EDIT 9/10: Okay, after not wanting to believe it was mold.... it was mold. lol. I removed the top part of the main cola that was in the early stages of bud rot (botrytis) I have never seen the inside of a developing bud like this. I wasn't really sure exactly what I was looking at lol. So I probably removed more than I had to and some parts probably could have been salvaged but fuck that I just got rid of all of it. Cleaned the tent with lysol disinfecting wipes and got a cheap dehumidifier. I am almost 100 percent sure I am gonna have to buy a 150-200$ dehu in the near future..... i hope not tho. ALSO, changed light schedule back to 20/4. 10 AM off, 2 PM on. Hopefully this will help with some cooler temps during the day. :) and @Philindicus recommended I switch it, I am gonna take his advice this time after he warned me of mold issues xDDD Sept 11th Day 75 - Got a 50 pint GE dehu setup today, big boy moves. Plants are thriving now, 55% RH controlled and ooooo its so nice! Feels good to regain control over the grow again xD. Will post some nice pics tomorrow :) Sept 12th day 76 - sorry no pics again today, just been super busy :p Plants are still thriving, currently 50% rh in the tent and 74.5f degrees :) TEXTBOOK! Catch y'all tomorrow ;)
Likes
10
Share
@420SYL
Follow
Séchage de la dernière plante, prêt pour la prochaine session !
Likes
2
Share
@A_Aron
Follow
Day 50: Everything is looking happy after the little trimming. Getting ready to head out of town in a few days. Ordered a small automatic waterer from Amazon to assist while I'm gone. Watering/feeding day. Each plant got 1 gallon of water with the following things: 5mL per gallon Alaska 5-1-1 30mL per gallon Alaska 0-10-10 (a little more than normal to give them a boost) 5mL per gallon GrowMore Seaweed Extract 15mL Blackstrap Molasses Scratched into the surface of each pot is a 1/2 cup of Happy Frog Fruit & Flower Day 52: Leaving town early on Day 53 for 5 days. To prepare for the time I'll be gone I got an automatic watering system from amazon. Since I only use a total of 4 gallons during watering and only need one watering done while I'm gone, a single bucket will do the trick. I set up the system, installed two watering stems per pot, and made a looped system. In the bucket of water, I added nothing but the water. I don't want to have to worry about stirring it or anything like that. I set the system up to water when lights come on during the 3rd day I'm gone, Day 55. After I had the system set up I watered/fed the plants. Each plant got 1 gallon with the following: 5mL per gallon Alaska 5-1-1 15mL per gallon Alaska 0-10-10 5mL per gallon Grow More Seaweed Extract 15mL Blackstrap Molasses Plant 2 also got 1.25mL of AGT-50 Plant 3 also got 15mL of Liquid Culture Microbes Plant 4 also got both the AGT-50 and LCM at the same amounts above. Hope the watering system works.
Likes
20
Share
March 3rd, 2019. The plants are 28 days old today. Growing well. They are well in early flower now. Began LST and did just a small amount of defoliating. They had Azos mixed with Mykos on day 26, will probably feed tomorrow depending on moisture, if not the next day for sure. They just look great. March 8th, 2019 - 33 days old. Was a big grow week. Both plants doing great. They had a full feeding Tuesday and today they got a good solid flushing. They are starting to smell pretty good. If you look closely at the cola shot, you can just see Trichomes starting to form. Lord knows what they will look like in 4 weeks. About 16 to 17 inches tall, really heavy branches, leaves look great, nice beautiful green.
Likes
6
Share
Got a hold of these beans direct from the UK and couldn't afford to have them sitting. This is a sativa dominant strain that checked all the boxes for my 4/20 smokes UPDATE: 14 days from germination, I posted a video and she's already has side branch action and we have only begun veg as of 12/14/22. Genetics shining on this one and I only feeding water, will introduce some light nutes over the wknd MAYBE
Likes
27
Share
1/20/2023- So much to do pre grow and over the next 16 days, absolute first order of business is that I have to take down my current Grow---TIMBER-- Then I have a list of things I have to get done in order to be ready to start this grow 1 Feb. With that said T - 2 days until start 48 hour Flush T - 2 days until Start 48 hours of Light T - 4 days until TIMBER!!! Items that need to be done before 1 Feb 2023 1. I need to clean the tent out 2. I need to clean the equipment- Proper Sanitization between grows in Hydro is a must!!! 3. I need to get the hole in the ceiling above my tent repaired- For my last grow I had a deep sink installed in my grow room, to make Hydroponics a little bit easier and have a water source in the same room. The seals on the pipes they were installing broke and leaked through the ceiling causing some damage all the way across my grow room, I was already weeks into my grow and couldn't risk them working above my tent and it would have been very awkward positon for them to be working in as well, so have to get this done quickly between chop and germination. 4. I have to install my new light- I was using a Vivosun 4000 and for this grow I am switching up to a Spider-farmer SF 7000. 1/20/23- For this upcoming grow I am working with M/F photo seeds so I ordered 4 Sex determination kits. I recieved my my 4 Sex determination testing kits from Rimrock Analytics today. I will be using these to test my plants at week 2 of Veg so that when/if I take clones I know I am taking them off females. As well as I don't want to accidently pollinate my tent during this grow I am looking for big beautiful buds not seeded buds. :-) 1/24/2023- Harvest of current grow- Started at 2:00pm and finshed wet trim and firt batch into the freeze dryer. 1/25/2023- Next batch into the freeze dryer and cleaning all my equipment for this Grow. T-1 Day until the workers are supposed to be here to fix the hole in the Grow Room. T-3 days until I instll my new Gorilla Grow Tent and my New Light Spider Farmer SE-7000 for this grow. T-7 Days until Start of Germination 1/26/2023- Harvest is done ran through the Freeze dryer and dry tim completed. 1/27/2023- Grow Room repairs completed. Hole is gone Letting the paint dry before I install the new tent. T-2 days until Install the New Gorilla Grow tent and the new Light T-3 days until I put the hydro equipment in the new tent T-5 days until Germination 1/29/2023- Day 0- Final Pre Germination activities Germination Start T-3 days The paint on the ceiling was dry and it was time to finish prepping for Germination. I got the following items knocked off my list. New 4X4 Gorilla Grow Tent is up and ready New Spider Farmer SE-7000 Light is installed- Thanks Moony Grows for the suggestion and for the Code that got me some money off and free shipping (Moonygrows)!! I turned the lights all the way up to max and set the timer to 18/6 0600-0000. I will keep an eye on the temperature and humidity without my plants and see how hot it gets with the new light. I put my Hydro system back together and put in 40 gallons of water into it, time to monitor for leaks the next few days. I Setup my cloning machine for Germination Days 3-11 1/30/2023 let me break down the situation, ROOM in the TENT.. Enough said.. No really I tried putting my exhaust system up in the new tent with my new light, The light is so big corner to corner that it really didn't give me enough room for the lights be be raised, with the exahust hanging the buckets my plants are Starting in are 2 and 1/2 feet off the ground, great for plenty of room for roots but not so great for upwards space for the plant to grow. In a 6' 11 tent with the exauhst in side and hanging that only gave me a little over 4 feet of grow room to play with. My last grow if you saw my diary, anyone could tell I was struggling to keep the buds off the lights. No good, Since space was such an issue I was running my carbon filter inside on the ground but It really needed to be up sucking the heat out not shooting the cool out. With that setup I was sucking air through the filter and pushing it out the tent at a bottom exhaust hole cold out. Wasn't doing me any good for my heat. I was hitting temps of up to 85 degrees. I bought a portable AC unit and have been running it in the grow room to try and keep temps below 85 and I have had to lower the power on my lights during grow also not ideal.. With that said a friend of mine MoonyGrows (Check out his diary) took the time to look at my issue send me a picture of my grow tent setup with detailed instructions on how to suck the air out from the top but putting my filter and fan on top of my tent so no room issue and I am sucking the air out from the top where the heat is instead of pushing the air out from the bottom where the cool is... THANK YOU MoonyGrows For taking the time to help me get this straightened out.. Now I have room and I have the exhausts working right and now my temps with everything at 100% are topping out at 80 this dropped the temp by 5 + degrees at 100% max. T-2 days until Start of Germination Prepped my seed tray with humidity dome Prepped my Rapid Rooter plugs. I Used RO water, and I added a few drops of Hydrogen peroxide to Oxygenate the water. I then PH balanced between 5.7-6.0 the same that they will be getting in the Cloning Machine and when they get to thier final grow pod. I perfere the 5.8x range and I hit 5.84 for these rapid rooters. If you want to see a complete video on the process HowWeedGrow has an amzing video that shows step by step how to do it and explains it better than I ever could including how to plant the seeds. Which I will cover when I get to that step on Wed. https://www.howweedgrow.com/how-germinate-weed-seeds-cannabis-rapid-rooters/ 1/31/2023 T-1 day until Germination Start All set and ready have my Rapid Rooter plugs ready to go have my seeds out.. Have my seed tray warming up tonight. Tomorrow morning right into the Rapid Rooter then strait into the tray. I will spray the dome to start the humidity in there. 2/1/2023 Germination Day!! Let the games begin! 0600am Put the seeds into the Root Riots. And then put the seeded Root Riots into their first home the Seed tray. I have them under the light 24/7. Sprayed the dome 7:30pm Sprayed the Dome to keep humidity going on the dome. 2/2/2023 Day 1 of Germination Sprayed the Dome in the morning Sprayed the Dome in the evening 2/3/2023 Day 2 of Germination Roots are starting to come out the bottom of the root riot plugs and the heads are slowly popping out of Number 4 just below the surface. Afternoon- Number 4 has popped up Evening- Number 3 has popped up as well. Happy Dance!! 2/4/2023 Day 3 - Germination Surprise Surprise Surprise- all 4 have now poked their heads up.. Happy day!! 100% Germination succeeded. Now major milestone to track is how many are female and how many are male. I will take look at the roots this afternoon/evening and see if they have enough root to go into the cloning machine for the next 7 days before they go into their Hydro Pods. Day 3 - Germination - Evening.. Roots looked good and they were tall enough to make it into the cloning machine. Now that they are all in the cloning machine I have switched the lighting to veg state 18 on 6 off. 2/5/2023 Day 4 - Germination - Morning All the Ladies (fingers crossed) looking great stretching nicely and look nice and green, Photo synthesis underway.... UPDATE!! After a very interesting POD cast on FSTS by Dr. Bruce Bugsbee from Utah University, I have shifted my lighting to 24 hours on through seedling and then I am going to shift to 20 hours on the rest of Veg. 2/6/2023 Day 5 - Germination While Checking on my conditions inside the new tent last night, I found that the Humidity was down to 39 Percent. I added an AquaOasis Cool Mist Humidifier, the reason I selected this humidifier is that I needed one that could be turned on and off utilizing my Inkbird Humidity Controller IHC200 that I have my Pro Breeze Dehumidifier currently running with. Root structures are starting to get there about 1/4 of an inch. 2/7/2023 Day 6 - Germination Everything seems on track more roots poking out of each today. They are each getting a little taller as well. Checked in the evening and number 3 was drooping the Root riot plug on the bottome was dry and the roots were not in the water yet. I raised the water just enough that the longest root that was sticking out is now hitting the water. 2/8/2023 Day 7 - Germination Everything looked good while checking in on them this morning number 3 is now full up and no droop again. 2/9/2023 Day 8 - Germination T-2 days until Plant into Forever Pods and we start week 1 of Veg .. :-) Surprising thing to me is that number 1 and 2 were later in popping then 3 and 4 but the roots are growing longer in 1 and 2. 2/10/2023 Day 9 - Germination Number 1 and Number 2 are definitely ready for transplant today.. Based on how they were yesterday and where they are today I am hoping by tomorrow 3 and 4 are ready. Today they look to me where 1 and 2 did yesterday.. I really hope 3 and 4 catch up by tomorrow since.. T-1 day until transplant to new/ final home for grow. Need the roots long enough to have some clay down in the basket to keep the root riot out of the water and only roots in the water.. 2/11/2023 Day 10 - Germination Today they got placed in thier forever Home, 7 days from Sprout and 7 days until Week 1 Start. PPM- 180 this is water out of the Tap Temp Water: 70.7 Temp Tent: 77 Humidity: 40% I have a humidifier going 24/7 to try and bring this up.. I also have Humidity Domes on each plant. 2/12/2023 Day 11 - Germination Sprayed the domes, all are looking good.. Nothing much to do at this phase but Keep monitoring the PH level in the system and making sure they have a comfortable home. T-6 days until Week 1 start 2/13/2023 Day 12 - Germination Sprayed the domes, They were looking a little yellow today so I moved the light down to assist. Nothing much to do at this phase but Keep monitoring the PH level in the system and making sure they have a comfortable home. T-5 days until Week 1 start 2/14/2023 Day 13 - Germination Sprayed the domes, They were looking a little Florissant yellow today, with what looks like slight burn on the tips, I talked with a fellow grower and we agreed that It was probably that I was drowning them, Yes you can drown you plants even in Hydro, but only early on.. :-) It usually happens with the water being too high, which soaks not only the roots but the medium (root Riot plug in this case). I lowered the water from touching the bottom of the pot to about 1" away. This will probably take 3-4 days to resolve. I will continue my daily monitoring. T-4 days until Week 1 start 2/15/2023 Day 14 - Germination Sprayed the domes, continue my daily monitoring they look a little darker green instead of lime green now that I lowered the water levels in the system, so I think that I might have resolved the issue but it will take a few days for recovery to happen. T-3 days until Week 1 start 2/16/2023 Day 15 - Germination I looked in on them this morning, 3 and 4 look like they are doing well and recovering nicely. Number 1 not so much it has brown spots on the leaves, this very well can still be a side effect of the overwatering but I decide to go ahead and add Nutes earlier than I was planning just incase. I was going to wait until Saturday but I think intervention is necessary now especially after drowning them early on. I added 1/2 what I am planning on adding for week 1 start. I also think I am going to adjust my chart to add 1/2 2 days after plant from now on. I don't think it would hurt it to have some Nutes to pull from. .25ml/Gal Calmag = 12.5ml 1ml/gal GH FloraMicro= 50ml 1ml/gal GH FloraGro = 50ml 1ml/gal GH FloraBloom = 50ml T-2 days until Week 1 start = I will drain the system and start it over on Saturday with Week 1 Nutes. 2/17/2023 Day 16- Germination I didn't even want to post today after looking in on them this morning, 3 of the 4 are now showing signs of dronwing.. Brown spots on the leaves, the water levels were still too high.. I drained about another inch out of the tanks.. Will see how quick they recover.. I start week 1 tomorrow and will have to ensure my water levels are at least 1" away from the basket on this round.
Likes
5
Share
Que pasa familia, vamos con la quinta semana de floración de estas GG4 Sherbet Fast Flowering, de FastBuds. Agradezco a Agrobeta todos los kits obtenidos de ellos 🙏. Ya veis que llevan buen ritmo ya tiene un color espectacular. Vamos al lío, El ph se controla en 6.2 , la temperatura la tenemos entre 21/24 grados y la humedad ronda el 50%, 7 litros de sustrato. Iremos viendo cómo avanzan. Agrobeta: https://www.agrobeta.com/agrobetatiendaonline/36-abonos-canamo Hasta aquí todo, Buenos humos 💨💨💨