


Likes
Comments
Share

@Piratebay
Follow
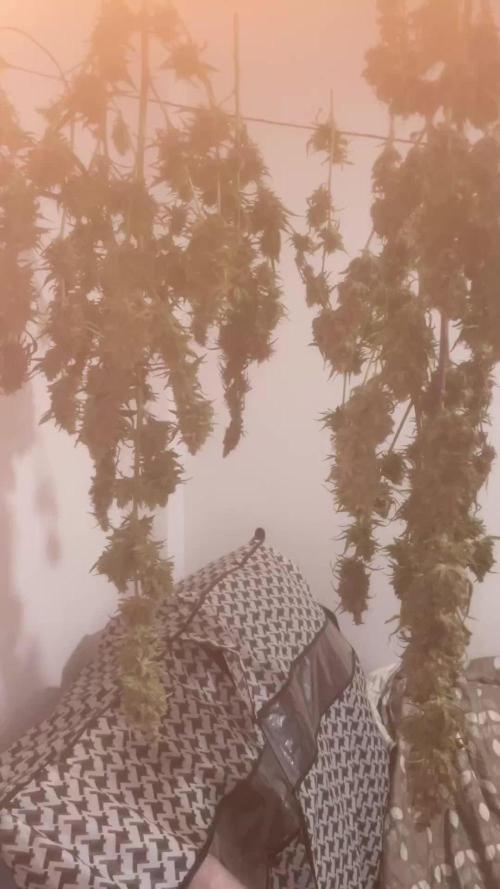
Todo llegó al fin de los finales con un bosque de gran aroma a madera envejecida!
Realmente delicioso el sabor a madera con fondo incienso que hace salibar en tu fondo paladar y que cuando acabas el join te deja sequedad en el paladar.
Las plantas respondieron muy bien a los últimos días de calor sofocante y la gran cantidad de fertilizante que acabaron siendo sofocadas al gran lavado de raíces de 14 días
Las plantas acabaron llegando casi todas en un 90% al final dos quedaron muy atacadas por las arañas y viendo los días restantes las retiré del armario quedando estas fuera en exterior en la que también. Sacaré provecho con extracciones .
Buenos resultados con los que acabamos este cultivo .

Likes
2
Share


@LadyGreen
Follow
She growing well, so well in fact I have started to HST the off shoot branches to keep the grow low. They are nice and green still so easy to HST and take to it well.
It's getting ready to flip but waiting on my new tent...so she will just have to keep growing taking over my veg cabinet

Likes
Comments
Share

@UDUDUDUDU
Follow
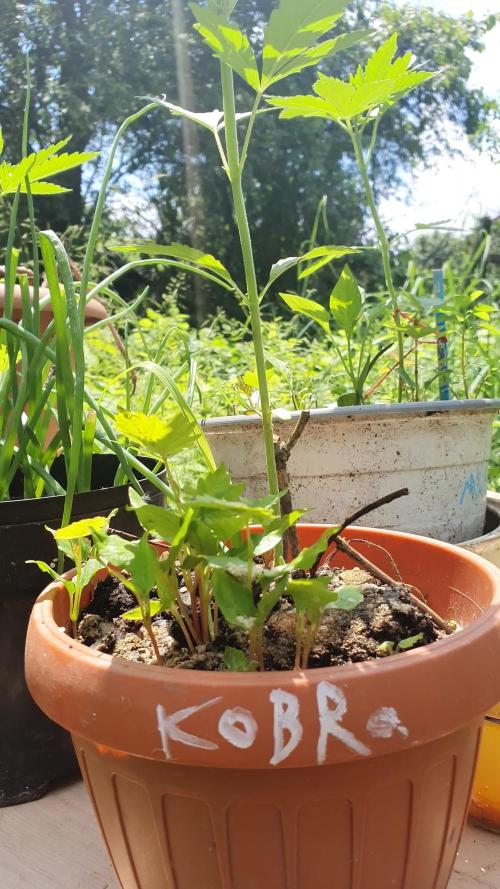
we have moved up to 1 cup of water a day and watching I dream of Jeeny
Likes
152
Share


@PEAKYPLANTERS
Follow
I can not believe.😲
We have reached the end of another magnificent journey made together on this splendid platform which gives ease and opportunity to learn and perform in the best crops
I can already tell you that this baked tent is one of the best weeds I have ever grown so far!
But this can also be seen from the contents. Spectacular colors, solid gems....and resin in rivers
Stay updated for the white smoke 😋😎

Likes
16
Share


@MadeInGermany
Follow
Info:
Unfortunately, I had to find out that my account is used for fake pages in social media.
I am only active here on growdiaries.
I am not on facebook instagram twitter etc All accounts except this one are fake.
Harvest day 71
since the time
change to 12/12 hrs.
Hey guys :-)
Finally the time has come .
The lady was harvested.
After the trichomes have been checked (70% milky 30% amber) as always, it was left in complete darkness for 48 hours before it was neatly trimmed by hand.
After trimming, she was put back in the drying tent on nets.
There they are allowed to dry for the next 8-12 days at 62% humidity before they are put into the jar to ferment with 62% boveda packs.
After about 4-6 weeks in the jar I will swap the 62% boveda pack for a 58% boveda pack where it can be ready for another 4-6 weeks to enjoy :-).
As always, the remains of the leaves are used to make Ice o Lator and oil.
Of course, as always, there is a final update during the fermentation process.
Until then, I wish you all a lot of fun with this update.
Stay healthy 🙏🏻 and let it grow 👍.
You can buy this Strain at
https://www.barneysfarm.com/blue-cheese-34
Type:
Blue Cheese
☝️🏼
Genetics:
Blueberry
X
Original Cheese
👍
Vega lamp:
2 x Todogrow Led
Quantum Board 100 W
💡
Bloom Lamp :
2 x Todogrow Led
Cxb 3590 COB 3500 K 205W
💡💡☝️🏼
Soil :
Canna Coco
☝️🏼
Fertilizer:
Green House Powder Feeding
☝️🏼🌱
Water:
Osmosis water mixed with normal water (24 hours stale that the chlorine evaporates) to 0.2 EC. Add Cal / Mag to 0.4 Ec Ph with Organic Ph - to 5.5 - 5.8

Likes
4
Share


@Scottydarkmoonbuds
Follow
She's look really good. Calyx are swelling nicely. They trichs are amazing and cloudy. I'll give her a few more days or a week and see how she is then

Likes
32
Share


@Gorrilla420
Follow
Not much to say this week, buds starting to dense up more now. Triple G back right yellowing need to keep eye on her weather she’s coming to end or some kind of deficiency, roughly a week or 2 before there down 🍁


Likes
6
Share


@rvabudman
Follow
Graduated, and am off from work for a few weeks, so went overboard on photos. Plant is doing well, leaves are starting to turn yellow (strain trait).
Can't wait for the harvest and being able legally gift my xmas ornaments to my cousins during our "cousins walk" at our family xmas party.

Processing
Likes
21
Share


@Fibro_Witch
Follow
Cal-Mag boost on Monday. Top dressed on Thursday. Most likely will sex them in the next few weeks.
Likes
36
Share


@OGTrauma
Follow
Im coming closer to the ✂️ time, i tried some pics without the lights on to show a more realistic approach of how plants are evolving besides al the self inflicted plages and nutrients burn , i can wait to the plants mature while im searching for the 🕵️♂️to check if thricome ratio should be mostly amber ... Because fuck im such a sedative whore, big gaz leaks homies!!!!

Likes
6
Share


@RhodiesGrow
Follow
Day 15/Day 3: + Speed is finally starting to take off. Should show excellent growth this week. Seedling coming along nicely for 3 days. Popped 5/19. Will keep humidity dome on for the week with 1 mist per day of straight RO water. OG + Speed looks horrible. Really stunted and has struggled ever since she was transplanted. Definitely germinate in paper towels and plant direct to final pot next time. We'll see what happens with her; she is trying to hang in there however. There is some new growth be it extremely slow. Might end up with one small cola. We shall see... OG + Speed is currently in a 1gl pot filled with Fox Farms Ocean Forest. She was fed a light feeding of nutes 5/21/23. First big feed for Day 15 + Speed: 4ml FloraMicro, 6ml FloraGro, 3ml FloraBloom, 2ml CALiMAgic, 1ml RapidStart, 1ml Floralicious Plus and 2.5ml Armor Si. RO water PH 6.0 Temp: 75º RH: 63% PPFD: 450 VPD: .53 kPa
Day 16/Day 4: + Speed looks about the same as yesterday with a tiny bit of new leaf growth. Checking the light I noticed the PPFD around 350 where she was sitting. I think the tripod was blocking some light. Moved around now about 450 PPFD. We'll see if that helps her speed up (pun intended) Applied LST to + Speed. New + Speed shows slightly larger leaves from yesterday so progressing and OG + Speed looks like she is thriving! She's trying to hang on and do something. No water no feed. Temp: 76º RH: 61% PPFD: 475 AVG VPD: .46 kPa
Day 17/Day 5: + Speed looks healthy and happy. Taking to LST nicely. New + Speed sprout doing it's thing. Will feed tomorrow. Temp 77º RH: 55 % PPFD: 500 AVG VPD: .6kPa
Day 18/Day 6: All is well the nursery. Moved up and turned up the lights. Fed 250ml of 4ml FloraMicro, 6ml FloraGro, 3ml FloraBloom, 1ml RapidStart, 2.5ml ArmorSi, 2ml CALiMAGic and 1ml Floralicious in RO water PH 6.2 PPM: 750 Solution Temp: 69º. Tent Temp: 77º RH: 60% PPFD: 575 VPD: .44 kPa New + Speed got 25ml of .3ml RapidStart (All per Gal)
Day 19/Day 7: Looking good. Tent Temp: 77º RH: 60% PPFD: 550 VPD: .44 kPa
Day 20/Day 8: Still looking good. New growth. Smaller + Speed still trying to catch up. She'll be small but should still produce. Fed another 250ml RO water with 1ml RapidStart PH: 5.7 Tent Temp: 77º RH: 60% PPFD: 550 VPD: .44 kPa
Day 21: End of Veg Week 3! Looking strong and healthy so far. Almost feeding/watering daily at this point, will up the solution volume and see if it will last a day or two longer. Lagging + Speed still truckin' along. New + Speed seedling looking a little shriveled. Fed 350ml-400ml of 4ml FloraMicro, 6ml FloraGro, 3ml FloraBloom, 1ml RapidStart, 2.5ml ArmorSi, 2ml CALiMAGic and 1ml Floralicious in RO water PH 6.2 PPM: 750 Solution Temp: 69º. Tent Temp: 77º RH: 60% PPFD: 500-550 AVG VPD: .44 kPa


Likes
21
Share


@FlavoursUk
Follow
Great grow from start to finish, very resilient plant and would of given her some more TLC if I was to grow her again.

Likes
6
Share


@IQuSX
Follow
Formula 1 Royal Queen presents:
[Medusa];
Orion;
Epsilon;
Titan;
&
One sssecret seed…
Watch them, topman, and see the revolution.
Here goes!
Likes
4
Share


@SuperGluedGrow
Follow
Got the guy separated and hopefully the other three are female so I can still flower two of them. Will be doing small pheno hunts with this strain in the future so ill be needing the seeds.
Likes
10
Share


@Andres
Follow
She is a large plant. my height is 1.94 cm / 6'4 f. her buds are very heavy for her. I need to have it with a rope so that it does not fall. I'm happy with this strain of ripper seed. I'll cut it in a couple of days.

Likes
43
Share


@TheCannaProphet
Follow
~ FastBuds PAPAYA SHERBET Photoperiod~
Well here we go on another journey together through 'Canna-land' and this one's kinda special... forget that, it's VERY special because this is FastBuds newest surprise for the community, a FEMINIZED PHOTOPERIOD STRAIN!🤯
I was fortunate enough to score these seeds, of which only 1000 were available and can't wait to see what this strain can do! This Papaya Sherbet, according to FastBuds, is a hybrid with a 9-10 weeks flowering period. For a more detailed and accurate description of this strain the following from FastBuds says it best:
"Combining the massive stature of Papaya (Oni Selection) with the strength and resilience of one of our best keeper cuts (Sunset Sherbet), this strain develops into a big, expansive bush adorned with numerous bud sites that later transform into a generous harvest of medium-sized buds. Papaya Sherbet flowers deliver a signature flavor of premium cannabis with subtle citrus undertones that emerge upon inhaling. During growth, her aroma makes for a sweet yet pleasantly bitter fragrance, giving you an idea of what the smoke will taste like. Notably stress-resistant, Papaya Sherbet is a great choice for growers working in challenging environments. She is very forgiving and rebounds quickly from any adversity, allowing growers the freedom to experiment with confidence that she will take everything like a champion she is. This strain embodies resilience, flavor, and abundant yields in every grow cycle."
Sounds like an epic strain and I personally cannot wait for this lady to strut her stuff!😍
________________________________________________________________________________________________________________________________________________________________________________________________________________________________________________________________________________________________________________________
The Setup:
This is going to be an outdoor grow, but I have started the Papaya Sherbet photoperiod indoors as our weather is still a bit too chilly to put a newly sprouted seedling outside (nighttime temp's dipping regularly into the 40's℉).
The plan is simple... let her grow inside under a 19/5 light schedule until the nighttime temperatures are in the mid 50's℉, which shouldn't be long. After which, she'll be moved outside and transplanted into the soil which I have already setup and inoculated with beneficial microbes from BioTabs and slow release dry amendments from Gaia Green. Once she's established herself outside she'll be given periodic top dressings of Gaia Green 4-4-4 and 2-8-4 along with worm castings and Compost Tea's. Her grow area is approx. 5'x5' and I have posts and a trellis net set up already for when she gets bigger to aid in training her. Let the fun begin!🤪💚
________________________________________________________________________________________________________________________________________________________________________________________________________________________________________________________________________________________________________________________
Weekly Updates:
7/18- Well, we're now going into the 10th week of veg for this FastBuds Papaya Sherbet photoperiod. She's becoming quite the tall lady with wide node spacing and a classic 'Christmas tree' shape. Her overall health and vigor have remained excellent and she's tolerating our oppressive heat with out complaint!
7/20- The daily watering of 5g continues, as does the hot weather.
7/22- Yesterday, I top dressed the FastBuds Papaya Sherbet photoperiod with 2 1/2 cups of Gaia Green 2-8-4 along with 1 cup of Down To Earth Bio-Fish 7-7-2 and 1/2g of Wiggle Worm castings. After top dressing and working the amendments in by hand I replaced the straw coating over the soil and watered them in with 5g of straight well water via garden hose as usual.
Today I resumed my regular watering routine, watering late in the afternoon with 5g of well water from the garden hose.
7/24- There goes ten weeks of veg for the FastBuds Papaya Sherbet photo and she shows no signs of slowing her vertical growth at this time. I am hoping that with our daylight hours slowly diminishing, the Papaya Sherbet will begin to transition into flower in the next few weeks so that it won't be late October before she's ready to harvest... we will see!
Thank you for checking out my diary, your positive comments and support make it all worthwhile! 💚Growers Love!💚😎🙏
Likes
1
Share

@c1note
Follow
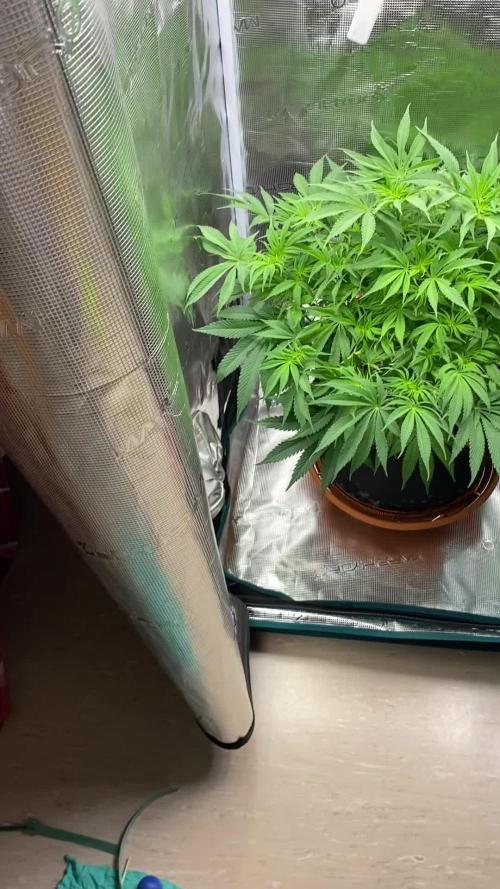
19.11 letzter Tag einer guten Blütewoche . VPD 1.1. 2L mit 1.85 Ec.
17.11 Lampe auf 100% PPFD 850-950. DlI 38 - 41. Vpd 1- 1.1. 1.5L mit 1.9 Ec.
14.11 gute erste Blütewoche gehabt. DLI auf 33-36 erhöht. Ernährung bleibt erstmal gleich bis auf ne kleine Steigerung beim CalMag. Ich scorg wieder im Verlauf der Woche.
Likes
91
Share


@DogDoctorOfficial
Follow
These one was a big messy jorney, everything happened from almost kinling them, to almost no space for them to grow, LED broken middle flower and still perform like the queen champion she is!!!
I am felling her mature over cycles , i am thinking of her like a wine vine that gets better over time , these one in my humble opinion its a must in everyones garden <3 <3 <3
Wen harvesting these one i felt the need to break it all apart to prevent bud raw or anything we do not want on our medicine, i like to hang them all and let them dry but in these case there was no chance i was taking that big of a risk with these big fruits all over the place, what a blessed run, my rack is completely full, there was no more space , i mean no more space at all hahah amazing , thank you thank you thank you <3 <3 <3
As always thank you guys for your love , your time, your support and it all, i fell blessed and i am truly thankful <3 <3 <3
All info and full product details can be find in can find @
https://www.zamnesia.com
https://aptus-holland.com
#aptus #aptusplanttech #aptusgang #aptusfamily #aptustrueplantscience #inbalancewithnature #trueplantscience #zamnesiaseeds #growerslove
With true love comes happiness <3 <3
Always believe in your self and always do things expecting nothing and with an open heart , be a giver and the universe will give back to you in ways you could not even imagine so <3 <3 <3
More info and updates @
https://growdiaries.com/grower/dogdoctor
https://instagram.com/dogdoctorofficial
https://youtube.com/channel/UCR7ta4DKLFMg2xxTMr2cpIg
<3 <3 <3 Growers love to you all <3 <3 <3

Likes
10
Share


@Colectivegrow
Follow
Hoy es el día 1 (día 35 desde la germinación) de floración de nuestras 3 plantas de Tropicanna Poison XL AUTO. Las plantas han sido sometidas a un entrenamiento LTS con piezas 3D para ver cómo funciona este tipo de entrenamiento.
Los 3 fenotipos se diferencian claramente a simple vista, dada la diferencia de portes de cada una. La primera planta es la más alta y tiene un porte muy abierto. La segunda planta es más baja y tiene un porte más compacto. La tercera planta es de tamaño intermedio y tiene un porte intermedio.
Esperamos que este entrenamiento ayude a las plantas a desarrollar su máximo potencial. Seguiremos publicando actualizaciones sobre su evolución.