
Processing
Likes
Comments
Share


Likes
8
Share

@Growbody
Follow
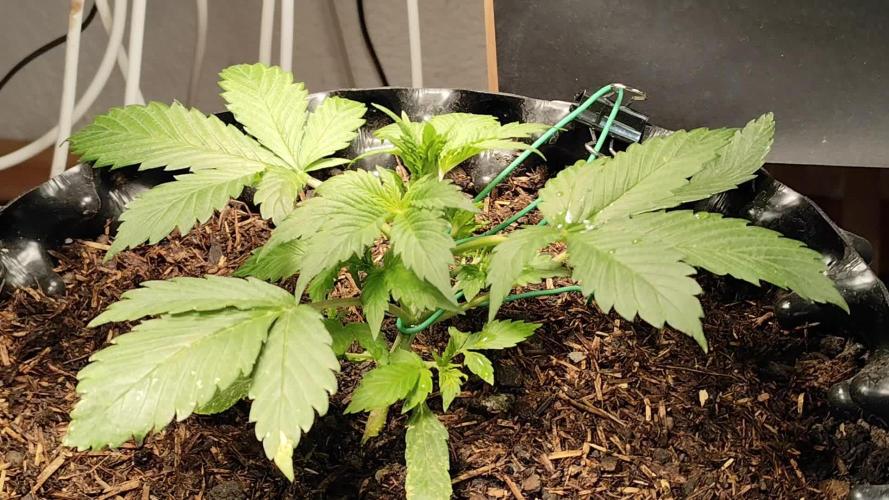
Willkommen zu meinem Growbericht der Cafe Racer Automatik von Blimburn Seeds. Die Samen sind von Zamnesias Tribe Programm als automatische Überraschungssamen angeboten worden.
Der neue AirPot Gen. 7 mit 20 Liter kommt hier wieder zum Einsatz.
Die Bio Hanferde von Sonnenerde wird wiederverwendet und mit 220 Gramm Monster Bud Mix Living Soil von BIONOVA x zamnesia und 2 Litern BioBizz Wurmhumus angereichert.
Und die zamnesia Smart Start Plugs mit Plagron's seedbooster plus haben sich bewährt.
Tag 29: Die Cafe Racer Automatic von Blimburn Seeds hat das LST ohne Probleme weggesteckt.
Tag 32: Sie ist sehr schön buschig geworden diese Woche. Nochmal etwas LST angewendet.
Schön, das du dir meinen Bericht ansiehst. Schau gerne wieder rein. 👋😎

Likes
7
Share

@DogDoctorOfficial
Follow
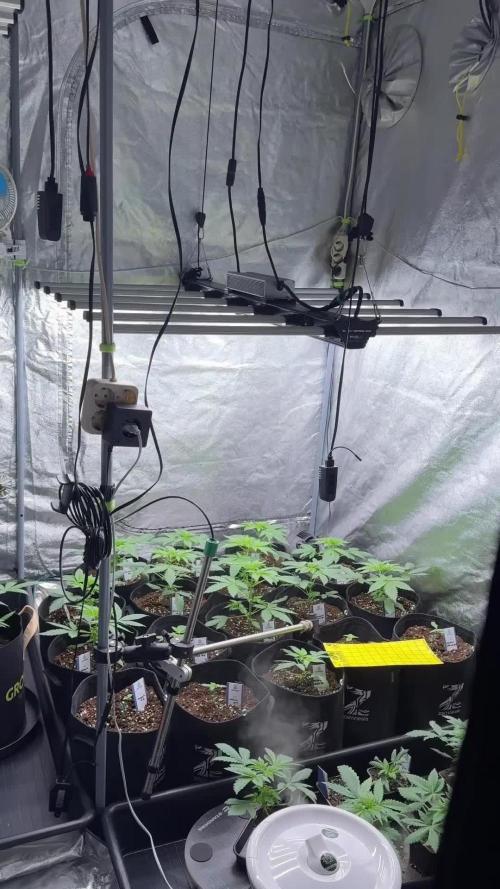
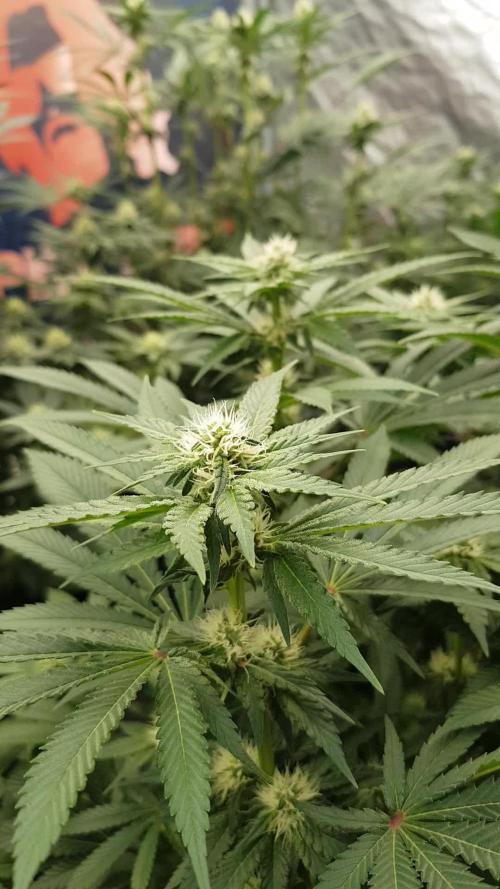
🌱 Week 3 – Transplant Time, Studio Vibes & Root Dreams
Grower’s Journal – BlueBerry by Zamnesia Seeds | Entry 004
This week marks a major milestone in our BlueBerry journey, transplant time. Our three beautiful girls have been thriving, and after careful observation, we’ve selected Pheno #1 and Pheno #2 to move forward into their new homes and toward the flowering stage.
⸻
Transplanting into Fabric Pots – Why & How
We’ve moved the selected girls into 11L Amnesia fabric pots, and here’s why fabric pots are a grower’s best friend:
• Air Pruning: Fabric pots naturally prune roots when they hit the edges, encouraging a dense, fibrous root ball with no circling.
• Oxygenation: They allow more airflow to the root zone, supporting microbial activity and preventing anaerobic pockets.
• Drainage: Overwatering is much harder—excess water simply flows through.
• Temperature Regulation: Fabric helps prevent root overheating, especially important under powerful grow lights.
🧡 These pots create an environment where roots can breathe, explore, and flourish. And that’s the heart of healthy, vigorous growth.
⸻
🌿 Roots & Selection – What We Saw
Before transplanting, we gently lifted the plants to check their roots, and they were absolutely gorgeous. White, fuzzy, and lively, signaling that they were ready to stretch into something bigger.
While all three seedlings looked fantastic, BlueBerry #1 and BlueBerry #2 stood out with stronger symmetry, tighter nodes, and a more expressive posture.
BlueBerry #3 will stay behind—for now—a backup, just in case. 💫
⸻
Soil Mix & Nutrient Support
We prepped the new pots with a focused super soil mix blended with Aptus Holland amendments:
Transplant Mix Includes:
• 🌱 Super soil base (organic, airy, compost-rich)
• Aptus Mycor-Mix – inoculates roots with powerful mycorrhizal fungi
• 🌿 Aptus Micro-Mix – delivers beneficial bacteria to balance the root zone
• ⚖️ Aptus Substrate Buffer Powder – stabilizes pH & improves nutrient exchange
First Watering Feed Mix (per liter):
• Aptus Regulator – 0.15 ml
Strengthens cell walls, improves nutrient flow, and boosts stress resistance (especially post-transplant).
• Aptus CalMag Boost – 0.25 ml
Helps develop strong structure and leaf formation.
• 💧 Aptus All-in-One Liquid – 1 ml
Balanced macro and micronutrients for baseline support.
• 🌾 Aptus Start Booster – 2 ml
Stimulates root expansion and early vegetative energy.
Water Stats:
• pH: 5.83
• EC: 1.01
• Water Temp: 18.5°C
⸻
🌬️ Environment & Gear Overview
Our setup is getting tighter every day:
• Lighting: Black Series 600 LED by Future of Grow, full-spectrum, clean white light, perfect for compact, healthy growth.
• Ventilation:
• 6” Spider Farmer inline fan + (carbon filtered) – controlled by Spider Farmer GGS Controller
• 6” TrolMaster AeroFan + (carbon filtered) – linked to the TrolMaster Ecosystem
• Why carbon filters? Even at this stage, clean air = clean grow. Carbon filters reduce smells, but more importantly, they help purify the incoming and outgoing air.
• Environmental Conditions:
• Temp: ~27°C
• Humidity: ~57.4%
• CO₂: ~632 ppm
• Airflow: Gentle, consistent, and perfectly balanced
⚙️ We’re gradually dialing in the TrolMaster system, automating parts of the grow environment, like extraction, CO₂ management, and eventually irrigation. For now, everything is still done by hand-watering, feeding, and loving every single leaf.
⸻
📸 Studio Time – A Celebration of Beauty
This week, the girls got a special treat: a trip to the studio. Their energy, their posture, their color, it all deserved to be captured.
Their presence under the soft lights was stunning. These won’t be the last photos we take, we’ll be back again before they outgrow their portability. But for now, these are moments to remember. 💙📷
⸻
🔮 What to Expect After Transplant
In the next few days:
• Some slower above-ground growth is normal, roots are stretching first.
• Expect to see a new flush of leaves and stronger stems midweek.
• No training yet, just letting them adapt and settle.
🙅♂️ What NOT to Expect
• No explosive height jumps yet
• No flowering signs
• No topping until they’re fully recovered
This week is about integration, expansion, and ease.
⸻
🎥 Series Continues – Follow the Rhythm
As always, this is part of our ongoing Grow Series, an open diary of everything we do and why. Whether you’re a new grower or just here for the vibes, you’re invited to come along.
📲 Don’t forget to Subscribe and follow me on Instagram and YouTube @DogDoctorOfficial for exclusive content, real-time updates, and behind-the-scenes magic. We’ve got so much more coming, including transplanting and all the amazing techniques that go along with it. You won’t want to miss it.
• GrowDiaries Journal: https://growdiaries.com/grower/dogdoctorofficial
• Instagram: https://www.instagram.com/dogdoctorofficial/
• YouTube: https://www.youtube.com/@dogdoctorofficial
⸻
Explore the Gear that Powers My Grow
If you’re curious about the tech I’m using, check out these links:
• Genetics, gear, nutrients, and more – Zamnesia: https://www.zamnesia.com/
• Environmental control & automation – TrolMaster: https://www.trolmaster.eu/
• Advanced LED lighting – Future of Grow: https://www.futureofgrow.com/
• Root and growth nutrition – Aptus Holland: https://aptus-holland.com/
• Nutrient systems & boosters – Plagron: https://plagron.com/en/
• Soil & substrate excellence – PRO-MIX BX: https://www.pthorticulture.com/en-us/products/pro-mix-bx-mycorrhizae
• Curing and storage – Grove Bags: https://grovebags.com/
⸻
We’ve got much more coming as we move through the grow cycles. Trust me, you won’t want to miss the next steps, let’s push the boundaries of indoor horticulture together!
As always, this is shared for educational purposes, aiming to spread understanding and appreciation for this plant. Let’s celebrate it responsibly and continue to learn and grow together.
With true love comes happiness. Always believe in yourself, and always do things expecting nothing and with an open heart. Be a giver, and the universe will give back in ways you could never imagine.
💚 Growers love to all 💚

Likes
16
Share


@eldruida_lamota
Follow
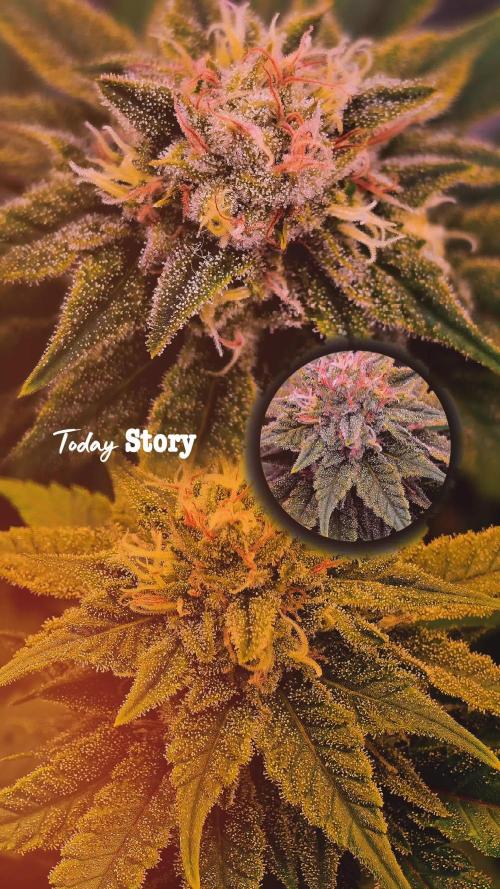
Que pasa familia, estamos otra vez actualizando la quinta semana de floración, y es que ya van cogiendo unos colores que ya van apeteciendo y todo, el aroma se noto esta semana la sala está llenándose de un aroma bastante dulzón.
Quite ya el big bud y empecé aportar un poco de overdrive así se van acostumbrando, y tengo que añadirles algo de Pk que tendré por el cajón esta semana que viene sin fallo lo añado.
El ph está siendo controlado y ahora mismo está regulado a 6.5 yo creo que es buen ph para que la planta absorba el Maximo de nutrientes, hasta aquí es todo nada nuevo sin problemas con este proyecto. Buenos humos 💨💨

Likes
8
Share

@Organic473
Follow
I love how this girl is turning up and her smell is so sweet.
I am happy that I lollipop to her for the airflow.

Likes
24
Share


@Wicked_Stix
Follow
Was a pretty smooth week for most the girls. Showing some steady growth. I topped all of the plants around day 12 other than the slurricane 7. Ph got a little high since the nutrient level was too low to buffer it at the beginning of the week. Slurricane 7 and sugar cane are the ones that took some damage. I think they will be ok though. I upped the nutrients to 1/4 tsp per gallon and the ph has held stable since then. Should be able to start some training the middle of next week and looks like we might be going 2 more weeks on veg before flipping them to flower depending on how this upcoming week goes. Guess you will have to show up next week to find out...

Processing
Likes
18
Share

@eldruida_lamota
Follow
La primera semana de floración les sentó bien la echaron su sexo, hembras, ahora ya queda ir viendo cómo se forman las flores.
La temperatura no pasa a los 30 nunca.


Likes
4
Share
@eldruida_lamota
Follow
Que pasa familia, vamos con la quinta semana de floración de estas F.U.H. feminizadas de Seedstockers.
Vamos al lío, las plantas se trasplantaron a macetas de 7 litros.
El ph se controla en 6.5, la temperatura la tenemos entre 24/21 grados y la humedad ronda el 50%.
El ciclo de crecimiento puse 12h de luz, el foco está al 100% de potencia.
Tenemos como visitante de nuevo los trips, compré depredadores que colocaré a principios de semana.
Me gustaría estar más encima este cultivo pero la salud me está impidiendo un poco estar 100% con el proyecto.
- os dejo por aquí un CÓDIGO: Eldruida
Descuento para la tienda de MARS HYDRO.
https://www.mars-hydro.com
Hasta aquí todo, Buenos humos 💨💨💨


Likes
Comments
Share


@Phenophilgrow
Follow
After topping and now warmer days, the Permanent Marker rises Back Up and started the Turbo.
Likes
86
Share


@Ageddd
Follow
-------------------------
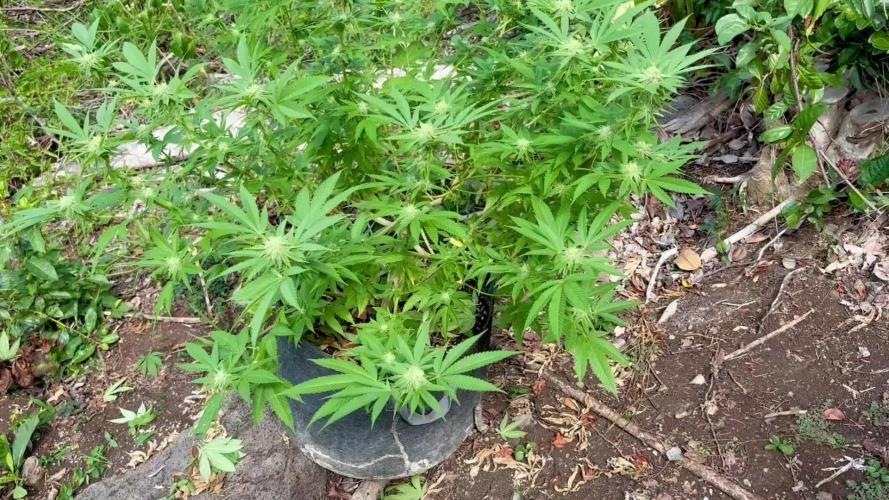
| BLUEBERRY HARVEST |
-------------------------
After two sunny days it is harvest time !!
- Finally, 16 days of flush -
At first thought, the trimming would be easier compared to my previous plants, but when removing more leaves, more buds appearing too hahaha so it took like 4 hours or more..It is not the most accuurate trimming but i had not much time that day, i removed all the leaves and branches after weighting it all..
Like i said on the last post, im harvesting having in mind my bud preferences (the later the better), weather, humidity and sunlight, so the first of the cloudy/rainy days she was chopped in the moring, attending the principle of thc regeneration at night..
Got to say that, i wasnt expecting such production (8 days until it was well dried), this plant started as the season saver because the Cheese started to flower in march, revegged etc.. and i have been rewarded with this BB, a true genetic portent !! If i could, i would keep her as mother forever ^^
The quality is awesome, she looks more like a WW talking about that coat of thc..
Flavour without proper cure, is deep earthy at first, transitioning to a fruity, sweet one, it is a pleasure to smoke, delicious sweet aftertaste..
Maybe, this is the last year with this awesome climate, because im planning to leave Spain..
Thank you for follow and check !!! I hope you liked the diary :)
Song of the week : Radiohead - Codex
Good Vibes GrowDiaries !!
----------------------------------------------------------------------------------------------------------------------------------------------
000000000000

Likes
36
Share


@Mazgoth
Follow
The grow is going fast enough and 0 problems,the smell is very very strong.

Likes
21
Share

@MadeInGermany
Follow
Flowering day 22
since time change
to 12/12 h.
Hey guys :-)
Another great week that is over.
They all develop exactly as it should be 💚.
Since the last leaf and substrate application against tripse, I finally haven't seen any of the little biters 👍.
Watering was done twice this week with 1.3 l each time (see table above for nutrients).
The lowest shoots were removed so that the energy is not wasted in the lower part :-) .
Otherwise, as always, everything was cleaned and checked.
Fresh osmosis water was filled with stale tap water in a 100 L tank for the coming week 👍.
Have fun and stay healthy 💚🙏🏻
👇🏼👇🏼👇🏼👇🏼👇🏼👇🏼👇🏼👇🏼👇🏼👇🏼👇🏼👇🏼
You can buy this Nutrients at :
https://greenbuzzliquids.com/en/shop/
With the discount code: Made_in_Germany you get a discount of 15% on all products from an order value of 100 euros.
👇🏼👇🏼👇🏼👇🏼👇🏼👇🏼👇🏼👇🏼👇🏼👇🏼👇🏼👇🏼
You can buy this strain at :
Clearwater Seeds
Water 💧 💧💧
Osmosis water mixed with normal water (24 hours stale that the chlorine evaporates) to 0.2 EC. Add Cal / Mag to 0.4 Ec Ph with Organic Ph - to 5.8 - 6.5
MadeInGermany
Likes
14
Share

@GERGrowDesigns
Follow
Welcome to Flower Week 3 of Kannabia Clementine Slush BioBoost Edition
Need a Fail-Safe Germination and Express Flowering?Kannabia Makes It Easy with BioBoost, Sproutly and Its Fast Genetics . More informations to find at The Kannabia Blog on GrowDiaries.
Check out Kannabia Seeds with my link [https://www.kannabia.com/de?ref=61966] and grab the germination device or the strains I used . Trust me – it’s worth it for sure !
Get another 20% Discount at all products using the code [GGD] at the checkout
For this Project , I’ve chosen the Feminized Photo Strain Clementine Slush BioBoost :
Here’s what I’m working with:
• 🌱 Tent: 225x150x150
• 🧑🌾 Breeder Company: Kannabia Seeds
• 💧 Humidity Range: 50
• ⏳ Flowering Time: 65 Days
• Strain Info: 21%THC
• 🌡️ Temperature: 26
• 🍵 Pot Size: 20
• Nutrient Brand: Hy-Pro
• ⚡ Lights : 600W x 2
A huge thank you to Kannabia Seeds for allowing me to try my Best with this amazing collection from Photo Strains they managed to Sponsore . Big thanks for supporting the grower community worldwide! Your genetics and passion speak for themselves!
Let’s grow together – and don’t forget to stop by again to see the latest updates!
Happy growing!
Stay lifted and stay curious!
Peace & Buds!
Likes
1
Share


@Fccfarms
Follow
Start of week 4, day 22. Flowers are producing very fast and thick. Slightly ahead of the last grow. And I have definitely got the excessive growth under control so far 🤞.
Likes
14
Share


@NorthernChemist
Follow
July 11: Finally this week getting some heat with 25-30 deg C daytime highs. Plants are thriving with a lot of vertical growth and flowers starting to build. Resin is developing nicely. Purple Punch is going to be big and heavy by the looks of it.

Likes
20
Share


@DeaneR
Follow
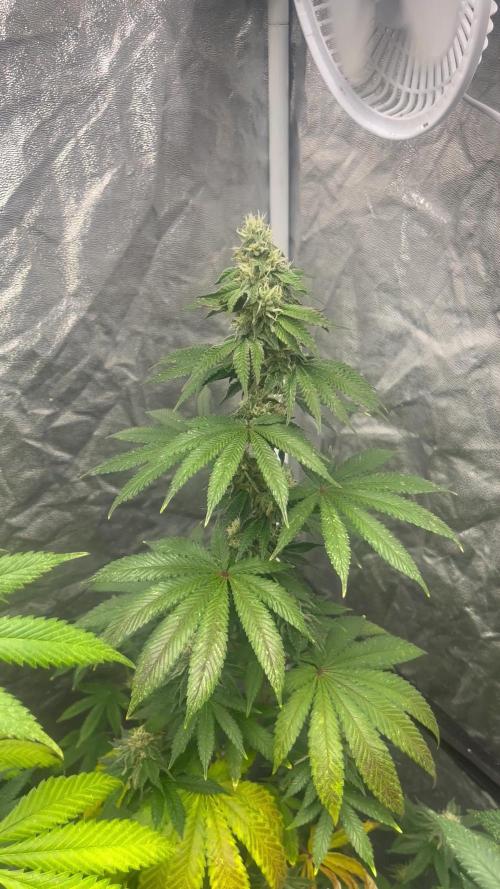
WEEK 1 Flowering😀.
Oh boy!! This plant is going to outgrow this tents height in no time. The trellis Height is 20 inches from the floor, and the plant is currently 10 inches through the trellis. This leaves only 8 inches of growth, to reach 18 inches from the light. Good thing She's still mobile. I foresee a move next week.
Tidied up her undercarriage with some defoliation on Day 6 of flower and applied some diatomaceous earth to fight fungus gnats.
I'm happy with the bud formation this early into flowering. The inter-nodal spacing looks good, and the buds should stack nicely.
My apologies for the shaky camera work and the changes in white balance levels. The video was taken with a tablet....so, it is what it is and I'm no Steven Spielberg😑.
Grow on People!
Peace,
DeaneR😎

Likes
41
Share


@Kush_queen
Follow
So I had to trim these ladies they desperately needed it
These ladies are getting nice and smelly fruity smell filling the tent there are plenty of crystals coming and the buds are bulking out filling up the stick
I am looking forward to these 🌱💚💨💯🙏
Likes
4
Share


@Prototype0181
Follow
I've done a big defoliation & some lollipopping @ day 12
The lady's are loving life

Likes
11
Share


@Shenelly78
Follow
Week 9 in the grow tent has been uneventful. The ladies buds continue to fill out and the hairs have turned to orange on .Started to flush Banana Purple Punch. And feel she may be ready to harvest by this weekend. The other ladies appear to have a few more weeks.