


Likes
Comments
Share

@rommyu
Follow
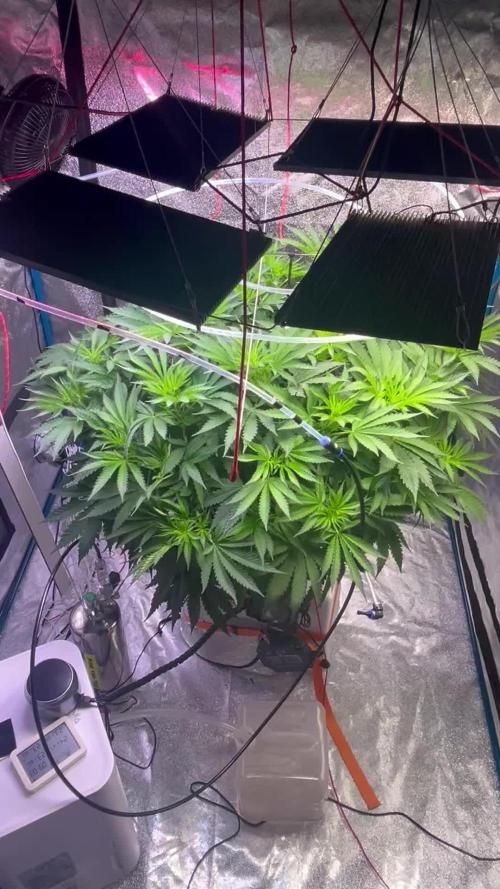
Finally moving on to the next stage where i expect to keep the conditions more stable and plan on moving the vpd up slowly as well as move the temperature down to around 21 degrees by the last week of flower. The lighting schedule will start at 12 hours of dark and increase by half an hour weekly until we get down to 10 hrs light and 14 hours of dark for the last two weeks (last week plus flush).

Likes
16
Share


@Mo_Powers
Follow
the 9th week. she's slowly starting to smell. when i open the door to the greenhouse, i get a sweet smell. but it's a really faint odour. the pistils are still white. i think she'll be ready for harvest in 2 to 3 weeks. she still has a few weeks to form proper buds. she still looks very healthy. i hope the next few weeks will be really sunny again. unfortunately it's very changeable weather at the moment.

Likes
1
Share


@GrowerL
Follow
26/01 - Day 17
PLANT A I pruned above the third node, with five nodes formed, and kept the bottom ones.
PLANT B I pruned above the third node, with five nodes formed, and also the nodes below the third.

Likes
7
Share


@Toptier_farm
Follow
Its flowering week 2. I’m starting to defo/Lst more, Plants stretching a little to gain more light.😇

Likes
20
Share


@Insaniac_0
Follow
8set Mainline & 6/4set Manifold in Auto Pot - Selfie Seeds Sweet Slurry x Sugar Cane (6X4) - Week 15
Flower Week 6 Day 42 to 48 - 4/29 to 5/5
They both look very healthy this week. The calyx are swelling with maturing hairs, the pistols are orange, the trichomes are mostly white, and the leaves are fading/changing colors - still not ripe enough for me, but flushing with half nute feeds now.
Feed this week was another auto pot reservoir flush feed at 400ppm total before add-ins. I used 400ppm of Bloom concentrate mix (recipe week 5). And then, I also added 1ml/gal of CaliMagic (General Hydroponics 1-0-0). PH balance this week was for 5.8 where I plan to maintain it until harvest.
Next week will continue the same half nute feed. I will continue to monitor the signs of trichomes, pistols, and calyx for a better harvest and allow the buds to mature more.
Likes
30
Share


@CanadianFillmore
Follow
Another successful week of growth, not much else to report, Green Crack and LSD are doing great!
Thanks for stopping by growfessors, tune in next week for another update.

Likes
16
Share


@eldruida_lamota
Follow
Vamos familia, actualizo la séptima semana de floración de estas Royal Gorilla de RoyalQueenSeeds.
Empiezan a estropearse un poco por el calor aunque se les ve sanas, están formándose las flores bastante bien. Y desprenden ya un aroma increíble. Alguna se adelantó en la floración intentaré cortarlas todas a la vez pero ya veremos cómo progresa.
Adelantó desde ya que llevan lavado de erices y están solo agua este armario no aguantará mucho más.
Hasta aquí todo bien el único suplicio que sufro son altas temperaturas por estar en pleno verano. Acabaré este proyecto y daremos parón unas semanas. Que avance algo más el verano.
Máximas de 29 y mínimas de 27 ahora viene el calor y ando jodido en humedad ronda el 40%.
Agrobeta:
https://www.agrobeta.com/agrobetatiendaonline/36-abonos-canamo
Mars hydro:
Code discount: EL420
https://www.mars-hydro.com/
Hasta aquí es todo , espero que lo disfrutéis, buenos humos 💨💨

Likes
27
Share


@Oetelando
Follow
We have day1 of Week 7 and i think in 2 Week is Harvest Day.
They look all very good and perform strong.
Only disapointment is that the Gorilla Fast need 8-9Weeks and not 6. but the Quality is strong.
Wir haben Tag 1 von Woche 7 der Blüte.
Alles läuft wie es soll schade das die Gorilla fast nicht in 6 Wochen fertig wird aber die Qualität passt und ist perfekt.
In 1-2 Werden alle geerntet.
Letzte Woche in der gedüngt wird und die allerletzte Woche wird mit Ph reguliertem Wasser gegossen aber wenig und 1 Tag später als normal.


Likes
20
Share


@FlavoursUk
Follow
Day 74 (28/05/18) - 2 of the Girl scout cookies are looking very close to being finished and seeing all cloudy trichomes with a couple amber. I look for 80/20% ratio of cloudy/milky to amber trichomes for harvest as this gives the best medicinal effects from my experiences. Flushing the GSC and will be waiting for her to use up the remainder of her nutrients in the leaves before I chop, hopefully get a nice fade. One of the Stardawg girls isn't so far behind but being more sativa dominant, I expected that. May upload one picture of her and how she is getting on. The smell coming from the GSC is so potent and sweet. Hoping the smoke quality lives up to the smell. Not long to go now.
Likes
2
Share


@CogordoAcuatico
Follow
Cosecha finalizada, fue una de las mejores plantas que e tenido, su aroma fuerte a menta y pegamento invadió toda mi casa, ni hablar del tamaño mounstruoso
Likes
6
Share


@GuerillaGorilla
Follow
Sept 10th
All going well here, just enjoying the show.
What a miracle to witness this beauty double every week.
Hoping for nice weather and an early but fully matured harvest

Likes
1
Share


@MaryStrix
Follow
Woche 9
und auf einmal waren es nur noch 3 Pflanzen.
Viel zu spät haben wir erkannt wo das Problem der einen Weddingcheesecake lag, durch den extremen Stress und der massiven Überdüngung (volles BioBizz Light Schema) hat die Pflanze sich zum Hemaphodite entwickelt...
RIP Holy
Likes
14
Share


@Whiteybulger1814
Follow
As for what I've been doing for maintenance, I've been watching and waiting and just adding water when needed into the reservoir, should be less then 2 or 3 days by now

Likes
14
Share


@Echevarriaf
Follow
So it seems my baby is transitioning as her budder nips are growing at a quite doubling rate! Topped of with ph 5.5 R/O and Added an extra 5ml bloom and 5ml floranectar keeping the same nutes until Friday 5/17/2019 😛💪🏽

Likes
Comments
Share


@GrowDiaries
Follow
You rated, we passed it to Serious Seeds with Adam iLL!
Time to spill it! Serious Seeds just got their rating️ from the growers over at growdiaries.com—total respect for their killer work in the grower's world! #SeriousSeeds #growdiaries
Likes
Comments
Share


@Steviegrows
Follow
Looks like they've recovered from nutrient burn once I backed off the nutes. I also checked the PH after mixing the 3 parts and the Micro doesn't seem to be bringing the PH down enough, it only goes to 7.3. I use Nectar for the Gods PH down to bring it around 6.5. Some of the leaves look a little light in color and slightly burned at the tips, I think they might be light stressed even though Ive get my lights spaced a safe 24" away. I LST where I can this week. The plants are so short that its difficult to do effectively.

Processing
Likes
19
Share


@Ianren
Follow
No problems yet, growing good. Transplanted other 2. I ran out of soil so I topped off the gelato with pellets. Starting low stress training on purple kush 1 and 2, will be topping pk 3, and maybe try and fim gelato after I read more about it. Maybe I should top it first.

Processing
Likes
12
Share


Likes
13
Share


@Sadhus
Follow
983 gramme sec sur 10 clones en table a marée EBB and flow de 1 M2 sous une lampe a 750 watt ce qui donne 1,31 gramme par watt par mètre carré 😯👌😁

Likes
29
Share


@Belverde
Follow
Welcome growers
This is the last day of the firsmonth in blooming for the PINK KUSH 🌳
She dosen't suffered to much after the defoliation
But i think isn't a good technique using with her
I mean...maybe a light defoliation can be great, but not too much 🙌
Anyway.
The flowers are forming well and she already has rich of sticky trichomes 💯
Also a very particular aroma is coming...i have never smells some similar
I cant wait the end for enjoy it 😍
This will be my 2022 first flowers 🎉🎉
About nutrients 👇
I still using organic/veganic nutrients at any watering 💧
A little bit of silicium (Bionova) / Crescita (Biomagno) / Activera (Biobizz) / Grow vegan (Bionova) / The Missing Link (Bionova) / X-Cell (Bionova) / Bioheaven (Biobizz) , a little bit of P-K 3-5 (Bionova) /Fioritura (Biomagno) / Bloom vegan (Bionova) / Biomassa (Biomagno) / Florastimo (Biomagno) and i started to use some enzymes present in the Sensizym (Advanced Nutrients)
That's it dor the week..
And that's all...
See you next..
Thanks for tge support 😎👍👍
FC ✌️
🇮🇹

Likes
Comments
Share


@MoneyMorris
Follow
The plants are looking really healthy, I've been defoliating here and there to get the light to penetrate to the lower leaves and branches. They have started to bush out from topping them last week. I started using Mammoth P Microbes halfway through last week. They seem to have grown a little quicker since adding them. The plants are still being fed 4 times a day at 1 minute each feeding. No signs yet of which is female and male, I am planning on pulling all the males once they show signs.