
Likes
Comments
Share


@Grey_Wolf
Follow
For Whom the Bell Tolls
Greenhouse Seeds The Church CBD
1st May 2020
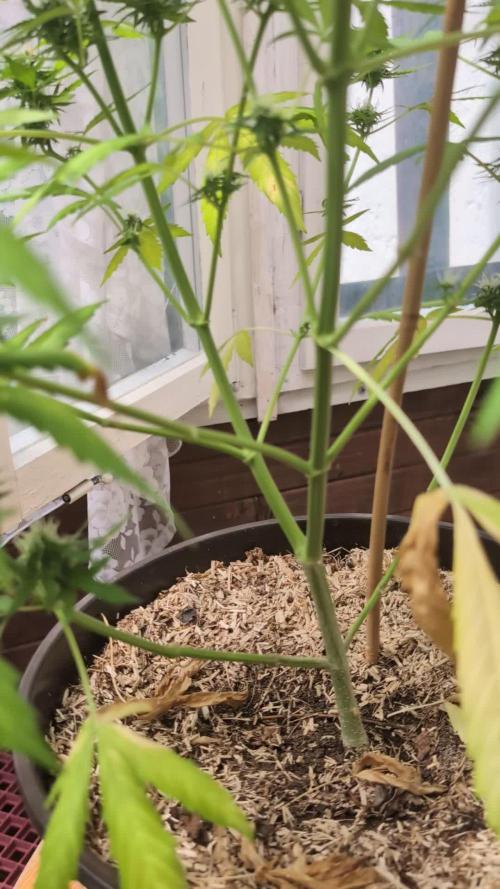
Another week of Veg down and she's taken fairly well to the topping I gave her. 😃
Nice and tight internodal spacing on this one too
I made up a killer brew foliar spray containing Filtered and diluted Aloe vera juice, Worm tea & Compost tea then sprayed all over the plant 💪
This super Dynamic mix will hopefully do wonders for my Plants.
Thanks for stopping by 👍

Likes
175
Share


@love_2_grow
Follow
Day 22 Flower (Day 64)
Today is the first day of week four of flower.
I gave the right girl 3 liters of pH 6.2 water, but the left girl didn't need any. She doesn't drink much since the light is turned way down not to fry her canopy more than it already has. Unfortunately, her new tent didn't show up today — hopefully, tomorrow.
I also put half of an avocado on top of the soil in each pot to feed my worms. It should be a nice little treat for my worm buddies.
Most of my cover crop has died now when the girls are blocking out all the lights, and I really should cover the soil in mulch, but as I'm changing to larger pots next run, I would have to remove it again in about a month, so I haven't bothered.
Day 23 Flower (Day 65)
Yay! The new tent finally arrived today. It is still a tiny 40x40 cm tent as that is all I can fit inside the wardrobe, but the new tent is 40 cm taller. The plant really needed the extra height since she was pressing against the light and roasting the top buds.
It was a bit tricky to get the left girl out of the old tent, but by combining some McGyverism with a bit of brute force, I got her out in mostly one piece. The damage from the light wasn't as bad as a feared, although three tops were fried and a few fan leaves. Not great, but it could have been worse.
I took the opportunity when she was between tents and did some defoliation/lollipopping before moving her into her new space and giving her 1.5 liters of ph 6.7 water to help her deal with the shock of being manhandled.
It is lovely to have some space again, and I was finally able to turn up the light to 100%. Now those buds can start to fatten up!
All I did with the right girl today was to give her 3 liters of pH 6.5 water.
Day 24 Flower (Day 66)
The left girl loves her new home and looks to be bouncing back nicely. She didn't need any water today, but it was the first time a tiny weed smell came out of the tent as I opened it.
The right girl in my main tent is further along in flower and technically should smell more than the small tent, but the CO2 bag still overpowers everything with its sh*t smell. lol
I gave the right girl 3 liters of pH 6.4 water today, and I also "shaved her legs" by removing some pointless leaves and branches low down on her.
Finally, I started brewing some compost tea with the same recipe as last week (worm castings, rock dust, biochar, lime, bentonite, neem meal, kelp meal, alfalfa meal, and molasses). Still, this time it will be filtered as it is too soon for additional topdressing. The tea will brew for 24 hours, and I'll feed it tomorrow.
Day 25 Flower (Day 67)
All I did today was to feed each girl 3 liters of pH 6.6 compost tea as well as rearranging the main tent (moved the CO2 bag so I could move the clip fan, attached the ratchet hangers to the lights differently, and did some LST to get a branch out of the way) so I could raise the lights another 5 cm.
Day 26 Flower (Day 68)
Today was a really easy day. I just gave the right girl 3 liters of pH 6.1 water. That was it.
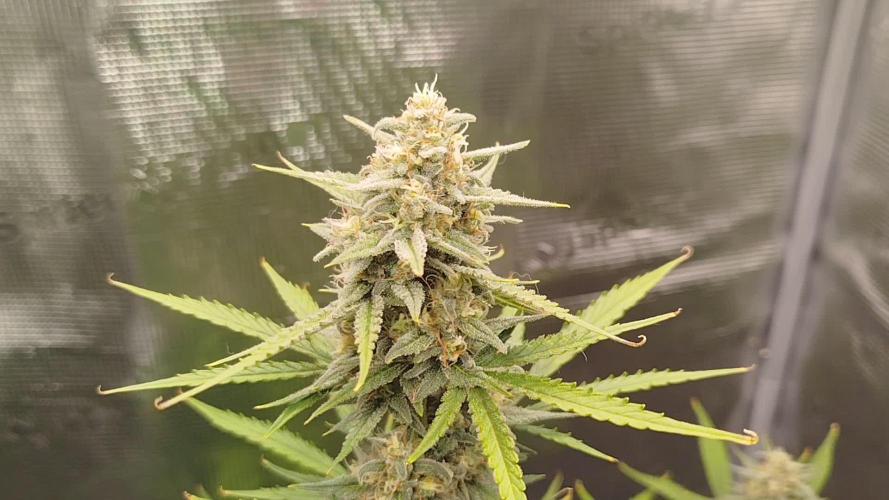
Day 27 Flower (Day 69)
I gave each girl 3 liters of pH 6.6 water today. I also took out my proper camera and tried a few quick bud shots. Just as an experiment though - handheld, no tripod, just the grow lights so no proper lighting, etc. Would love some feedback on these photos though as I'm completely new to bud photography and am looking to improve.
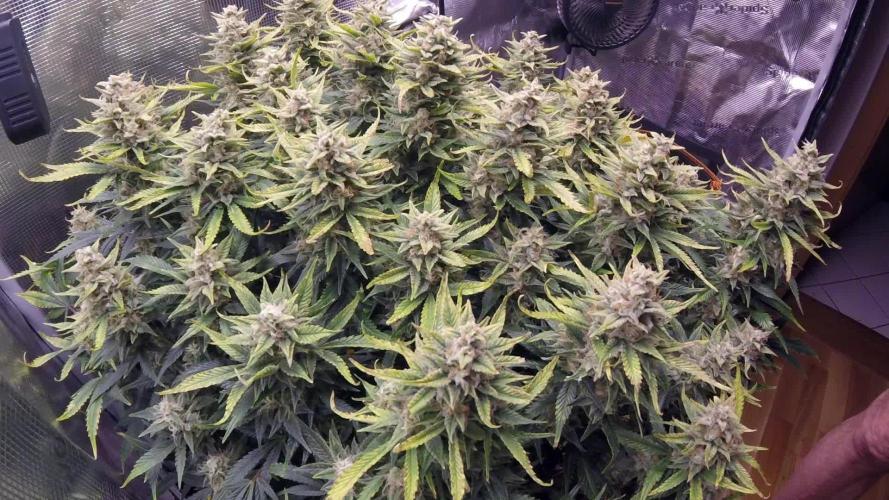
Day 28 Flower (Day 70)
The last day of the fourth week of flower and all is well in the tents.
The left girl is 97 cm tall (12 cm increase in a week), and the right girl is 120 cm tall (a 3 cm increase in a week). The left girl has been stretching this week since she got her new tent (which allowed me to turn up the light.) She certainly is loving those extra photons! On the other hand, the right girl seems done with stretching and is working on fattening up the buds.
All I did today was to snap some pics and videos and give the right girl 3 liters of pH 6.2 water.

Likes
11
Share


@GermGrowFox
Follow
18. Mai
Pflanze wächst sehr schnell. Untere Triebe plus Blätter großzügig entfernt
20. Mai
4l Wasser, davon 1l mit 1ml Bio grow
Pflanze zeigt erste Blüteanzeichen

Likes
15
Share


@Canadiancultivation101
Follow
Definitely love the colours on this girl. Very true to her name, very dark purple/black. 10/10 would grow again

Likes
1
Share


@Growing_Spartan
Follow
May 8th, the trellis is getting filled out but the biggest plant is still looking bare and small

Likes
120
Share


@Kitties_and_Colas
Follow
This was a effortless week 🐱👌 all plants (except 1runt) were topped and given their first feeding..new growth has already developed on most.. A few plants are distinct from all the others, there's only 2 different strains but it looks like way more at the moment. We're expecting a bunch of vegetative growth this week, will update..thank for dropping by growmies and happy harvests ❤️

Likes
13
Share


@JoeyGonz
Follow
Defoliated the heck out of them for the last time.. 2 weeks into flowering, now I’ll just clip stuff here and there that interferes with light.. But that’s it they both look healthy.. Crazy happy with the Red Diesels come back from death to 18” tall so far and multiple colas. For a backup the Cinderella grew great.. Caught up to the diesel with a decent height and still growing.. Both strong plants I may try one re-veg, I’m in between that or mini field of green with Orange Creamsicle seeds I have.. The nutrient calculations are off.. I give them 5ml of mantis per liter every feeding, and 15 ml Bembe per gallon once a week now during flowering.


Likes
32
Share


@GODSGIFT_2005_JM
Follow
🍼Greenhouse Feeding BioGrow & BioBloom
⛺️MARSHYDRO
The ⛺️ has a small door 🚪 on the sides which is useful for mid section groom room work. 🤩
☀️ by VIPARSPECTRA (models: P2000 & XS 2000)
🌱 DUTCH HEADSHOP SEEDS:
www.dutch-headshop.eu
www.dutch-headshop.nl
ONE STOP SHOP
. 100% germination success on first try! with HUGE seed selection!
. Very friendly customer service
. Best bio-seed packaging
. Sells other products @ best prices:
. Nutrients
. Vaporizers
. Smoking accessories (grinders, cones)
. CBD Tinctures
. Resin Extracts
. Boveda humidity packs
. Ziplock bags
. Other health supplements such as:
. Lion’s Mane Organic Capsules
. Hemp Seed coffee

Likes
31
Share


@crystal_garden_0
Follow
Bud quality is amazing, tons of frost and very sticky. Plants didn't get big colas unfortunately it was more smaller buds everywhere but still turned out good. Very tasty, could produce lots of hash also.
Likes
2
Share


@CK_OrgGrow
Follow
Direkt zum start der Woche beginnt für die Pflanzen die Blüte Phase.
Bis jetzt bin ich zufrieden mit der Sorte die Stecklinge wachsen auch bis jetzt sehr gleichmäßig.
Mal gucken wie groß sie in den nächsten 2 bis 3 Wochen werden. Bis der Strech vorbei ist.
👉Update 1:
😓😓😓
Leider hat die rechts hinten mit ein paar Problemen zu kämpfen. Dünger, Licht, PH, EC kann ich aus schließen ich denke das ich den Topf nicht richtig Sauber gemacht habe.
Mal gucken wie sich das bei der einen weiter entwickelt.

Likes
12
Share


@Ge252
Follow
First ever grow was going well, using 2 x 400/600w hps depending on heat in a 1.2x2.4m tent...
But think one or two have hermied
Had a 5week veg and possible hermie from the heat a while back?


Likes
3
Share

@GoodTimesOrganics
Follow
Die Pandora legt allmählich an Dichte zu und die Buds werden immer kompakter. Im Schnitt performed die Pflanze etwas besser als die Skywalker OG Auto.
Es sieht auch so aus als würde die Pflanze etwas mehr Gewicht entwickeln. Dafür benötigt sie insgesamt länger als ihre Kollegin.

Likes
2
Share


Likes
12
Share


@KalooNie
Follow
These gals are doing fantastic! Smell is really starting to come out now, smells like a very strong citrus pine 👌🙌 Switched them to full strength flowering nutes and they're doing pretty well. I probably should have transitioned them a little earlier but a little stress doesn't hurt, they're growing just fine! Heat is also an issue but they'll manage 😅
8-4-18 :: Largest plant's bucket got empty on accident; Filled a 15gallon reservoir of full strength nutes and pumped the solution into the bucket as always. Next day my largest plant is dying and the other two are fine, looks like lockout. Flushed for a day and then added nutes, no improvement.. Orange pistils are appearing pretty fast on it too as if it's trying to ripen but not grow. My heart is broken😰
UPDATE: Realized I was an idiot and didn't plug up the holes I drilled into the top of the buckets (I stick a hose in there to fill them up) and the roots were exposed to light.

Likes
6
Share


@jaydee702
Follow
This strain is growing fast and flawless so far they are stretching alot more than expected and hope that stops soon running out of room after 4' tall wich is 5' tall from the tent floor was 2' only last week
Likes
14
Share


@Chuckwaggon420
Follow
These 3 girls have just completly taken over the flowering tent just massive! Keeps changing the light i raise it and they back at it again next couple days! Think they slowing a little possibly as u can see some bud clusters starting to form. That also tells me she is ready for a hair cut to get that light in there more!
They have a great strong kush smell when u do a stem rub but I don't smell anything at tent opening yet. They been getting heavy canna dose of nutrients for the steeach will see if they need another week of that dose if they chase the light again or if going to flower development now.
Food every 2 days around 3 L till runoff at ph of 5.6-5.7. I like how the canna nutrients when ur in correct ph range it foams so u know ur getting close. I have really came to like the stuff. Great results compared to past soil grows. Nutrients being more ready for the plants like force feeding is way faster for growth.
Like I mentioned will do hair cut over next week possibly start to see some more bud development over the next week also. Love yall.


Likes
5
Share

@hinterhofgrower
Follow
.
🌱 :
💧 : 4l day 92, 4l day 95, 2l H2O day 96, 2l H2O day 98
💡 : Dli: 40 mol/m²/d
🤔 :
Likes
17
Share

@GreenEldritchGardens
Follow
I think it was the right choice to keep her in 12/12 so far, I had the case already that lowering the lights before harvest got me a tasteful plant, she did not stressed and seems happy and gaining weight. Even thou she has grow box just for her, the light she is under now is 100w instead of almost 300w before.
Her smell is intense candy like lime, really exotic and one of the best terpines profiles I've ever grown.
Really makes me wonder how is Lemon Tree strain from them...
Likes
10
Share


@ZzTooRightOGzZ
Follow
Just letting her do her the now .
She looks and smells amazing at the moment.